Table of Contents
Advertisement
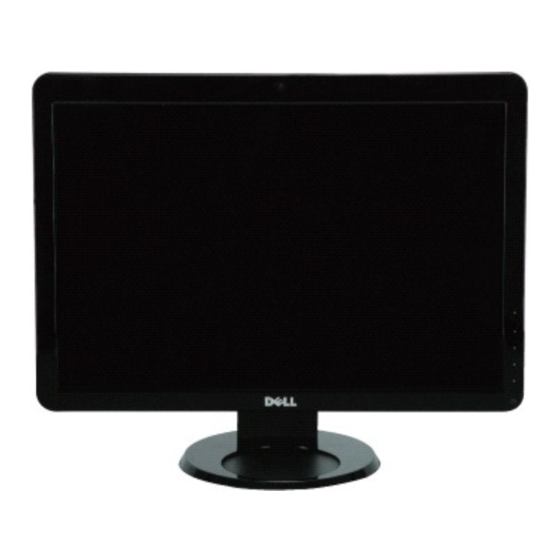
Dell™ SP2009W Flat Panel Monitor User's Guide
About Your Monitor
Setting Up the Monitor
Operating the Monitor
Troubleshooting
Appendix
Notes, Notices, and Cautions
NOTE:
A NOTE indicates important information that helps you make better use of your computer.
NOTICE:
A NOTICE indicates either potential damage to hardware or loss of data and tells you how to avoid the problem.
CAUTION:
A CAUTION indicates a potential for property damage, personal injury, or death.
Information in this document is subject to change without notice.
© 2008 Dell Inc. All rights reserved.
Reproduction in any manner whatsoever without the written permission of Dell Inc. is strictly forbidden.
Trademarks used in this text: DELL and the DELL logo are trademarks of Dell Inc; Microsoft, Windows, a n d Windows Vista are either registered trademarks or trademarks of
Microsoft Corporation in the United States and/or other countries; ENERGY STAR is a registered trademark of the U.S. Environmental Protection Agency. As an ENERGY STAR partner,
Dell Inc. has determined that this product meets the ENERGY STAR guidelines for energy efficiency.
Other trademarks and trade names may be used in this document to refer to either the entities claiming the marks and names or their products. Dell Inc. disclaims any
proprietary interest in trademarks and trade names other than its own.
Model SP2009Wc
May 2008 Rev. A00
Advertisement
Table of Contents

Related Manuals for Dell SP2009W


Summary of Contents for Dell SP2009W
- Page 1 Dell Inc. has determined that this product meets the ENERGY STAR guidelines for energy efficiency. Other trademarks and trade names may be used in this document to refer to either the entities claiming the marks and names or their products. Dell Inc. disclaims any proprietary interest in trademarks and trade names other than its own.
-
Page 2: About Your Monitor
Back to Contents Page About Your Monitor Dell™ SP2009W Flat Panel Monitor User's Guide Package Contents Product Features Identifying Parts and Controls Monitor Specifications Universal Serial Bus (USB) Interface Plug and Play Capability Camera - MIC Specifications Maintenance Guidelines Package Contents Your monitor comes with all the items shown below. -
Page 3: Product Features
Product Features The SP2009W flat panel display has an active matrix, thin-film transistor (TFT), liquid crystal display (LCD). The monitor features include: ■ 20 inches(511mm) diagonal. ■ 1680x1050 resolution, plus full-screen support for lower resolutions. ■ Wide viewing angle to allow viewing from a sitting or standing position, or while moving from side-to-side. -
Page 4: Side View
VESA mounting holes (100mm) To mount the monitor. (Behind attached VESA plate) Barcode serial number label To contact Dell for technical support. Security lock slot To help secure your monitor. Dell soundbar mounting brackets To attach the optional Dell Soundbar. -
Page 5: Monitor Specifications
If the computer detects input from keyboard, mouse, or other input devices, the monitor automatically resumes functioning. The following table shows the power consumption and automatic power saving feature: VESA Modes Horizontal Sync Vertical Sync Video Power Indicator Power Consumption Normal operation (with Dell Soundbar and USB active) Active Active Active White 75 W (maximum) Normal operation Active... -
Page 7: Pin Assignments
Pin Assignments VGA Connector 15-pin Side of the Connected Signal Cable Number Video-Red Video-Green Video-Blue Self-test GND-R GND-G GND-B Computer 5V GND-sync DDC data H-sync V-sync DDC clock DVI Connector 24-pin Side of the Connected Signal Number Cable TMDS RX2- TMDS RX2+ TMDS Ground Floating Floating... - Page 8 DDC Data Floating TMDS RX1- TMDS RX1+ TMDS Ground Floating Floating +5V power Self test Hot Plug Detect TMDS RX0- TMDS RX0+ TMDS Ground Floating Floating TMDS Ground TMDS Clock+ TMDS Clock-...
-
Page 11: Fcc Notices (U.s. Only) And Other Regulatory Information
Dell product catalog. Dell provides several online and telephone-based support and service options. Availability varies by country and product, and some services may not be available in your area. To contact Dell for sales, technical support, or customer service issues: Visit support.dell.com. -
Page 12: Setting Up Your Monitor
Back to Contents Page Setting Up Your Monitor Dell™ SP2009W Flat Panel Monitor If you have a Dell™ desktop or a Dell™ portable computer with internet access 1. Go to http://support.dell.com, enter your service tag, and download the latest driver for your graphics card. 2. After installing the drivers for your graphics Adapter, attempt to set the resolution to 1680x1050 again. NOTE: If you are unable to set the resolution to 1680x1050, please contact Dell™ to inquire about a graphics Adapter that supports these resolutions. Back to Contents Page... -
Page 13: If You Have Non Dell™ Desktop, Portable Computer, Or Graphic Card
Back to Contents Page Setting Up Your Monitor Dell™ SP2009W Flat Panel Monitor If you have non Dell™ desktop, portable computer, or graphic card 1. Right-click on the desktop and click Properties. 2. Select the Settings tab. 3. Select Advanced. 4. Identify your graphics controller supplier from the description at the top of the window (e.g. NVIDIA, ATI, Intel etc.). -
Page 14: Operating The Monitor
Back to Contents Page Operating the Monitor Dell™ SP2009W Flat Panel Monitor User's Guide Using the Front Panel Controls Using the On-Screen Display (OSD) Menu Setting the Optimal Resolution Using the Dell Soundbar (Optional) Using the Tilt, Swivel, and Vertical Extension Rotating the monitor... -
Page 15: Using The On-Screen Display (Osd) Menu
Front panel Button Description Use the Up button to adjust (increase ranges) items in the OSD menu. Use the Down button to adjust (decrease ranges) items in the OSD menu. Down Use the OK button to confirm your selection. ... - Page 16 Icon Menu and Submenus Description BRIGHTNESS/CONTRAST Use the Brightness and Contrast menu to adjust the Brightness/Contrast. Back Press to go back to the main menu. Brightness Allows you to adjust the brightness or luminance of the backlight. Press the button to increase brightness and press the ...
- Page 17 Color setting mode submenu Back Press to go back to the main menu. Input Color Format Allows you to set the video input mode to. RGB: Select this option if your monitor is connected to a computer or DVD player using the HDMI cable or the HDMI to DVI adapter.
- Page 18 Display setting mode submenu Back Press to go back to the main menu. Wide Mode Allows you to change the image scale with various default settings. NOTE: Wide Mode is not available at video resolutions greater than 1680x1050. However, 16:9 and Fill will be available for video timing.
- Page 19 Power Save Audio Allows you to turn on or off the power to the audio during the audio power save mode. Default is "On". On — Allows you to turn off the power to the sound bar during monitor standby. Off —...
- Page 20 NOTE: Press any button on the monitor to terminate LCD Conditioning at any time. Factory Reset Resets all OSD settings to the factory preset values. Personalize Allow you to adjust shortcut key button for preset mode. Brightness & Contrast Auto Adjust and Input source. OSD Warning Messagess The following warning messages may appear on the screen to indicate that the monitor is out of synchronization.
-
Page 21: Setting The Optimal Resolution
Using the Dell Soundbar (Optional) The Dell Soundbar is a stereo two channel system, mountable on Dell Flat Panel Displays. The Soundbar has a rotary volume and on/off control to adjust the overall system level, a LED for power indication, and two audio headset jacks. -
Page 22: Using The Camera
Dell Webcam Central enables convenient access to all exciting applications to enhance your Dell Webcam experience. Creative Live! Cam Avatar Creator Creative Live! Cam Avatar Creator lets you personalize an animated avatar from any digital photo you want. Using advanced speech technology, your personalized avatar even lip syncs with you. Share creation with friends using Live! Cam Avatar, via email or even YouTube(TM). Accessing the Camera Help File To access the camera’s help file, right-click the Dell Webcam Central icon in the notification area and click. Click Help from the menu and select Contents. ... - Page 23 Resetting the Camera Defaults To reset the Camera settings using the Dell Webcam Central: 1. Right-click the Dell Webcam Central icon in the system tray located in the lower right corner of the screen. Click Open Webcam Central. 2. In the Webcam Central window: - Click the Settings icon and navigate to Settings - Picture Control.
- Page 24 Back to Contents Page Setting Up Your Monitor Dell™ SP2009W Flat Panel Monitor Setting the display resolution to 1680X1050 (Optimal) For optimal display performance while using the Microsoft Windows operating systems, set the display resolution to 1680 x 1050 pixels by performing the following steps: 1.
- Page 25 Dell Inc. has determined that this product meets the ENERGY STAR guidelines for energy efficiency. Other trademarks and trade names may be used in this document to refer to either the entities claiming the marks and names or their products. Dell Inc. disclaims any proprietary interest in trademarks and trade names other than its own.
-
Page 26: Setting Up The Monitor
Back to Contents Page Setting Up the Monitor Dell™ SP2009W Flat Panel Monitor User's Guide Attaching the Stand Connecting the Monitor Organizing Your Cables Attaching the Soundbar (optional) Removing the Stand Wall Mounting (Optional) Attaching the Base NOTE: The Base of the stand is detached when the monitor hipped from the factory. -
Page 27: Connecting The White Dvi Cable
Connecting the White DVI Cable NOTE: The graphics are used for the purpose of illustration only. Appearance of the computer may vary. Connecting the USB Cable After you have completed connecting the DVI/VGA cable, follow the procedure below to connect the USB cable to the computer and complete your monitor setup: 1. -
Page 28: Removing The Base
NOTICE: Do not use with any device other than Dell Soundbar. NOTE: The soundbar power connector (+12 V DC output) is for the optional Dell Soundbar only. To attach the soundbar: Working from the back of the monitor, attach Soundbar by aligning the two slots with the two tabs along the bottom of the monitor. - Page 29 2. Lay the LCD display face down on a towel or blanket. 3. Remove the Plastic Covers from the back of the LCD display. 4. Remove the four screws attaching the base (Screw dimension: M4 x 10mm). 5. Remove the Rubber Plugs from inside the four VESA screw holes. 6.
-
Page 30: Troubleshooting
Back to Contents Page Troubleshooting Dell™ SP2009W Flat Panel Monitor Self-Test Common Problems Product Specific Problems Universal Serial Bus Specific Problems Dell Soundbar Problems Camera Problems CAUTION: Before you begin any of the procedures in this section, follow the Safety Instructions. -
Page 31: Common Problems
Safety Related Issues Visible signs of smoke or Do not perform any troubleshooting steps. sparks Contact Dell immediately. Intermittent Problems Monitor malfunctions on & Ensure that the video cable connecting the monitor to the computer is connected properly and is secure. -
Page 32: Product Specific Problems
Reconnect the upstream cable to your computer. Reconnect the USB peripherals (downstream connector). Reboot the computer. Dell™ Soundbar Problems Common Symptoms What You Experience Possible Solutions No Sound No power to Soundbar - the Turn the Power/Volume knob on the Soundbar clockwise to the middle position; check if power indicator is off (built-in the power indicator on the front of the Soundbar is illuminated. -
Page 33: Camera Problems
Set the correct audio source in Dell Webcam Central. to select the correct audio source: 1. In the Dell Webcam Central, navigate to configure settings by clicking on the More Options button. 2. Select Monitor Webcam in the Microphone box. - Page 34 3. Adjust the Volume slider to obtain the desired audio level. Test the microphone. Try testing the microphone using an application other than the Dell Webcam Central. To test the microphone, 1.Click Start®Control Panel®Sound and Audio Devices. 2.Click the Voice tab.
Need help?
Do you have a question about the SP2009W and is the answer not in the manual?
Questions and answers