Table of Contents
Advertisement
Available languages
Available languages
Quick Links
Advertisement
Table of Contents

Related Manuals for Sagitter SG AQUPAR7


Summary of Contents for Sagitter SG AQUPAR7
- Page 1 IP LED Projector RGBWA-UV SG AQUPAR7 MANUALE UTENTE USER MANUAL...
-
Page 2: Table Of Contents
Rev. 01-06/18 INDICE: 1. INTRODUZIONE p. 3 2. ISTRUZIONI DI SICUREZZA p. 4 3. APERTURA CONFEZIONE E CONTROLLO p. 6 4. INSTALLAZIONE ED ACCENSIONE p. 7 5. ISTRUZIONI PER L'USO p. 9 6. MANUTENZIONE p. 14 7. SPECIFICHE TECNICHE p. 15 INDEX: 1. -
Page 3: Introduzione
1. INTRODUZIONE Grazie per avere scelto un nostro prodotto! Vi preghiamo di fare riferimento alle istruzioni e alle avvertenze contenute nel presente manuale per l’utilizzo del dispositivo e di conservarlo per future consultazioni. Il presente manuale contiene informazioni riguardanti l’installazione e l’utilizzo del dispositivo. Le informazioni contenute in questo documento sono state attentamente redatte e controllate. -
Page 4: Istruzioni Di Sicurezza
2. ISTRUZIONI DI SICUREZZA Attenzione! Questo prodotto non è adatto ad un uso domestico. Leggere il presente manuale prima di installare e dare corrente all’apparecchiatura, seguire le precauzioni di sicurezza elencate di seguito ed osservare tutti gli avvertimenti indicati nel presente manuale e stampati sull’apparecchiatura. - Page 5 CLASSE DI PROTEZIONE IP65 Il dispositivo è protetto dalla penetrazione di polvere (prima cifra 6) e da getti d’acqua (seconda cifra 5). Apparecchio adatto per uso esterno. PROTEZIONE CONTRO LE SCOSSE ELETTRICHE Il dispositivo deve essere collegato ad un sistema di alimentazione dotato di un’efficiente messa a terra.
-
Page 6: Apertura Confezione E Controllo
Controllare che la scatola contenga i seguenti articoli: N° 1 SG AQUPAR7 N° 1 Cavo di alimentazione N° 1 Cavo DMX N°... -
Page 7: Installazione Ed Accensione
4. - INSTALLAZIONE ED ACCENSIONE 4.1 - INSTALLAZIONE PRODOTTO - Non scuotere l'apparecchio. Evitare l'utilizzo di forza eccessiva durante le operazioni di installazione o fissaggio dell'unità. - L'unità può essere installata a pavimento in appoggio sugli appositi piedini, a parete, a soffitto o su truss. - Page 8 4.2 - COLLEGAMENTO ALLA LINEA DI ALIMENTAZIONE Il dispositivo deve essere collegato ad un sistema di alimentazione dotato di un’efficiente messa a terra. Inoltre, si consiglia di proteggere le linee di alimentazione dei prodotti dai contatti indiretti e/o da cortocircuiti verso massa utilizzando interruttori differenziali opportunamente dimensionati.
-
Page 9: Istruzioni Per L'uso
- ISTRUZIONI PER L'UTILIZZO 5.1 - MAPPA DEL MENU' Set ADDR 001 - 512 Indirizzo DMX Channels Mode 3 / 6 / 8 / 12 Modalità canali DMX In caso di perdita di DMX, mantiene DMX Hold l'ultima configurazione DMX State Blackout In caso di perdita di DMX, si spegne Red: 000 - 255... - Page 10 Fade: 00 - 30 Regolazione manuale fade Flash: 00 - 30 Regolazione manuale flash Strobe: 00 - 30 Regolazione manuale strobo Time: 00 - 30 Regolazione manuale tempo Password: Upload (*) UP - DOWN - UP - DOWN - ENTER ID number: Impostazione ID OFF - 01 …...
- Page 11 Impostare tutte le unità in SLAVE tranne la prima dove sono memorizzati i programmi Sulla prima premere UPLOAD, tutti i programmi custom saranno trasferiti alle successive 5.2 – MODALITA' MASTER/SLAVE In questa modalità possono essere collegate più unità insieme come un'unica catena e funzionare in modo sincronizzato.
- Page 12 Modalità 12 canali Canale Valore Descrizione 000 - 255 Dimmer 000 - 255 Strobo da lento a veloce 000 - 255 Rosso 000 - 255 Verde 000 - 255 000 - 255 Bianco 000 - 255 Ambra 000 - 255 000 –...
- Page 13 164 – 167 Color 36 168 – 171 Color 37 172 – 175 Color 38 176 – 179 Color 39 180 – 183 Color 40 184 – 187 Color 41 188 – 191 Color 42 192 – 195 Color 43 196 –...
-
Page 14: Manutenzione
Indirizzi ID: Indirizzo DMX Indirizzo ID Indirizzo DMX Indirizzo ID Indirizzo DMX Indirizzo ID Indirizzo DMX Indirizzo ID 000 – 009 Tutti 170 – 179 010 – 019 180 – 189 020 – 029 190 – 199 030 – 039 200 –... -
Page 15: Specifiche Tecniche
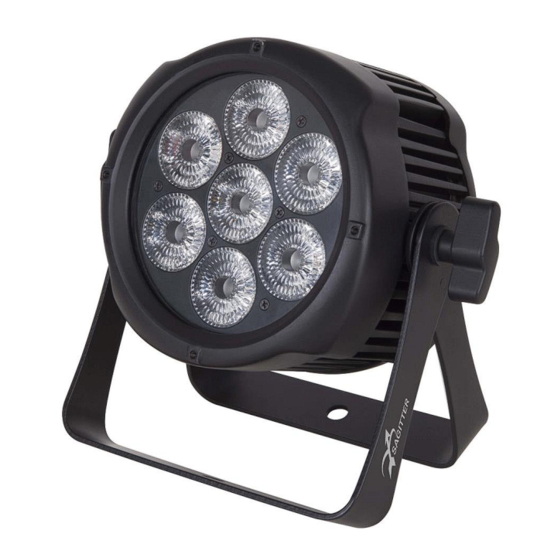
- SPECIFICHE TECNICHE • Alimentazione: 100-240V, 50/60HZ • LED: 7x12W LED RGBW • Angolo del fascio di luce: 25° • Potenza: • Modalità operative: Auto, Master/Slave, DMX512, • Regolazione elettronica della luminosità 0-100% • DMX: 3 – 6 – 8 – 12 canali •... -
Page 16: Introduction
1. - INTRODUCTION Thank You for choosing one of Our products! Please refer to the instructions and warnings contained in this user manual, please retain it for future reference. This manual contains information about the installation and use of the device. The information contained in this publication has been carefully prepared and checked. -
Page 17: Safety Instructions
2. - SAFETY INSTRUCTIONS Caution! This product is not suitable for household illumination. Please read this manual before installing and applying power to the equipment, follow the safety precautions listed below and observe all warnings in this manual and printed on. Please contact a PROEL distributor for assistance with any questions about how to activate the equipment safely. - Page 18 IP65 PROTECTION RATING The device is protected against the dust penetration (first digit 6) and against jets of water (second digit 5). Suitable for outdoor use. PROTECTION AGAIN ELECTRIC SHOCK The device must be connected to a power supply system with efficient earthing. Moreover, it is recommended to protect power supply lines of the product from indirect contact and / or shorting to earth by using appropriately sized anti electrical shock switch.
-
Page 19: Opening And Control
Verify that the box contains the following items: N° 1 SG AQUPAR7 N° 1 Power cord N° 1 DMX cable N°... -
Page 20: Installation And Switch
4. - INSTALLATION AND SWITCH ON 4.1 - PRODUCT INSTALLATION - Do not shake the device. Avoid the use of too much force during installation or unit fixing. - The unit can be installed on the floor resting on the rubber feet, on the wall, ceiling or on a truss. - Page 21 4.2 - CONNECTION TO THE MAINS The device must be connected to a power supply system with a proper earth system. Moreover, it is recommended to protect power supply lines of the products from indirect contact and / or shorting to earth by using appropriately sized anti electrical shock switch. The electrical connection must be carried out by a qualified electrician.
-
Page 22: Setup
5. - SETUP 5.1 – MENU Set ADDR 001 - 512 DMX address Channels Mode 3 / 6 / 8 / 12 DMX channels mode In case of DMX lost, it keeps the DMX Hold last configuration DMX State Blackout In case of DMX lost, it switches off Red: 000 - 255 Manual red adjustment... - Page 23 Fade: 00 - 30 Manual fade adjustment Flash: 00 - 30 Manual flash adjustment Strobe: 00 - 30 Manual strobe adjustment Time: 00 - 30 Manual time adjustment Password: Upload (*) UP - DOWN - UP - DOWN - ENTER ID number: Impostazione ID OFF - 01 …...
- Page 24 programs On the first unit press UPLOAD, all the custom programs will be sent to the other units. 5.2 – MASTER/SLAVE MODE In this mode, more units can be linked together as a single chain and work in a synchronized way.
- Page 25 12-channels mode Channel Value Description 000 - 255 Dimmer 000 - 255 Strobe from slow to fast 000 - 255 000 - 255 Green 000 - 255 Blue 000 - 255 White 000 - 255 Amber 000 - 255 000 – 010 No function 011 –...
- Page 26 164 – 167 Color 36 168 – 171 Color 37 172 – 175 Color 38 176 – 179 Color 39 180 – 183 Color 40 184 – 187 Color 41 188 – 191 Color 42 192 – 195 Color 43 196 –...
-
Page 27: Maintenance
ID addresses: DMX Address ID Address DMX Address ID Address DMX Address ID Address DMX Address ID Address 000 – 009 Tutti 170 – 179 010 – 019 180 – 189 020 – 029 190 – 199 030 – 039 200 –... -
Page 28: Technical Specifications
7. - TECHNICAL SPECIFICATIONS • Power Supply: 100-240V, 50/60HZ • LED: 7x12W LED RGBW • Beam Angle: 25° • Power: • Operation Mode: Auto, Master/Slave, DMX512 • Electronic Dimming 0-100% • DMX: 3 – 6 – 8 – 12 Channels •... - Page 32 Proel S.p.A. Via alla Ruenia 37/43 64027 Sant'Omero (TE) ITALY Tel. +39 0861 81241 Fax. +39 0861 887862 Mail: info@proel.com Web: www.proel.com...
Need help?
Do you have a question about the SG AQUPAR7 and is the answer not in the manual?
Questions and answers