
Related Manuals for Sagitter SG IPLEDBAR8BAT


Summary of Contents for Sagitter SG IPLEDBAR8BAT
- Page 1 IP LED BATTERY BAR 8 WIRELESS Y BAR RGBW BATTER Order code: SG IPLEDBAR8BAT MANUALE UTENTE USER MANUAL...
- Page 2 Rev. 01-01/19 INDICE: 1. INTRODUZIONE p. 3 2. ISTRUZIONI DI SICUREZZA p. 4 3. APERTURA CONFEZIONE E CONTROLLO p. 6 4. CARICA DELLA BATTERIA p. 7 5. INSTALLAZIONE ED ACCENSIONE p. 7 6. ISTRUZIONI PER L'USO p. 9 7. MANUTENZIONE p.
- Page 3 1. INTRODUZIONE Grazie per avere scelto un nostro prodotto! Vi preghiamo di fare riferimento alle istruzioni e alle avvertenze contenute nel presente manuale per l’utilizzo del dispositivo e di conservarlo per future consultazioni. Il presente manuale contiene informazioni riguardanti l’installazione e l’utilizzo del dispositivo. Le informazioni contenute in questo documento sono state attentamente redatte e controllate.
- Page 4 2. ISTRUZIONI DI SICUREZZA Attenzione! Questo prodotto non è adatto ad un uso domestico. Solo uso professionale. Leggere il presente manuale prima di installare e dare corrente all’apparecchiatura, seguire le precauzioni di sicurezza elencate di seguito ed osservare tutti gli avvertimenti indicati nel presente manuale e stampati sull’apparecchiatura.
- Page 5 CLASSE DI PROTEZIONE IP65 Il dispositivo è protetto dalla penetrazione di polvere (prima cifra 6) e da getti d’acqua (seconda cifra 5). Apparecchio adatto per uso esterno. COLLEGAMENTO ALLA RETE DI ALIMENTAZIONE DURANTE LA CARICA Il collegamento alla rete elettrica durante la carica deve essere effettuato da un installatore elettrotecnico qualificato.
- Page 6 Controllare che la scatola contenga i seguenti articoli: N° 1 SG IPLEDBAR8BAT N° 1 Cavo di alimentazione N° 1 Telecomando IR N°...
- Page 7 4. - CARICA DELLA BATTERIA - Collegare l’apparecchio alla rete elettrica tramite l’apposito cavo di alimentazione a corredo. - DURANTE TUTTO IL PROCESSO DI CARICA DELLA BATTERIA L’APPARECCHIO DEVE ESSERE SPENTO. - Il tempo di ricarica standard per un faro con livello della batteria del 5% è di circa 8 ore. - Durante la carica, l'indicatore di riferimento si illumina.
- Page 8 5.2 - COLLEGAMENTO ALLA CATENA DMX Il collegamento alla linea DMX può essere effettuato sia tramite il trasmettitore / ricevitore wireless SG AIRBOX (venduto separatamente) o via cavo. COLLEGAMENTO WIRELESS Collegare SG AIRBOX alla consolle DMX impostandolo alla modalità trasmettitore(TX) (pulsante verde premuto).
- Page 9 Per collegare il trasmettitore alla consolle DMX Utilizzare un cavo conforme alle specifiche EIA RS-485: bipolare intrecciato, schermato, 120Ohm di impedenza caratteristica e bassa capacità (SAGITTERSG DMX3 – SG DMX5). Non utilizzare cavo microfonico o altro cavo con caratteristiche diverse da quelle specificate. Le terminazioni devono essere effettuate con connettori maschio / femmina tipo XLR a 3 pin.
- Page 10 6.3 - MODALITA' DMX Modalità 1 canale Canale Valore Istruzione 000 - 255 51 Colori Modalità 4 canali Canale Valore Istruzione 000 - 255 Rosso 000 - 255 Verde 000 - 255 000 - 255 Bianco Modalità 9 canali Canale Valore Istruzione 000 - 255...
- Page 11 000 - 255 Rosso 5 000 - 255 Verde 5 000 - 255 Blu 5 000 - 255 Bianco 5 000 - 255 Rosso 6 000 - 255 Verde 6 000 - 255 Blu 6 000 - 255 Bianco 6 000 - 255 Rosso 7 000 - 255...
- Page 12 000 - 255 Blu 6 000 - 255 Bianco 6 000 - 255 Rosso 7 000 - 255 Verde 7 000 - 255 Blu 7 000 - 255 Bianco 7 000 - 255 Rosso 8 000 - 255 Verde 8 000 - 255 Blu 8 000 - 255...
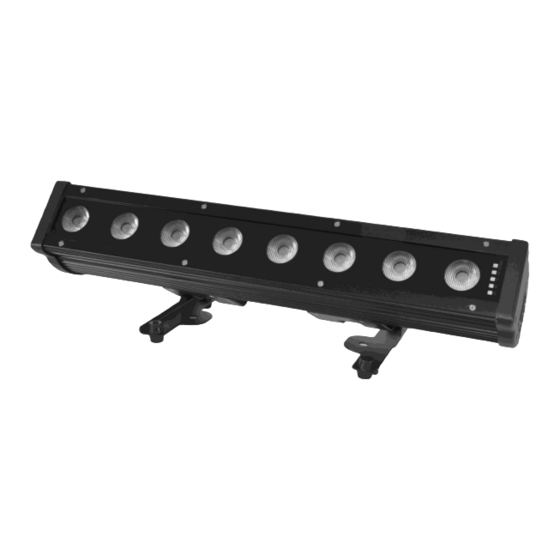
- Page 13 8. - SPECIFICHE TECNICHE • Alimentazione: 100-240 VAC, 50/60Hz o tramite batteria 11,1 VDC. • LED: 8x10 W LED RGBW. • Angolo del fascio di luce: 10x45°. • Potenza: 70W. • Modalità operative: Auto, Master/slave, DMX512. • Regolazione elettronica della luminosità 0-100%. •...
- Page 14 1. - INTRODUCTION Thank You for choosing one of Our products! Please refer to the instructions and warnings contained in this user manual, please retain it for future reference. This manual contains information about the installation and use of the device. The information contained in this publication has been carefully prepared and checked.
- Page 15 2. - SAFETY INSTRUCTIONS Caution! This product is not suitable for household illumination. Only professional use Please read this manual before installing and applying power to the equipment, follow the safety precautions listed below and observe all warnings in this manual and printed on. Please contact a PROEL distributor for assistance with any questions about how to activate the equipment safely.
- Page 16 IP65 PROTECTION RATING The device is protected against the penetration of dust (first digit 6) and from water jets (second digit 5). Appliance suitable for outdoor use. CONNECTION TO THE MAINS The electrical connection for the charge must be carried out by a qualified electrician. Ensure that the mains frequency and voltage correspond to those for which the equipment is designed, as shown in the electrical data label.
- Page 17 Verify that the box contains the following items: N° 1 SG IPLEDBAR8BAT N° 1 Power cable N° 1 IR Remote control N°...
- Page 18 4. - BATTERY CHARGE - Connect the projector to the mains with the included power cable. - DURING THE COMPLETE PROCESS OF BATTERIES CHARGE THE PROJECTOR MUST BE OFF. - The standard time for battery charge when the level is 5%, is approximately 8 hours. - During the charge, the indicator is lighted.
- Page 19 5.2 - CONNECTION TO THE DMX CHAIN The connection to the DMX chain can be done with the transceiver SG AIRBOX (sold separately) or cable. WIRELESS CONNECTION Connect the SG AIRBOX to the DMX console and set it up as transmitter (TX) by pressing down the green button.
- Page 20 To connect the transmitter to a DMX console use a cable conforming to specifications EIA RS- 485: pole twisted, shielded, 120Ohm characteristic impedance and low capacity (SAGITTER SG DMX3 – SG DMX5). Do not use microphone cable or other cable with different characteristics than those specified.
- Page 21 6.3 - DMX MODE 1 Channel mode Channel Value Instruction 000 - 255 51 Color 4 Channels mode Channel Value Instruction 000 - 255 000 - 255 Green 000 - 255 Blue 000 - 255 White 9 Channels mode Channel Value Instruction 000 - 255...
- Page 22 000 - 255 White 4 000 - 255 Red 5 000 - 255 Green 5 000 - 255 Blue 5 000 - 255 White 5 000 - 255 Red 6 000 - 255 Green 6 000 - 255 Blue 6 000 - 255 White 6 000 - 255...
- Page 23 000 - 255 Green 6 000 - 255 Blue 6 000 - 255 White 6 000 - 255 Red 7 000 - 255 Green 7 000 - 255 Blue 7 000 - 255 White 7 000 - 255 Red 8 000 - 255 Green 8 000 - 255...
- Page 24 8. - TECHNICAL SPECIFICATIONS • Power Supply: 100-240 VAC, 50/60Hz and with 11,1 VDC battery. • LED: 8x10 W LED RGBW. • Beam Angle: 10x45°. • Power: 70W. • Operation Mode: Auto, Master/slave, DMX512. • Electronic Dimming 0-100%. • DMX: 1 –...
- Page 28 Proel S.p.A. Via alla Ruenia 37/43 64027 Sant'Omero (TE) ITALY Tel. +39 0861 81241 Fax. +39 0861 887862 Mail: info@proel.com Web: www.proel.com...
Need help?
Do you have a question about the SG IPLEDBAR8BAT and is the answer not in the manual?
Questions and answers