
Subscribe to Our Youtube Channel
Related Manuals for Maxi-Cosi Tayla


Summary of Contents for Maxi-Cosi Tayla
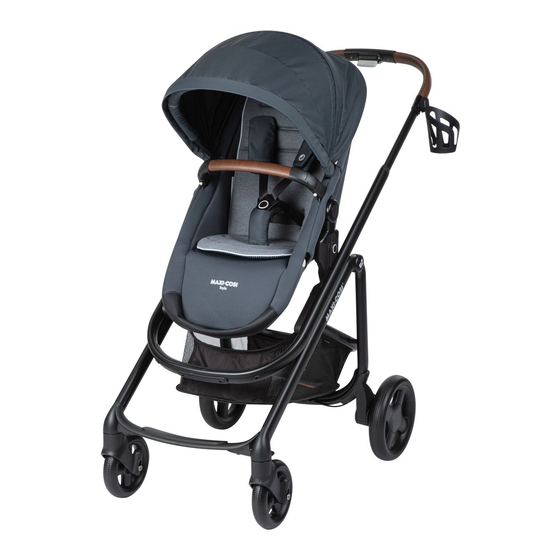
- Page 1 Tayla Modular Stroller Max 50 lb (22.67 kg) 4358-7811B 5.3.21 KEEP INSTRUCTIONS FOR FUTURE USE. Read all instructions before using this stroller.
- Page 2 Safety Information WARNING: FOR THE SAFETY OF YOUR CHILD, PLEASE READ THE FOLLOWING WARNINGS AND ASSEMBLY INSTRUCTIONS AND KEEP FOR FUTURE REFERENCE. • Adult assembly required. • NEVER LEAVE CHILD UNATTENDED. ALWAYS keep child in view when in stroller. • AVOID SERIOUS INJURY from falling or sliding out. ALWAYS use the harness system. Check frequently to make sure it is secure.
- Page 3 • NEVER place or hang parcels, bags, or accessories on the handle or canopy. The stroller may tip over or the canopy may collapse. • This product will become unstable if a parcel bag or rack is used when there is no provision for one.
-
Page 4: Table Of Contents
Contents Parts of Stroller ........Adjusting Canopy & Footrest ..... Installing Wheels ........Privacy Shade & Storage Basket Use ..Unfolding Stroller Frame ......Adjusting Stroller Seat Harness Straps ..Adjusting Handle ........Securing Child in Stroller Seat ....Using Parking Brake & Folding Stroller ........ -
Page 5: Parts Of Stroller
If any parts are missing, do not • Phone: 1-800-951-4113 return this product to the • Text: 1-812-652-2525 It is located on a label on the place of purchase. stroller frame. • Chat: www.maxi-cosi.com... -
Page 6: Installing Wheels
Installing Wheels Front Swivel Wheels Rear Wheels click! click! Attach the front Attach the rear wheels. Finished! swivel wheels. NOTE: Pull out on the wheels to make sure they are secured. -
Page 7: Unfolding Stroller Frame
Unfolding Stroller Frame Release Buttons • Slide the stroller frame release button to Place your foot on the storage either the left or right. basket frame. • Then squeeze the handle adjustment button. • Hold them together. click! • Push your foot down to start Finished! unfolding. -
Page 8: Adjusting Handle
Adjusting Handle This stroller’s handle is adjustable and has 5 positions: 4 strolling heights and 1 storage. Adjust to a strolling height that is comfortable for you. Handle Height Adjustment Button Squeeze the handle Lift or lower the handle DO NOT use with the adjustment button and to your desired position. -
Page 9: Using Parking Brake & Locking Swivel Wheels
Using Parking Brake & Locking Swivel Wheels Rear Wheels To Lock Parking Brake To Release Parking Brake Front Swivel Wheels To Lock Swivel Wheels To Release Swivel Wheels click! click! • The wheels must face forward • Firmly pull the lock tabs as shown. -
Page 10: Attaching Car Seat To Stroller Frame
Attaching Car Seat to Stroller Frame Illustrations show a generic car seat icon. Seat Receivers Car Seat Adapters click! click! Install the seat receivers to the stroller frame attachments. Match the colored dots on the adapters with the Match the colored dots on the receivers with the colored dots colored dots on the receivers and attach. -
Page 11: Removing Car Seat From Stroller Frame
Removing Car Seat from Stroller Frame Illustrations show a generic car seat icon. Car seat stroller While engaging release mechanisms your car seat’s & locations vary by stroller release Mico Models’ car seat model. mechanism, lift Stroller Release Buttons the car seat off Review your car seat’s the stroller frame. -
Page 12: Attaching Stroller Seat Forward-Facing
Attaching Stroller Seat Forward-Facing click! Seat Receivers Install the seat receivers to the stroller frame attachments. Match the colored dots on the receivers with the colored dots on the attachments. click! click! Attach the seat Attach the bumper bar to the receivers. to the stroller seat. -
Page 13: Removing Stroller Seat From Stroller Frame
Removing Stroller Seat from Stroller Frame Removing Stroller Seat from Receivers Press each of the release buttons and lift the stroller seat up to remove it from the stroller. Removing Seat Receivers from Stroller Frame You can fold and store the stroller frame with the receivers still attached. Press and hold the release buttons in while lifting the receivers up to remove them from the stroller frame. -
Page 14: Attaching Stroller Seat Rear-Facing
Attaching Stroller Seat Rear-Facing click! Press each of the release buttons and lift the Turn the stroller seat stroller seat up to remove it from the stroller. rear-facing and reattach it to the receivers. Finished! -
Page 15: Reclining Stroller Seat
Reclining Stroller Seat This stroller seat has multiple recline positions. Adjust to a position that is comfortable for your child. Extend the stroller handle to one of the 4 strolling Lift the recline lever to heights that is comfortable for you. recline the stroller seat. -
Page 16: Adjusting Canopy & Footrest
Adjusting Canopy & Footrest Adjusting Canopy Pull the canopy forward. Lift the fabric to access the Peek-a-Boo window. Adjusting Footrest The footrest does not lock into the lowest position. To lower footrest, press the footrest adjustment buttons To raise footrest, pull the and push down on the footrest. -
Page 17: Privacy Shade & Storage Basket Use
Privacy Shade & Storage Basket Use Unzip the storage pocket in the canopy and pull Pull the privacy shade down and tuck it around the privacy shade out. the front of the stroller seat footrest. Storing Privacy Shade Storage Basket Fold the privacy shade up and tuck into the storage pocket in the canopy. -
Page 18: Adjusting Stroller Seat Harness Straps
Adjusting Stroller Seat Harness Straps As your child grows, you will need to adjust the harness strap height. Harness System Press the buttons Unbuckle. on both sides of the bumper bar to remove. From the back of the Push the harness covers’ Pull the harness cover seat, unzip the stroller retainers through the... - Page 19 Push the harness covers’ retainers Pull the harness covers’ Zip the back panel. into the harness slot closest to your retainers through the child’s shoulders. harness slots. To Lengthen Harness Strap To Shorten Harness Strap Hold the long end of the strap Hold the short end of the strap and then push it up.
-
Page 20: Securing Child In Stroller Seat
Securing Child in Stroller Seat Unbuckle. Place your child in Fit the top buckle Buckle. Finished! the stroller seat. tongue over the bottom buckle tongue. Hold them together. WARNING: • NEVER LEAVE CHILD UNATTENDED. ALWAYS keep child in view when in stroller. •... -
Page 21: Folding Stroller
Folding Stroller Sliding Stroller Release Button • Slide the stroller frame release button to either the left or right. Handle Adjustment • Then squeeze the handle adjustment button. Button • Hold them together until the stroller starts to fold. • Then release the sliding stroller release button, but continue to squeeze the handle adjustment button and lower the handle to the storage position. -
Page 22: Removing & Installing Stroller Seat Pad
Removing & Installing Stroller Seat Pad The stroller seat pad is reversible. One side is for colder weather and the other for hotter weather. Press the buttons Unbuckle. Undo the harness From the back of the on both sides of the straps from the seat, unzip the stroller bumper bar to remove. - Page 23 Push the harness covers’ Pull the harness cover Undo the fastening strip Pull the seat pad out of retainers through the out of the harness slot. on the harness straps. the stroller seat. harness slots. Thread the harness Attach the fastening Flip the pad to the straps through the slots strip on the harness...
- Page 24 Push the harness covers’ Pull the buckle through Pull the harness covers’ retainers into the harness slot the slot in the seat pad. retainers through the closest to your child’s shoulders. harness slots. Attach the harness Zip the back panel. Attach the bumper bar.
-
Page 25: Accessoy Use & Care
Accessory Use & Care Rain Shield Cup Holder Spot Clean Secure the cup holder to the Hand attachment. Wash WARNING: • NEVER place more than 1 lb (.5 kg) in cup holder. -
Page 26: Wash & Care Of Stroller Parts
Wash & Care of Stroller Parts Spot Clean Spot Clean Cleaning Seat Pad Insert • Machine wash separately with cold water on a gentle cycle. • Do not use bleach. • Tumble dry separately for 10-12 Spot minutes on low heat. Clean •... -
Page 27: Dorel Juvenile Group Information
Two-Year Limited Warranty Dorel Juvenile Group, Inc. warrants to the original purchaser that this product (Tayla Modular Stroller), is free from material and workmanship defects when used under normal conditions for a period of two (2) years from the date of purchase. Should the product contain defects in material or workmanship Dorel Juvenile Group, Inc., will repair or replace the product, at our option, free of charge. - Page 28 Tayla Modular Stroller Max 50 lb (22.67 kg) ©2021 Dorel Juvenile Group, Inc. (800) 951-4113 www.maxicosi.com. Styles and colors may vary. Les styles et les couleurs peuvent varier. Made in China Fabriqué en Chine. Distributed by (distribué par) Dorel Juvenile Group, Inc., 2525 State St., Columbus, IN 47201-7494. Dorel Juvenile Canada, 2855 Argentia Road, Unit 4, Mississauga, ON L5N 8G6.
Need help?
Do you have a question about the Tayla and is the answer not in the manual?
Questions and answers
I have the maxi cosi tayla travel set. I put the car seat on the base but I can’t figure out how to remove the car seat from the base. I’m pulling on the grey lever in the back but it’s not releasing.