Table of Contents
Advertisement
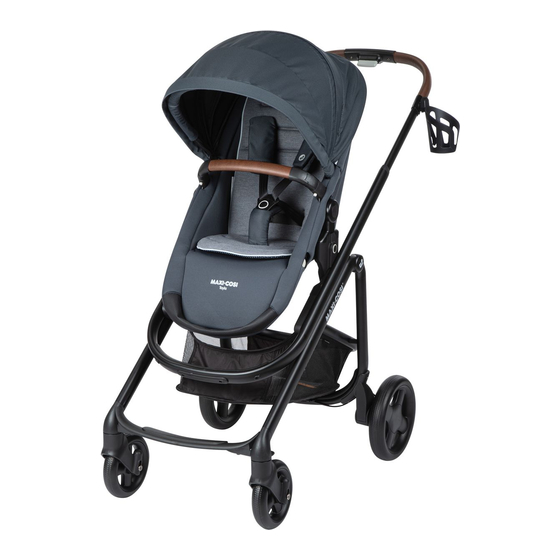
Tayla
TM
Stroller
Max 50 lb (22.67 kg)
Instructions
CV369, TR428
4358-7811 1.8.20
KEEP INSTRUCTIONS FOR FUTURE USE.
Read all instructions before using this stroller.
WARNING
Failure to follow the steps and
warnings on the labels and in the instruction
manual can result in serious injury or death to
your child.
Advertisement
Table of Contents

Related Manuals for Maxi-Cosi Tayla


Summary of Contents for Maxi-Cosi Tayla
- Page 1 Tayla Stroller Max 50 lb (22.67 kg) Instructions CV369, TR428 4358-7811 1.8.20 KEEP INSTRUCTIONS FOR FUTURE USE. Read all instructions before using this stroller. WARNING Failure to follow the steps and warnings on the labels and in the instruction manual can result in serious injury or death to...
- Page 2 Safety Information WARNINGS FOR THE SAFETY OF YOUR CHILD, PLEASE READ THE FOLLOWING WARNINGS AND ASSEMBLY INSTRUCTIONS AND KEEP FOR FUTURE REFERENCE. • Adult assembly required. CAUTION: Keep small parts away from children during assembly. • NEVER LEAVE CHILD UNATTENDED. ALWAYS keep child in view when in stroller. •...
- Page 3 • NEVER place or hang parcels, bags, or accessories on the handle or canopy. The stroller may tip over or the canopy may collapse. • This product will become unstable if a parcel bag or rack is used when there is no provision for one.
-
Page 4: Table Of Contents
Contents Parts of Stroller ........Adjusting Canopy and Footrest ....Installing Wheels ........Privacy Shade and Storage Basket Use ..Unfolding Stroller Frame ......Adjusting Stroller Seat Harness Straps ..Adjusting Handle ........Securing Child in Stroller Seat ....Using Parking Brake and Folding Stroller ........ -
Page 5: Parts Of Stroller
If any parts are missing, do not • Phone: 1-800-951-4113 return this product to the • Text: 1-812-652-2525 It is located on a label on the place of purchase. stroller frame. • Chat: www.maxi-cosi.com... -
Page 6: Installing Wheels
Installing Wheels Front Swivel Wheels Rear Wheels click! click! Attach the front Attach the rear wheels. Finished! swivel wheels. Note: Pull out on the wheels to make sure they are secured. -
Page 7: Unfolding Stroller Frame
Unfolding Stroller Frame Release Buttons • Slide the stroller frame release button to either the left or right. • Then squeeze the handle adjustment button. • Hold them together. Place your foot on the storage basket frame. Finished! • Push your foot down to start unfolding. -
Page 8: Adjusting Handle
Adjusting Handle This stroller’s handle is adjustable and has 5 positions: 4 strolling heights and 1 storage. Adjust to a position that is comfortable for you. Handle Height Adjustment Button Squeeze the handle Lift or lower the handle DO NOT use with the adjustment button and to your desired position. -
Page 9: Using Parking Brake And Locking Swivel Wheels
Using Parking Brake and Locking Swivel Wheels Rear Wheels To Lock Parking Brake To Release Parking Brake Front Swivel Wheels To Lock Swivel Wheels To Release Swivel Wheels click! click! • The wheels must face forward • Firmly pull the lock tabs up with both of your index as shown. -
Page 10: Attaching Car Seat To Stroller Frame
Attaching Car Seat to Stroller Frame The car seat shown is a generic icon used for reference and may not look like your car seat. Seat Receivers Car Seat Adapters click! click! Attach the seat receivers with a blue dot to Attach the car seat adpaters to the stroller frame fi... -
Page 11: Removing Car Seat From Stroller Frame
Removing Car Seat from Stroller Frame The car seat shown is a generic icon used for reference and may not look like your car seat. Locate the stroller release buttons While holding the on the car seat and hold them in. stroller release buttons Please review your car seat’s in, lift the car seat off... -
Page 12: Attaching Stroller Seat Forward-Facing
Attaching Stroller Seat Forward-Facing Seat Receivers click! Attach the seat receivers with a blue dot to the stroller frame fi xture with a blue dot. Then attach the receiver with a red dot to the fi xture with a red dot. click! click! Attach the seat... -
Page 13: Removing Stroller Seat From Stroller Frame
Removing Stroller Seat from Stroller Frame Removing Stroller Seat from Receivers Press and hold in the release buttons and remove the stroller seat from the receivers. Removing Seat Receivers from Stroller Frame You can fold and store the stroller frame with the receivers still attached. Press the release buttons and remove the receivers from the stroller frame. -
Page 14: Attaching Stroller Seat Rear-Facing
Attaching Stroller Seat Rear Facing click! Press and hold in the release button on the seat Turn the stroller seat receivers to remove the stroller seat. rear-facing and reattach it to the receivers. DO NOT fold the stroller when the stroller seat is rear-facing. -
Page 15: Reclining Stroller Seat
Reclining Stroller Seat This stroller seat has multiple recline positions. Adjust to a position that is comfortable for your child. Extend the stroller handle to one of the 4 strolling Lift the recline lever to heights that is comfortable for you. recline the stroller seat. -
Page 16: Adjusting Canopy And Footrest
Adjusting Canopy and Footrest Adjusting Canopy Pull the canopy forward. There is a Peek-a-Boo window. Adjusting Footrest The footrest does not lock into the lowest position. To lower footrest, press the footrest adjustment buttons To raise footrest, pull the and push down on the footrest. footrest up until it locks into place. -
Page 17: Privacy Shade And Storage Basket Use
Privacy Shade and Storage Basket Use Unzip the storage pocket in the canopy and pull Pull the privacy shade down and tuck it around the privacy shade out. the front of the stroller seat footrest. Storing Privacy Shade Storage Basket Fold the privacy shade up and tuck into the strorage pocket in the canopy. -
Page 18: Adjusting Stroller Seat Harness Straps
Adjusting Stroller Seat Harness Straps As your child grows, you will need to adjust the harness strap height. Harness System Press the buttons Unbuckle. From the back of the on both sides of the seat, unzip the stroller bumper bar to remove. seat’s back panel. - Page 19 WARNINGS For proper installation of the harness system, make sure the harness covers’ retainers lay flat against the back board. NEVER use stroller without the harness system. Zip the back panel. To Lengthen Harness Strap To Shorten Harness Strap Hold the long end of the strap Hold the short end of the strap and then push it up.
-
Page 20: Securing Child In Stroller Seat
Securing Child in Stroller Seat Unbuckle. Place your child in the stroller seat. Finished! Place the top buckle Buckle. tongue on the bottom buckle tongue. Hold them together. WARNINGS • NEVER LEAVE CHILD UNATTENDED. Always keep child in view when in stroller. • AVOID SERIOUS INJURY from falling or sliding out. -
Page 21: Folding Stroller
Folding Stroller Release Buttons • Slide the stroller frame release button to either the left or right. • Then squeeze the handle adjustment button. • Hold them together. Lift the stroller up. Finished! DO NOT fold the stroller when the stroller seat is rear-facing. -
Page 22: Removing And Installing Stroller Seat Pad
Removing and Installing Stroller Seat Pad The stroller seat pad is reversible. One side is for colder weather and the other for hotter weather. Undo the harness From the back of the Press the buttons Unbuckle. straps from the seat, unzip the stroller on both sides of the harness covers. - Page 23 Pull the seat pad out of Push the harness covers’ Pull the harness cover Undo the fastening strip the stroller seat. retainers through the out of the harness slot. on the harness straps. harness slots. Attach the fastening Thread the harness Flip the pad to the strip on the harness straps through the slots...
- Page 24 Pull the buckle through Push the harness Pull the harness covers’ the slot in the seat pad. covers’ retainers into retainers through the the harness slot closest harness slots. to your child’s shoulders. Attach the harness Zip the back panel. Attach the bumper bar.
-
Page 25: Accessories
Accessories Rain Shield Cup Holder todmU Push the cup holder attachment on to the handle as shown. Attach the cup holder to the attachment. WARNINGS • Never hang parcels or accessories from the cup holder as the stroller may tip over. •... -
Page 26: Wash And Care
Wash and Care Spot clean Hand wash Machine wash, gentle Do not wash Do not bleach Do not tumble dry Do not iron Do not dry clean... -
Page 27: Dorel Juvenile Group Information
Manufacture Label Dorel Juvenile Group, Inc. warrants to the original purchaser that this product (Tayla Stroller), is free from material and workmanship defects when used under normal conditions for a period of two (2) years from the date of purchase. Should the product contain defects in material or workmanship Dorel Juvenile Group, Inc., will repair or replace the product, at our option, free of charge. - Page 28 Max 50 lb (22.67 kg) ©2019 Dorel Juvenile Group, Inc. (800) 951-4113 www.maxi-cosi.com. Styles and colors may vary. Les styles et les couleurs peuvent varier. Made in CHINA. Fabriqué en CHINE. Distributed by (distribué par) Dorel Juvenile Group, Inc., 2525 State St., Columbus, IN 47201-7494. Dorel Juvenile Canada, 2855 Argentia Road, Unit 4, Mississauga, ON L5N 8G6.