
Related Manuals for CreatBot F430


Summary of Contents for CreatBot F430
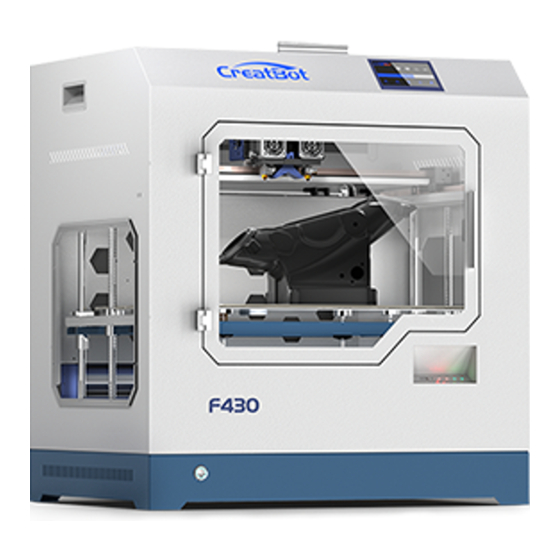
- Page 1 CreatBot 3D Printer User manual English V7.4 Henan Creatbot Technology Limited - 1 -...
-
Page 2: Table Of Contents
CONTENTS Notice ··················································· 3 View Mode ··································· 26 Machine Diagram Right Click on Model ················ 27 Front and back ························· 4 Toolpath Structure ····················· 27 Printer Head ································ 5 Basic Setting ································ 28 Hardware Installation Advanced Setting ······················ 29 Unpacking ··································· 6 Expert Setting ····························... -
Page 3: Notice
Please use the filament provided by CreatBot, or high quality filament by third manufacturers. Due to the use of third party inferior material caused by the failure of the printer, the loss will be borne by the user. -
Page 4: Machine Diagram
Machine Diagram Front and Back 1.Power switch 2.Usb input 3.Indicator light 4.Hot bed 5.Touch screen 1.Power input 2.Air filter 3.Filament space 4.Z ball screw - 4 -... -
Page 5: Printer Head
Machine Diagram Indicator light Hotbed Nozzle 2 Nozzle 1 U disk Printer Head 1.Nozzle 5.Heatbreak 9.Pressure arm 2.Heating tube 6.Extruder block 10.Pressure spring 3.Thermostat tube 7.Cooling fan 11.Pressure nut 4.Heating block 8.Extruder box 12.BLtouch - 5 -... -
Page 6: Hardware Installation
Hardware Installation Unpacking Up platform Turn on printer Up platform Take out filament 1. Ensure the packing is not broken. 2. Need two people at the same time. 3. Lift it out by grasping the frame, not the belt or rails. 4. -
Page 7: Printer Operation
Note: Ser vo Z offset means vertical height between nozzle and detector when probe needle outstretch. It is a fixed value if you don't change hotend or detector. Contact us for videos. Or Youtube enter keywords CreatBot F430 leveling - 7 -... -
Page 8: Load Filament
Printer Operation Load Filament Preheat head Load filament Get filament through Sharpen and straighten filament head 1.Preheat nozzle first. 2.Twist the printed parts,and load filament roll. Get filament through guide tube until extruder. Sharpen and straighten filament head,and check filament if they wind themself. 3. -
Page 9: Unload Filament
Printer Operation Unload Filament Unload filament menu Preheat head Pull out filament 1. Enter "Filament" menu ->"Unload filament", and select the head you want unload. 2. Wait for the nozzle heated to a suitable temperature. 3. After reching temperature, feeder will send a certain number of filament, and then automatically withdraw filament. -
Page 10: Main Menu
Printer Operation Main Menu Touch and set up the temp of the nozzle. Touch and set up the temp of the nozzle. 210℃ 210℃ 210℃ Preset nozzle temperature 200.0℃ 200.0℃ 210℃ Current nozzle temperature Touch and set up the temp of the nozzle. Touch and set up the temp of the 45℃... - Page 11 Printer Operation Main Menu preheat Move axis Filament menu Cool down resume Open U-disk USB unavailable Setting bed up bed down pause stop - 11 -...
-
Page 12: Detail Page
Printer Operation Detail page Adjust. During printing, you can click it to adjust the print speed, fan speed and the extrusion. Current/ printing /progress stop change pause print speed:100% flow rate:100% colling fan speed:100% - 12 -... -
Page 13: Printing Page
Printer Operation Printing page Current printing progress Pause and Change resume filament. Pause print Cancel print bed up bed down The display will get darken when no operation in ten seconds and can be waken by clicking anywhere on the screen. When the display shows the default print page, click anywhere except the buttons to turn back to the print details page. -
Page 14: Axis Operation
Printer Operation Axis operation X Home Minimum units Move X to home ±X/Y Y Home Move X/Y axis Move Y to home Z Home Z up Move Z to home All Home Z down All axis to home 00.00 X,Y,Z current position of Back 00.00... -
Page 15: Filament Menu
Printer Operation Filament menu Click and enter #1 extruder a value Head 1 #2 extruder Adjust value when (unavailable) extrude/retract Head 2 filament Retract filament Unload Extrude Retract Back filament filament When you want to remove the filament, you need first to heat the extruder. - 15 -... -
Page 16: Sd Card/U-Disk
Printer Operation SD Card/U-disk file1.gcode file2.gcode Click and choose a file1.gcode file to print file2.gcode Next page Last page Superior menu Back - 16 -... -
Page 17: Setting Menu
Printer Operation Setting menu X/Y/Z and exturder motor setting (range:5-9999) Save Back The values in the picture are not real values, the real values refer to the printer default values - 17 -... - Page 18 Setting menu sink fan speed (range:1-100) cooling fan speed (range:1-100) Air filter fan speed(range:1-100) head temperature (range:0-420) hotbed temperature (range:0-140) chamber temperature (range:0-70) - 18 -...
- Page 19 Printer Operation Setting menu When the probe is extended for detection, the relative height difference between the probe and the nozzle(range-20-20mm)。 Turn on or off the auto leveling function. Probe measuring several points on the platform to obtain height information. Close auto leveling function after this print height(range:0-100mm).
-
Page 20: Info. Menu
Printer Operation Info. page 0000:00:00 6.1.XXXXXX 5.1.0 Time used UI version Print time used 5.1.0 0000:00:00 Firmware Firmware version Back 6.1.XXXXXX - 20 -... -
Page 21: Software Operation
Software Operation CreatWare Setup Download CreatWare installation package from the CD-ROM or www.CreatBot.com, follow the prompts to install the software, tr y using the default installation path as well. Installation path can not contain non-Latinn characters. Please associated common 3D file format. -
Page 22: Quick Print Ui
Software Operation Quick Print UI Save toolpath Load model Normal Overhang Transparent X-Ray Layers When insert SD card, the toolpath will saved to the SD card. The file name can not contain non-Latinn characters. Print Your First Model Insert U-Disk to the card reader, open the CreatWare, load 3D model file , choose correct filament and option , finally click... -
Page 23: Full Setting Ui
Software Operation Full Setting UI Load model Save toolpath Manual slicing View mode Setting area View area Rotate Zoom Mirror As you can see from the complete UI, the left side of the software is setting area, the right side is view area. The setting area contain "Basic", "Advanced", "Plugins", "Start/End GCode"... -
Page 24: Mouse Operation
Software Operation Mouse Operation Left click Right click Select model, hold and Hold and move to rotate move to change the viewpoint around position, double-click to the 3D model. load 3D models. Left + Right Scrollwheel Hold and move the Use the scroll wheel to mouse to zoom. -
Page 25: Model Rotate/Scale
Software Operation Model Rotate Click on the left corner of the rotate button , you can see three ring line around the model, respectively along the X, Y, Z direction. The default rotation angle is 5 degrees, press the Shift key can restrict the rotation angle to 1 degree. -
Page 26: Model Mirror
Software Operation Model Mirror Click the mirror button you can pop up the mirror menu. Button is a mirror along the X axis. Button is a mirror along the Y axis. Button is a mirror along the Z axis. Note that the mirror transformation is different from the rotation, such as the mirror transformation will lead to a... -
Page 27: Right Click On Model
Software Operation Right Click on Model Right-click on the model pop-up shortcut menu, here are more features: "Centered" make the model back to the center position of the platform. "Delete" to remove the currently selected model. "Multiply" to copy the currently selected model and automatically position, which is useful for printing more than one model at a time. -
Page 28: Basic Setting
Software Operation Basic Setting Layer height: This is the most important setting to determent the quality of your print, maximum value not exceed 80% of the nozzle diameter. Shell thickness: Refers to the total thickness of the inner and outer walls, the outer wall is only one, the inner wall can be more, set this value to an integer multiple of the diameter of the nozzle. -
Page 29: Advanced Setting
Software Operation Advanced Setting Solid fill top: Refers to whether to print the top surface of the model, uncheck will print it with infill method. Solid fill bottom: Same as above, and so on. Spiralis print: Refers to the method of spiral printing the outer wall of the model (single layer), and this feature is very suitable for print glass vase model. -
Page 30: Expert Setting
Software Operation Export Setting Nozzle size: Set the nozzle size. Diameter: Accurate measurement of your filament gives better quality prints. Minimum travel: The minimum distance which can trigger filament retract. Minimum extrusion: The minimal amount of extrusion that needs to be done before retracting. -
Page 31: Skirt/Brim/Raft
Software Operation Skirt · Brim · Raft Adhesion type: None Adhesion type: Brim Raft Adhesion type: Plugins Plugin enable you to easily include your own features, without having to modify the source code or Gcode. In the screen shot above, these can be enabled by clicking on the arrow down button, then you can configure the plugin. -
Page 32: Start/End Gcode
Software Operation Start / End GCode The start and end gcode are the startup and end procedure of the print, editing this requires knowledge of GCode. If you want to set the automatic heating station after printing, you can remove the ";" in the code ";M190 S50". -
Page 33: Align Dual Head Horizontal
Software Operation Align Dual Head Horizontal There are alignment problem while printing dual color model, this is because the small difference in multi-nozzle assembly, CreatWare built fine-tuning features. Click menu "Machine">"Machine settings", default X offset is: 73.0, default Y offset is: 0.0, adjustment method as shown below: Extruder 2 Extruder 2 Offset X:... -
Page 34: Add Multi Type Printer
Can open 230~260 ℃ 100 ℃ Brim Enclosed PEEK 380~430 ℃ Raft Enclosed Bed 120 ℃ /Air 70 ℃ * The data is only for reference, different environmental data will be different.F160 and F430 can print PEEK. - 34 -... -
Page 35: Change Fuse
Using skills Change Fuse Open fuse tray Change new fuse Routine Maintenance 1. Frequent cleaning stains on the rail. 2. Lubricate the four guide rail. 3. Frequent cleaning feeder gear. Notice: Don’t add too much lubricating oil. - 35 -... -
Page 36: Installation Section
Using skills Installation section - 36 -... -
Page 37: Software
Using skills 1.Better to use printed spool holders. Accroading to curl direction of filament, Get filament through guide tube can prevent winding filament. 2.After preheating nozzle, Sharpen and straighten filament head is necessar y. This will get filament through extruder easily. 3.if you can’t send filament through nozzle well, remove pressure nut and pressure spring first. -
Page 38: Hardware Troubleshoot
Frequently Asked Questions Hardware Troubleshoot 1. Display "MINTEMP" ? The environment is too low, or temperature sensor is damaged, please keep the room temperature above 0 ℃ . 2. Display "MAXTEMP" ? Temperature of nozzle or bed too high, or temperature sensor is damaged, please keep their temperature in a suitable range. -
Page 39: Printing Troubleshoot
Frequently Asked Questions Printing Troubleshoot not over 120℃, and you can close the bed above 100mm except printing ABS or other high-temperature required filaments. 3. The model not stick on the platform ? Please paste masking paper or Kapton tape on the platform, or the nozzle is too far away from the platform, or the bottom of the model is not leveled. -
Page 40: Specifications
Specifications Model DX Plus DE Plus Single Extrusion 300*250*300 300*250*520 400*300*300 400*300*520 Dual Extrusion 280*250*300 280*250*520 380*300*300 380*300*520 Triple Extrusion 260*250*300 260*250*520 360*300*300 360*300*520 Dual/Tris Nozzles Diameter 0.4mm(0.3/0.6/0.8/1.0mm can be customized) Temperature 350 ℃ Nozzles Type print head/new print head Hot bed 100 ℃... - Page 41 Specifications Model F160 F430 D600 Build volume 160*160*200 400*300*300 600*600*600 Dual Extrusion 320*300*300 540*600*600 Single Dual Nozzles Diameter 0.4mm(0.3/0.6/0.8/1.0mm can be customized) Temperature 260 ℃ ( support max 420 ° C ) 350 ℃ Nozzles Type Direct drive Hot bed 140 ℃...
- Page 42 Specifications PEEK-300 F1000 Model 300*300*400mm 1000*1000*1000mm Build volume Dual Extrusion 240*300*400mm 940*1000*1000mm Nozzles Double 1.0 mm(0.4~1.5 mm) Diameter 0.4mm(0.3/0.6/0.8/1.0mm optional) Max 500℃ Max 420℃ Temperature Max 200 ℃ Max 100℃ Hot bed 0.05mm Min. Layer 0.05mm Accuracy X.Y0.011mm;Z 0.025 X.Y0.011mm;Z 0.025 10-150 mm/s 10-120 mm/s Print Speed...
- Page 43 Quality · Experience · Ser vice Henan Creatbot Technology Limited Telephone: +86 4000-558-930 Website: www.CreatBot.com Email: sales@creatbot.com Address: 6#, Chaoya Industr y Park , Hanghai Road, No.13 Ave., Eco-Tech Development Zone, Zhengzhou City, Henan Province, China - 43 -...
Need help?
Do you have a question about the F430 and is the answer not in the manual?
Questions and answers