
Related Manuals for ClosetMaid Style+


Summary of Contents for ClosetMaid Style+
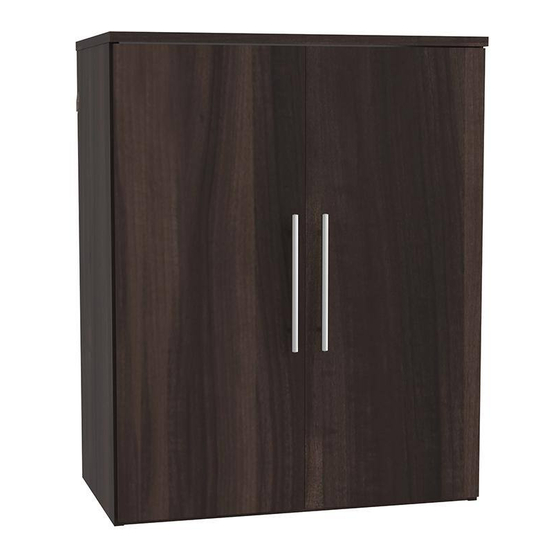
- Page 1 6 ft. Floating Cabinet with Doors Kit Instruction Manuals Base Unit Page 2 Doors Page 20 © 2022 The AMES Companies, Inc. | Orlando, FL 32827 | 1-800-874-0008 (USA, Canada) | www.closetmaid.com 08/2022...
- Page 2 Vous aurez besoin de : Va a necesitar: Maximum load = 100 lbs (evenly distributed) Maximum load = 45,36 kg (evenly distributed) Maximum load = 45,36 kg (evenly distributed) © ClosetMaid Corporation 2017 | Ocala, FL 34471 | 1-800-874-0008 | www.closetmaid.com 01-62216 6/17...
- Page 3 SAFETY PRECAUTIONS | CONSIGNES DE SÉCURITÉ | PRECAUCIONES DE SEGURIDAD MISE EN GARDE WARNING ADVERTENCIA • This unit contains small parts which • Ce module contient de petites pièces • Este producto contiene piezas pequeñas que could be a choking hazard for small avec lesquelles de petits enfants peuvent pueden causar peligro de asfixia a niños children.
- Page 4 PARTS | PIÈCES | PIEZAS Left Side Panel (1) Right Side Panel (1) Panneau gauche (1) Panneau droit (1) Panel lateral izquierdo (1) Panel lateral derecho (1) Top Shelf (1) Bottom Shelf (1) Étagère supérieure (1) tablette du bas (1) Repisa superior (1) repisa inferior (1) Hang Rail (1)
- Page 5 HELPFUL HINTS | CONSEILS UTILES | CONSEJOS PRÁCTICOS PART IDENTIFICATION IDENTIFICATION DES PIÈCES IDENTIFICACIÓN DE LAS PIE- • Count and locate holes in each part. • Note overall shape of part. • Compter et localiser les trous de • Remarquer la forme générale de chaque pièce.
- Page 6 HELPFUL HINTS | CONSEILS UTILES | CONSEJOS PRÁCTICOS INSTALLING L-BRACKET INSTALLATION DU SUPPORT INSTALACIÓN DEL SOPORTE EN L EN FORMA DE L All units MUST be fastened to the wall. Tous les modules DOIVENT être attachés Todas las unidades DEBEN sujetarse au mur.
- Page 7 STEP 1 Install cam posts into top shelf. ÉTAPE 1 Installer les boulons à tige dans l’étagère supérieure. PASO 1 Instale los postes de leva en la repisa superior. • Unfinished surfaces are shaded in gray. • Les surfaces brutes sont colorées en gris. •...
- Page 8 STEP 2 Install cam locks and cam posts into panels. Installer les boulons à verrou et les boulons à tige dans les ÉTAPE 2 panneaux. PASO 2 Instale los cierres de leva y los postes de leva en los paneles. •...
- Page 9 STEP 3 Push 4 cam locks into the bottom shelf. ÉTAPE 3 Pousser 4 boulons à verrou dans la tablette du bas. Empuje 4 cierres de leva de las patas dentro de la repisa PASO 3 inferior. • Unfinished surfaces are shaded in gray. •...
- Page 10 STEP 4 Attach bottom shelf to side panel. ÉTAPE 4 Installer la tablette du bas aux panneau latérau. Sujete la repisa inferior al panel lateral. PASO 4 NOTE: REMARQUE : NOTA: • Disposer un panneau latéral et la tablette • Coloque un panel lateral y la repisa •...
- Page 11 STEP 5 Attach fixed shelf to side panel. ÉTAPE 5 Installer la étagère fixe aux panneau latérau. Sujete la repisa fija al panel lateral. PASO 5 NOTE: REMARQUE : NOTA: • Arrange side panel and fixed shelf as • Disposer panneau latéral et étagère fixe, •...
- Page 12 STEP 6 Attach top shelf to assembly. ÉTAPE 6 Fixer l’étagère supérieure au module. Fije la repisa superior al ensamblaje. PASO 6 Make sure the finished side faces UP S’assurer que le côté fini est orienté vers le HAUT Asegúrese de que los bordes terminados miren hacia ARRIBA NOTE: REMARQUE :...
- Page 13 STEP 7 Mark hang track location. ÉTAPE 7 Marquer l’emplacement du rail horizontal. PASO 7 Marque la ubicación del riel horizontal. +31” NOTE: REMARQUE : NOTA: • Using measuring tape, make sure • Avec un ruban à mesurer, s’assurer le •...
- Page 14 STEP 8 Attach hang track to wall. ÉTAPE 8 Fixer le rail horizontal au mur. PASO 8 Fije el riel horizontal a la pared. (3x for 16 in. wide unit) (3x pour une unité de 16 po de largeur) (3x por unidad de 16 pulg.) No drill for Ne pas percer pour No taladre para...
- Page 15 STEP 9 Attach hang track to wall. ÉTAPE 9 Fixer le rail horizontal au mur. Fije el riel horizontal a la pared. PASO 9 (1x for 16 in. wide unit) (1x pour une unité de 16 po de largeur) (1x por unidad de 16 pulg.) Fold the toggle back, and insert it through the wall hole until you feel the wings have opened on the other side of the wall.
- Page 16 STEP 10 Attach unit to hang rail. ÉTAPE 10 Fixez l’unité pour suspendre la rail. PASO 10 Fijar unidad al riel lateral. NOTE: REMARQUE : NOTA: • Using team lift, align assembly with the • En utilisant la technique de •...
- Page 17 STEP 11 Attach unit to wall. ÉTAPE 11 Fixer le module au mur. Una la unidad a la pared. PASO 11 Tap the pointed tip of the WALL anchor into the wall, and with a screwdriver, screw the anchor in until it’s flush to the wall.
- Page 18 STEP 12 Install adjustable shelves. ÉTAPE 12 Installer les étagères réglables. Instale las repisas ajustables. PASO 12 NOTE: REMARQUE : NOTA : • Push shelf supports into holes at • Pousser les supports d’étagères dans • Empuje los soportes de repisa en los desired locations.
- Page 19 STEP 12 Install hole covers. ÉTAPE 12 Installer les capuchons. Instale las cubiertas de agujero. PASO 12 NOTE: REMARQUE : NOTA : • Cover cam hole with hole plugs. • Couvrir les trous avec les capuchons • Cubra el agujero de la leva con tapones fournis.
- Page 20 La poignée est / ou le modèle peuvent varier. El mango puede variar y / o estilo. What you will need: Vous aurez besoin de : Va a necesitar: © ClosetMaid Corporation 2017 | Ocala, FL 34471 | 1-800-874-0008 | www.closetmaid.com 01-80876 03/17...
- Page 21 SAFETY PRECAUTIONS | CONSIGNES DE SÉCURITÉ | PRECAUCIONES DE SEGURIDAD MISE EN GARDE WARNING ADVERTENCIA • This unit contains small parts which • Ce module contient de petites pièces avec • Este producto contiene piezas pequeñas que could be a choking hazard for small lesquelles de petits enfants peuvent pueden causar peligro de asfixia a niños children.
- Page 22 PARTS | PIÈCES | PIEZAS panel door front (2) avant de panneau de porte (2) parte delantera del panel de la puerta (2) hinge/2-piece (4) charnière / 2 sections (4) bisagra/2 piezas (4) handle (2) poignée (2) manija (2) 99423 50645 rubber bumper (2) handle screw (4)
- Page 23 Separate hinges. Attach door hinge and handle to door. STEP 1 Séparer les charnières. Fixer la charnière de la porte et la ÉTAPE 1 poignée à la porte. Separe las bisagras. Una la bisagra y la manija de la puerta PASO 1 a la puerta.
- Page 24 STEP 2 Attach base hinge to base. Attach and adjust door. Fixer la charnière de la base à la base. Fixer et ajuster la ÉTAPE 2 porte. PASO 2 Una la bisagra de la base a la base. Una la puerta y ajústela. BASE/TOWER HINGE CHARNIÈRE BASE/TOUR BISAGRA DE LA BASE/TORRE...
- Page 25 STEP 3 Install door stop and door bumpers. Installer le butoir de porte et les butoirs de caoutchouc à la ÉTAPE 3 porte. PASO 3 Instale el tope de la puerta y los topes de goma. DOOR STOP BUTOIR DE PORTE TOPE DE LA PUERTA Use only one door stop!
Need help?
Do you have a question about the Style+ and is the answer not in the manual?
Questions and answers