Table of Contents
Advertisement
Quick Links
UC-7112-LX
Plus
SW version 2.0.0
1 Document information
2 About the Module
3 Setting up the Module
4 Communication options
5 Troubleshooting
Copyright © 2019 ComAp a.s.
Written by Jakub Suchý
Prague, Czech Republic
ComAp a.s., U Uranie 1612/14a,
170 00 Prague 7, Czech Republic
Tel: +420 246 012 111
E-mail: info@comap-control.com, www.comap-control.com
Universal communication
3
5
6
15
17
User Guide
module
Advertisement
Table of Contents

Related Manuals for ComAp UC-7112-LX Plus


Summary of Contents for ComAp UC-7112-LX Plus
- Page 1 1 Document information 2 About the Module 3 Setting up the Module 4 Communication options 5 Troubleshooting Copyright © 2019 ComAp a.s. Written by Jakub Suchý Prague, Czech Republic ComAp a.s., U Uranie 1612/14a, 170 00 Prague 7, Czech Republic...
-
Page 2: Table Of Contents
4.2 Communication with 3rd party devices 4.3 Communication with MTU MIP4000 5 Troubleshooting 5.1 Device is not detectable via ComAp Communication Gateway Configurator 5.2 InteliSys NTC Hybrid displays "WrnConCommErr" 5.3 Not possible to connect 5.4 Getting data for technical support... -
Page 3: Document Information
Official version of the ComAp’s End User's Guide/Manual is the version published in English. ComAp reserves the right to update this End User's Guide/Manual at any time. ComAp does not assume any responsibility for its use outside of the scope of the Terms or the Conditions and the License Agreement. -
Page 4: Document History
Even if the prior written consent from ComAp is acquired, ComAp does not take any responsibility for the content, trustworthiness and quality of any such translation. ComAp will deem a translation equal to this End User's Guide/Manual only if it agrees to verify such translation. The terms and conditions of such verification must be agreed in the written form and in advance. -
Page 5: About The Module
Create configuration by selecting predefined devices selected from list. Using predefined configuration, available on ComAp website. In case of specific requests or non-supported device, please contact ComAp support for help with solution. ComAp support can prepare custom configuration file. This service may be charged. -
Page 6: Setting Up The Module
3 Setting up the Module For setting up the module there is „ComAp Communication Gateway Configurator 2“ PC based application. First you need to download it from ComAp website: https://www.comap-control.com/products/communications/uc-7112-lx-plus 3.1 Installation of ComAp Gateway Configurator 2 To install „ComAp Communication Gateway Configurator 2“ open downloaded Windows Installer package file and follow the instructions. -
Page 7: Connecting To The Module
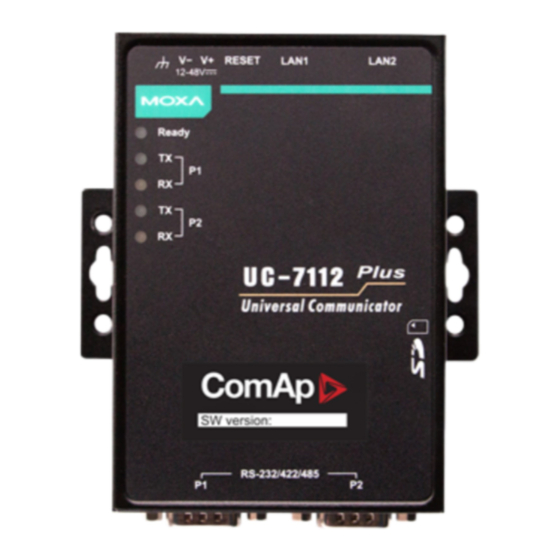
IMPORTANT: It is highly recommended to change default password. Switch mode can be used when is needed to connect more Ethernet devices. Eg. ComAp controller can be connected through UC-7112-LX Plus to WebSupervisor. But it is not recommended to pass high traffic through UC-7112-LX Plus. - Page 8 Note: Host address can be written manually in case device was not detected. This problem could be caused by firewall for instance. IMPORTANT: Default Username is „admin “. Default Password is „rw“. Default IP address for LAN1: 192.168.3.127 and for LAN2: 192.168.4.127 Note: In case of connection failure see Troubleshooting (page 17). UC-7112-LX Plus - User Guide...
-
Page 9: Updating Firmware
To upgrade firmware first connect to gateway and click on „Update FW“ button in the upper bar of „ComAp Communication Gateway Configurator 2“. Then click on “Update Firmware” button. -
Page 10: Creating Configuration
Note: After uploading firmware the UC-7112-LX Plus will be restarted. This operation can take up to 5 minutes. 3.5 Creating configuration This chapter is related to creating configuration based on list of predefined devices. Mainly used for communication with PV inverters (Hybrid application) In Gateway tab fill information about project. - Page 11 Add all devices used on site. Note: Up to 16 PV inverters and 4 Wind turbine inverters and one battery inverter can be added. Add auxiliary values (optional) Go to Port P1 tab and click edit icon in InteliSys Hybrid UC-7112-LX Plus - User Guide...
-
Page 12: Uploading Configuration
Configure auxiliary values 3.6 Uploading configuration Configuration can be uploaded into UC-7112-LX Plus by click on button “Upload” in upper bar and "Build and upload" button. UC-7112-LX Plus - User Guide... -
Page 13: Uploading Predefined Configuration
Click on “Upload Predefined” button in upper bar of ComAp Communication Gateway Configurator 2. Note: If you need configuration for device which is not supported, please contact ComAp technical support or your local distributor. Configuration file is dependent on target application and contains parameters of communication (eg. Modbus registers for reading and writing). -
Page 14: Getting Airgate Id
For using www.websupervisor.net it is needed to get the AirGate ID of module. The AirGate ID can be obtained only in case if configuration with WebSupervisor functionality is uploaded in UC-7112-LX Plus. In this case Airgate ID is displayed in the bottom part of “ComAp Gateway Configurator 2” window. Otherwise there will be “N/A” statement. -
Page 15: Communication Options
Creating configuration. If there are used more PV inverters, the UC-7112-LX Plus will calculate totals from all kind of available values, eg.: sum of all active powers, sum of all reactive powers... Note: Available communication for PV inverter is Modbus RTU (RS485, RS422 or RS232) or Modbus TCP (Ethernet). -
Page 16: Communication With 3Rd Party Devices
4.2 Communication with 3rd party devices UC-7112-LX Plus can be a communication gateway between 3rd party devices and ComAp WebSupervisor. UC-7112-LX Plus obtains data from Modbus 3rd party device and transfers this data to the WebSupervisor. Communication channel is ethernet connection with RJ45 connector. -
Page 17: Troubleshooting
Check wiring and settings see Settings InteliSysNTC Hybrid on page 15 Check if TX LED at UC-7112-LX Plus is flashing. If TX is flashing and RX not it means that InteliSys NTC Hybrid is not responding and the wrong setting is at InteliSys NTC Hybrid. If the TX LED is not flashing the configuration in UC-7112-LX Plus is not correct, please make sure UC-7112-LX Plus has configuration related to PV inverters. -
Page 18: Getting Data For Technical Support
If the UC-7112-LX Plus is connected into network with DHCP server (most of office networks), you can try to set UC-7112-LX Plus to obtain IP address automatically. After Download is completed, check Use DHCP option and click on “Upload Settings” button. - Page 19 UC-7112-LX Plus - User Guide...
Need help?
Do you have a question about the UC-7112-LX Plus and is the answer not in the manual?
Questions and answers