Table of Contents
Advertisement
Quick Links
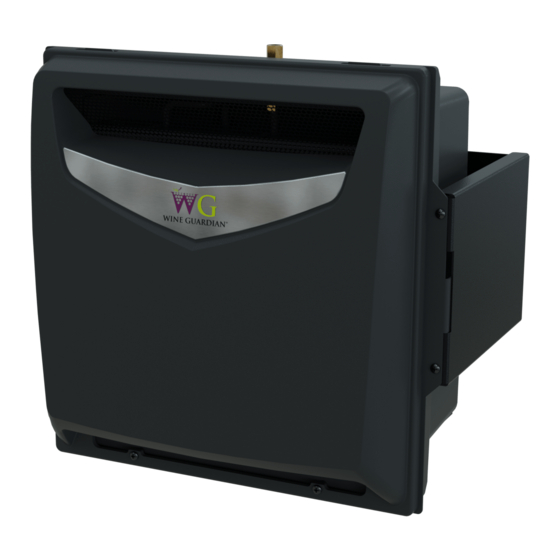
Humidifier
Integrated and Wall Mounted
Wine Cellar Cooling Systems
Installation, Operation and Maintenance Manual
60Hz and 50Hz Models
Manufactured by
Syracuse, NY
wineguardian.com
airinnovations.com
Wine Guardian reserves the right, without notice, to make changes to this document at its sole discretion.
Please visit our web site for the most current version of the Wine Guardian manual and other literature.
Wine Guardian is a registered trademark (2,972,262) of Air Innovations, Inc.
Edition 3/2022 (Original Instructions)
© Air Innovations 2022
15H0164-00
Part No.
1
Advertisement
Table of Contents

Subscribe to Our Youtube Channel
Related Manuals for Wine Guardian 99H0174-21

Summary of Contents for Wine Guardian 99H0174-21
- Page 1 Wine Guardian reserves the right, without notice, to make changes to this document at its sole discretion. Please visit our web site for the most current version of the Wine Guardian manual and other literature. Wine Guardian is a registered trademark (2,972,262) of Air Innovations, Inc.
-
Page 2: Table Of Contents
Table of Contents Safety ................................4 Lockout/Tagout Procedure ........................ 5 Safety Warnings ........................... 5 Receiving, Inspecting and Unpacking ....................5 Directory of terms ............................ 7 General Overview ............................. 7 Wiring Diagram – Integrated Humidifier (60Hz / 50Hz) ............... 9 Wiring Diagram – Freestanding Humidifier (60Hz) ..............10 Wiring Diagram –... - Page 3 Note: This equipment has been tested and found to comply with the limits for a Class B digital device, pursuant to part 15 of the FCC Rules. These limits are designed to provide reasonable protection against harmful interference in a residential installation. This equipment generates, uses and can radiate radio frequency energy and, if not installed and used in accordance with the instructions, may cause harmful interference to radio communications.
-
Page 4: Safety
When performing maintenance, always use the Lockout/Tagout procedure, which is described in this chapter. Observe the maintenance safety guidelines in the Wine Guardian Manual. Electrical Hazards - Working on the equipment may involve exposure to dangerously high voltage. Make sure you are aware of the level of electrical hazard when working on the system. -
Page 5: Lockout/Tagout Procedure
Lockout/Tagout Procedure 1. Unplug the unit from the electrical outlet and cover the outlet to prevent accidentally plugging in the unit. (Freestanding, Self-Powered) 2. Unplug the unit from the Wine Guardian Unit to prevent the humidifier from running (Integrated) Safety Warnings •... - Page 6 If any items listed on the packing slip do not match your order information, contact the place of purchase immediately. This Wine Guardian Humidifier is shipped in a cardboard box. Each humidifier is factory assembled and tested prior to shipment. There are three models of the Wine Guardian humidifier.
-
Page 7: Directory Of Terms
It has been designed for easy installation and operation, either as a freestanding unit or mounted on a Wine Guardian cooling unit. Wine Guardian uses a humidistat to sense and control the amount of moisture needed to be added to the cellar. Humidifiers are not intended to remove moisture, only add moisture. - Page 8 REFERENCE. Size and Capacity The Wine Guardian Humidifier uses a 10” wide x 10” high x 1.5” thick (254mm wide x 254mm high x 38mm thick) expanded coated aluminum pad. Its rated output capacity for wine cellars is 1.11 lbs/HR (0.5 kg/HR) using 100°F (38°C) supply water. Humidifier...
-
Page 9: Wiring Diagram - Integrated Humidifier (60Hz / 50Hz)
Wiring Diagram – Integrated Humidifier (60Hz / 50Hz) -
Page 10: Wiring Diagram - Freestanding Humidifier (60Hz)
Wiring Diagram – Freestanding Humidifier (60Hz) -
Page 11: Wiring Diagram - Freestanding Humidifier (50Hz)
Wiring Diagram – Freestanding Humidifier (50Hz) -
Page 12: Humidifier Dimensions (Freestanding)
Humidifier Dimensions (Freestanding) -
Page 13: Humidifier Dimensions (Integrated)
Humidifier Dimensions (Integrated) -
Page 14: Installation
Installation For questions or help regarding installation, call customer service at 1-315-452-7400 or email info@wineguardian.com a sketch of the proposed area where the unit is to be installed. Pre-Installation HUMIDIFIER MAY NOT BE INSTALLED WHERE IT MIGHT BE EXPOSED TO FREEZING TEMPERATURES. -
Page 15: Freestanding Installation
(see Fig. 8 on page 14). The communication cable provides power and control signals to humidifier from Wine Guardian main control panel. Proceed to set up of the Remote or Local Interface Controller at Wine Guardian unit to reprogram for humidity control. Starting on page 22 Install the humidistat on the wall where it is open to the cellar and can be read easily, approximately 60"... - Page 16 Fig. 1 Fig. 5 Fig. 2 Fig. 6 Fig. 3 Fig. 7 Fig. 4 Fig. 8...
-
Page 17: Integrated Installation (Sentinel)
Connect the communication cable to the top of the humidifier and to the side of the Wine Guardian system (see Fig. 8 on page 14). The communication cable provides power and control signals to the humidifier from the Wine Guardian main control panel. -
Page 18: Integrated Installation (Legacy D050 & D088)
Remove the 4 screws that secure the door on WG unit. Discard both the screws and door. Attach the adaptor plate (Fig. 11) seen on the next page to the Wine Guardian unit with the (4) #8-32x1.25” screws provided. Hook the cleat at bottom of the humidifier over the bottom edge of the opening on the adaptor plate. - Page 19 Fig. 11...
-
Page 20: Integrated Installation (Legacy D200)
Connect the communication cable to the top of the humidifier and to the side of the Wine Guardian system (see Fig. 8 on page 14). The communication cable provides power and control signals to the humidifier from the Wine Guardian main control panel. - Page 21 Fig. 12 Fig. 13...
- Page 22 Fig. 14 Fig. 15...
-
Page 23: Start-Up
Start-Up Fig A. 1. Locate the Wine Guardian remote interface controller (Fig B.) within the wine cellar or proceed to the Wine Guardian Local Interface Controller main control panel. (Fig. A) 2. Press the up arrow to ensure the controller is active. -
Page 25: Mounting The Humidistat
Freestanding humidifiers only, • 60Hz models 99H0185-21 Note: Each Wine Guardian Freestanding humidifier comes with a humidistat and humidistat cable pre-wired to unit. Mount the humidistat on a solid surface away from doors, corners, air outlets or other drafty or heat generating equipment. Do not mount directly on an outside wall or wall adjacent to a boiler room. -
Page 26: Maintenance
BEFORE PERFORMING MAINTENANCE ON THE UNIT, READ AND UNDERSTAND THE SAFETY INFORMATION CONTAINED IN THIS GUIDE. The Wine Guardian Humidifier is designed for minimal maintenance. Never oil any part of the humidifier. Always disconnect the electrical power to the humidifier and the cooling unit prior to servicing. -
Page 27: Replacing The Drip Pad
Replacing the Drip Pad BEFORE STARTING WORK, BE SURE THE POWER TO THE WINE GUARDIAN COOLING UNIT AND HUMIDIFIER ARE TURNED OFF. MAKE SURE THE POWER CORD IS DISCONNECTED FROM THE POWER SOURCE. Start by disconnecting the electrical power and shutting off the water supply. -
Page 28: Water Line Maintenance
Water Line Maintenance Start by disconnecting the electrical power and shutting off the water supply. Remove front cover of humidifier or remove humidifier from ducted Wine Guardian unit (depending on your set-up). Disconnect the water line at the inlet to the solenoid valve. Remove the in-line strainer from inside the inlet fitting using caution to avoid penetrating the strainer and rendering it useless. -
Page 29: Contact And Warranty
Wine Guardian warranty. GENERAL Wine Guardian warrants, to the original buyer, its goods and all parts thereof to be free from defects in material and workmanship for a period of two (2) years from the date of invoicing assuming NORMAL USE AND SERVICE. LIABILITY Wine Guardian liability shall be limited to the repair or replacement (at its option) of any part, which, at our sole discretion, is determined to be defective. - Page 30 ADDITONAL REQUIREMENTS If a defect covered by the Warranty occurs, contact Wine Guardian for authorization to proceed with corrective action. Do not return any parts or incur any charges for which you expect to be reimbursed under this Warranty without receiving this authorization. If parts are replaced under this Warranty, the defective parts must be returned prepaid within 30 days.
Need help?
Do you have a question about the 99H0174-21 and is the answer not in the manual?
Questions and answers
I have a wine guardian 99H174-21, but do not have a wine guardian cooler. can I purchase a power cord and humidistat so I can use it independently?