Yellowtec iXm Briefing Book
Hide thumbs
Also See for iXm:
- Operation manual (36 pages) ,
- Briefing book (8 pages) ,
- Getting started (7 pages)
Table of Contents
Advertisement
Available languages
Available languages
Quick Links
Advertisement
Chapters
Table of Contents

Subscribe to Our Youtube Channel
Related Manuals for Yellowtec iXm


Summary of Contents for Yellowtec iXm
- Page 1 briefing book DE / EN...
- Page 2 Vielen Dank und herzlichen Glückwunsch, dass du dich für das iXm Aufnahmemikrofon entschieden hast! Erkunde eine der fortschrittlichsten Lösungen zur Sprachaufnahme. Als intuitive und robuste Konstruktion liefert das iXm dir tadellose Audio- qualität, ganz ohne dass du Pegel überwachen oder manuelle Anpassungen vornehmen musst.
-
Page 3: Table Of Contents
Inhalt Lieferumfang Sicherheitshinweise Basisfunktionen Bedienelemente Dashboard Anzeige Aufnahme Wiedergabe Energieversorgung Speicher Mikrofonköpfe Line-Eingang + Line-Ausgang Software USB-Anbindung English Version EC & FCC Erklärungen... -
Page 4: Lieferumfang
Lieferumfang Auspacken Überprüfe bitte, ob alles im Karton enthalten ist: Mikrofonkopf Rekorder Netzteil SD-Karte USB-Kabel (Typ A auf Mini-USB) Internationale Netzteiladapter... -
Page 5: Sicherheitshinweise
Nutze das iXm nie ohne Mikrofonkopf. Dies hilft, Schäden am Befestigungsgewinde und an den elektronischen Kontakten zu vermeiden. Halte den Mikrofonkopf gerade, wenn du ihn am iXm Rekorder anbringst und wende keine übermäßige Kraft an. Drehe den Mikrofonkopf vorsichtig fest. Das feine Gewinde verhindert, dass er sich löst. -
Page 6: Basisfunktionen
Basisfunktionen Um das iXm ideal in verschiedenen Aufnahmeumgebungen zu nutzen, hast du die Wahl zwischen verschiedenen Mikrofon- köpfen. Die Mikrofonköpfe können durch einen Schraubmecha- nismus einfach mit Hilfe der TOTO-Halterung ausgetauscht werden (twisting-off-twisting-on). Stelle stets sicher, dass du den Mikrofonrekorder niemals ohne... - Page 7 Es ist nicht erforderlich, ein Display zu über- wachen. Unsere erstaunliche LEA Engine liefert immer eine perfekte Pegelung. iXm erledigt alles automatisch für dich und erstellt auf Knopfdruck sendefähige Aufnahmen. Probiere es jetzt aus - hier ist alles, was du tun musst: Einschalten Halte die RECORD-Taste gedrückt und drücke...
- Page 8 Wiedergabelautstärke sorgfältig auf einen geeigneten Wert eingestellt hast, um vorübergehende oder dauerhafte Hörschäden zu vermeiden. Es wird empfohlen, in der iXm User Software einen maximalen Aus- gangspegel einzustellen. Ausschalten Halte zum Ausschalten des iXm die STOP-Taste des Dashboards gedrückt und drücke gleichzeitig...
-
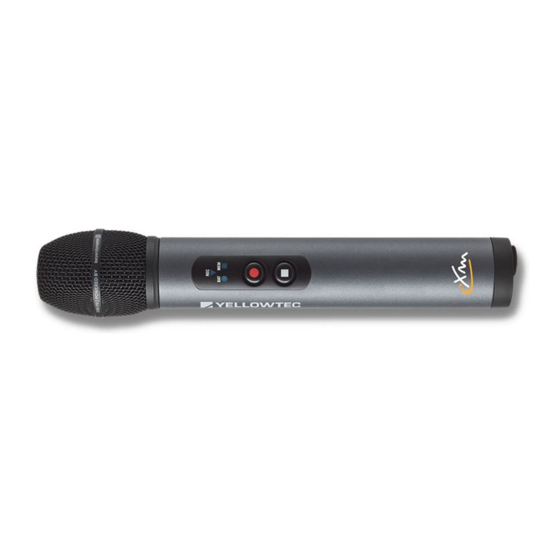
Page 9: Bedienelemente
Bedienelemente Record Keypad / Dashboard REC LED BAT LED MEM LED STOP Playback Keypad RÜCKWÄRTS STOP PLAY VORWÄRTS... -
Page 10: Dashboard Anzeige
Dashboard Anzeige 1. Boot Sequenz Wenn du dein iXm einschaltest, blinkt die REC-LED während der Start- sequenz grün. Sobald die Startsequenz beendet ist, blinkt die MEM-LED rot, um eine Speicherüberprüfung der SD-Karte anzuzeigen. Wenn keine Speicherkarte eingelegt ist, blinkt die MEM-LED kontinuierlich rot, um anzuzeigen, dass dein iXm nicht aufnahmebereit ist. - Page 11 Sobald du deine Aufnahme gestartet hast, leuchtet die REC-LED rot: Die REC-LED leuchtet während der Wiedergabe grün. Die Wiedergabe kann jederzeit durch Drücken der REC-Taste unterbrochen werden. Nach dem Einschalten befindet sich dein iXm immer in einem der ausgewählten Aufnahmebereitschaftsmodi. 4. Marker Während der Aufnahme kannst du mit der REC-Taste Marker setzen.
- Page 12 Wenn die MEM-LED rot zu blinken beginnt, ist es an der Zeit, deine Aufnahme zu beenden und zu speichern. 10. USB-Verbindungsmodi Schließe dein iXm an den USB-Anschluss eines Computers an. Die SD- Speicherkarte wird im Betriebssystem als externer Speicher angezeigt. Eine durchgehend rot oder gelb aufleuchtende BAT-LED zeigt an, in welchem Modus sich dein iXm befindet, während es über USB mit...
-
Page 13: Aufnahme
(via USB) mache ich eine Aufnahme? Drücke einfach REC nachdem du dein iXm eingeschaltet hast. Um die Aufnahme zu stoppen, musst du die STOP-Taste drücken und warten, bis die Aufnahme auf deiner SD-Karte gespeichert ist. Es stehen verschiedene Aufnahmemodi (Pre-Roll / Voice Activated... - Page 14 Aufnahme Wie arbeite ich mit Pre-Roll Recording? Mit Pre-Roll Recording kann dein iXm bis zu 30 Sekunden deines Interviews aufzeichnen, bevor du die REC-Taste drückst. Dieser Modus vermeidet das Fehlen unerwarteter Statements. HINWEIS: Der Pre-Roll Aufnahmemodus verkürzt die Batterielaufzeit und damit die Einsatzzeit des iXm.
- Page 15 Drücke die jeweilige Taste je einmal, um die Lautstärke in Schritten von 1dB zu erhöhen / zu verringern, oder halte die Taste gedrückt, um die Lautstärke um 1dB pro Sekunde zu erhöhen / zu verringern. Diese Option muss zuvor in der iXm Admin Software aktiviert werden. vermeide ich ein unbeabsichtigtes Aufnahmeende? Für zusätzliche Sicherheit kannst du über die iXm Admin Software eine...
- Page 16 Während der Wiedergabe einer Aufnahme kannst du die Kopfhörer- pegel jedoch auch direkt über das iXm einstellen, indem du die STOP- Taste auf der Aufnahmetastatur gedrückt hältst und gleichzeitig die FFW-Taste oder die REW-Taste auf dem Playback Keypad drückst, um die Lautstärke zu erhöhen oder zu verringern.
-
Page 17: Wiedergabe
Wiedergabe Welche Dateiformate kann ich erstellen? Dein iXm kann Standard * .wav (unkomprimiert und komprimiert / MPEG1 Layer2) und Broadcast * .bwf Dateiformate aufzeichnen. Das gewünschte Dateiformat lässt sich in der User oder Admin Software auswählen. Wie werden die Dateien... - Page 18 HINWEIS: Das iXm ist nicht völlig wasserfest. lade ich das iXm auf? Lade dein iXm auf, indem du das Ladegerät über ein USB-Kabel an das iXm anschließt. Der Mini-USB-Anschluss befindet sich auf dem Port Panel. Auch wenn dein iXm über USB an einen PC angeschlossen ist, wird der Ladevorgang gestartet.
-
Page 19: Energieversorgung
Energieversorgung überprüfe ich die Batteriekapazität? Wenn dein iXm eingeschaltet ist und du nicht aufzeichnest, kannst du jederzeit die verbleibende Akku-Leistung und die verbleibende Speicherkapazität abrufen. Drücke einfach die STOP-Taste auf dem Dashboard, um die verbleibende Kapazität anzuzeigen. Zuerst blinkt die BAT-LED langsam gelb, gefolgt von einer gelb blinkenden MEM-LED. -
Page 20: Speicher
Energiequellen bei Bedarf automatisch um. Die Verwen- dung von AA-Batterien ist für den Betrieb des iXm nicht erforderlich. Der interne Li-Ion-Akku ist in der Lage, dein iXm bis zu 8 Stunden lang zu betreiben. Achte beim Verwenden von AA-Batterien darauf, dass du sie richtig einlegst (Polarität beachten!). -
Page 21: Mikrofonköpfe
Drehe des Mikrofonkopf deiner Wahl dann im Uhrzeigersinn fest. Halte ihn dabei immer gerade. Riskiere kein Verkanten. Stelle sicher, dass der iXm Rekorder niemals ohne installierten Mikro- fonkopf gelagert wird, um alle elektronischen Kontakte zu schützen! HINWEIS: Drehe die Mikrofonköpfe vorsichtig auf und ab (siehe Sicherheitshinweise). - Page 22 Der Line-Eingang deines iXm ist ein symmetrischer Mono-Eingang. Er befindet sich in Form einer 3,5-mm-Buchse am Anschlussfeld deines iXm Port Panels und ist dort gelb markiert ist. Die Zeichnungen zeigen, wie man sich mit dem Eingang verbindet. Wenn deine Signalquelle an einem XLR-Anschluss angeschlossen ist, benötigst du wie abgebildet...
- Page 23 Signal ist mono. Du kannst den Ausgang in einen symmetrischen oder asymmetrischen Line-Ausgang ändern. Diese Modi können in der iXm User Software, iXm Admin Software oder einfach durch Auswahl eines vordefinierten Setups geändert werden. Wenn du die Ausgabe von H/P auf Line-Out schaltest, werden die Sprachnachrichten unterdrückt.
-
Page 24: Software
Nutzen sind. Dazu gehören die Präfix-Benennung deiner Dateien und das Festlegen von Abtastraten und Mikrofonpegeln, für den Fall, dass du die LEA Engine nicht verwendest. Weitere Optionen, die in der iXm User Software verfügbar sind, werden im Software Guide erläutert. -
Page 25: Usb-Anbindung
USB-Anbindung iXm USB-Anbindung Um dein iXm per USB zu verbinde, musst du zunächst über ein USB- Kabel eine physische Verbindung zu deinem Host-Computer herstellen. Dein iXm kann dabei auf zwei verschiedene Arten verwendet werden: Verwende dein iXm im Mass Storage Device Mode als Massenspeicher- gerät oder im Setup Access Mode (Administration Mode). - Page 26 – just turn it on, press record and you’re good to go! No need to watch level displays and to constantly readjust your settings. The quality of our intelligent...
- Page 27 Content What‘s in the Box Safety Instructions Basic Functions Layout of Controls Dashboard Indicators Recording Playback Power Management Memory Mic Heads Line-In + Line-Out Software USB Connection EC & FCC Declarations...
-
Page 28: What's In The Box
What‘s in the Box Unpacking Please make sure all parts are included: Mic Head Recorder Wall Charger SD-Card USB Cable (Type A to Mini-USB) International Main Adapters... -
Page 29: Safety Instructions
Charge the internal li-ion battery for a minimum of 4 hrs before you start to use the iXm. The battery indicator will stop flashing when the li-ion battery is fully charged. When using batteries make sure you use quality AA- batteries of the same make. -
Page 30: Basic Functions
Basic Functions In order to operate the iXm in various recording environments, you have a choice of different mic heads. Mic heads can be exchanged easily by the TOTO mount (twisting-off-twisting-on). In order to protect the thread and the electronic contacts,... - Page 31 Basic Functions Recording great audio material with iXm is easy. There is no need to monitor a display as our amazing LEA Engine will always deliver a perfect leveling. iXm takes care of this automatically for you, producing broadcast-ready recordings at the touch of a button.
- Page 32 It is advised to set a maximum output level via iXm User Software. Power Off To switch the iXm off, press and hold the STOP button of the dashboard and hit the STOP button of the playback keypad simultaneously. All LEDs will turn off and the unit will power down.
-
Page 33: Layout Of Controls
Layout of Controls Record Keypad / Dashboard REC LED BAT LED MEM LED STOP Playback Keypad FAST REWIND STOP PLAY FAST FOWARD... -
Page 34: Dashboard Indicators
Dashboard Indicators 1. Boot sequence When you turn on your iXm, the REC LED will flash green during boot sequence. Once the boot sequence is finished the MEM LED will flash red to indicate a memory check of the SD card. With no memory card inserted the MEM LED will continuously flash red to indicate that the iXm will not be ready to record. - Page 35 The REC LED will illuminate green during playback. Playback can always be interrupted by hitting the REC Button. Once powered up, iXm is always in the selected one of the three record ready modes. 4. Markers During recording you can use the REC button to set markers. Due to the iXm‘s click-free design, you will not suffer from any audible noise.
- Page 36 When the MEM LED will start flashing red it is time to end and save your recording. Solid red and amber BAT LED will indicate the mode your iXm is in, while your it is connected to a PC via USB. A solid red light means you are connected in configuration mode.
-
Page 37: Recording
How do I make a recording? Simply press REC after your iXm has been turned on. To stop the recording you have to press the STOP button and wait for the audio to be saved to your SD card. Several recording modes (pre-roll / voice activation) are available... - Page 38 This mode is very useful when you need to remote control your iXm. All parameters for VAR will be selected in then iXm Admin Software.
- Page 39 H/P volume. Push to increase/decrease the volume in steps of 1dB or hold the button to increase/decrease volume by 1dB per second. First, you need to activate the option in the iXm Admin Software. You need headphones plugged into the H/P-Out of the port panel in order to monitor your recording.
-
Page 40: Playback
It is recommended to use headphones with adjustable volume control. Anyway, while playing back a recording you can adjust headphone levels directly on the iXm. If you need to control volume via the iXm keypads, press and hold the STOP key on the record keypad and the FFW or REW button on the playback keypad simultaneously in order to increase or decrease the volume by 1dB per second. - Page 41 I create? iXm can record standard *.wav (uncompressed and compressed / MPEG1 Layer2) and broadcast *.bwf file formats. The required file format needs to be selected in the iXm User Software or iXm Admin Software. How will my files be organized? The recorded files will always be organized by order of their index.
- Page 42 The main body of the iXm is spray proof. You should take care of the capsule and the port panel though. The port panel should face down when it rains and the capsule should be protected by an iXm Wind- screen.
-
Page 43: Power Management
How do I check my battery capacity? When the iXm is powered up and you are not recording, you can always recall the remaining battery power and the remaining memory capacity. To indicate the remaining time to go, simply hit the STOP button on the dashboard. -
Page 44: Memory
AA-batteries (see: “How to check my battery capacity?“). Use three AA-batteries in addition to the internal li-ion battery. They will add to the total of your iXm‘s battery capacity. Power management will automatically switch power sources, if necessary. The use of AA- batteries is not necessary to operate the iXm. -
Page 45: Mic Heads
How do I check my remaining memory? Check the iXm‘s remaining SD Card capacity by hitting the STOP button on the record keypad. The MEM LED will flash amber once for every hour of recording time that is left. Checking your remaining operating time will also cause a battery check. - Page 46 The line input of your iXm is a balanced mono input. The input is a 3.5mm jack marked yellow on the port panel. The drawings show how to connect with the input. When your signal source is on an XLR connector, you will need an adapter as shown.
-
Page 47: Line-In + Line-Out
Yes. You can use your H/P output as a line output. You can transfer your recordings via cable while playing back your file. The output of your iXm is capable of being switched to different output formats. By default, it is set to headphone out. In this mode the output is single ended L and R. -
Page 48: Software
“save to device“ action. The iXm User Software allows you to monitor and change some of the settings that are most useful for a field operator. These include the prefix naming of your files, setting sample rates and setting mic levels when you choose not to use the LEA Engine. -
Page 49: Usb Connection
The BAT light will flash yellow to inform you that your iXm is being char- ged. As soon as you turn on your iXm, the MEM LED will light up yellow to confirm that your iXm is being recognized as an external flash drive. - Page 50 EC Declaration EC Declaration of Conformity according EC Directive 2004/108/EC (EMC-Directive) We, Yellowtec GmbH, Heinrich-Hertz-Str. 3, 40789 Monheim, Germany herewith declare in sole responsibility that the product: Microphone with integrated recorder observes the essential protection and safety related requirements determined in the council directive for the adoptions of the legal regulations of the Member States about the electromagnet compatibility (2004/108/EC).
- Page 51 Reinhard Gallos, Product Manager Phone: +49 2173 967 323 Fax: +49 2173 967 400 e-mail: rgallos@yellowtec.com Model Name: iXm Type of Equipment: Microphone with integrated recorder Classification: Class B digital device We hereby declare that the equipment bearing the model name specified above...
- Page 52 BB v4 www.yellowtec.com/iXm shop.yellowtec.com Manufactured by Yellowtec GmbH Heinrich-Hertz-Str. 3, 40789 Monheim, Germany...
Need help?
Do you have a question about the iXm and is the answer not in the manual?
Questions and answers