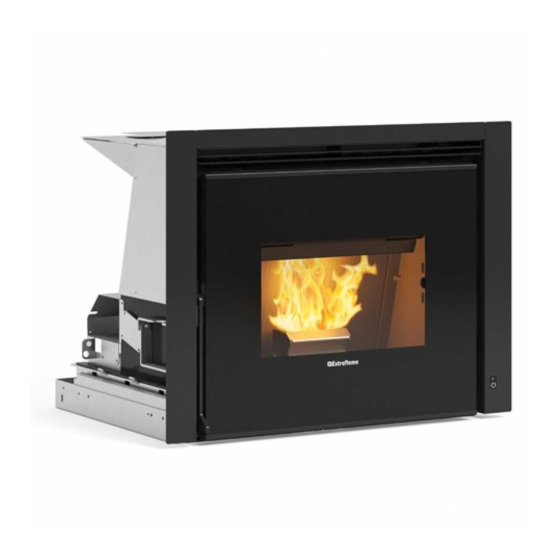
Extraflame COMFORT P70 AIR H49 Instruction Manual
Front drawer inserts
Hide thumbs
Also See for COMFORT P70 AIR H49:
- Assembly instructions manual (6 pages) ,
- User manual (40 pages) ,
- User manual (44 pages)
Table of Contents
Advertisement
Available languages
Available languages
Quick Links
maNUaLE iStrUZioNi caSSEtto froNtaLE iNSErti
IT
iNStrUctioNS maNUaL for froNt DraWEr iNSErtS
UK
maNUEL D'iNStrUctioN DES PiÈcES ENcaStraBLES DU tiroir froNtaL
FR
BEDiENUNGSaNLEitUNG VorDErE ScHUBLaDE EiNSatZStÜcKE
DE
maNUaL DE iNStrUccioNE caJÓN froNtaL iNSErcioNES
ES
comfort P70 air H49
MADE
IN
ITALY
design & production
004281293 - rev.000
Advertisement
Table of Contents

Subscribe to Our Youtube Channel
Related Manuals for Extraflame COMFORT P70 AIR H49


Summary of Contents for Extraflame COMFORT P70 AIR H49
- Page 1 DraWEr iNSErtS maNUEL D’iNStrUctioN DES PiÈcES ENcaStraBLES DU tiroir froNtaL BEDiENUNGSaNLEitUNG VorDErE ScHUBLaDE EiNSatZStÜcKE maNUaL DE iNStrUccioNE caJÓN froNtaL iNSErcioNES comfort P70 air H49 MADE ITALY design & production 004281293 - rev.000...
-
Page 3: Table Of Contents
ITALIANO ....................................4 KIT OPZIONALE CARICAMENTO PELLET FRONTALE......................4 COMPONENTI dEL KIT ................................5 UTILIZZO dEL CAssETTO ................................8 sMALTIMENTO ..................................11 ENGLIsH ....................................12 OPTIONAL FRONT PELLET LOAdING KIT ..........................12 COMPONENTs OF THE KIT ..............................13 HOw TO UsE THE TRAy ................................16 dIsPOsAL....................................19 FRANÇAIs ....................................20 KIT OPTIONNEL POUR LE CHARGEMENT FRONTAL dEs GRANULÉs .................20... -
Page 4: Italiano
Nell’immagini sono riportate le misure minime da rispettare tra l’inserto e il rivestimento: tali misure risultano necessarie per permettere il corretto movimento della cornice e la sua rimozione dalla locazione originaria. Il montaggio è possibile anche da inserto montato. COMFORT P70 AIR H49 550 X 700 mm coN cASSETTo oPTIoNAL ATTENZIONE:... -
Page 5: Componenti Del Kit
COMPONENTI dEL KIT Rimuovere la cornice frontale ITALIANO... - Page 6 Installare le cornici in dotazione al kit Fissare rotaia destra ITALIANO...
- Page 7 Inserire il cassetto e la rotaia sinistra. Fissare rotaia sinistra e rinforzo posteriore. ITALIANO...
-
Page 8: Utilizzo Del Cassetto
Fissare la cornice estetica. Regolare gli appoggi in chiusura. uTILIZZO dEL CAssETTO Estrarre il cassetto (A) fino alla massima estensione, mediante l’uso dell’attizzatoio in dotazione. ITALIANO... - Page 9 Estrarre il cassetto (B) fino alla massima estensione, mediante l’uso dell’attizzatoio in dotazione. caricare il pellet sul cassetto e utilizzare il raschietto in dotazione per spingerlo nel serbatoio retrostante. E’ tassativo svuotare totalemente il pellet dal cassetto al serbatoio retrostante! ITALIANO...
- Page 10 A caricamento pellet ultimato, chiudere il cassetto (B) mediante l’uso degli attizzatoi in dotazione. Una volta chiuso il cassetto (B), sarà possibile chiudere il cassetto (A) mediante l’uso dell’attizzatoio in dotazione. ITALIANO...
-
Page 11: Smaltimento
Per un corretto funzionamento del camino, il cassetto di caricamento deve essere estratto solamente per il tempo neccessario al caricamento del serbatoio. Poi deve restare chiuso come da immagine allegata. sMALTIMENTO Al momEnto dEllo smAltimEnto, quEsto AccEssorio dEvE EssErE sEpArAto dAl prodotto principAlE su cui ErA originAriAmEntE incluso, E dEvE EssErE smAltito sEpArAtAmEntE sEcondo lE normAtivE nAzionAli rElAtivE AllA suA tipologiA di mAtEriAlE. -
Page 12: English
The pictures show the minimum measurements between the insert and the cover: these measurements are necessary to allow for the frame to move correctly and to be removed from its original position. Assembly is possible even with the insert installed. cOmFORT P70 AIR H49 550 X 700 mm wiTh OPTiONAL TRAY WARNING:... -
Page 13: Components Of The Kit
cOmPONENTs OF THE KIT Remove the front frame ENGLISH... - Page 14 install the frames supplied with the kit Tighten the right rail ENGLISH...
- Page 15 insert the drawer and the left rail Tighten the left rail and back plate ENGLISH...
-
Page 16: How To Use The Tray
Tighten the aesthetic frame Adjust the supports when closing HOW TO usE THE TRAy Extract the drawer (A) until the maximum extension with the supplied poker ENGLISH... - Page 17 Extract the drawer (B) until the maximum extension with the supplied poker Load the pellet into the drawer and use the supplied scraper to push it in the back hopper. Is mandatory to empty completely the pellet from the drawer to the hopper! ENGLISH...
- Page 18 when the load is finished, close the drawer (B) with the supplied pokers. Once the drawer is closed (B), it will be possible to close the drawer (A) with the supplied pokers ENGLISH...
-
Page 19: Disposal
For a correct use of the chimney, the drawer have to be extracted only for the time necessary to load the hopper. it has to remain closed as the following image. DIsPOsAL When dIsposIng, thIs Accessory must Be sepArAted from the mAIn product on WhIch It WAs orIgInAlly Included, And should Be dIsposed sepArAtely In AccordAnce to the nAtIonAl regulAtIons relAtIng to Its type of mAterIAl. -
Page 20: Français
L’image reporte les mesures minimales à respecter entre l’insert et le revêtement : ces mesures s’avèrent nécessaires pour permettre le mouvement correct du cadre et son retrait de l’emplacement d’origine. Le montage est possible également avec l’insert monté. COMFORT P70 AIR H49 550 X 700 mm Avec TIROIR OPTIONNeL ATTENTION : TOUjOURS SUIvRE LES INDICATIONS EN TOUTE SÉCURITÉ... -
Page 21: Composants Du Kit
COMPOSANTS DU KIT Retirez le cadre frontal FRANCAIS... - Page 22 Installez les cadres fournis avec le kit Fixer le rail droit FRANCAIS...
- Page 23 Insérez le tiroir et le rail gauche. Fixez le rail gauche et le renfort posterieur. FRANCAIS...
-
Page 24: Utilisation Du Tiroir
Fixez le cadre esthétique. Régler les supports en fermeture UTILISATION DU TIROIR extraire le tiroir (A) jusqu’à l’extension maximale en utilisant le tisonnier fourni. FRANCAIS... - Page 25 extraire le tiroir (B) jusqu’à l’extension maximale à l’aide du tisonnier fourni. charger les granulés dans le tiroir et utiliser les râteau fourni pour le pousser dans le réservoir postérieur. Il est impératif de vider complètement les pellets du tiroir dans le réservoir postérieur! FRANCAIS...
- Page 26 Une fois les pellets terminés, fermez le tiroir (B) à l’aide des tisonniers fournis. Une fois que le tiroir (B) a été fermé, il sera possible de fermer le tiroir (A) en utilisant le tisonnier fourni. FRANCAIS...
-
Page 27: Élimination
Pour un fonctionnement correct de la cheminée, le tiroir de chargement ne doit être retiré que pendant le temps nécessaire au chargement du réservoir. ensuite, il doit rester fermé, comme illustré. ÉLIMINATION Au moment de l’élImInAtIon, cet AccessoIre doIt être sépAré du produIt prIncIpAl sur lequel Il étAIt InItIAlement Inclus, et doIt être élImIné... -
Page 28: Deutsch
In den Abbildungen werden die zu beachtenden Mindestmaße zwischen Einsatz und Verkleidung aufgeführt: Diese Maße sind notwendig, um die korrekte Bewegung des Rahmens und seine Entfernung von der ursprünglichen Position zu erlauben. Die Montage ist auch bei montiertem Einsatz möglich. cOMFORT P70 AIR H49 550 X 700 MM MIT OPTIONALER SCHUBLADE AcHTUNg: DIE ANwEISUNgEN IMMER IN gRöSSTMögLIcHER SIcHERHEIT AUSFüHREN! -
Page 29: Komponenten Des Kit
KOMPONENTEN DES KIT Entfernen Sie den Frontrahmen DEUTSCH... - Page 30 Installieren Sie den gelieferten Rahmen Rechte Schiene befestigen DEUTSCH...
- Page 31 Schublade und die linke Schiene zusammensetzen Linke Schiene und hintere Verstärkung befestigen. DEUTSCH...
-
Page 32: Gebrauch Der Schublade
Befestigen Sie den Frontrahmen Justieren Sie die Schließstützen ein. gEbRAUcH DER ScHUbLADE Ziehen Sie die Schublade (A) bis zur maximalen Verlängerung heraus, mit hilfe des Schürhakens. DEUTSCH... - Page 33 Ziehen Sie die Schublade (B) bis zur maximalen Verlängerung heraus, mit hilfe des Schürhakens. Die Pellets in die Schublade laden und den Schaber in der Ausstattung verwenden, um sie in den dahinter liegenden Tank zu schieben. Die Pellets müssen unbedingt vollständig aus der Schublade bis zum dahinter liegenden Tank entleert werden! DEUTSCH...
- Page 34 Nach dem Laden des Pellets Schließen Sie die Schublade (B) mit den mitgelieferten Schürhaken. Sobald die Schublade (B) geschlossen ist, kann die Schublade (A) mit der mitgelieferten Schürhaken geschlossen werden. DEUTSCH...
-
Page 35: Beseitigung
Für einen korrekten Betrieb des Einsatzes, muss die Schublade nur für erforderliche Zeit benutzt werden, den Tank auszufüllen. bESEITIgUNg Bei Der enTSorgung muSS DieSeS ZuBehörTeil von Dem hAuPTProDukT, Dem eS urSPrünglich BeigefügT wAr, geTrennT werDen unD iST gemäSS Den nATionAlen vorSchrifTen für Die jeweilige mATeriAlArT geTrennT Zu enTSorgen. -
Page 36: Español
En las imágenes aparecen las medidas mínimas que deben respetarse entre el inserto y el revestimiento: dichas medidas son necesarias para que el marco se mueva correctamente y para poder extraerlo de su lugar originario. El montaje se puede realizar también con el inserto montado. COmFORT P70 AIR H49 550 X 700 mm con cAJÓn oPcIonAL ATENCIóN: ¡SIGA LAS INdICACIONES SIEmPRE CON LA máxImA SEGuRIdAd! -
Page 37: Componentes Del Kit
COmPONENTES dEL KIT Retire el marco frontal ESPAÑOL... - Page 38 Instale los marcos suministrados con el kit Sujetar el rail derecho ESPAÑOL...
- Page 39 Inserte el cajón y el rail izquierdo. Fije el rail izquierdo y el refuerzo trasero. ESPAÑOL...
-
Page 40: Utilización Del Cajón
Arreglar el marco estético. Ajustar los soportes de cierre. uTILIzACIóN dEL CAJóN Saque el cajón (A) hasta la extensión máxima, utilizando el atizador suministrado. ESPAÑOL... - Page 41 Saque el cajón (B) hasta la extensión máxima, utilizando el atizador suministrado. cargue los gránulos en el cajón y use el rastrillo suministrado para empujarlo en el deposito posterior. ¡Es imperativo vaciar por completo el pellet del cajón al deposito trasero! ESPAÑOL...
- Page 42 cuando haya terminado con los pellets, cierre el cajón (B) con los atizador suministrados. Una vez que se haya cerrado el cajón (B), será posible cerrar el cajón (A) utilizando el atizador suministrado. ESPAÑOL...
-
Page 43: Eliminación
Para un correcto funcionamiento de la chimenea, el cajón de carga solo debe retirarse por el tiempo necesario, cuando se carga el tanque. Sino, por todo el tiempo debe permanecer cerrado como da imagen. ELImINACIóN En El momEnto dE lA EliminAción, EstE AccEsorio dEBE sEpArArsE dEl producto principAl En El quE sE incluyó... - Page 44 Ihr nächstlIegendes kundendIenstzentrum zu kennen, kontakt mIt Ihrem händler auf oder konsultIeren sIe dIe webseIte www.lanordIca-eXtraflame.com para conocer el centro de asIstencIa mÁs cercano contactar a su revendedor o consultar el sItIo www.lanordIca-eXtraflame.com Il fabbrIcante sI rIserva dI varIare le caratterIstIche e I datI rIportate nel presente fascIcolo In qualunque momento e senza preavvIso, al fIne dI mIglIorare I proprI prodottI.
Need help?
Do you have a question about the COMFORT P70 AIR H49 and is the answer not in the manual?
Questions and answers