Table of Contents
Advertisement
NORTEK GLOBAL HVAC, LLC
Owner's Manual
Installation Instructions
Split System Heat Pumps
Up to 23 SEER Wall Mounted Indoor Units:
GHH09(2.6)LUA4DH
GHH09(2.6)LUK4DH
GHH12(3.5)LUA4DH
GHH12(3.5)LUK4DH
GHH18(5.3)LUK4DH
GHH24(7.0)LUK4DH
• Please read this owner's manual carefully before operation and retain for future reference.
•
•
If you have lost the owner's manual, please visit www.NortekHVAC.com for electronic version.
Advertisement
Table of Contents

Related Manuals for Nortek GHH09LUA4DH


Summary of Contents for Nortek GHH09LUA4DH
- Page 1 NORTEK GLOBAL HVAC, LLC Owner’s Manual Installation Instructions Split System Heat Pumps Up to 23 SEER Wall Mounted Indoor Units: GHH09(2.6)LUA4DH GHH09(2.6)LUK4DH GHH12(3.5)LUA4DH GHH12(3.5)LUK4DH GHH18(5.3)LUK4DH GHH24(7.0)LUK4DH • Please read this owner’s manual carefully before operation and retain for future reference.
- Page 2 Explanation of Symbols DANGER WARNING CAUTION Indicates important but not hazard-related information, NOTICE...
-
Page 3: Table Of Contents
Contents Operation Notices Precautions............1 Parts Name. -
Page 5: Precautions
Precautions WARNING Operation and Maintenance • This appliance should not be used by children or persons with reduced physical, sensory or mental • Children shall not play with the appliance. • by children. • Do not connect heat pump to multi-purpose socket. •... - Page 6 Precautions WARNING • • Do not block air outlet or air inlet. It may cause malfunction. • Do not spill water on the remote controller. • and disconnect power immediately, and then contact • If the heat pump malfunctions, it may cause electric •...
- Page 7 Precautions WARNING Attachment • • the unit. • Use approved power supply circuit and circuit breaker • A circuit breaker must be used. • • Include a circuit break with suitable capacity, please note the capacity table. Air switch should include from circuit-short and overload.
- Page 8 Precautions WARNING • • • keep all cords and cables away from the copper tube. • The appliance shall be installed in accordance with • Installation must be performed in accordance with the requirement of NEC and CEC by authorized personnel only.
- Page 9 Precautions WARNING • Once installed the heat pump should not be moved and • Select a location which is out of reach for children and far away from animals or plants. If it is unavoidable, please put up a fence for safety purpose. •...
-
Page 10: Parts Name
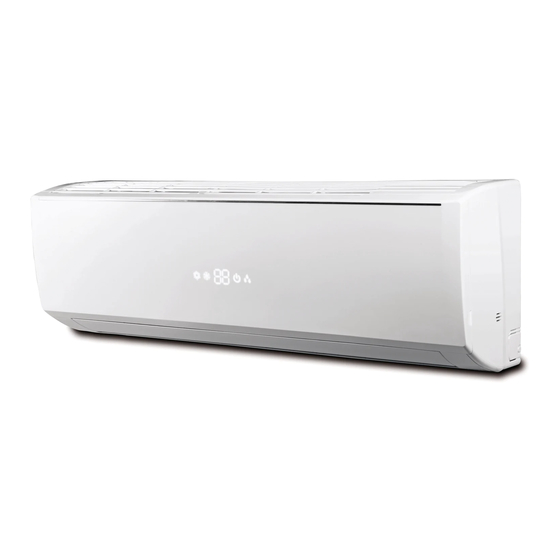
Parts Name Indoor Unit Air Inlet Panel Filter Aux. Button Horizontal Louver Air Outlet Remote NOTICE:... - Page 11 Parts Name Display Temp. Power Receiver Indicator Indicator Indicator Window Indicator Display Indicator Receiver Power Window Temp. Display Indicator Indicator Indicator Indicator Indicator Display Temp. Power LED color indicator: Indicator Green - ON Receiver Red - OFF Window Mode LED color indicator: W R G Display Temp.
-
Page 12: Remote Control Buttons
Remote Control Buttons 2. MODE Button 3. FAN Button 4. SWING Button 5. TURBO Button 7. SLEEP Button 8. TEMP Button 9. I FEEL Button 10. LIGHT Button 11. CLOCK Button Display Screen Icons Set Fan Speed I Feel Operation Mode Turbo Mode Auto Mode Cool Mode... -
Page 13: Remote Control Button Description
Remote Control Button Description Note: • • remote controller. • on the display of remote controller will blink once and the heat pump will emit a • pump, operation indicator on indoor unit’s display is ON and indoor unit will MODE Button Press this button to select your required operation mode. - Page 14 Remote Control Button Description • Heat indicator Note: • minutes to blow air (actual delay time is depend on indoor ambient temperature). • FAN Button Press this button to set fan speed: auto (AUTO), low( ), medium ( Auto Note: •...
- Page 15 Remote Control Button Description TURBO Button Under COOL or HEAT mode, press this button to select quick COOL or HEAT mode. turbo function and icon will disappear. • • (Refer to CLOCK, TIMER ON, TIMER OFF buttons) SLEEP Button Under COOL, HEAT or DRY mode, press this button to start up sleep function. function and icon will disappear.
- Page 16 Remote Control Button Description • indicator displays current temperature and automatically returns to display set I FEEL Button • Press this button to start I FEEL function and will be displayed on the remote controller. After this function is set, the remote controller will send the detected will disappear.
-
Page 17: Combination Button Functions
Remote Control Button Description • TIMER OFF button button, icon disappears and the word “OFF” on remote controller blinks. Press reached desired time. icon resumes Note: • • • TIMER ON or TIMER OFF will need to be cancelled as explained above. Combination Button Functions Energy-Saving Function Note:... -
Page 18: Operation Guide
Combination Button Functions Child Lock Function When child lock function is on, icon is displayed on remote controller. If you press any button on the remote controller, the icon will blink three times without Temperature Scale Display Function Operation Guide on the heat pump. -
Page 19: Operation Guide
Operation Guide 1. Press the back side of remote controller Batteries marked “OPEN,” and push the battery cover as Reinstall 2. Replace two 7# (AAA 1.5V) dry batteries, and make sure the position of “+” and “-” polar Remove 3. Reinstall the battery cover. Battery Cover Notice •... - Page 20 Cleaning and Maintenance WARNING • electric shock. • Do not wash the heat pump with water to avoid electric shock. • Do not use volatile liquid to clean the heat pump. Cleaning the Surface of Indoor Unit When the surface of indoor unit is dirty, it is recommended to use a soft dry cloth or damp cloth to wipe it.
- Page 21 Cleaning and Maintenance WARNING • • • Notice: Preseason Checklist 1. Check whether air inlets and air outlets are blocked. Notice: Post-Season Checklist 1. Disconnect power supply. Disposal and Recycling responsibly. 2. Contact local dealer or service center for the proper disposal method.
-
Page 22: Troubleshooting
Troubleshooting General Analysis Malfunction Check Items Solutions • The heat pump may be • Turn unit back on. have been sent too rapidly from the wireless controller • Is the remote controller within • (25 ft). • Are there obstacles between •... - Page 23 Troubleshooting Malfunction Check Items Solutions • • Wait until power recovery. • • • • Ask professional to replace circuit break or fuse. Heat pump won’t • • Call professional for repair. • Unit has restarted • Wait for 3 min, and then turn •...
- Page 24 Troubleshooting Malfunction Check Items Solutions • • The noise is the sound of the unit, which is normal. • This is the sound of friction • Cracking noise contraction of panel or other temperature. Error Codes • When heat pump malfunctions, the temperature indictor on indoor unit will required action to be taken.
-
Page 25: Installation Clearances
Installation Clearances At least 15cm (6 in) At least 15cm (6 in) At least 15cm (6 in) to the wall. to the wall. At least 300cm (10 ft) to any obstruction At least 250cm (8 ft) -
Page 26: Tools For Installation
Tools for Installation 1. Level 6. Torque wrench 11. Pressure Meter 2. Screwdriver 7. Open-end wrench 12. Multi-meter 3. Impact drill 8. Pipe cutter 4. Drill bit 9. Leak detector 5. Pipe expander 10. Vacuum pump Note: • • Proper power cord must be used. Installation Location Selection Basic requirement: equipment). -
Page 27: Electrical Requirements
Electrical Requirements Safety Precautions 2. Use approved power supply, circuit and circuit breaker as required by local 3. Make sure the power supply matches with the requirement listed on the Use approved power supply cable. safety. 10. Installation must be performed in accordance with the requirement of NEC and CEC by authorized personnel only. -
Page 28: Indoor Unit Installation
Indoor Unit Installation Step one: choosing installation location Step two: install wall-mounting frame screw locations on the wall. 2. Drill holes in the wall for screws. Insert plastic expansion or anchor in the hole. Step three: open piping hole shown as below. Size 09K, 12K Size 18K Mark midway point... - Page 29 Indoor Unit Installation Note: • Take all appropriate safety Indoor Outdoor much dust as possible. • The plastic expansion anchors are not provided and should be Ø55 or 70mm Step four: outlet pipe 2. After selection position of outlet heat pump. case.
- Page 30 Indoor Unit Installation Open-end Hex Nut Diameter Wrench Union Nut Pipe Torque Wrench Indoor Pipe tape. Step six: install drain hose 1. Connect the drain hose to the outlet pipe of indoor unit. Note: Drain Hose Drain Outlet pipe Outlet •...
- Page 31 Indoor Unit Installation cable-cross hole at the back of indoor unit and then pull it out from Cable-cross the front side. Hole Power Connection Cord power cable with the wire clip. Outdoor Unit Connection Outdoor Unit Connection N(1) white black red (brown) (blue) Outdoor Unit Connection...
- Page 32 Indoor Unit Installation Step eight: bind up pipe Connection Pipe Drain Hose Tape 1. Bind the connection pipe, power cord and drain hose with tape. Indoor and Outdoor Power Cord Indoor Gas Pipe Unit Indoor Power Cord 3. Bind them evenly. Liquid Pipe Band...
-
Page 33: After Installation Checklist
After Installation Checklist • Items to check Possible result The unit may fall, shake or emit noise. It may cause condensation and water It may cause condensation and water It may cause short circuit. Does the power cord match the Is there any obstruction in the air inlet Is the dust and debris from installation... -
Page 34: Test Operation
Test Operation 1. Preparation of test operation • The client approves the installation. • Explain operation and other important notes to client. 2. Method of test operation operation. • Press MODE button to select AUTO, COOL, DRY, FAN and HEAT to check whether the operation is normal or not. - Page 35 connection pipe additional 5m (16 ft) of connection pipe. liquid pipe): Diameter of connection pipe mm (in) Liquid Pipe Gas Pipe Ø9.52 or 12 Ø6 or 9.52 Ø16 or 19 Ø19 or 22.2 Ø25.4 or 31.8...
-
Page 36: Pipe Expansion Method
Pipe Expansion Method Note: A. Cut the pipe E. Expand the port - Expand the port with expander. indoor and outdoor units. cutter. Pipe Hard Mold Expander Pipe Cutter Correct: Pipe Uneven Burr Note: diameter, please refer to the table B. -
Page 37: Optional Wired Controller
Optional Wired Controller 1. Display 1.1. LCD Display of Wired Controller... - Page 38 Optional Wired Controller 1.2. Instructions to LCD Display (not all functions available on all models). Number Symbol Description unit). Sleep function (Only sleep 1). Auto mode Dry mode Fan mode Gate-control function (this function is yet unavailable for this unit). Lock function.
- Page 39 Optional Wired Controller 2. Buttons 2.1. Button Layout 2.2. Button Function Number Name Function Function selection and cancellation. Mode Function Timer memory is set, after power failure and recovery the unit will resume the 4 + 2 3 + 6 unit.
- Page 40 Optional Wired Controller 3. Operation Instructions 3.1. 3.2. Auto 3.3.
- Page 41 Optional Wired Controller 3.4. Auto Middle 3.5. • • • Cancel timer: display xx. Turn on the unit without Press Timer repeatedly Timer activated the time Press Timer to cancel Press Enter/Cancel to...
- Page 42 Optional Wired Controller Press Timer repeatedly without Timer activated the time Press Timer to cancel Press Enter/Cancel to decrease by 0.5hr every 0.5s.
- Page 43 Optional Wired Controller 3.6. press it several times until the to press it several times until the Press Function Press Enter/Cancel to repeatedly to enter Press Enter/Cancel to Press Function repeatedly to enter Notes: screen.
- Page 44 Optional Wired Controller 3.7. Sleep on: While the unit is in ON state, press the Function button until the sleep Press Function Press Enter/Cancel to without Sleep activated repeatedly to enter activate Sleep Function Press Enter/Cancel to Press Function repeatedly to enter...
- Page 45 Optional Wired Controller 3.8. Press Function Press Enter/Cancel to without Turbo activated repeatedly to enter activate Turbo Function Press Enter/Cancel to Press Function repeatedly to enter...
- Page 46 Optional Wired Controller 3.9. function will be turned on automatically. Press Function Press Enter/Cancel without E-Heater repeatedly to enter to activate E-Heater activated Function Press Enter/Cancel to Press Function repeatedly to enter...
- Page 47 Optional Wired Controller 3.10. fan will continue run at low speed for 2 minutes to dry the inside of the unit. This will help prevent mildew. Press Function Press Enter/Cancel to without Blow activated repeatedly to enter activate Blow Function Press Enter/Cancel to Press Function repeatedly to enter...
- Page 48 Optional Wired Controller 3.11. Other Functions a. Lock controller enters the Lock function. In this case, LCD displays Repress these two buttons at the same time for 5s to exit this function. Under the Lock state, no other buttons will operate. b.
- Page 49 Optional Wired Controller attention. until installation is complete. c. Mount the wired controller soleplate to the wall over the installation hole and then secure it with d. Insert the four-core twisted pair line into the slot of the wired controller and then buckle the front CAUTION! connection lines between the indoor and outdoor unit, a minimum of 20cm (8 in), otherwise the communication of the unit will probably work abnormally.
- Page 50 Optional Wired Controller 4.3. Wired Controller Disassembly 5. Error Display time, their codes will be displayed consecutively. skilled personnel.
- Page 51 Optional Wired Controller Table 5.1 Error Code Description Error Error Code Description Code Description Indoor unit liquid valve temperature Pump-down IPM Current protection Jumper error Communication line disconnected or Compressor desynchronized expansion valve error PFC protection protection Low pressure protection Outdoor fan 1 error protection Over-power protection Whole unit over-current protection...
- Page 52 66129920532...
Need help?
Do you have a question about the GHH09LUA4DH and is the answer not in the manual?
Questions and answers
I HAVE A E7 ERROR CODE. DOESNT BLOW AIR