Sign In
Upload
Download
Table of Contents
Contents
Add to my manuals
Delete from my manuals
Share
URL of this page:
HTML Link:
Bookmark this page
Add
Manual will be automatically added to "My Manuals"
Print this page
×
Bookmark added
×
Added to my manuals
Manuals
Brands
Stoll Manuals
Industrial Equipment
CMS 530
Operating instructions manual
Stoll CMS 530 Operating Instructions Manual
Hide thumbs
Also See for CMS 530
:
Instruction manual
(79 pages)
,
Instruction manual
(54 pages)
1
2
3
4
Table Of Contents
5
6
7
8
9
10
11
12
13
14
15
16
17
18
19
20
21
22
23
24
25
26
27
28
29
30
31
32
33
34
35
36
37
38
39
40
41
42
43
44
45
46
47
48
49
50
51
52
53
54
55
56
57
58
59
60
61
62
63
64
65
66
67
68
69
70
71
72
73
74
75
76
77
78
79
80
81
82
83
84
85
86
87
88
89
90
91
92
93
94
95
96
97
98
99
100
101
102
103
104
105
106
107
108
109
110
111
112
113
114
115
116
117
118
119
120
121
122
123
124
125
126
127
128
129
130
131
132
133
134
135
136
137
138
139
140
141
142
143
144
145
146
147
148
149
150
151
152
153
154
155
156
157
158
159
160
161
162
163
164
165
166
167
168
169
170
171
172
173
174
175
176
177
178
179
180
181
182
183
184
185
186
187
188
189
190
191
192
193
194
195
196
197
198
199
200
201
202
203
204
205
206
207
208
209
210
211
212
213
214
215
216
217
218
219
220
221
222
223
224
225
226
227
228
229
230
231
232
233
234
235
236
237
238
239
240
241
242
243
244
245
246
247
248
249
250
251
252
253
254
255
256
257
258
259
260
261
262
263
264
265
266
267
268
269
270
271
272
273
274
275
276
277
278
279
280
281
282
283
284
285
286
287
288
289
290
291
292
293
294
295
296
297
298
299
300
301
302
303
304
305
306
307
308
309
310
311
312
313
314
315
316
317
318
319
320
321
322
323
324
325
326
327
328
329
330
331
332
333
334
335
336
337
338
339
340
341
342
343
344
345
346
347
348
349
350
351
352
353
354
355
356
357
358
359
360
361
362
363
364
365
366
367
368
369
370
371
372
373
374
375
376
377
378
379
380
381
382
383
384
385
386
387
388
389
390
391
392
393
394
395
396
397
398
399
400
401
402
403
404
405
406
407
408
409
410
411
412
413
414
415
416
417
418
419
420
421
422
423
424
425
426
427
428
429
430
431
432
433
434
435
436
437
438
439
440
441
442
443
444
445
446
447
448
449
450
451
452
453
454
455
456
457
458
459
460
461
462
463
464
465
466
467
468
469
470
471
472
473
474
475
476
477
478
479
480
481
482
483
484
485
486
487
488
489
490
491
492
493
494
495
496
497
498
499
500
501
502
503
504
505
506
507
508
509
510
511
512
513
514
515
516
517
518
519
520
521
522
523
524
525
526
527
528
529
530
531
532
533
534
535
536
537
538
539
540
541
542
543
544
545
546
547
548
549
550
551
552
553
554
555
556
557
558
559
560
561
562
page
of
562
Go
/
562
Contents
Table of Contents
Bookmarks
Table of Contents
Table of Contents
About this Document
Function of this Document
Target Groups of this Document
Information in this Document
Symbols in this Document
Warnings in the Documentation
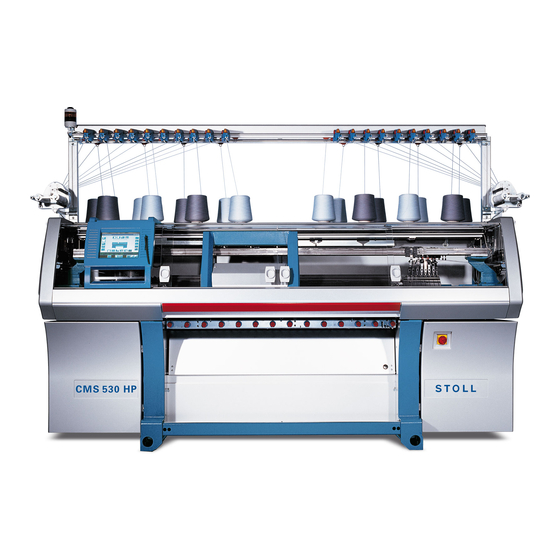
Description of Knitting Machine
Components of the Knitting Machine
Front Side (CMS 530, CMS 520, CMS 520 C, CMS 502)
Front Side (CMS 830 C, CMS 822, CMS 740)
Lateral View (Right)
Rear Side
Yarn Guide
Courses of Yarn
Yarn Control Unit
Lateral Yarn Guide
Thread Clamping and Cutting Device
Intarsia Yarn Carrier
Plating Yarn Carriers
Carriage Assembly
Drive, Speed and Operating Path
Suction and Cleaning Row
Central Lubrication
Knitting System
Needle Paths and Design
Raising Cams (CMS 520 C+)
Holding-Down Function
Step Motor for Adjusting the Stitch Tension
Control Devices
Impulse Sensor
Stop Resistance
Shock Stop
Needle Detector
Needle Beds
Structure
Racking Device
Fabric Take-Down
Main Take-Down
Auxiliary Take-Down
Comb Take-Down
Belt Take-Down
Control Devices (Fabric Take-Down)
Display and Operating Elements
Main Switch
Engaging Rod
Signal Light
Input Unit
User Interface
Producing with the Knitting Machine
Preparing Production and Shift Changes
Loading Files, Libraries and Pattern Folders
Entering Piece Number or Number of Courses
Setting Touch Screen
Threading up Yarn
Calling up Yarn Carrier Assignment and Allocation
Putting up Bobbins
Threading Threads through Yarn Guide Bracket
Threading Threads through Yarn Control Device
Thread the Yarns through the Yarn Length Measuring Device
Threading up Threads into Friction Feed Wheel
Thread up the Yarn into the Permanent Brake
Threading Threads through Safety Door
Threading up Yarns into Yarn Deflector (CMS 520 C, CMS 830 C)
Threading up Yarns into Yarn Carrier
Production
Starting Machine
Calling up Report and Shift Counters
Stopping Machine
Switch off Machine at the End of Work
Monitoring the Running Time
Measuring the Running Time
Producing with Knitting Orders (Order Menu)
Creating and Managing Order Menu
Setting or Changing Counters for Order Menu
Saving/Loading Order Menu
Eliminating Errors in the Fabric
Starting Again after Pressing off Fabric
Threading up Thread into Yarn Carrier
Removing Fabric Winding Around Fabric Take-Down
Removing the Fabric Winding Around the Belt Take-Down
Starting the Machine after a Fault
Message and Tip Retrospective View
Suppressing Error Messages
Adjusting Knitting Machine
Basic Settings
Adjusting Carriage Speed
Setting Stitch Tension
Adjusting Yarn Carriers
Staggering Yarn Carriers
Adjusting Yarn Tension
Adjusting Yarn Delivery on Friction Feed Wheel
Adjusting Storage Feed Wheel MSF 3
Adjusting Knitting Areas
Adjusting Take-Down
Processing Fabric Take-Down Menu
Processing Fabric Take-Down Menu WBF (Belt Take-Down)
Setting Cycle Counter and Quantity of Fabrics
Adjusting Shape Counters
Setting Counters
Switch Illumination on and off
Setting Value for Releasing Thread Clamp
Configuration Symbol Bar
Configuring Monitoring
Setting up the Pattern
Racking Correction
Advanced Adjustments
Switching on and off Aggregates
Setting Language
Adjusting Sensor Mechanism
Setting Needle Bed Parameters
Setting Machine Parameters
Setting Switch-Off Time When a Power Failure Occurs
Copying Service Data
Carry out the Reference Run
Adjusting Racking Position Correction VPK
Adjusting Basic Racking Correction VGK
Correcting Position of Stitch Cams
Adjusting Needle Brushes
Coupling Carriage Assembly Wide or Narrow (CMS 822)
Adjusting Needle Detector
Adjusting Yarn Carriers
Adjusting Yarn Carrier Limiters
Adjusting Yarn Carrier Guide
Adjusting the Brushes of the Central Lubrication
Adjusting Intarsia Yarn Carrier (Type 1)
Adjusting Intarsia Yarn Carriers (Type 2)
Shifting Intarsia Yarn Carriers in Area of Carriage Assembly
Intarsia Yarn Carrier - Adjust Stopping Point (Basic Setting, Braking Value)
Intarsia Yarn Carrier - Check the Pressure Plates
Intarsia Yarn Carrier - Correct Stopping Point (Correction Value)
Float Slider (Holding-Down Jack Control)
Normal Yarn Carrier Type 2
Plating - the Different Possibilities
Plating - Double Bow Yarn Carrier
Plating - Plating Yarn Carrier Carriage
Changing the Position of the Knock-Over Wire
Overview of All Machine Data
Working with Files
Help on Working in the Windows
File Manager
Working with Files, Libraries and Folders
Displaying File in Pattern Editor
Clear Knitting Memory
Copying Files
Selecting the Current Folder
Carrying out a Program Check
Working with the Sintral Editor
Activating Sintral Editor
Go to Help in Function and Error List
Knitlan Connection
Defining User Profile
Setup Data
Background
Comparing Setup1 to Setup2
Using Setup1 or Setup2
Loading Knitting Program
Setup2 Editor
Overview of the Setup2 Editor of the CMS
Take-Down
Yarn Carrier
Stitch Lengths
Carriage Speed
Cycle Counters
Yarn Length
Racking
Miscellaneous
Data Mode and File Mode
Setup1 - Editing the Setup File
Maintenance of the Knitting Machine
Minimize Wear
Cleaning the Knitting Machine
Cleaning the Touch Screen
Cleaning Suction and Lint Container
Vacuuming off Knitting Machine
Cleaning Needle Bed
Cleaning Thread Clamping and Cutting Device
Cleaning the Active Thread Clamp
Cleaning the Permanent Brakes
Cleaning the Friction Feed Wheel
Cleaning Main Drive Fan
Cleaning Fan and Radiators in Right Control Unit
Cleaning Filter Mat of Power Supply Unit
Thoroughly Cleaning Needle Bed
Clean the Knitting Systems
Lubricate Knitting Machine
Lubrication Interval
Setting Lubricating Interval for Needle Bed
Setting of Central Lubrication
Oil Needle Bed
Restarting Lubricating Interval
Oiling Jack Bed
Oiling Yarn Carrier Rods
Oiling the Control of the Holding-Down Jacks
Oiling Carriage Guide Rail
Greasing Impulse Sensor Rails
Greasing Butts of the Coupling Parts and Intermediate Sliders
Oiling Lifting Slide (Yarn Carrier Plunger)
Greasing the Control Sliders (CMS 822)
Greasing Racking Device
Grease Needle Bed Support/Adjustment Pieces
Repairing the Knitting Machine
Supplementary Activities During Maintenance
Switching Power Supply 40 V off and on
Central Lubrication - Mounting and Working Position
Helpful Knitting Rows
Replacing Parts
Replacing Needle and Coupling Part (CMS 530, CMS 502, CMS 822, CMS 803)
Replacing Needle and Coupling Part (CMS 830 C)
Replacing Needle and Coupling Part (CMS 520 C+)
Replacing Intermediate Slider
Replacing Selection Jack
Replacing Holding-Down Jack (CMS 530, CMS 502, CMS 822, CMS 803)
Replacing Holding-Down Jack (CMS 830 C)
Replacing Holding-Down Jack (CMS 520 C+)
Remove Needle Bed or Position It at an Angle
Repairing Needle Bed and Additional Needle Bed
Removing Selection Jack Bed (CMS 520 C+, CMS 830 C)
Removing and Mounting Carriage Part
Removing Cam Plate
Removing and Mounting Step Motor
Replacing Gear Racks in the Step Motor
Replacing Yarn Carrier
Mount Intarsia Yarn Carrier
Replacing Yarn Control Unit
Friction Feed Wheel - Replacing Drive Belts and Friction Roller
Deaerating Oil Line
Replacing Comb Hook
Disassembling the Belt Take-Down
Replacing Belt
Eliminating Faults in Electronics System
Overview of the Electronic Control (Control Cabinet Right)
Overview of the Electronic Control (Control Cabinet Left and Right)
Power Supply Unit
Control of Yarn Carrier Magnets
Replacing Electronic Card
Check Fuses
Checking Fuse (Right Control Cabinet)
Checking Fuse (Right and Left Control Cabinet)
Needle Selection Displacement
Setting the Impulse Sensor Type
Preparations
Reset Reference Values of Impulse Sensor, Carry out Carriage Reference Run
Determining the Needle Selection Displacement Manually
Entering the Data of the Needle Selection Displacement Manually
Software - Installation and Basic Settings
Boot Process
Basic Settings
Saving All Machine Data on the USB-Memory-Stick
Saving Pattern after a Big Fault
Installing the Stoll Operating System
Direct Installation
Indirect Installation
Updating Software
Carrying out a Restart (Restart)
Carrying out Restart with Machine Configuration (Restart and Configuration)
Setting Online Connection
Overview of All System Data
Diagnose Control
Yarns and Stitch Tension
Economic Production and the Influencing Factors
Stitch Tension Range
Stitch Lengths
Yarn Table
Conversion Table
CMS 822 - Operating Modes and Particularities
Operating Modes of CMS 822
Four-System Machine Operating Mode
Tandem Machine Without Comb Operating Mode
Tandem Machine with Comb Operating Mode
Unusual Features in the Tandem with Comb Operating Mode
Installing Operating System for CMS
Opening and Closing the Holding-Down Jacks
Machine Management Tools
Machine Management Tools Window
Display the Virtual Keyboard
Remote Control with the Software VNC
Activating the Remote Control VNC on the Machine
Configuring the Remote Control VNC on the Machine
Determine the IP Address of the Machine
Installing Software VNC Viewer on the Computer (E.g. a Note-Book)
Remote Control with the VNC Viewer
Remote Control Via a Web Browser
Send Email Directly from the Machine
Key Word Directory
Advertisement
Quick Links
Download this manual
CMS 530
CMS 520 C+
CMS 502 HP+
ID 268 533
Operating instructions
Type
642
643
652
658
668
Computer type
Component type
001 - 003
OKC6.0
OKC6.0
001
001 - 001
OKC6.0
GB
Table of
Contents
Previous
Page
Next
Page
1
2
3
4
5
Advertisement
Table of Contents
Need help?
Do you have a question about the CMS 530 and is the answer not in the manual?
Ask a question
Questions and answers
Related Manuals for Stoll CMS 530
Sewing Machine Stoll CMS 530 Instruction Manual
(79 pages)
Sewing Machine Stoll CMS 933 Instruction Manual
(54 pages)
Industrial Equipment Stoll CMS ADF-3 Operating Instructions Manual
(444 pages)
Industrial Equipment Stoll CMS 933 Operating Instructions Manual
(384 pages)
Industrial Equipment Stoll CMS 933 Operating Instructions Manual
(468 pages)
Industrial Equipment Stoll CMS 502 HP+ Operating Instructions Manual
(562 pages)
Industrial Equipment Stoll GLOBAL Operating And Maintenance Manual
Front loader tool program, wrapped bale handler (24 pages)
This manual is also suitable for:
Cms 520 c+
Cms 502 hp+
Table of Contents
Save PDF
Print
Rename the bookmark
Delete bookmark?
Delete from my manuals?
Login
Sign In
OR
Sign in with Facebook
Sign in with Google
Upload manual
Upload from disk
Upload from URL


Need help?
Do you have a question about the CMS 530 and is the answer not in the manual?
Questions and answers