
Related Manuals for Stoll CMS ADF-3


Summary of Contents for Stoll CMS ADF-3
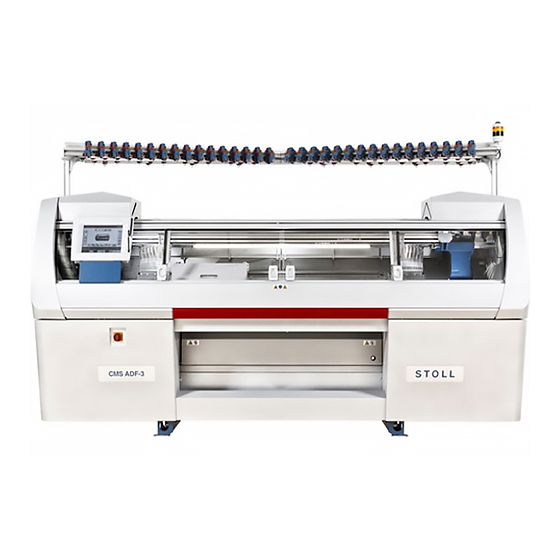
- Page 1 Operating instructions Type Computer type Component type CMS ADF-3 000 - 001 ID 263 800...
- Page 2 Date: 2013-09-20 Translation of the original operating instructions Operating system of the machine: V_OKC_002.008.000_STOLL (or higher) H. STOLL GmbH & Co. KG, Stollweg 1, D-72760 Reutlingen, Germany Our products are being developed further continuously. They are therefore subject to technical modifica-...
- Page 3 "licensed software". The licensed software is only intended to be used with the STOLL knitting machine with which the software was delivered and can only be run in connection with this knitting machine. Any other form of use of the licensed software is not permitted.
- Page 4 If the licensed software proves to be useless or defective within the meaning of Par. (2), the warranty is carried out by replacement delivery versus the return of the defective software. If the software delivered on a replacement basis also proves to be useless or defective and the licenser is not able to restore the usability or eliminate the error within a suitable time limit, the licensee can demand, according to his choice, a reduction of the licence fee or reimbursement of the licence fee versus the return of the licensed software.
-
Page 5: Table Of Contents
Table of contents About this document Function of this document ..................... 11 Target groups of this document ..................... 11 Information in this document ....................12 Symbols in this document ...................... 14 Warnings in the documentation ..................... 15 Description of knitting machine Components of the knitting machine .................. - Page 6 Display and operating elements .................... 48 2.8.1 Main switch......................... 48 2.8.2 Engaging rod ......................49 2.8.3 Signal light ........................51 2.8.4 Input unit........................52 2.8.5 User Interface ......................53 Producing with the knitting machine Preparing production and shift changes ................61 3.1.1 Loading files, libraries and pattern folders..............
- Page 7 4.1.6 Adjusting knitting areas .................... 117 4.1.7 Adjusting take-down ....................118 4.1.8 Processing fabric take-down menu ................121 4.1.9 Setting Cycle Counter and Quantity of Fabrics ............124 4.1.10 Adjusting shape counters ..................125 4.1.11 Setting counters ....................... 127 4.1.12 Switch illumination on and off................... 128 4.1.13 Setting value for releasing thread clamp ..............
- Page 8 Setup Data Background .......................... 234 Comparing Setup1 to Setup2 ....................235 Loading knitting program ..................... 236 Setup2 Editor ........................237 5.4.1 Overview of the Setup2 Editor of the CMS............... 237 5.4.2 Take-down........................ 246 5.4.3 Yarn carrier....................... 250 5.4.4 Stitch lengths ......................255 5.4.5 Carriage speed ......................
- Page 9 6.3.12 Greasing racking device................... 294 6.3.13 Grease needle bed support/adjustment pieces............295 Repairing the knitting machine Supplementary activities during maintenance ..............297 7.1.1 Switching power supply 40 V off and on ..............297 7.1.2 Moving yarn carriers and repositioning them ............299 7.1.3 Separating the suction tubes from the carriage............
- Page 10 Boot process ........................366 8.1.1 Basic Settings......................370 Saving all machine data on the USB-Memory-Stick ............381 Saving pattern after a big fault ..................... 382 Installing the Stoll operating system ..................385 8.4.1 Direct installation ...................... 386 8.4.2 Indirect installation....................392 8.4.3...
-
Page 11: About This Document
About this document 1.1 Function of this document 1 About this document This chapter contains information on: Function of this document [-> 11] Target groups of this document [-> 11] Information in this document [-> 12] Symbols in this document [-> 14] ... -
Page 12: Information In This Document
Software for the distribution, control and (OMS) management of knitting orders Overview of the documents for the knitting machine and STOLL pattern preparation unit Additional information is available via: the Stoll branch office or Stoll dealer in your country ... - Page 13 About this document 1.3 Information in this document Type plate Some information and descriptions depend on the component and computer type. There may be differences in the design depending on the manufacturing date of the machine. The type plate and the table, which are located on the front page of these operating instructions, indicate which machine model is concerned.
-
Page 14: Symbols In This Document
About this document Symbols in this document 1.4 1.4 Symbols in this document Some information in this document are marked with special symbols to make it easier to access this information quickly. The additional equipment of your machine can deviate from this description depending on the machine type (type of machine, scope of supply, special equipment). -
Page 15: Warnings In The Documentation
About this document 1.5 Warnings in the documentation 1.5 Warnings in the documentation The warnings in the documentation have the following structure: Safety sign (display the danger of injury) Signal word (DANGER, WARNING, CAUTION, IMPORTANT) Text comprises of: –... - Page 16 About this document Warnings in the documentation 1.5...
-
Page 17: Description Of Knitting Machine
Description of knitting machine 2 Description of knitting machine This chapter contains information on: Components of the knitting machine [-> 18] Yarn guide [-> 23] Carriage assembly [-> 34] Knitting system [-> 36] Control devices [-> 39] ... -
Page 18: Components Of The Knitting Machine
Description of knitting machine Components of the knitting machine 2.1 2.1 Components of the knitting machine 2.1.1 Front side Front view of the knitting machine Label Explanation Carriage It moves over the needle beds. It controls the work positions of each yarn carrier and each and every needle in the needle bed. - Page 19 Description of knitting machine 2.1 Components of the knitting machine Front view of the knitting machine Label Explanation Fabric collection The fabric take-down guides the finished fabric into chamber the fabric collection chamber. There the fabric is protected from soiling. Fabric take-down Main take-down: (main take-down,...
- Page 20 Description of knitting machine Components of the knitting machine 2.1 Inner view Inner view of the knitting machine Label Explanation Carriage It moves over the needle beds. It controls the work positions of each and every needle in the needle bed. Needle bed Every machine has a front and a rear needle bed.
-
Page 21: Rear Side
Description of knitting machine 2.1 Components of the knitting machine 2.1.2 Rear side * Label Explanation Carriage It moves over the needle beds. It controls the work positions of each yarn carrier and each and every needle in the needle bed. Rear Needle Bed Every machine has a front and a rear needle bed. - Page 22 Description of knitting machine Components of the knitting machine 2.1 Label Explanation Control Unit It controls the knitting process. (CMS 530, CMS 520, CMS 520 C, It saves the data of the knitting CMS 502) program. It controls the needle selection and the motors in the carriage.
-
Page 23: Yarn Guide
Description of knitting machine 2.2 Yarn guide 2.2 Yarn guide The yarn guide has the following tasks: Guiding knitting yarn – from the bobbin to the yarn carrier – as friction-free as possible – without the threads touching or crossing over each other ... -
Page 24: Course Of Yarn
Description of knitting machine Yarn guide 2.2 2.2.1 Course of yarn The yarn feeding is carried out from the top - directly from the yarn control device to the yarn carrier. To prevent the threads from touching each other, the yarn control devices are arranged in a V-shape. In order to ensure that the course of yarn from the bobbin to the yarn carrier runs straight, there is a fixed allocation of bobbin, yarn control device and yarn carrier. - Page 25 Description of knitting machine 2.2 Yarn guide The machine is equipped as follows: Bobbin boards for a total of 32 yarn bobbins 32 Yarn control devices 32 yarn carriers (2 yarn carriers on 16 tracks) This means: If several threads are combined in one yarn carrier it is no longer possible to use all of the 32 yarn carriers.
- Page 26 Description of knitting machine Yarn guide 2.2 One thread per yarn carrier Threads per yarn carrier Number of yarn carriers Number of bobbins...
- Page 27 Description of knitting machine 2.2 Yarn guide Two yarns per yarn carrier Threads per yarn carrier (One yarn carrier per track) Number of yarn carriers Yarn carriers per track Number of bobbins...
- Page 28 Description of knitting machine Yarn guide 2.2 Two yarns per yarn carrier Threads per yarn carrier (Two yarn carrier per track) Number of yarn carriers Yarn carriers per track Number of bobbins...
- Page 29 Description of knitting machine 2.2 Yarn guide Three yarns per yarn carrier Threads per yarn carrier 3 (a total of 7 yarn carriers) and one yarn per yarn carrier (One yarn carrier per track) 1 (a total of 7 yarn carriers) Number of yarn carriers Yarn carriers per track Number of bobbins...
- Page 30 Description of knitting machine Yarn guide 2.2 Three yarns per yarn carrier Threads per yarn carrier 3 (a total of 7 yarn carriers) and one yarn per yarn carrier (Two yarn carriers per track) 1 (a total of 7 yarn carriers) Number of yarn carriers Yarn carriers per track Number of bobbins...
- Page 31 Description of knitting machine 2.2 Yarn guide Four threads per yarn carrier Threads per yarn carrier Number of yarn carriers Yarn carriers per track Number of bobbins...
-
Page 32: Yarn Control Unit
The yarn brake setting (4) regulates the yarn tension and prevents the thread from hanging through. With the CMS ADF-3 there is a fixed allocation of bobbin, yarn control device and yarn carrier. When working with 3 threads in one yarn carrier, this allocation is no longer possible - the third thread must be threaded in a yarn control device of the next higher track. -
Page 33: Autarkic Yarn Carriers
Description of knitting machine 2.2 Yarn guide 2.2.3 Autarkic yarn carriers The machine is equipped with autarkic yarn carriers - the yarn carriers are not taken along by the carriage but instead each yarn carrier has its own drive. A toothed belt (1) moves the yarn carrier synchronously with the carriage or freely, regardless of the carriage direction. -
Page 34: Carriage Assembly
Description of knitting machine Carriage assembly 2.3 2.3 Carriage assembly 2.3.1 Drive, speed and operating path Carriage assembly The carriage assembly is driven by the drive motor via a toothed belt. The speed is infinitely programmable, and can therefore be adapted to the yarn material, pattern and working step. -
Page 35: Suction And Cleaning Row
Description of knitting machine 2.3 Carriage assembly 2.3.2 Suction and cleaning row Suction Fluff absorption and lint container The suction removes the yarn fluff from the upper area of the needle beds. The fluff is collected in a container. Cleaning row ... -
Page 36: Knitting System
Description of knitting machine Knitting system 2.4 2.4 Knitting system 2.4.1 Needle paths and design Knitting system 1 Stitch cam 3 Selection system 2 Raising cam 4 movable cams Each knitting system can knit using the three-way technique without limitation. -
Page 37: Holding-Down Function
Description of knitting machine 2.4 Knitting system 2.4.2 Holding-down function The holding-down jacks hold down the fabric when the needles for stitch formation are driven out. The holding down jacks are moved by the holding- down jack control unit on the carriage. ... -
Page 38: Step Motor For Adjusting The Stitch Tension
Description of knitting machine Knitting system 2.4 2.4.3 Step motor for adjusting the stitch tension Step motor for adjusting the stitch tension A step motor (1) on each knitting system adjusts the stitch tension. The step motor is controlled by the knitting program. The stitch tension can be adjusted individually ... -
Page 39: Control Devices
Description of knitting machine 2.5 Control devices 2.5 Control devices 2.5.1 Impulse sensor Impulse sensor The impulse sensor (1) scans the grooves and trick walls on the impulse sensor rail on the front and rear guide rail for the carriage assembly. It recognizes the position of the carriage assembly and specifies the time for the selection of the selection jacks by the selection systems. -
Page 40: Shock Stop
Description of knitting machine Control devices 2.5 2.5.3 Shock stop In the case of a shock on the needle bed, e.g. in the case of needle breakage, the piezo-electric shock stop switches off the knitting machine. The piezo-electric shock stop is located below the needle beds. 2.5.4 Needle detector The needle detector (1) checks the height of the fabric in the needle area. -
Page 41: Needle Beds
Description of knitting machine 2.6 Needle beds 2.6 Needle beds 2.6.1 Structure The front needle bed is screwed to the needle bed support tightly. The rear needle bed can laterally be racked relative to the front needle bed by the racking device. -
Page 42: Racking Device
Description of knitting machine Needle beds 2.6 2.6.2 Racking device The front needle bed is screwed to the needle bed support tightly. The rear needle bed can laterally be racked relative to the front needle bed by the racking device. ... - Page 43 Description of knitting machine 2.6 Needle beds Transferring During transfer the rear needle bed is racked until the needles of the front and rear needle beds almost touch. The needle dips into the pelerine spring of the needle opposite. Overracking The overracking mechanism pre-stretches the stitches prior to transfer so, that they are somewhat enlarged.
-
Page 44: Fabric Take-Down
Description of knitting machine Fabric take-down 2.7 2.7 Fabric take-down The fabric take-down consists of three units: Main take-down Auxiliary take-down Comb take-down Each unit is driven by a separate motor. The motor can individually be adapted to the knitting situation. 2.7.1 Main take-down ... -
Page 45: Auxiliary Take-Down
Description of knitting machine 2.7 Fabric take-down Premature wear of the take- The roller rubber of the take-down roller (1) is prematurely worn by: down roller Fabric take-down values too high (roller spins) Contact pressure too high Yarns harmful to rubber, e.g. abrasive, sanding yarns or yarn finishes such as greases or oils ... -
Page 46: Comb Take-Down
Description of knitting machine Fabric take-down 2.7 2.7.3 Comb Take-down Comb Take-down With the comb take-down fabric pieces are automatically started and press off after completion. Comb hooks of comb take-down with sliders (left open, right closed) When starting a new fabric, a net row is knitted with the elastic thread (comb thread). -
Page 47: Control Devices (Fabric Take-Down)
Description of knitting machine 2.7 Fabric take-down 2.7.4 Control devices (fabric take-down) The following parameters are controlled on the fabric take-down: Parameter Control Speed of the take-down The rotating speed of the take-down rollers is roller constantly measured. If the deviation from the upper or lower limit is too large, the knitting machine stops. -
Page 48: Display And Operating Elements
Description of knitting machine Display and operating elements 2.8 2.8 Display and operating elements 2.8.1 Main switch Main switch The main switch (1) is located on the front of the machine above the left control unit. In position "1 - On" the main switch is switched on, in position "0 - Off" it is switched off. -
Page 49: Engaging Rod
Description of knitting machine 2.8 Display and operating elements 2.8.2 Engaging rod Engaging rod 1 Carriage stopped 2 reduced speed 3 normal speed The carriage assembly, and therefore also knitting, is started and stopped with the engaging rod. The engaging rod can be moved into three positions. Smooth and jolt-free start-up The path of the engaging rod from "0"... - Page 50 Description of knitting machine Display and operating elements 2.8 Please observe in position 3 1. When the covers are closed, the engaging rod is held by a magnet (production at normal speed). DANGER Danger by parts of needles which have broken off! Danger of injury to eyes by parts of needles.
-
Page 51: Signal Light
Description of knitting machine 2.8 Display and operating elements 2.8.3 Signal light Signal light The signal light (1) displays the operating status of the knitting machine. Depending on the machine type, the signal light is mounted either on the left or on the right machine side. -
Page 52: Input Unit
Description of knitting machine Display and operating elements 2.8 2.8.4 Input unit Input unit The input unit (1) enables communication with the machine control: Display of operating data Calling up help information Changing machine settings and pattern data ... -
Page 53: User Interface
Description of knitting machine 2.8 Display and operating elements 2.8.5 User Interface Design of the user interface Design of the user interface Do not touch the touch screen with sharp objects and do not subject it to direct sunlight, which will destroy the picture tubes. - Page 54 Description of knitting machine Display and operating elements 2.8 Functions of user interface The following is possible on the touch screen: Calling up pages, menus and input masks Calling up help information Displaying the operating data of the knitting machine ...
- Page 55 Description of knitting machine 2.8 Display and operating elements Function keys in the main menu Function keys in the "Main menu" Function Function Load/save data Comb take-down Editing the knitting program Fabric take-down Carriage speed Same SEN area size Racking Correction Stitch tension Setting up the pattern...
- Page 56 Description of knitting machine Display and operating elements 2.8 Standard function keys Function return to "Main menu" Return to previous page Proceed to the next page Calling up help Return to previous help page Display list of the last messages and references Confirm input Call up command line and output window for direct commands Order menu: Reset counter of already fabrics to "0"...
- Page 57 Description of knitting machine 2.8 Display and operating elements Additional function keys The additional function keys can be called up from any window with the "Additional function keys" key. These additional function keys are described in the corresponding chapters. The following additional function keys are displayed in all windows. Function Call up input window for a direct Sintral command.
- Page 58 Description of knitting machine Display and operating elements 2.8 Input elements In the following sections three groups of input elements are shown: Standard input elements; these are displayed when an input field is activated by briefly touching in Selection elements; these are displayed when a selection field is activated by briefly touching it ...
- Page 59 Description of knitting machine 2.8 Display and operating elements Element Function Only one switch can be active at a time Position switch (on/off) Check box (on/off) Arrow switch (left/right) or (up/down) Slider Reduce current value by one step Increase current value by one step Switches and linear regulators Selection elements Element...
- Page 60 Description of knitting machine Display and operating elements 2.8 Virtual keyboard To input letters and numbers, the virtual keyboard can be displayed. Either a number block appears for inputting numbers or an alphanumeric keyboard appears for entering letters and numbers. The virtual keyboard contains three switchover keys: ...
-
Page 61: Producing With The Knitting Machine
Producing with the knitting machine 3.1 Preparing production and shift changes 3 Producing with the knitting machine This chapter contains information on: Preparing production and shift changes [-> 61] Threading up yarn [-> 69] Production [-> 75] ... -
Page 62: Loading Files, Libraries And Pattern Folders
Producing with the knitting machine Preparing production and shift changes 3.1 3.1.1 Loading files, libraries and pattern folders Files (Sintral, Jacquard, Setup), libraries (Auto-Sintral) and folders can be loaded from the following sources (data carriers): Removable data carrier (on the USB socket) for example: USB-Memory-Stick, floppy disk drive, CD drive, DVD drive, external hard disk ... - Page 63 Producing with the knitting machine 3.1 Preparing production and shift changes Always set these settings before loading: Function Delete previous pattern Delete all yarn carrier positions After the pattern is loaded, the function is automatically executed "Start Program from Line 1". This means that you need not take the "detour" over the window "Machine start"...
- Page 64 Producing with the knitting machine Preparing production and shift changes 3.1 Loading knitting program: 1. From the "Main menu" call up the "Load & Save" window. 2. Set the desired path with one of the "Direct pattern folder selection" keys. 3.
- Page 65 Producing with the knitting machine 3.1 Preparing production and shift changes Load data (Setup2) Function Call up the "Load & save" window Load pattern Load the pattern with selected Setup data Display the content of the Zip file Close the zip file Call up "Main menu"...
-
Page 66: Entering Piece Number Or Number Of Courses
Producing with the knitting machine Preparing production and shift changes 3.1 Further information: Selecting the current folder [-> 208] Working with files, libraries and folders [-> 196] Go to help in function and error list [-> 219] ... -
Page 67: Setting Touch Screen
Incorrect adjustment of the touch screen! Permanent incorrect adjustment: If you set the touch screen incorrectly, the keys on the screen are no longer accessible. The program can only be readjusted with a keyboard (Stoll helpline). ➜ During calibration, touch the touch screen within the target circles only! 1. - Page 68 Producing with the knitting machine Preparing production and shift changes 3.1 The "Set touch screen" window appears. "Set touch screen" window 3. Tap the "Calibrate" key. The setting window appears. A target circle is located on the upper, left side.
-
Page 69: Threading Up Yarn
Producing with the knitting machine 3.2 Threading up yarn Setting screen brightness Two key buttons for brightness setting are located on the rear of the input unit. Setting screen brightness The screen display is made brighter with key button (1) and darker with key button (2). - Page 70 Producing with the knitting machine Threading up yarn 3.2 Calling up yarn carrier assignment: 1. Call up the window "Machine start" from the "Main menu". "Machine start" window 2. Type "SP from line 1" key. The computer searches in the knitting program to see which yarn carriers are required.
-
Page 71: Putting Up Bobbins
Producing with the knitting machine 3.2 Threading up yarn 3.2.2 Putting up bobbins When the threads of several bobbins are led to one yarn carrier, supply approximately the same number of threads to the yarn carrier from each side. ➜ Put up the bobbins on the knitting machine or on the additional bobbin board. -
Page 72: Moving Yarn Carriers And Repositioning Them
Producing with the knitting machine Threading up yarn 3.2 3.2.5 Moving yarn carriers and repositioning them For threading up and for repair work it is necessary to move the yarn carrier out of the knitting area. Our recommendation: Move the yarn carrier to a position where it is as accessible as possible and where you can thread it up easier. -
Page 73: Threading Up Thread Into Yarn Carrier
Producing with the knitting machine 3.2 Threading up yarn 3.2.6 Threading up thread into yarn carrier Proceed as follows: 1. Open the covers. 2. Move the yarn carrier to a position where it can be threaded it up easier - for example outside the knitting area. 3. - Page 74 Producing with the knitting machine Threading up yarn 3.2 DANGER The yarn carrier moves back into its knitting position! Danger of crushing and cutting by the autarkic yarn carriers. The yarn carriers that were moved will automatically move back into their knitting position. ➜...
-
Page 75: Production
Producing with the knitting machine 3.3 Production 3.3 Production This chapter contains information on: Starting machine [-> 75] Calling up report and shift counters [-> 78] Stopping machine [-> 83] Switch off machine at the end of work [-> 85] ... - Page 76 Producing with the knitting machine Production 3.3 Pattern changes - Apply Use this function only for the following machines: shape counters ➜ Machine without comb take-down ➜ Machine with comb take-down but without use of comb The machine compares automatically the shape counters (old-new) in order to e able to adjust the new knitting width (widening or narrowing) with the pattern change.
- Page 77 Producing with the knitting machine 3.3 Production Converting a basic pattern A small trick - with an impressive effect into a shaped pattern Using a small trick you can easily convert a basic pattern into a fully fashion pattern on the M1plus. Converting a basic pattern into a shaped pattern: ➜...
-
Page 78: Calling Up Report And Shift Counters
Producing with the knitting machine Production 3.3 3.3.2 Calling up report and shift counters The control collects all operating data recorded since the operating system was first read in and since the current knitting program was started. These data help you optimize the performance and loading of the knitting machine. Report The individual types of operating data (1) are listed on the left side. - Page 79 The data will be saved on the selected data carrier. It will be saved on the data carrier that is set in the "Copy service data" window. File name: STOLL machine number and the file name extension ".rep" (e. g. "5320081234.rep").
- Page 80 Producing with the knitting machine Production 3.3 Shift counter A total of five shift counters are available. A complete report is generated for each shift. The table has the same structure as the report. Column "F" shows the number of stop motions during the shift. ...
- Page 81 The data will be saved on the selected data carrier. It will be saved on the data carrier that is set in the "Copy service data" window. File name: STOLL machine number, date, time and the file name extension ".sft" (e. g. "56600101234_31_10_08_1105.sft").
- Page 82 Producing with the knitting machine Production 3.3 Function Call up the "Automatic shift change" window Confirm entries Call up "Main menu" Keys for setting the automatic shift change Setting the automatic shift change: 1. Call up the "Service" menu from the "Main menu". 2.
-
Page 83: Stopping Machine
Producing with the knitting machine 3.3 Production 3.3.3 Stopping machine The knitting machine can be stopped in the following ways: Disengage the engaging rod Actuate the stop motion device, e.g. open a cover Stop the machine in the "Machine stop" window Function Call up "Main menu"... - Page 84 Producing with the knitting machine Production 3.3 3. If the knitting machine is to stop when a certain condition is fulfilled, select a condition in the field "Conditional stop". Stop in minutes Remaining running time in minutes Stop in Sintral line When the set Sintral line is reached Stop in Jacquard line When the set jacquard line is reached...
-
Page 85: Switch Off Machine At The End Of Work
Producing with the knitting machine 3.3 Production 3.3.4 Switch off machine at the end of work Do not switch-off machine at the main switch, but via the "Machine Stop" window. Reason: The computer will be shut down by current of the battery pack when switching off the main switch. - Page 86 Producing with the knitting machine Production 3.3 Configuring automatic machine switching off: 1. Call up "Machine stop" window from "Main menu". 2. In the "Switch off machine" field activate the desired check box. 3. Confirm entries. When the machine switches off, the main switch moves from "1" to "0". While switching off the main switch, the fabric remains tensioned in the fabric take-down.
-
Page 87: Monitoring The Running Time
Producing with the knitting machine 3.3 Production 3.3.5 Monitoring the running time In order to display the "Running time control" window it must be activated in the "Knit report configuration" window. (BootOkc --> Restart and Configuration --> Knit report configuration --> Additional function keys) The running times of sequence lists, sequences or orders, their individual elements or individual patterns are recorded and displayed in the "Running time control"... - Page 88 Producing with the knitting machine Production 3.3 Open the "Running time 1. Call up the "Service" window in the "Main menu". control" window 2. Call up the "Running time control" window in the "Service" window. The "Running time control" window can alternatively be called up by using the additional functions keys in the "Sequence menu"...
- Page 89 Producing with the knitting machine 3.3 Production Functional description for the "Catalog running time data" window "Catalog running time data" window Meaning "Load" selected file and corresponding data "Save" selected file in the current folder "Delete file" that was selected delete all files "Update": Re-determine the contents of the current folder "Select current folder": Dialog box for selecting the current...
- Page 90 Producing with the knitting machine Production 3.3 1. Call up the "Service" window in the "Main menu". 2. Call up the "Running time control" window in the "Service" window. 3. Call up "Additional function keys". 4. Call up the "Catalog running time data" window. 5.
-
Page 91: Measuring The Running Time
Producing with the knitting machine 3.3 Production 1. Call up the "Service" window in the "Main menu". 2. Call up the "Running time control" window in the "Service" window. 3. Select sequence, sequence element or pattern. 4. Call up "Additional function keys". 5. - Page 92 Producing with the knitting machine Production 3.3 Function Call up the "Service" window Call up "Statistics" window Call up "Measurement of running time" window Start measurement of running time (start) Stop measurement of running time (Stop) Set display at 0 (Reset) Call up the "Main menu"...
-
Page 93: Producing With Knitting Orders (Order Menu)
Producing with the knitting machine 3.4 Producing with knitting orders (order menu) 3.4 Producing with knitting orders (order menu) This chapter contains information on: Creating and managing order menu [-> 93] Setting or changing counters for order menu [-> 95] ... - Page 94 Producing with the knitting machine Producing with knitting orders (order menu) 3.4 Function Call up the "Order menu" window Confirm entries Call up "Additional function keys" Reset values in column "ST2" (counter for the previously produced pieces) to "0". delete all information in the order menu "Copy line"...
-
Page 95: Setting Or Changing Counters For Order Menu
Producing with the knitting machine 3.4 Producing with knitting orders (order menu) 3.4.2 Setting or changing counters for order menu In the Sintral program, the knitting of different pieces or sizes can be controlled from a program via counters. Function Call up the "Order menu"... -
Page 96: Saving/Loading Order Menu
Producing with the knitting machine Producing with knitting orders (order menu) 3.4 3.4.3 Saving/loading order menu The information in the order menu can be saved, loaded and deleted in the "Catalog order data" window. Function Call up the "Order menu" window Call up "Additional function keys"... - Page 97 Producing with the knitting machine 3.4 Producing with knitting orders (order menu) Actions in "Catalog order data" window "Catalog order data" window Function "Direct folder selection": predefined folder selection "Load" selected file and corresponding pattern elements "Save" selected pattern elements in the current folder "Delete selected file"...
-
Page 98: Eliminating Errors In The Fabric
Producing with the knitting machine Eliminating errors in the fabric 3.5 3.5 Eliminating errors in the fabric If the fabric piece is not to be completed properly, two options in the "Machine start" window can be used. Function Call up "Additional function keys" The cycle currently being knitted is aborted and the other cycles will be knitted as programmed. -
Page 99: Starting Again After Pressing Off Fabric
Producing with the knitting machine 3.5 Eliminating errors in the fabric 3.5.1 Starting again after pressing off fabric Function Call up "Machine start" window Confirm entries Keys for starting again after pressing off fabric For machines without a After pressing off fabric, a problem arises where stitches are pressed off comb take-down and therefore further knitting is not possible. - Page 100 Producing with the knitting machine Eliminating errors in the fabric 3.5 IMPORTANT If you notice defective needles while picking up after pressing off: ➜ Stop picking up after pressing off and replace the defective needles. 5. When the fabric is long enough to be placed in the main take-down, stop the machine with the engaging rod.
- Page 101 Producing with the knitting machine 3.5 Eliminating errors in the fabric 1. If threads are broken, thread them up again. 2. Call up "Machine start" window. 3. Call up the "Picking up after pressing off" function. Tap the "P.aft. press- off M1 from row"...
-
Page 102: Threading Up Thread Into Yarn Carrier
Producing with the knitting machine Eliminating errors in the fabric 3.5 3.5.2 Threading up thread into yarn carrier Proceed as follows: 1. Open the covers. 2. Move the yarn carrier to a position where it can be threaded it up easier - for example outside the knitting area. - Page 103 Producing with the knitting machine 3.5 Eliminating errors in the fabric DANGER The yarn carrier moves back into its knitting position! Danger of crushing and cutting by the autarkic yarn carriers. The yarn carriers that were moved will automatically move back into their knitting position.
-
Page 104: Removing Fabric Winding Around Fabric Take-Down
Producing with the knitting machine Eliminating errors in the fabric 3.5 3.5.3 Removing fabric winding around fabric take-down Function Call up "Take-down" window Key for removing fabric winding around fabric take-down Fabric winding in main take- 1. To remove the fabric winding, call up the "Take-down" window. down ... -
Page 105: Adjusting Knitting Machine
Adjusting knitting machine 4.1 Basic settings 4 Adjusting knitting machine This chapter contains information on: Basic settings [-> 105] Advanced adjustments [-> 146] Working with files [-> 186] Working with the Sintral editor [-> 213] KnitLAN connection [-> 220] ... -
Page 106: Adjusting Carriage Speed
Adjusting knitting machine Basic settings 4.1 4.1.1 Adjusting carriage speed Different carriage speeds can be entered for different knitting situations. The indirect carriage speed only becomes effective when it is slower than the normal speed. "Carriage speed" window Explanation Value range (meters/second) MSECK... - Page 107 Adjusting knitting machine 4.1 Basic settings Function Call up "Carriage speed" window Confirm entries Call up "Main menu" Keys for entering the carriage speed Adjusting carriage speed: 1. Call up the "Carriage speed" window. 2. Tap the input fields for the carriage speed and enter the desired values. 3.
-
Page 108: Setting Stitch Tension
Adjusting knitting machine Basic settings 4.1 4.1.2 Setting stitch tension The stitch tension and thus the stitch size depend on the stitch cam values. It is possible to specify either the stitch tension as an absolute value or the stitch length. Explanation Value range Correction for all stitch cams... - Page 109 Adjusting knitting machine 4.1 Basic settings Function Call up "Stitch length" window Confirm entries Call up "Main menu" Keys for setting the stitch tension Setting stitch tension: 1. Call up the "Stitch length" window. 2. Tap on the input field that is to be edited and enter the value. 3.
-
Page 110: Adjusting Yarn Carriers
Adjusting knitting machine Basic settings 4.1 4.1.3 Adjusting yarn carriers Function Call up the "Yarn carrier" window Call up the "Adjusting yarn carrier" window Call up "Additional function keys" Call up desired knitting area Confirm entries Keys for adjusting the yarn carriers ... - Page 111 Adjusting knitting machine 4.1 Basic settings Column Data shown Correction value for yarn carrier (on the left) if the autarkic yarn carrier is positioned outside its own color field. Value range: -120...0...120 . Step width: 0.5=1/32 inch=0.8 mm Correction value for yarn carrier (on the right) if the autarkic yarn carrier is positioned outside its own color field....
- Page 112 Adjusting knitting machine Basic settings 4.1 Adjusting yarn carriers: 1. Call up the "Yarn carrier" window. In the default setting the yarn carriers are displayed in all knitting areas (SEN areas). 2. If only the yarn carriers of a certain SEN area are to be displayed, then call up "additional function keys"...
- Page 113 Adjusting knitting machine 4.1 Basic settings Explanation Value range Correction value for the yarn carrier (on Minimum value: -120 the right) if the autarkic yarn carrier is Maximum value: 120 positioned in its own color field. Step width: 0.5=1/32 inch=0.8 mm K<I>a Correction value for yarn carrier (on the Minimum value: -120...
-
Page 114: Staggering Yarn Carriers
Adjusting knitting machine Basic settings 4.1 4.1.4 Staggering yarn carriers Adjust the staggering of the yarn carriers at the fabric selvedge. "YC staggering" window The yarn carrier staggering is displayed in the window. If you want to change the staggering, call up the Setup2 editor. Explanation Value range Distance between yarn carriers and... - Page 115 Adjusting knitting machine 4.1 Basic settings Function Call up the "Yarn carrier" window Call up "Additional function keys" Call up "YC staggering" window Call up the Setup2 Editor Confirm entries return to the "YC staggering" window Keys for staggering the yarn carriers Staggering the yarn carriers: 1.
-
Page 116: Adjusting Yarn Control Device
Adjusting knitting machine Basic settings 4.1 4.1.5 Adjusting yarn control device Adjustment of yarn tension 1. To avoid loops, adjust restoring force on rotary knob (1) so that tension arm (1) has just enough force to pull up loose thread from yarn carrier. 2. -
Page 117: Adjusting Knitting Areas
Adjusting knitting machine 4.1 Basic settings 4.1.6 Adjusting knitting areas In the Sintral program up to four knitting areas (SEN areas) can be defined and switched on and off separately. If the knitting areas are not defined in the Sintral program, they can be adjusted in the "Knitting areas" window. Function Call up "Knitting areas"... -
Page 118: Adjusting Take-Down
Adjusting knitting machine Basic settings 4.1 4.1.7 Adjusting take-down Setting fabric take-down Function values Call up "Take-down" window Confirm entries Call up "Main menu" Keys for setting the fabric take-down values Setting the fabric take-down values: 1. Call up the "Take-down" window. ... - Page 119 Adjusting knitting machine 4.1 Basic settings Adjusting the control of the During production, the control of knitting machine compares the current fabric take-down: values with threshold values. If a threshold value is exceeded, the knitting machine stops and displays a fault. Function Call up "Additional function keys"...
- Page 120 Adjusting knitting machine Basic settings 4.1 Control comb take-down It is always only possible to carry out one comb function. Function Call up "Additional function keys" Call up "Comb" window Return to "Take-down" window Keys for controlling comb take-down Control comb take-down: 1.
-
Page 121: Processing Fabric Take-Down Menu
Adjusting knitting machine 4.1 Basic settings 4.1.8 Processing fabric take-down menu In the fabric take-down menu (WMF menu), the fabric take-down commands are combined into a single function which concerns a knitting situation. Function Call up "Take-down" window Call up "Additional function keys" Call up "WMF menu"... - Page 122 Adjusting knitting machine Basic settings 4.1 Fabric take-down menu Explanation Value range WMF… Fabric take-down function WMF1 to WMF50 WM min Minimum fabric take-down value Minimum value: 0 (with Fully Fashion) Maximum value: 31.5 Step width: 0.1 Maximum fabric take-down value WM max Minimum value: 0...
- Page 123 Adjusting knitting machine 4.1 Basic settings Explanation Value range WM+C Monitoring of main take-down. If the Minimum value: 0 take-down has not been used after n (0- Maximum value: 100 100) knitting rows, the machine will stop. Step width: 1 (0 = no supervision) WMK+C Controlling the comb.
-
Page 124: Setting Cycle Counter And Quantity Of Fabrics
Adjusting knitting machine Basic settings 4.1 4.1.9 Setting Cycle Counter and Quantity of Fabrics The cycle counter specifies how often a pattern area is to be repeated. Which cycle counter controls which pattern area is defined in the knitting program. The piece number specifies how many pieces are to be knitted. -
Page 125: Adjusting Shape Counters
Adjusting knitting machine 4.1 Basic settings 4.1.10 Adjusting shape counters During fully fashion knitting the knitting edges are controlled by the shape counters. When the values of the shape counters changes, then the fabric becomes broader or narrower. The alteration in the fabric width is mentioned in the knitting program. - Page 126 Adjusting knitting machine Basic settings 4.1 In the case of single-piece knitting, up to 4 shape counters can be used, in the case of double-piece knitting up to 8 shape counters. Shape Counters for the counter start-width #LM1 #RM1 #LM2 #RM2 The counters for start-width can be changed only in the knitting program or in the pattern preparation unit.
-
Page 127: Setting Counters
Adjusting knitting machine 4.1 Basic settings 4.1.11 Setting counters In addition to the piece counter and the cycle counters, there are also other counters. On the one hand, they can be used in the knitting program, e.g. to request conditions. On the other hand, they indicate various machine states. -
Page 128: Switch Illumination On And Off
Adjusting knitting machine Basic settings 4.1 4.1.12 Switch illumination on and off Function Call up "Machine start" window Call up "Additional function keys" Switch on lighting Switch off lighting Call up "Main menu" Keys for switching the lighting on and off Switch the lighting on and off: 1. -
Page 129: Setting Value For Releasing Thread Clamp
Adjusting knitting machine 4.1 Basic settings 4.1.13 Setting value for releasing thread clamp The thread clamping and cutting device holds the thread of a yarn carrier not used for knitting at the moment. When the yarn carrier is used again, the carriage opens the clamping device after knitting a few rows and the yarn end is released. -
Page 130: Configuration Symbol Bar
Adjusting knitting machine Basic settings 4.1 4.1.14 Configuration symbol bar The configurable toolbar allows you to jump directly to the individual windows without having to take the "Detour" through the main menu or using the "Additional functions" key. The toolbar is the headline or title bar of a window. - Page 131 Adjusting knitting machine 4.1 Basic settings Function Call up the "Service" window Call up "Configuration toolbar" window Call up "Main menu" Keys for configuring the toolbar Configuring toolbar: 1. Call up the "Service" window. 2. Call up "Configuration toolbar" window. 3.
-
Page 132: Configuring Monitoring
Adjusting knitting machine Basic settings 4.1 4.1.15 Configuring monitoring The current Sintral line and the corresponding values for the cycle counters, Jacquards, stitch tension and counters are displayed in the "Changeable monitoring" window for each carriage stroke during productions. You can specify yourself which values are to be displayed or have them determined automatically. - Page 133 Adjusting knitting machine 4.1 Basic settings Linking a field to a value Function Call up the "Changeable monitoring" window Call up "Additional function keys" "Automatic configuration" "Clear all fields" (reset) End setting process and save changes End setting process without saving changes Call up "Main menu"...
- Page 134 Adjusting knitting machine Basic settings 4.1 Activating the function block Various function blocks can furthermore be displayed for the configurable values. The selected function blocks are positioned at fixed positions over the existing fields. They do not delete these, but just cover them, so that the fields are visible again when the function block is deactivated.
- Page 135 Adjusting knitting machine 4.1 Basic settings Saving, loading, deleting The configuration carried out by you can be saved, loaded and deleted. settings ... Function Call up the "Changeable monitoring" window Call up "Additional function keys" Call up "Catalog Monitoring" window Call up "Main menu"...
-
Page 136: Setting Up The Pattern
Adjusting knitting machine Basic settings 4.1 4.1.16 Setting up the pattern This menu can be used for fine adjustment of a pattern at the knitting machine. While the machine is knitting, the corresponding data of the knitting program are displayed for every carriage stroke. If required, changes can be carried out directly in this menu via setting windows, or the corresponding menu is opened for your input. - Page 137 Adjusting knitting machine 4.1 Basic settings Area Explanation Actions for yarn carrier plunger, fabric take-down, comb take-down and auxiliary take-down Call up "Stitch length" window Additional yarn carrier distance for fully fashion knitting Changing a value The values are changed by means of a virtual keyboard. If a value can be changed, a keyboard bar which allows a value to be entered, is displayed in the title bar of the menu.
- Page 138 Adjusting knitting machine Basic settings 4.1 Setting up of the knitting The stitch tension, needle action, yarn carrier and jacquard line are systems displayed for every knitting system. The corresponding menu is opened if the yarn carrier, stitch tension or jacquard line is touched. ...
- Page 139 Adjusting knitting machine 4.1 Basic settings Stitch tension Not only the value of the stitch tension is displayed, but also the type of specification. "Display of the stitch tension" window Type Explanation Setting possibility Direct specification: "- -" (NP=12.5) Indirect specification: "5"...
- Page 140 Adjusting knitting machine Basic settings 4.1 Symbols for the needle The needle actions are represented by symbols so that you know actions immediately which needle action is being carried out in one knitting system. Symbol Meaning Symbol Meaning Miss-knit Front stitch Rear stitch Front tuck Rear tuck...
- Page 141 Adjusting knitting machine 4.1 Basic settings Yarn Carrier If this field is touched, the "Yarn carrier" window opens up. "Yarn carrier" window Area Explanation Display of the current yarn carrier specification. After this specification (End character " : ") further information is available about this yarn carrier:...
- Page 142 Adjusting knitting machine Basic settings 4.1 Window with selection Actions can be selected in the following windows: possibilities Comb actions Fabric take-down, auxiliary take-down State line Sintral line Comb actions Various actions for the comb take-down can be selected by tapping the key (1).
- Page 143 Adjusting knitting machine 4.1 Basic settings Actions for fabric take-down, The keys (1) can be used to select actions for the fabric take-down and for auxiliary take-down the auxiliary take-down. The possible action is always displayed on the key. "Actions for fabric take-down, ...
-
Page 144: Racking Correction
Adjusting knitting machine Basic settings 4.1 4.1.17 Racking correction To achieve the optimum transfer position even with different stitch tensions, the racking specification can be provided with a correction. Usually, the correction value is provided with a "?" when writing the knitting program. During knitting, the machine automatically stops in the reversing position before the line with the correction specification is knitted. - Page 145 Adjusting knitting machine 4.1 Basic settings Function Call up the "Racking correction" window Confirm entries Button for calling up the "Racking correction" window Adjusting racking correction value: 1. Call up the "Racking correction" window from the "Main menu". 2. Press the input field for the racking correction and enter the value. - or - ➜...
-
Page 146: Advanced Adjustments
Adjusting knitting machine Advanced adjustments 4.2 4.2 Advanced adjustments This chapter contains information on: Switching on and off aggregates * [-> 147] Setting language [-> 149] Adjusting sensor mechanism * [-> 151] Setting needle bed parameters [-> 153] ... -
Page 147: Switching On And Off Aggregates
Adjusting knitting machine 4.2 Advanced adjustments 4.2.1 Switching on and off aggregates * Function Call up the "Machine settings" window. Keys for calling up the "Machine settings" window "Machine settings" window Explanation Switch on or off lighting in machine area Switching right or left feed wheel on or off. - Page 148 Adjusting knitting machine Advanced adjustments 4.2 Explanation Clean the selection systems. Some brushes are fixed on the exterior part of the needle bed. The carriage runs so far outwards that the brushes can clean the selection systems. This does not interrupt ongoing knitting process. After n courses Number of courses till the selection systems get cleaned (1 course = 2 rows)
-
Page 149: Setting Language
Adjusting knitting machine 4.2 Advanced adjustments 4.2.2 Setting language The windows and the messages on the touch screen can be displayed in different languages. Function Call up the "Service" menu Call up the "Basic settings" menu Call up the "Language" window Tap the "Select Path"... - Page 150 Adjusting knitting machine Advanced adjustments 4.2 Set language: 1. Call up the "Service" menu. 2. Call up the "Basic settings" menu. 3. Call up the "Language" window. "Language" window 4. Select a language present in the machine from the column on the left. Confirm input.
-
Page 151: Adjusting Sensor Mechanism
Adjusting knitting machine 4.2 Advanced adjustments 4.2.3 Adjusting sensor mechanism * "Sensors" window Field Data shown Stop resistance Value range: 1-32, 1=not sensitive, 32=very sensitive Carriage speed after small knots Activating/deactivating of horn and selection of volume in three degrees: 0=off 1=low, 2=middle, 3=loud... - Page 152 Adjusting knitting machine Advanced adjustments 4.2 Function Call up the "Machine settings" window. Call up "Additional function keys" Call up "Sensors" window Confirm input Call up "Main menu" Keys for adjusting the sensor mechanism Adjusting sensor mechanism: 1. Call up the "Machine settings" window. 2.
-
Page 153: Setting Needle Bed Parameters
Adjusting knitting machine 4.2 Advanced adjustments 4.2.4 Setting needle bed parameters The needle bed parameters are used to make the needle-bed-specific settings. They serve for the fine adjustment of the needle beds. The needle bed parameters always remain saved, even when the operating system is read in again. -
Page 154: Setting Machine Parameters
Adjusting knitting machine Advanced adjustments 4.2 Setting needle bed parameters: 1. Call up "Main menu". 2. Call up the "Service" menu. 3. Call up "Basic Settings" menu. 4. Open the "Needle bed parameters" window. 5. Enter the value on the appropriate line. 6. - Page 155 Adjusting knitting machine 4.2 Advanced adjustments Field Data shown Automatic deactivation of lighting after a certain time. Duty cycle: 10 minutes (standard), value range: 0...60 minutes Recommendation: LED lamp: 0 minutes, fluorescent lamp 10 minutes Speed outside the SEN area (MSECOS) Standard: 1.2 m/sec (maximal speed) Maximum carriage speed with open cover hoods if the engaging rod is held in position 3 (production).
-
Page 156: Setting Switch-Off Time When A Power Failure Occurs
Adjusting knitting machine Advanced adjustments 4.2 4.2.6 Setting switch-off time when a power failure occurs The machine is immediately stopped when a power failure (longer than 45 milliseconds) occurs. The knitting program, operating system and the machine-specific data are not lost. The battery card (with the accumulators) ensures this. - Page 157 Adjusting knitting machine 4.2 Advanced adjustments Function Confirm message Switch off main switch Call up the "Service" menu Call up the "Basic settings" menu Call up "Machine parameters" window Confirm input Call up "Main menu" Keys for adjusting the power failure time Set power failure time: 1.
-
Page 158: Copying Service Data
Stoll. The computer saves the data up to the fault internally in so-called "Logfiles". These files can be saved and sent to the Stoll helpline so that Stoll can carry out an exact error diagnostics. - Page 159 Adjusting knitting machine 4.2 Advanced adjustments Label Explanation Select language With next switching on of the machine, the language selection with next startup appears. The setting is reset after switching on. Keys in the "Copy service data" window Function Call up the "Service" menu Call up "Copy service data"...
-
Page 160: Carry Out The Reference Run
Adjusting knitting machine Advanced adjustments 4.2 4.2.8 Carry out the reference run Following all repair and conversion work on the carriage assembly or on the needle bed, a reference run must be carried out. The reference run is carried out with the following steps: ... - Page 161 Adjusting knitting machine 4.2 Advanced adjustments 4. Compare the displayed values with the values on the machine data sheet. If necessary, correct the values on the machine data sheet (see the "Copy Mc" description [ 158]). 5. Switch back to the previous window. 6.
- Page 162 Adjusting knitting machine Advanced adjustments 4.2 7. To stop the carriage assembly on the left side outside the needle bed, tap the "S<" or "S>" key and start the machine with the engaging rod. 8. To move the carriage assembly a few centimeters to the right, tap the "S>"...
- Page 163 Adjusting knitting machine 4.2 Advanced adjustments Load knitting program and 1. Load the knitting program. determine racking reference 2. Call up the "Machine start" window. data 3. Tap on the key "SP from line 1". 4. Start the machine with the engaging rod. ...
-
Page 164: Adjusting Racking Position Correction Vpk
Adjusting knitting machine Advanced adjustments 4.2 4.2.9 Adjusting racking position correction VPK The fine adjustment of the transfer racking is carried out by means of the VPK value. With the "Racking position correction (VPK)" the rear needle bed is aligned exactly relative to the front needle bed. The VPK value always remains saved, even if the operating system is imported again. - Page 165 Adjusting knitting machine 4.2 Advanced adjustments 7. Call up the "Service Racking" window. "Service Racking" window 8. Enter the value in the "VPK" line using the linear regulator. -1…-8 Correction to the left (1 step = 0.18 – 0.25 mm, according to the machine gauge) +1…+8 Correction to the right (1 step = 0.18 –...
-
Page 166: Adjusting Basic Racking Correction Vgk
Adjusting knitting machine Advanced adjustments 4.2 4.2.10 Adjusting basic racking correction VGK The position of the rear needle bed relative to the front needle bed is set with the VGK value (factory setting). If part of the racking device is replaced, e.g. the racking motor or the racking belt, the VGK value has to be set anew. - Page 167 Adjusting knitting machine 4.2 Advanced adjustments 5. Tap the "Racking adjusting run" key. A message appears, answer this with "Yes". The needle bed moves to the left and right. The racking will be synchronized. 6. Tap the "Reference run V>REF" key. A message appears, answer this with "Yes".
- Page 168 Adjusting knitting machine Advanced adjustments 4.2 Wrong selection - individual needles miss-knit If a wrong selection occurs, then the synchronisation "Impulse sensor – control – selection system" is not optimal anymore. This has been caused by the big difference between the old and new VGK values. ➜...
-
Page 169: Correcting Position Of Stitch Cams
Adjusting knitting machine 4.2 Advanced adjustments 4.2.11 Correcting position of stitch cams Each stitch cam can be corrected for each carriage direction for knitting for knitting with split-stitch technique Reduce stitch tension: Value without sign or with "+" sign Increase stitch tension: Value with "-"... - Page 170 Adjusting knitting machine Advanced adjustments 4.2 Function Call up the "Service" menu Call up the "Basic settings" menu Call up "NPK values" window Reduce current value by one step Increase current value by one step End the setting process and save the changed values. Call up "Main menu"...
-
Page 171: Adjusting Needle Brushes
Adjusting knitting machine 4.2 Advanced adjustments 4.2.12 Adjusting needle brushes The needle brushes must be adjusted when errors occur during stitch formation, e.g. drop stitches. The needle brushes open the needle latches for laying in the thread. They are swivel-mounted so, that they are always inclined in the direction of travel of the carriage assembly. -
Page 172: Adjusting Needle Detector
Adjusting knitting machine Advanced adjustments 4.2 4.2.13 Adjusting needle detector The needle detector is correctly adjusted if: Adjusting the needle detector it is near the holding-down jacks of the rear needle bed, however does not tap them the lower end of the needle detector is at the level of the needle hooks IMPORTANT Damage to the needle detector! If several yarn carriers are stopped at the same place, the... -
Page 173: Adjust The Yarn Carriers
Adjusting knitting machine 4.2 Advanced adjustments 4.2.14 Adjust the yarn carriers The optimal adjustment of the yarn carrier depends: on the centering of the yarn carrier tip. It is correctly adjusted if it is located exactly between both needle beds. ... - Page 174 Adjusting knitting machine Advanced adjustments 4.2 The "Adjustment of yarn carriers" window appears. 3. In the "Adjustment" field set the switch to "Vertically". 4. Tap on the corresponding yarn carrier. The setting window appears. 5. Open the covers and move the yarn carrier to a position where you can control it.
- Page 175 Adjusting knitting machine 4.2 Advanced adjustments 6. Form a "needle cross". For that purpose slide several needles of the front needle bed upward, slide also the opposite needles of the rear needle bed upward. The needles form the so-called "needle cross". 7.
- Page 176 Adjusting knitting machine Advanced adjustments 4.2 ✔ The covers must be closed. Centering the yarn carrier 1. The yarn carrier must be in the insert position. Tap the (1) key for this. If the yarn carrier is located in the insert position, the (1) key is greyed out.
- Page 177 Adjusting knitting machine 4.2 Advanced adjustments 6. With the lower adjusting lever (4) bend carefully (without using force) the yarn carrier tip to the front and to the rear. 7. Check the adjustment. For that purpose move the yarn carrier over the "needle cross". The adjustment is correct, if the lower end of the yarn carrier tip is located exactly in the center of the needle cross.
- Page 178 Adjusting knitting machine Advanced adjustments 4.2 Adjusting the height of the 1. In the (2) "Correction value" enter the desired height. yarn carrier Value range: -2.5...0...2.5. Default = 0. Step width: 0.05 mm 2. Check the height. The yarn carriers are correctly adjusted if ...
-
Page 179: Reference Yarn Carrier
Adjusting knitting machine 4.2 Advanced adjustments 4.2.15 Reference yarn carrier During the yarn carrier reference run the autarkic yarn carriers are synchronized. They move outwards to their limit stop, then into clamping position above the clamping and cutting bed. A yarn carrier reference run is necessary for example after a Restart. Function Call up the "Service"... - Page 180 Adjusting knitting machine Advanced adjustments 4.2 The "Reference run of yarn carriers" window appears. 4. Tap on the "Reference all" key. 5. The yarn carriers are automatically referenced consecutively rail by rail. The yarn carriers move outwards to their left or right limit stop, then into clamping position above the clamping and cutting bed.
- Page 181 Adjusting knitting machine 4.2 Advanced adjustments If during a yarn carrier reference run appears the "Command canceled"message, this means that it was not possible to reference one yarn carrier; it must be newly adjusted. The corresponding yarn carrier will be marked with the icon.
-
Page 182: Adjust Yarn Carrier Horizontally
Adjusting knitting machine Advanced adjustments 4.2 4.2.16 Adjust yarn carrier horizontally Function Call up the "Service" menu Call up the "Adjustment of yarn carriers" window Keys for calling up the "Adjustment of yarn carriers" 1. Call up the "Service" menu from the "Main menu". 2. - Page 183 Adjusting knitting machine 4.2 Advanced adjustments 6. With the help of the arrow keys in the "Manually adjust the horizontal position" field, position the yarn carriers so that yarn carrier tip is centered to the first needle. 7. Confirm the setting. To do so tap on the "Confirm position"...
-
Page 184: Adjust Yarn Carrier Vertically
Adjusting knitting machine Advanced adjustments 4.2 4.2.17 Adjust yarn carrier vertically Function Call up the "Service" menu Call up the "Adjustment of yarn carriers" window Keys for calling up the "Adjustment of yarn carriers" 1. Call up the "Service" menu from the "Main menu". 2. - Page 185 Adjusting knitting machine 4.2 Advanced adjustments 6. Adjust the yarn carrier. Position of the yarn carrier tip: Inner yarn carrier (track 7, 8 or 9) Outer yarn carrier (track 1, 2, 15 or 16) Further information: Adjusting the height of the yarn carrier [-> 178]...
-
Page 186: Working With Files
Adjusting knitting machine Working with files 4.3 4.3 Working with files IMPORTANT Computer viruses! Loss of data or production. Computer viruses can creep into the machine through unscanned data via USB port or network. ➜ Bring in only virus free data on to the knitting machine. This chapter contains information on: ... - Page 187 Adjusting knitting machine 4.3 Working with files Marking text A word or a text block is marked for being copied, moved or deleted. 1. To mark a word, tap the word twice. 2. To mark a line, tap the line three times. 3.
- Page 188 Adjusting knitting machine Working with files 4.3 Call up "Search" selection The corresponding location is sought when you enter line numbers or text window and select the keys. Function "Search": search for a specific term "Carry on searching": Continue searching for a certain term "Search"...
- Page 189 Adjusting knitting machine 4.3 Working with files Call up "Replace" selection This is replaced in the loaded file by entering line numbers and commands window and selecting the keys. Function "Replace": search for a certain term and replace it by a new one "Replace"...
- Page 190 Adjusting knitting machine Working with files 4.3 Call up "Go to" selection You can jump to the corresponding point in the loaded file by entering line window numbers or names and selecting the keys. Function "Go to" a certain position "Go to"...
- Page 191 Adjusting knitting machine 4.3 Working with files Automatic calling of virtual The virtual keyboard is automatically activated when various function keys keyboard are selected. Either a number block appears for inputting numbers or an alphanumeric keyboard appears for entering letters and numbers. The virtual keyboard contains three switchover keys: ...
-
Page 192: File Manager
Adjusting knitting machine Working with files 4.3 4.3.2 File manager Files and folders (directories and images) are managed in "File -Manager" window. "File manager" window All actions pertaining to folders are mentioned on the left side. A new folder can be created, for example. - Page 193 Adjusting knitting machine 4.3 Working with files Function Call up the "Load & save" window Call up "Additional function keys" Call up "File manager" window Call up "Main menu" Keys for the "File manager" window Call up "File manager" window: 1.
- Page 194 Adjusting knitting machine Working with files 4.3 Actions in the "File manager" window "File manager" window Function Function "Update": Refresh the "Delete all": Delete all files in contents of all the folders the selected folder "Create folder": Create folder "Display file": Display in the selected directory selected file...
- Page 195 Adjusting knitting machine 4.3 Working with files Call up the selection window With the selection of a drive or a folder in the list on the left side, the key "Create folder" "Create folder " appears. "Create folder"key in window "File-Manager" 1.
-
Page 196: Working With Files, Libraries And Folders
Adjusting knitting machine Working with files 4.3 4.3.3 Working with files, libraries and folders Working with files (Sintral, jacquard, setup), libraries (Auto-Sintral) and pattern folders occurs in the "Load & save". The file list is divided into machine type, file name, type and changed_on:. Sorting is possible in each of the 4 columns by pressing the column header. - Page 197 Adjusting knitting machine 4.3 Working with files 1. From the "Main menu" call up the "Load & Save" window. "Load & save" window 2. Set the desired path with one of the "Direct pattern folder selection" keys. 3. Use the PAT/SIN/JAC/SET/LIB keys to select whether the entire pattern of the current machine (PAT) or individual file types are to be listed.
- Page 198 Adjusting knitting machine Working with files 4.3 Actions in "Load & save" window "Load & save" window Function "Direct folder selection": predefined folder selection "Current folder selection": Open the dialog box for definition of the current folder Display the content of the Zip file (for Setup2) Close the zip file (for Setup2) Load selected file and accompanying pattern elements...
- Page 199 Adjusting knitting machine 4.3 Working with files Function Save pattern with selected setup data (for Setup2) Delete selected file Display selected file "Add": add selected file and corresponding pattern elements to pattern already loaded Editing the setup data (for Setup1) "Update": Update the contents of the folder Call up "Direct Help"...
- Page 200 Adjusting knitting machine Working with files 4.3 Function Activate/deactivate "EAY selection" Activate/deactivate "SP1 selection" Activate/deactivate "YLC selection" Keys in "Load & save" window Further information: KnitLAN connection [-> 220] Selecting the current folder [-> 208] Copying files [-> 205] ...
-
Page 201: Displaying File In Pattern Editor
Adjusting knitting machine 4.3 Working with files 4.3.4 Displaying file in pattern editor The selected file from the "Load & save" window is displayed in the "Pattern editor" window (preview). Function Call up the "Load & save" window "Display file" key Call up "Pattern editor"... - Page 202 Adjusting knitting machine Working with files 4.3 Function search for a specific term "Continue": Continue to find a certain term "Go to" a certain position Carry out the "Quick jump" corresponding mark (e.g. from FBEG to FEND) "Enlarge": Display text enlarged "Reduce": Display the text decreased "Function list": Toggle on/off the display of pattern functions.
-
Page 203: Clear Knitting Memory
Adjusting knitting machine 4.3 Working with files 4.3.5 Clear knitting memory The current knitting program with which your knitting machine works is saved in the knitting memory. When you delete the knitting memory, this has no influence on the saved patterns and files on the data carriers. Function Call up the "Load &... - Page 204 Adjusting knitting machine Working with files 4.3 Deleting individual files in the 1. Call up the "Load & save" window. knitting memory: "Load & save" window 2. Select the file via the SIN or JAC key. 3. Call up "Additional function keys". 4.
-
Page 205: Copying Files
Adjusting knitting machine 4.3 Working with files 4.3.6 Copying files Files are copied from one drive to another in the "Copying catalog" window. This list of files appears in alphabetical order, the number of existing files is displayed on the status line (Total:) of the list. In the following example, the files are copied from the hard disk to the USB memory stick (backup copy). - Page 206 Adjusting knitting machine Working with files 4.3 8. Tap the "Copy file" key. When the file is copied, it appears in the right list ("Target"). 9. To copy other files, repeat steps 7 and 8. Actions in "Copying catalog" window ...
- Page 207 Adjusting knitting machine 4.3 Working with files Setting the sort sequence The sort sequence can individually be adjusted. To do so, click on the header line (1). "Copying catalog" window Select and confirm the sort sequence in the "Sort by" window. ...
-
Page 208: Selecting The Current Folder
A path contains the following information: 1. Drive letter (or computer name) (e. g.: "D:" or "\\SERVER01") 2. Specification of the subdirectories (e. g.: "\PATTERN" or "Stoll\M1\Extract\") Standard setting Following drives are set by default in the keys of "Direct folder selection":... - Page 209 Adjusting knitting machine 4.3 Working with files Function Call up the "Load & save" window "Direct folder selection" key The symbols of the 3 keys "Direct folder selection" are adapted based on the linked drive: USB Memory Stick Hard disk ...
- Page 210 Adjusting knitting machine Working with files 4.3 5. End setting process and save changes. In the "Load & Save " window, the display of the key "Direct folder selection" is adapted to the new path. The path is displayed below it. ...
-
Page 211: Carrying Out A Program Check
Adjusting knitting machine 4.3 Working with files 4.3.8 Carrying out a program check If you carried out changes in the knitting program you can have your inputs checked. With it the knitting program will be checked for its knitting ability. If an error is detected, an error message will be displayed in the lower area of the window. - Page 212 Adjusting knitting machine Working with files 4.3 Actions in "Program test" window "Program test" window Function "Start program test": Start program test from 1st line "Start program test": Start program test from a certain line on "Interrupt program test": Interrupt program test and restart it "End program test"...
-
Page 213: Working With The Sintral Editor
Adjusting knitting machine 4.4 Working with the Sintral editor Function "Reduce": Display the text decreased "Change size": Change window size of pattern and error output Call up "Direct Help" for the key pressed next Keys in the "Program test" window 4.4 Working with the Sintral editor Minor changes or additions to the knitting programs are processed with the Sintral editor. - Page 214 Adjusting knitting machine Working with the Sintral editor 4.4 The window of the first level in the "SINTRAL Editor" appears. The file currently loaded is shown in this window. Window of the first level in the "SINTRAL editor" Function Function "Switch toolbar": Switch over...
- Page 215 Adjusting knitting machine 4.4 Working with the Sintral editor 2nd level of "SINTRAL Pressing the "Switch over toolbar" key, the window goes to the 2nd level of Editor" the "SINTRAL Editor". Window of the second level in the "SINTRAL-Editor" Function Function "Switch toolbar": Switch over...
- Page 216 Adjusting knitting machine Working with the Sintral editor 4.4 "Auto-Sintral" function key To activate this key, "Auto-Sintral" must be loaded. In the editor now one can switch between the currently loaded pattern and "Auto-Sintral". Function Switch over between current pattern and "Auto-Sintral" "Auto-Sintral"...
- Page 217 Adjusting knitting machine 4.4 Working with the Sintral editor "Tile window vertically" This function makes two editors available, which both always show the function key same lines. Vertical scrolling in one editor changes the second editor simultaneously. Horizontal scrolling only changes one editor, and the start of a long line can be displayed in the left editor and the rest on the right one.
- Page 218 Adjusting knitting machine Working with the Sintral editor 4.4 Call up "Go to" submenu Press the arrow key next to the "Go to" key. You can jump to the start or the end of the file or line using this submenu. ...
-
Page 219: Go To Help In Function And Error List
Adjusting knitting machine 4.4 Working with the Sintral editor 4.4.2 Go to help in function and error list After loading and checking a file, the corresponding functions and error messages can be displayed in the "SINTRAL editor". You can jump in these lists using the following keys. -
Page 220: Knitlan Connection
This description applies only to machines for which the connection to the Stoll Nameserver is not active. If the connection to the Stoll Nameserver is active, the "Network favorites" key is not available since the KnitLAN connection will be configured on the Stoll Nameserver. - Page 221 Adjusting knitting machine 4.5 KnitLAN connection Function Call up "Main menu" Keys for setting the KnitLAN connection 1. Call up the "Service" menu. 2. Call up the "Basic settings" menu. 3. Call up the "Network favorites" window. "Network favorites" window 1 Display of network environment which machine is integrated in.
- Page 222 Share Folder 2. In the Windows firewall you have to call up the firewall settings and allow the Stoll FTP service as an exception. (Start > Control panel > Windows firewall, tab: Exceptions). The program "Stoll FTP service" can be found under the installation path of the M1 (e.g.
-
Page 223: Defining User Profile
Adjusting knitting machine 4.6 Defining user profile 4.6 Defining user profile In the standard configuration each knitting machine user can open and make changes to any window of the user interface. However, in some cases this is not desirable and not every user is to be able to change data and machine settings. - Page 224 ➜ Uppercase and lowercase letters can be used in a password. ➜ Note the password and keep it in a safe place. If the password is lost, the Stoll Helpline can help with a special password. The "User profile" window ...
- Page 225 Adjusting knitting machine 4.6 Defining user profile Defining user profile Function Call up the "Service" window Call up "User profile" window Confirm password Return to previous window (cancel process) Block window Enable window Call up "Additional function keys" Enable all windows Block all windows Call up "Main menu"...
- Page 226 Adjusting knitting machine Defining user profile 4.6 "User profile" window 4. Block window: Tap the corresponding window in the selection list (1) and tap on the "Block window" (3) switch. - or - ➜ Tap the corresponding window in the selection list with a double click. 5.
- Page 227 Adjusting knitting machine 4.6 Defining user profile Saving, loading, deleting The user profile can be saved, loaded and deleted. user profiles ... So that the same user profiles are active on all knitting machines, save the user profiles to USB memory stick or a network drive and load them in each machine.
- Page 228 Adjusting knitting machine Defining user profile 4.6 Enabling blocked window During production it may be necessary to open a blocked window and carry out a change or action. Or you find that it is necessary for this window to be enabled for the active user.
- Page 229 From time to time you should change the password to be sure that it has not become known. Carry out this activity on all knitting machines. If the knitting machine is connected with the STOLL pattern workstation, the password can be changed simultaneously on all the knitting machines with the help of on-line connection (see section "On-line commands"...
- Page 230 Adjusting knitting machine Defining user profile 4.6 Examples of how a user Example 1: profile can be specified The machine settings are to be blocked. To do this, block the four windows in the selection list. "User profile" window Example 2: When beginning work with user profiles, there is an uncertainty as to which windows are required for daily work and which are not.
- Page 231 4.6 Defining user profile Online commands If the knitting machine is connected with the STOLL pattern workstation, the password and the user profile can be changed simultaneously on all the machines with the help of the on-line connection. The condition is that the password is written in uppercase letters.
- Page 232 Adjusting knitting machine Defining user profile 4.6...
-
Page 233: Setup Data
Setup Data 5 Setup Data The knitting program consists of: Sintral program (*.sin) Jacquard program (*.jac) Information about production: – Specification of the stitch length – Distance between yarn carriers and fabric selvedge – Carriage Speed... You can handle this information about production as follows: ... -
Page 234: Background
Setup Data Background 5.1 5.1 Background A short review Setup-data were introduced for CMS machines (starting with ST 711) in 1998. Following data can be saved to the setup-file: WMF(Fabric take-down menu) NP (All NP values) YD (Position of yarn carriers at the fabric selvedge) ... -
Page 235: Comparing Setup1 To Setup2
Setup Data 5.2 Comparing Setup1 to Setup2 5.2 Comparing Setup1 to Setup2 Setup1 Setup2 Fabric take-down 8 functions 50 fabric take-down functions (WMF) functions (WMF) 50 Auxiliary take-down functions (W+F) Switching auxiliary take- down on and off (W+1, W+0) Tabs for WM% and WMK% 21 staggerings ... -
Page 236: Loading Knitting Program
Setup Data Loading knitting program 5.3 Setup1 Setup2 Correction of stitch length Not possible possible for right carriage in tandem operation (NPR) Additional information Not possible possible such as: Machine Number Online Number Host Name File Extension .set .setx (XML file) (File Extension) -
Page 237: Setup2 Editor
Setup Data 5.4 Setup2 Editor 5.4 Setup2 Editor 5.4.1 Overview of the Setup2 Editor of the CMS The Setup2 data will be displayed in the "Setup2 Editor". Explanation Tabs of a menu Table Call-up the individual menus Switch on or off the virtual keyboard : The menu keys are covered by the active virtual keyboard.... - Page 238 Setup Data Setup2 Editor 5.4 Calling up the Setup2 Editor How to call up the Setup2 Editor with the Setup data of the actual pattern: on the machine Function Call up the "Setup2 Editor" window Key to call-up the "Setup2 Editor" window 1.
- Page 239 Setup Data 5.4 Setup2 Editor Helpers for Input Depending on the active input field appears: the numeric keyboard the alpha-numeric keyboard (for comments) the input helper for list fields The input helper for NP measure units Explanation Switch on the virtual keyboard Switch off virtual keyboard...
- Page 240 Setup Data Setup2 Editor 5.4 The alpha-numeric keyboard Function Jump to the next field. CPS LCK Shift between uppercase and lowercase letters; the setting of numbers or special characters is maintained SHIFT Shift between uppercase and lowercase letters and between numbers and special characters BACKSPACE Move the cursor by one step to left and delete the character there ENTER...
- Page 241 Setup Data 5.4 Setup2 Editor The input helper for list fields Element Function Fold open selection field Fold closed selection field Move cursor: one line upwards Move cursor: one line downwards Move cursor: one character to left Move cursor: one character to the right Move cursor: to first input of selection field Move cursor: to last input of selection field Confirm input...
- Page 242 Setup Data Setup2 Editor 5.4 The Input Helper for Yarn Element Function Carriers (YLC tab) Enter yarn carrier specification Example: 3A Delete entry Move cursor: one character to left Move cursor: one character to the right Confirm input...
- Page 243 Setup Data 5.4 Setup2 Editor Adding a table row You will find only those entries in the selection list which are not yet part of the table. Example: Some NP are part of the table. Select NP indices in the "Add Rows" dialog box from those not yet listed in the table....
- Page 244 Setup Data Setup2 Editor 5.4 Switching on or off the table Explanation tools Switch on the table tools Switch off the table tools Table Tools Explanation Go to row. Select the desired line in the selection list The cursor jumps to the desired line of the table. : Active with more than 21 lines.
- Page 245 Setup Data 5.4 Setup2 Editor File tools Explanation Display the content of the Zip file In the "Load & save" window Close the zip file Load pattern Load the pattern with selected Setup data Save Pattern Save the pattern with selected Setup data. ➜...
-
Page 246: Take-Down
Setup Data Setup2 Editor 5.4 5.4.2 Take-down WMF (tab) Explanation Value range WMF… Fabric take-down function WMF1 to WMF50 WM min Minimum fabric take-down value Minimum value: 0 (with Fully Fashion) Maximum value: 31.5 Step width: 0.1 Maximum fabric take-down value WM max Minimum value: 0... - Page 247 Setup Data 5.4 Setup2 Editor Explanation Value range WM+C Monitoring of main take-down. If the Minimum value: 0 take-down has not been used after n (0- Maximum value: 100 100) knitting rows, the machine will stop. Step width: 1 (0 = no supervision) WMK+C Controlling the comb.
- Page 248 Setup Data Setup2 Editor 5.4 W+F (tab) Explanation Value range W+F… Auxiliary Take-down function W+F1 - W+F50 Switch on auxiliary take-down. W+F On The auxiliary take-down will be closed. The speed of the auxiliary take-down W+=n is active Switch off the auxiliary take-down. The auxiliary take-down will be opened.
- Page 249 Setup Data 5.4 Setup2 Editor WM% WMK% (tab) Explanation Value range Modify the fabric take-down value by -80 to 80 n percent WMK% Changing the fabric take-down value -80 to 80 by n percent while the comb take- down is working. The value is active till the fabric is taken down by the main take-down.
-
Page 250: Yarn Carrier
Setup Data Setup2 Editor 5.4 5.4.3 Yarn carrier YD / YDI (tab) Staggering the yarn carriers at the fabric selvedge. Explanation Value range Distance between yarn carriers and fabric selvedge Collapse (reduced display) Expand (expanded display) YD1 Distance of the yarn carriers on track 1 to 8 Minimum value: 0... - Page 251 Setup Data 5.4 Setup2 Editor YC / YCI (tab) Yarn carrier corrections for autarkic yarn carriers (ADF). Explanation Value range Direct yarn carrier correction Collapse (reduced display) Expand (expanded display) Yarn carrier correction index YCI1 to YCI20 Collapse (reduced display) Expand (expanded display) Corrections of yarn carrier 1A to 16B...
- Page 252 Setup Data Setup2 Editor 5.4 Explanation Value range Reduce carriage speed (n) for yarn carrier (n = 0..3). The speed is reduced to 75% from carriage reversal point until achievement of the operating range of the yarn carrier. Finally it can be chosen between the following possibilities: ...
- Page 253 Setup Data 5.4 Setup2 Editor Control clamping depth Y:Ncc (tab) Explanation Value range Control of the clamping depth of the clamping Minimum value: -10 and cutting needles. Maximum value: 10 Step width: 1 Standard setting: n=0 e.g.: Lower the cutting needles by 5 steps: NCC=5 Comment Comment ASCII Characters...
- Page 254 Setup Data Setup2 Editor 5.4 YPI (tab) Plating indices for autarkic yarn carriers (ADF): Control the insertion position of the basic yarn. Control the insertion angle of the basic yarn Explanation Value range Plating index Defines the distance between the yarn carrier and the normal yarn insertion position in the needles and the insertion angel.
-
Page 255: Stitch Lengths
Setup Data 5.4 Setup2 Editor 5.4.4 Stitch lengths NP 1-100 (tab) Explanation Value range Correction for all stitch cams Minimum value: -2 Maximum value: 2 Step width: 0.05 NP1 - Stitch cam position 1 to 100 NP100 Value Stitch length in NP values or mm Value [mm]... -
Page 256: Carriage Speed
Setup Data Setup2 Editor 5.4 5.4.5 Carriage speed Different carriage speeds can be entered for different knitting situations. The indirect carriage speed only becomes effective when it is slower than the normal speed. Explanation Value range (meters/second) MSECK Carriage speed for small knots over m rows, Minimum value: 0.05... -
Page 257: Cycle Counters
Setup Data 5.4 Setup2 Editor 5.4.6 Cycle counters The cycle counter specifies how often a pattern area is to be repeated. Which cycle counter controls which pattern area is defined in the knitting program. Explanation Value range RS1 - Cycle counters 1 to 39 1-99999 RS39 Comment... -
Page 258: Yarn Length
Setup Data Setup2 Editor 5.4 5.4.7 Yarn length Basic settings Explanation "Operating Determine the yarn length control mode. mode for : On the CMS the mode can be changed here. patterns" Production without YLC Working with mm Working with original fabric ... - Page 259 Setup Data 5.4 Setup2 Editor Correction Values Explanation "Correction for Enter a correction value for all measuring wheels all measuring wheels" "Maximum Stopping the machine when exceeding the correction value deviation of the (Standard = 15%). target value per knitting row" "Wheel"...
- Page 260 Setup Data Setup2 Editor 5.4 Explanation "Minimum width" Change the minimum width only if the error message "YLC: deviation from set value of measuring wheel x too large" is displayed. Value range: - 2 E…0…+ 2 E (E = Number of needles per inch = Gauge of the machine) Example for E16: -32…0…+32 needles : In the "Yarn length control"...
- Page 261 Setup Data 5.4 Setup2 Editor Yarn data The yarn data are necessary for the calculation of the yarn consumption. Explanation "Wheel" right device: Select measuring wheel (n=1 to 8). left device: Select measuring wheel (n=9 to 16). "Y" Select the yarn carrier (1A to 8D) working with this measuring wheel.
- Page 262 Setup Data Setup2 Editor 5.4 NP (Knitting Mode) / Wheel Display showing which stitch cam position works together with which measuring wheel. The list is filled out automatically (mode "Working with mm", program item "Determine basic conditions"). Explanation "front" Stitch cam position on the front needle bed "Back"...
-
Page 263: Racking
Setup Data 5.4 Setup2 Editor 5.4.8 Racking The racking instructions are valid for one carriage stroke. Explanation Value range VCI… Racking function VCI1 to VCI50 Racking correction by m steps (0-10) Step width: 1/70 of the needle distance Direction of the racking correction <... -
Page 264: Miscellaneous
"Select #195 Needle hook gauge Machine" dialog box of the M1plus #156 Coupling width (with tandem machines) Machine- Stoll machine number: These data are entered automatically at the Hostname Name of the computer within the network machine. Online-ID... -
Page 265: Data Mode And File Mode
Setup Data 5.4 Setup2 Editor 5.4.10 Data Mode and File Mode The "Setup2 Editor" of the CMS and of the M1plus differs between the editing of Setup2 files (.setx) and of data of the loaded pattern (.mdv / .zip). Data Mode File Mode Origin of the data Loaded pattern... -
Page 266: Setup1 - Editing The Setup File
Setup Data Setup1 - Editing the setup file 5.5 5.5 Setup1 - Editing the setup file The Setup data editor allows setup data to be edited without loading them into the machine beforehand. It is thus possible to edit another setup file while the machine is knitting a pattern. - Page 267 Setup Data 5.5 Setup1 - Editing the setup file Function Call up the "Load & save" window Activate the "Setup selection" Call up the "Setup data editor" window Call up "Additional function keys" "Activate write protection" key "Deactivate write protection" key Call up "Main menu"...
- Page 268 Setup Data Setup1 - Editing the setup file 5.5 The "Setup data editor" window is open. "Setup data editor" window A Total of 8 tabs: The STIXX and STIXX3 tabs are only displayed if a STIXX device is connected.
- Page 269 Setup Data 5.5 Setup1 - Editing the setup file Working with the setup data Set/deactivate write protection: editor ✔ The Setup data editor window is open. 1. Call up "Additional function keys". 2. Tap the "Activate write protection" key in order to activate the write protection.
- Page 270 Setup Data Setup1 - Editing the setup file 5.5...
-
Page 271: Maintenance Of The Knitting Machine
6.1 Minimize wear All parts of the knitting machine have carefully been selected and checked by Stoll. Nevertheless, they are subject to wear due to wear. You can keep the wear to a minimum if you lubricate, clean and check the machine regularly. - Page 272 Belt tension too high: Danger of bearing damage Belts (drive, racking, comb take-down, auxiliary take- (adjustment with measuring device by Stoll down) technician) Belt tension too low: Danger of position errors (racking, auxiliary take-down) Energy chain trailing cable ...
-
Page 273: Cleaning The Knitting Machine
Maintenance of the knitting machine 6.2 Cleaning the knitting machine 6.2 Cleaning the knitting machine To retain the operability of the knitting machine and ensure the quality of the fabric, the knitting machine must be cleaned regularly. Cleaning interval Cleaning work if necessary Cleaning the touch screen 6 to 24 operating hours... - Page 274 Maintenance of the knitting machine Cleaning the knitting machine 6.2 IMPORTANT Do not remove metallic parts and fragments (e.g. broken needle latch or needle hook) with a magnetic tool. There is a danger that the needle bed or cams can be magnetized, leading to incorrect selection.
-
Page 275: Cleaning The Touch Screen
Maintenance of the knitting machine 6.2 Cleaning the knitting machine 6.2.1 Cleaning the touch screen Use a clean, soft cloth for cleaning. If heavy soiling is present, use a cleaning agent suitable for plexiglas. To prevent menus and function keys from being activated when cleaning, two options are available: ... -
Page 276: Cleaning Suction And Fluff Container
Maintenance of the knitting machine Cleaning the knitting machine 6.2 6.2.2 Cleaning suction and fluff container 1. Stop the knitting machine when the carriage is located in the center of the needle bed. 2. Open the covers. 3. Remove the carriage assembly panelling (1). 4. - Page 277 Maintenance of the knitting machine 6.2 Cleaning the knitting machine 8. Loosen the screw (3) and swivel the retainer downwards. 9. Lift the suction tube somewhat at the lower end (4). Push the suction tube upwards until the fixing clip (5) is pulled out of the carriage. 10.
-
Page 278: Vacuuming Off Knitting Machine
Maintenance of the knitting machine Cleaning the knitting machine 6.2 6.2.3 Vacuuming off knitting machine In order to avoid any dust being deposited on the inaccessible points of the machine, we recommend that the dust should be vacuum cleaned and the machine not to be cleaned by compressed air. -
Page 279: Cleaning Thread Clamping And Cutting Device
Maintenance of the knitting machine 6.2 Cleaning the knitting machine 6.2.5 Cleaning thread clamping and cutting device Cleaning thread clamping and cutting device 1. Push the clamping and cutting needle upward. 2. Clean the clamp and cutting needles and the clamping pinion with a cloth or a brush. -
Page 280: Cleaning Main Drive Fan
Maintenance of the knitting machine Cleaning the knitting machine 6.2 6.2.7 Cleaning main drive fan 1. Switch off the machine and wait until the machine is currentless. 2. Swing open the cover on the right-hand control unit. Main drive fan 3. -
Page 281: Cleaning Filter Mat Of Power Supply Unit
Maintenance of the knitting machine 6.2 Cleaning the knitting machine 6.2.9 Cleaning filter mat of power supply unit 1. Swing open the cover on the control unit. Fan power supply unit 2. Remove screw (1) and hinge down the housing toward the front. 3. -
Page 282: Thoroughly Cleaning Needle Bed
Maintenance of the knitting machine Cleaning the knitting machine 6.2 6.2.10 Thoroughly cleaning needle bed The needle bed is cleaned daily by the operator. In addition, it must be cleaned thoroughly every 12 to 26 weeks. If the needle bed it not cleaned thoroughly and carefully, a non-uniform stitch appearance results during production due to needles that do not run smoothly, and the operation of the machine can no longer be ensured. - Page 283 Maintenance of the knitting machine 6.2 Cleaning the knitting machine 6. Push dirt out of needle channels with groove cleaner (6). Groove cleaner 7. Clean groove for pelerine spring of needle. 8. Blow out dirt with compressed air from the needle bed. 9.
-
Page 284: Clean The Knitting Systems
Maintenance of the knitting machine Cleaning the knitting machine 6.2 6.2.11 Clean the knitting systems 1. Stop the knitting machine. 2. Move the carriage assembly into the left reversing position. 3. Set the main switch to "0" and wait until the touch screen is switched off. 4. -
Page 285: Lubricate Knitting Machine
Maintenance of the knitting machine 6.3 Lubricate knitting machine 6.3 Lubricate knitting machine This chapter contains information on: Lubrication interval [-> 286] Setting lubricating interval for needle bed [-> 287] Oil needle bed [-> 288] Restarting lubricating interval [-> 289] ... -
Page 286: Lubrication Interval
Greasing the racking device Greasing the needle bed supports/adjustment pieces Lubrication schedule Only the named lubricants or others recommended by Stoll may be used. Other lubricants may damage the machine, e. g. due to insufficient lubricating action, rust on metal parts or damage to the electrical cable insulation and the plastic parts. -
Page 287: Setting Lubricating Interval For Needle Bed
Maintenance of the knitting machine 6.3 Lubricate knitting machine 6.3.2 Setting lubricating interval for needle bed For the needle bed a lubricating interval of between 1 and 65.535 courses can be set. A mean value for a three-system machine is 25,000 courses. However, this value depends highly on: Machine speed, temperature and number of knitting systems. -
Page 288: Oil Needle Bed
Maintenance of the knitting machine Lubricate knitting machine 6.3 6.3.3 Oil needle bed When the lubricating interval for the needle bed expires, a pictograph appears stating that the needle bed must be oiled. 1. Apply oil with a brush or spray bottle. ... -
Page 289: Restarting Lubricating Interval
Maintenance of the knitting machine 6.3 Lubricate knitting machine 6.3.4 Restarting lubricating interval 1. Tap display for "Lubricate needle bed" message. The "Current message" window appears. 2. Tap"624 Lubricate needle bed (OIL)" message. The message is marked with a frame. The function key for opening the "Sensors"... -
Page 290: Oiling The Wires In The Yarn Carrier Rail
Maintenance of the knitting machine Lubricate knitting machine 6.3 6.3.7 Oiling the wires in the yarn carrier rail ➜ Apply oil on the wires in the yarn carrier rail using a paintbrush. -
Page 291: Greasing Impulse Sensor Rails
Maintenance of the knitting machine 6.3 Lubricate knitting machine 6.3.8 Greasing impulse sensor rails Depending on the machine gauge, there is a front and a rear impulse sensor rail. Machine gauge Impulse sensor rail E18 (E9.2) at the front and at the rear E16 (E8.2) E14 (E7.2) E12 (E6.2) -
Page 292: Greasing Butts Of The Coupling Parts And Intermediate Sliders
Maintenance of the knitting machine Lubricate knitting machine 6.3 6.3.9 Greasing butts of the coupling parts and intermediate sliders After every tenth "Oil needle bed" note appears a "Grease needle bed" pictograph. Greasing the butts of the coupling part and intermediate sliders ➜... -
Page 293: Greasing The Linear Guidance
Maintenance of the knitting machine 6.3 Lubricate knitting machine 6.3.11 Greasing the linear guidance If the lubricating interval for the linear guidance has elapsed, a pictograph appears indicating that the linear guidance has to be greased. IMPORTANT An irreversible damage of the linear guidance is possible! In case of insufficient grease, there is the risk of damaging the linear guidance. -
Page 294: Greasing Racking Device
Maintenance of the knitting machine Lubricate knitting machine 6.3 3. Grease quantity per lubricating nipple: about 3 - 4 cm = activate the hand lever three times. : Use a grease gun with a flexible hose to be able to reach the lubricating point more easily.... -
Page 295: Grease Needle Bed Support/Adjustment Pieces
Maintenance of the knitting machine 6.3 Lubricate knitting machine 6.3.13 Grease needle bed support/adjustment pieces Greasing the needle bed supports/adjustment pieces 1. Position the needle beds at an angle. 2. Vacuum off fluff and dust. 3. Apply grease to needle bed supports with a brush. Further information: ... - Page 296 Maintenance of the knitting machine Lubricate knitting machine 6.3...
-
Page 297: Repairing The Knitting Machine
Repairing the knitting machine 7.1 Supplementary activities during maintenance 7 Repairing the knitting machine This chapter contains information on: Supplementary activities during maintenance [-> 297] Helpful knitting rows [-> 303] Replacing parts [-> 305] Eliminating faults in electronics system [-> 345] ... - Page 298 Repairing the knitting machine Supplementary activities during maintenance 7.1 Function Call up "Main menu" Keys for switching power supply 40 V off / on Switch power supply off and on again: 1. Call up the "Service" menu from the "Main menu". 2.
-
Page 299: Moving Yarn Carriers And Repositioning Them
Repairing the knitting machine 7.1 Supplementary activities during maintenance 7.1.2 Moving yarn carriers and repositioning them For threading up and for repair work it is necessary to move the yarn carrier out of the knitting area. Our recommendation: Move the yarn carrier to a position where it is as accessible as possible and where you can thread it up easier. -
Page 300: Separating The Suction Tubes From The Carriage
Repairing the knitting machine Supplementary activities during maintenance 7.1 7.1.3 Separating the suction tubes from the carriage 1. Remove the carriage assembly panelling (1). 2. Loosen the screw (3) and swivel the retainer downwards. 3. Lift the suction tube somewhat at the lower end (4). Push the suction tube upwards until the fixing clip (5) is pulled out of the carriage. -
Page 301: Move The Carriage Assembly Outward Up To The Support Surface
Repairing the knitting machine 7.1 Supplementary activities during maintenance 7.1.4 Move the carriage assembly outward up to the support surface Function Call up "Manual interventions" window 1. From the "Main menu" call up the "Manual interventions" window. 2. Activate the "Carr.revers.outs.n.bed" option in the "Manual interventions"... -
Page 302: Sliding Board
Repairing the knitting machine Supplementary activities during maintenance 7.1 7.1.5 Sliding board The sliding board consists of two individual boards. Each sliding board can be pushed to the left or to the right. The sliding boards are secured at three points. Use the square spanner from the accessories for opening. -
Page 303: Helpful Knitting Rows
Repairing the knitting machine 7.2 Helpful knitting rows 7.2 Helpful knitting rows When carrying out cleaning, adjustments and repair work, it is helpful to set a certain knitting situation immediately. The following table lists the knitting specifications mentioned in the operating instructions. Knitting specifications Empty row <... - Page 304 11. To resume production tap in the window "Machine start" on the key "SP from line 1" and engage the machine. An empty row is entered on line 999 in a STOLL knitting program. For the first 2 knitting rows after "SPF", the carriage moves...
-
Page 305: Replacing Parts
Repairing the knitting machine 7.3 Replacing parts 7.3 Replacing parts This chapter contains information on: Replacing needle and coupling part [-> 306] Replacing intermediate slider [-> 307] Replacing selection jack [-> 309] Replacing holding-down jack [-> 310] ... -
Page 306: Replacing Needle And Coupling Part
Repairing the knitting machine Replacing parts 7.3 7.3.1 Replacing needle and coupling part Replacing needle and coupling part 1. Pull-out the needle rail (1) with the extraction hook (6). 2. Pull needle (2) upwards, the coupling part (3) will, with it, also be pulled upwards. -
Page 307: Replacing Intermediate Slider
Repairing the knitting machine 7.3 Replacing parts 7.3.2 Replacing intermediate slider There are different models depending on the gauge. Type 1 Valid for: E10 │ E12 │ E14 │ E16 │ E18 │ E6.2 │ E7.2 │ E8.2 To replace the intermediate slider, you need a small pair of pliers. ... - Page 308 Repairing the knitting machine Replacing parts 7.3 Type 2 Valid for: E5 │ E7 │ E8 To replace the intermediate slider, you need a small pair of pliers. Replacing the intermediate slider 1. Push the needle and coupling part (1) upward. 2.
-
Page 309: Replacing Selection Jack
Repairing the knitting machine 7.3 Replacing parts 7.3.3 Replacing selection jack Replacing selection jack 1. Push the needle with the coupling part upward. 2. Push the intermediate slider (1) until the lower butt bumps into the spring wedge (2). 3. -
Page 310: Replacing Holding-Down Jack
Repairing the knitting machine Replacing parts 7.3 7.3.4 Replacing holding-down jack 1. Transfer all stitches of the needle bed in which the jack is replaced to the other needle bed. Removing the limiter (3) 2. Remove screw (1) on left and right-hand sides of jack bed. Use the special hexagon screwdriver from the accessories for this purpose. -
Page 311: Remove Needle Bed Or Position It At An Angle
Repairing the knitting machine 7.3 Replacing parts 7.3.5 Remove needle bed or position it at an angle This chapter contains instructions on: Releasing needle bed Removing needle bed Positioning the needle bed at an angle Screwing on the needle bed tight Function Call up "Manual interventions"... - Page 312 Repairing the knitting machine Replacing parts 7.3 Remove needle bed or 1. Front needle bed: Swivel towards the front carefully and lean it against position it at an angle the machine covering. 2. Rear needle bed: Remove the needle bed from the machine with two persons.
-
Page 313: Repairing Needle Bed And Additional Needle Bed
Repairing the knitting machine 7.3 Replacing parts 7.3.6 Repairing needle bed and additional needle bed Damaged needle bed If the carriage is blocked, the needle bed may be damaged. This means that the movable parts (needles, coupling part, intermediate slider and selection jack) do not move smoothly or are blocked. - Page 314 Repairing the knitting machine Replacing parts 7.3 4. Set damaged stays into a vertical position again using the channel chisel and straighten them. The chisel may only be struck with light hammer blows in the damaged groove. Do not strike the chisel in too deep, as the needle bed foundation will be damaged.
- Page 315 If too much of a stay is filed off, the needle bed is defective at this point and can only be repaired by a Stoll technician. ➜ Use the channel file for the removal of burrs only. ➜ The grooves must be cleaned carefully after the channel file is used.
-
Page 316: Removing Carriage Part
Do not loosen or remove any adjusting screws ever! Screws to separate carriage part and carriage support IMPORTANT Adjusting screws! If adjusting screws are loosen, the carriage part must be newly adjusted by a Stoll service technician. ➜ Do not loosen any adjusting screws (1). - Page 317 Repairing the knitting machine 7.3 Replacing parts This chapter contains information on: Remove the carriage part to replace the cams [-> 317] Remove the carriage part when the carriage assembly is blocked in the needle bed [-> 320] ...
- Page 318 Repairing the knitting machine Replacing parts 7.3 5. Remove the carriage assembly panelling (1). Panelling of carriage assembly 6. Take the suction tubes (2) out of the carriage part. 7. Loosen the screws on the plugs (3) and pull out the plugs. 8.
- Page 319 Repairing the knitting machine 7.3 Replacing parts 10. To release the drive brake, tap the "Rel. drive brake" key. ("Main menu" -> "Manual interventions service" window, "Release drive brake" key) 11. Push away the carriage support to the machine center. If the carriage support blocks: The drive brake has automatically closed.
- Page 320 Repairing the knitting machine Replacing parts 7.3 Remove the carriage part In the case of a shock on the needle bed, e.g. in the case of needle when the carriage assembly breakage, the piezo-electric shock stop switches off the knitting machine. is blocked in the needle bed On the touch screen a pictograph appears showing on which needle bed the fault occured.
- Page 321 Repairing the knitting machine 7.3 Replacing parts 7. Take the suction tubes (2) out of the carriage part. 8. Loosen the screws on the plugs (3) and pull out the plugs. 9. Unscrew the shoulder screws (4) and screws (5) on the left and right sides.
- Page 322 Repairing the knitting machine Replacing parts 7.3 12. Move the carriage support away continuing in the original carriage direction. If the carriage support blocks: The drive brake has automatically closed. ➜ Release the drive brake again and continue pushing the carriage support in the original direction.
- Page 323 Repairing the knitting machine 7.3 Replacing parts Further information: Switching power supply 40 V off and on [-> 297] Separating the suction tubes from the carriage [-> 300] Assembling carriage part and carriage support [-> 324] Repairing needle bed and additional needle bed [-> 313]...
- Page 324 Repairing the knitting machine Replacing parts 7.3 Assembling carriage part and carriage support Preparations If the front carriage part is returned to the machine, it needs to be pushed from outside on to the support surface (1). The reason for this: The movable parts in the clamping and cutting bed will be pushed by the carriage part (more exactly: by the cam box curves) into their correct position.
- Page 325 Repairing the knitting machine 7.3 Replacing parts Function Call up "Manual interventions" window Call up "Machine start" window Call up "Main menu" Keys for assembling carriage part and carriage support 1. Switch off 40 V power supply. 2. Call up "Manual interventions" window. 3.
- Page 326 Repairing the knitting machine Replacing parts 7.3 11. Mount the suction tubes again. 12. Mount the carriage assembly panelling. 13. Close the covers. 14. Switch on 40 V power supply. 15. Call up "Main menu". 16. Call up "Machine start" window. 17.
-
Page 327: Removing Cam Plate
Repairing the knitting machine 7.3 Replacing parts 7.3.8 Removing cam plate The cam plate is removed for cleaning, checking or replacing cams or step motors. 1. Switch off 40 V power supply. 2. Remove the carriage part. Plugs of the selection systems 3. -
Page 328: Removing And Mounting Step Motor
(1) is positioned exactly on the zero point (3). IMPORTANT Adjusting screws! If adjusting screws are released, the step motor must be readjusted at STOLL. ➜ Do not loosen any adjusting screws (5). 4. Remove the screws (4). 5. Take off the defective step motor. - Page 329 Repairing the knitting machine 7.3 Replacing parts 7. Press the mechanics (pressure part tuck) downward to be able to insert the roller (6) in the gear rack of the step motor. 8. Mount the step motor. If this is not possible, repeat step 7. 9.
-
Page 330: Replacing Gear Racks In The Step Motor
There are different models depending on the machine type and the gauge. Type 1 Valid for: CMS 530, CMS 520, CMS 822, CMS 933, CMS ADF-3 E10 │ E12 │ E14 │ E16 │ E18 │ E6.2 │ E7.2 │ E8.2 │ E9.2 Replacing gear racks: 1. - Page 331 Type 2 Valid for: CMS 530, CMS 520, CMS 822, CMS 933, CMS ADF-3 E5 │ E7 │ E8 │ E2,5.2 │ E3,5.2 │ E5.2 CMS 740, CMS 730 T, CMS 530 T, CMS 502, CMS 830 C, CMS 520 C...
- Page 332 Repairing the knitting machine Replacing parts 7.3 3. Set at the rear the left pin of the lower gear rack guide. Pin of gear rack guide 4. Push lower gear rack manually to the left until all gear racks can be removed.
- Page 333 Repairing the knitting machine 7.3 Replacing parts 12. The gear racks must be aligned. Monitoring of built-in position 13. If this is not the case, repeat step 3 through 11. 14. Move pin of the lower gear rack guide at the rear to the home position. ...
-
Page 334: Replacing Yarn Control Unit
Repairing the knitting machine Replacing parts 7.3 7.3.11 Replacing yarn control unit Dismantling a yarn control unit 1. Mark the position of the old yarn control unit. 2. Remove the screw (1). 3. Lift the yarn control unit in the front until the contact pins are free. Push the yarn control unit to the rear and remove it. -
Page 335: Replacing Drive Belts And Friction Roller Of Friction Feed Wheel
Repairing the knitting machine 7.3 Replacing parts 7.3.12 Replacing drive belts and friction roller of friction feed wheel The drive belts and the friction roller of the friction feed wheel are replaced with the following steps: Preparations Replace the drive belt ... - Page 336 Repairing the knitting machine Replacing parts 7.3 3. Mount the new belt in such a way that it runs in the grooves of the drive pulley. 4. Press the motor (9) upward and tighten the screws of holes (7) 5. Check the belt tension. ...
-
Page 337: Replacing Comb Hook
Repairing the knitting machine 7.3 Replacing parts 7.3.13 Replacing comb hook Function Call up "Main menu" Call up "Comb" window Keys for replacing comb hooks 1. Open the comb cover plate. 2. Call up the "Comb" window from the "Main menu". 3. -
Page 338: Checking The Alignment Of The Light Curtain
Repairing the knitting machine Replacing parts 7.3 7.3.14 Checking the alignment of the light curtain If a yarn carrier rail is replaced, the light curtain has to be dismantled. After installing it, the alignment of the light curtain has to be checked. Thereby, the alignment of the left and the right device of the light curtain to each other are checked. - Page 339 Repairing the knitting machine 7.3 Replacing parts 4. The light curtain indicates the alignment quality with help of the blue LEDs (1 to 5). Means how well both devices on the left and right machine side are oriented towards each other. ...
- Page 340 Repairing the knitting machine Replacing parts 7.3 On the left side of the yarn carrier rails move the test rod into With the machine the protective area. running The carriage must be stopped immediately Confirm the error message. ...
-
Page 341: Replacing Yarn Carrier
Repairing the knitting machine 7.3 Replacing parts 7.3.15 Replacing yarn carrier To be able to exchange a yarn carrier the complete yarn carrier rail must be removed from the machine. Dismantle the light curtain Perform the following tasks at the light curtain on both sides of the machine. 1. - Page 342 Repairing the knitting machine Replacing parts 7.3 Disassemble the yarn carrier 1. The yarn carrier rail is fastened with a total of 3 screws. Depending on rail the assembly of the rail there are one or two screws at the left or at the right-hand side.
- Page 343 Repairing the knitting machine 7.3 Replacing parts 1. Remove the screw (2). 2. In case that the second yarn carrier must be replaced, both yarn carriers are to be dismantled. 3. Push the yarn carriers to the replacement point. 4. Once the left ball bearings (3) are outside the wire (4) turn the yarn carrier somewhat away from the rail.
- Page 344 Repairing the knitting machine Replacing parts 7.3 6. Mount the yarn carrier. Mount the right ball bearing on the wire. Insert the curtain (5) at the yarn carrier in the switching shaft (6). Push the yarn carrier inward until it is running completely on the wire.
-
Page 345: Eliminating Faults In Electronics System
Repairing the knitting machine 7.4 Eliminating faults in electronics system 7.4 Eliminating faults in electronics system This chapter contains information on: Overview of the electronic control (control cabinet left and right) [-> 345] Power supply unit [-> 349] ... - Page 346 Repairing the knitting machine Eliminating faults in electronics system 7.4 Left control cabinet Left control cabinet Card Function 013 Controlling the motors for the yarn carriers. (ID 301 013) Each card controls 4 yarn carrier drives (servo motors) and 4 high/ low motors (step motors).
- Page 347 Repairing the knitting machine 7.4 Eliminating faults in electronics system Right control cabinet Right control cabinet Card Function 301 000 Drive and racking control unit Controlling the drive and racking motor. Forwarding the error messages from the motors to card 032. 301 036 Battery-, input-, output-card (BIO), fuse for (1)...
- Page 348 Repairing the knitting machine Eliminating faults in electronics system 7.4 Right control cabinet Card Function Controlling the input unit and the touch screen. 010 (ID 301 010) Controlling hard disk. The hard disk is integrated on the board. 032...
-
Page 349: Power Supply Unit
Repairing the knitting machine 7.4 Eliminating faults in electronics system 7.4.2 Power supply unit Power supply unit The LEDs on the power supply unit indicate which voltages are generated and at which voltage an error occurs. While switching on the main switch, the lower three LEDs light up immediately, and the +28 V approx. -
Page 350: Replacing Electronic Card
Repairing the knitting machine Eliminating faults in electronics system 7.4 7.4.3 Replacing electronic card 1. Set main switch to "0" and wait until the LEDs on the power supply unit go out (approx. 60 seconds). 2. Open the cover of the left control cabinet. IMPORTANT An electronic card can be destroyed by electrostatic charge! -
Page 351: Check Fuses
Valid for: CMS 530 CMS 520 C CMS 520 CMS 502 CMS ADF-3 DANGER Life-threatening high voltage! Electrical shock may cause death or serious injuries. ➜ Set the main switch to "0" and wait until the touch screen is dark and an alarm signal sounds. - Page 352 Repairing the knitting machine Check fuses 7.5 4. Check the battery fuse (7) on the control unit. Battery fuse below the power supply unit DANGER Burning risk! Injuries by hot parts. ➜ Watch out not to touch the resistors (6) when pulling out the board.
- Page 353 Repairing the knitting machine 7.5 Check fuses 6. Check fuses on the transformer at the rear of the machine. Fuses on transformer at the rear of the machine F1-F3 Fabric take-down F11-F13 Power supply unit F4-F6 Friction feed wheel Central Lubrication F8-F10 Servos...
-
Page 354: Needle Selection Displacement
2 and 4 hours depending on the machine gauge. Automatic: The measuring system "JNA" (Setup-Needle-Selection) is available at your agency or at Stoll. With this measuring system the test series are carried out automatically. Time required: 30 - 60 minutes. -
Page 355: Preparations
Repairing the knitting machine 7.6 Needle selection displacement 7.6.1 Preparations Stop the carriage after the left reversing position. With tandem machine: Couple carriage narrow. Cast-off the stitches on both needle beds. Remove the needle brushes on the front and rear carriage part. ... -
Page 356: Reset Reference Values Of Impulse Sensor, Carry Out Carriage Reference Run
Repairing the knitting machine Needle selection displacement 7.6 7.6.2 Reset reference values of impulse sensor, carry out carriage reference run Before determining the new values you have to delete the "old" values of the impulse sensors. Function Call up the "Service" menu Call up the "Basic settings"... -
Page 357: Determining The Needle Selection Displacement Manually
Repairing the knitting machine 7.6 Needle selection displacement 7.6.3 Determining the needle selection displacement manually Function Call up the "Service" menu Call up the "Basic settings" menu Call up the "Adjustment of needle selection" menu Call up the "Automatic" menu Call up the "Manually coarse"... - Page 358 Repairing the knitting machine Needle selection displacement 7.6 7. Carry out the test series. A Test for the front needle bed B Test for the rear needle bed 1 Reset 4 Enter the test result (carriage Delete the test results for the front direction: <<) needle bed.
- Page 359 Repairing the knitting machine 7.6 Needle selection displacement If you are not sure that no error occurred, repeat the check for both carriage directions. 15. Resume the test series. Press the (5) key for this. The next line of the test series is selected automatically. Internally, the reaction time is increased by "1".
-
Page 360: Entering The Data Of The Needle Selection Displacement Manually
7.7 Entering the data of the needle selection displacement manually Only for Stoll technicians or knitting technicians If the data for the needle selection displacement got lost and there is no Dongle data available, the data can be entered manually. - Page 361 Repairing the knitting machine 7.7 Entering the data of the needle selection displacement manually Function Call up "Additional function keys" Open the "Needle bed parameters 2" window Call up "Main menu" Keys for controlling the data for the needle selection displacement Controlling the data of the 1.
- Page 362 Repairing the knitting machine Entering the data of the needle selection displacement manually 7.7 ✔ The machine is switched off. 1. To switch on the machine, set the main switch to 1. The "BootOkc" window is displayed on the touch screen. ...
- Page 363 Repairing the knitting machine 7.7 Entering the data of the needle selection displacement manually IMPORTANT If you enter wrong values it will lead to a faulty selection of the needles. 6. Enter the values of the machine data sheet in the "Needle bed parameters 2"...
- Page 364 Repairing the knitting machine Entering the data of the needle selection displacement manually 7.7...
-
Page 365: Software - Installation And Basic Settings
Software - Installation and basic settings 8 Software - Installation and basic settings In this chapter the description of how can one install and set the Stoll operating system is given. It is important thereby that one gets to know the boot process (the booting of software and the activation of control) on the knitting machine. -
Page 366: Boot Process
Software - Installation and basic settings Boot process 8.1 8.1 Boot process The following figure shows a schematic representation of the boot process of the knitting machine (with control OKC). Schematic representation of the boot process Description of the boot After switching on knitting machine (main switch 1) windows XP gets process started. - Page 367 Software - Installation and basic settings 8.1 Boot process During this time, the following window is displayed on the touch screen: Start the System Control Unit (SCU) If this process is closed, then the "BootOkc" window is displayed. "BootOkc"...
- Page 368 Software - Installation and basic settings Boot process 8.1 First of all, only the keys "Installation", "Installation and Configuration" and "Basic Settings" are released. As soon as the connection to control is made, more keys are released based on the control information. If a warm start is possible, then this is automatically carried out after a waiting time that can be set (basic setting: 30 seconds).
- Page 369 The warm start of the knitting machine can be interrupted. This happens by tapping the keys in the "BootOkc" window. Meaning Start the installation process of a Stoll operating system. The storage location of the Stoll operating system can be selected in the "Basic Settings"...
-
Page 370: Basic Settings
Software - Installation and basic settings Boot process 8.1 8.1.1 Basic Settings Call up "Basic Settings Menu" window: ✔ The knitting machine is switched off. 1. Set the main switch to "1". The "BootOkc" window is displayed. 2. Type in within the waiting time for the warm start on the "Basic Settings" key. - Page 371 Selecting the source of the In the "Boot Source" area of the "Basic Settings Menu" window ascertain installation data (Boot the source from where the installation of the Stoll operating system is done. Source) Selection of the source in "Basic Settings Menu" window...
- Page 372 Software - Installation and basic settings Boot process 8.1 Configure machine Defined by the concept of control OKC some basic information about the machine should be known right from the start. Enter this information in the "Machine Configuration" window. ➜ Tap on the "Machine configuration" key. ...
- Page 373 Software - Installation and basic settings 8.1 Boot process Entering the machine classification and the component type: 1. In the "Machine Classification" list field, select the machine classification. 2. In the "Component Type" list field, select the component type. In the "Controller Characteristic" field, the controller type is displayed.
- Page 374 Software - Installation and basic settings Boot process 8.1 Configuring network If you wish to connect the knitting machine with another knitting machine or a pattern unit, you must set up and switch on the network on the knitting machine. The "Network Configuration" window is used for it. ➜...
- Page 375 The Ethernet IP addresses 192.168.0.0 to 192.168.0.255 are reserved for Stoll knitting machines and may not be used in the company network. The reason for this: The cards 963 (IPC) and 966 (Power CPU) in the knitting machine use these IP addresses to communicate with each other.
- Page 376 Software - Installation and basic settings Boot process 8.1 ➜ In order to keep the virtual keyboard constantly open, activate the check Display/hide screen keyboard box before "Use Touch Screen Keyboard". By clicking on an input field the virtual keyboard opens. - or - ➜...
- Page 377 3. Select the cases in the Events field by the appearance of which the email should be sent. 4. Enter the e-mail address in the "E-Mail address" field 5. Confirm input. Further information: KnitLAN connection [-> 220] Advanced adjustments For the Stoll technician only...
- Page 378 Software - Installation and basic settings Boot process 8.1 Load the machine settings in The machine settings do not only contain the machine data, but also the the machine computer machine options, the machine configuration, the report, the network settings, and other internal control information. This data is referred as Dongle.
- Page 379 Stoll. The computer saves the data up to the fault internally in so-called Logfiles. For an exact error diagnosis, we want to ask you to save these files and to send them to the Stoll-Helpline.
- Page 380 For diagnostics purposes it is important to know which software is installed version on the computer. In the "Info" window, the version numbers of the currently installed Stoll operating system are displayed. In the case of error messages, these version numbers should also be provided to Stoll- Helpline, if possible.
-
Page 381: Saving All Machine Data On The Usb-Memory-Stick
Software - Installation and basic settings 8.2 Saving all machine data on the USB-Memory-Stick 8.2 Saving all machine data on the USB- Memory-Stick The machine settings do not only contain the machine data, but also the machine options, the machine configuration, the report, the network settings, and other internal control information. -
Page 382: Saving Pattern After A Big Fault
Software - Installation and basic settings Saving pattern after a big fault 8.3 5. Tap on the "Copy Dongle" key. The entire machine data are saved under the mcnumber.dgl on the USB-Memory-Stick (mcnumber = machine number) file name. 6. Call up "Main menu". 7. - Page 383 Software - Installation and basic settings 8.3 Saving pattern after a big fault Save pattern: 1. If you want to save the logfiles and the pattern, then tap on the "YES" key. 2. You will be asked where the logfiles and the pattern which has been loaded recently are to be saved.
- Page 384 Software - Installation and basic settings Saving pattern after a big fault 8.3 8. In order to be able to load the pattern into the machine, you have to add the machine type to the pattern name. For example for a CMS 530: CMS530.Saved_pattern.sin 9.
-
Page 385: Installing The Stoll Operating System
When the machine is switched on again the software can determine that a new Stoll operating system is available for installation. You will be asked in one window whether you want to install the new Stoll operating system and whether you wish to configure the machine anew simultaneously. -
Page 386: Direct Installation
Configuration" key or start a reference run after having selected the "Installation" key. Select the "Installation and Configuration" key, if along with the installation of the new Stoll operating system the machine parameters are also to be altered. Select the "Installation" key, if the machine parameters are not to be altered. - Page 387 Software - Installation and basic settings 8.4 Installing the Stoll operating system ✔ The machine is switched off. Select Boot Source 1. Set the main switch to 1. The "BootOkc" window is displayed on the touch screen. "BootOkc" window 2.
- Page 388 "User Message" window (CAUTION!) The current operating system version will be overwritten! When you install a new Stoll operating system version the current one is overwritten. Carry out the following step only if you want to replace the current operating system by the previous version.
- Page 389 Software - Installation and basic settings 8.4 Installing the Stoll operating system 4. To confirm the installation, tap on the "YES" key. When the installation file of the Stoll operating system has several languages, the "Install Languages" window is open. ...
- Page 390 Software - Installation and basic settings Installing the Stoll operating system 8.4 6. Confirm selection. The installation process gets started. The "Language" window is displayed after having selected the "Installation and Configuration" key. - or - The "Reference runs " window is displayed after having selected the "Installation"...
- Page 391 Software - Installation and basic settings 8.4 Installing the Stoll operating system 11. If other NPK values are to be used, change the values and confirm the changes. 12. Proceed to the next window. The "Knit Report Configuration" window is displayed.
-
Page 392: Indirect Installation
Software - Installation and basic settings Installing the Stoll operating system 8.4 8.4.2 Indirect installation In the case of Indirect Installation the new Stoll operating system is immediately transmitted on the hard disk of the knitting machine ("Software update" window). - Page 393 3. To start installation process tap on "YES". In the "User Message" window (INSTALLATION STARTED!) the path to the installation data is displayed. To proceed with the old Stoll operating system, tap on "NO". "User Message" window (INSTALLATION STARTED!) 4.
- Page 394 Carry out the following step only if you want to replace the current operating system by the previous version. 6. To confirm the installation, tap on the "YES" key. When the installation file of the Stoll operating system has several languages, the "Install Languages" window is open.
- Page 395 Software - Installation and basic settings 8.4 Installing the Stoll operating system "Install Languages" window Function End selection process without saving modifications Confirm selection Key "All languages" Key "No language" Keys for language selection 7. Select the desired language(s).
- Page 396 Software - Installation and basic settings Installing the Stoll operating system 8.4 8. Confirm selection. The installation process gets started. The "Language" window is displayed after having selected the "Installation without configuration" check box. - or - The "Reference runs" window is displayed after having selected the "Installation without configuration"...
- Page 397 Software - Installation and basic settings 8.4 Installing the Stoll operating system 11. If other NPK values are to be used, change the values and confirm the changes. 12. Proceed to the next window. The "Knit Report Configuration" window is displayed.
-
Page 398: Updating Software
Installing the Stoll operating system 8.4 8.4.3 Updating software A new Stoll operating system can also be copied on the hard disk while the machine is producing. No data is overwritten here; the operating system is loaded into a separate memory area. - Page 399 "Software updating" window 3. Select source folder. If multiple Stoll operating systems are found on the data carrier, these are listed. When searching for the Stoll operating system the selected folder section and a section under this section (sub-folder section) is also searched.
- Page 400 Software - Installation and basic settings Installing the Stoll operating system 8.4 When the Stoll operating system is copied, two more program points are displayed in the "Software update" window. "Software updating" expanded window Function The data in the separate memory area are deleted.
- Page 401 Software - Installation and basic settings 8.4 Installing the Stoll operating system Select type of installation: 1. If the new Stoll operating system is to be installed after a waiting time of 10 seconds automatically, set the switch "Automatic Installation" (2) to - or - ➜...
-
Page 402: Carrying Out A Restart (Restart)
Software - Installation and basic settings Installing the Stoll operating system 8.4 8.4.4 Carrying out a restart (Restart) A restart is carried out when the software no longer reacts to inputs following an error. Carry out a restart: 1. Set machine main switch to 0. -
Page 403: Carrying Out Restart With Machine Configuration (Restart And Configuration)
Software - Installation and basic settings 8.4 Installing the Stoll operating system 8.4.5 Carrying out restart with machine configuration (Restart and Configuration) A restart with the machine configuration is carried out after a gauge conversion or after attaching special attachments. - Page 404 Software - Installation and basic settings Installing the Stoll operating system 8.4 Machine fault! The presence or lack of machine options must correctly be specified, as otherwise a fault may occur on the machine. Always specify the machine options correctly.
-
Page 405: Setting Online Connection
Software - Installation and basic settings 8.4 Installing the Stoll operating system 8.4.6 Setting online connection The knitting machine (s) and the STOLL pattern preparation unit can be connected to an Ethernet connection. Function Switch on virtual keyboard Confirm input... - Page 406 Software - Installation and basic settings Installing the Stoll operating system 8.4 2. For the automatic warm start within the waiting time tap on the "Restart and Configuration" key. The Restart Process gets started. After the process is shut, the "Language" window is displayed.
-
Page 407: Overview Of All System Data
"System info" window Field Data shown Stoll operating system (OS) that is loaded, the machine number, machine type, gauge, yarn carrier type, etc. "Memory" line: Display of the amount of memory this pattern occupies Hardware and software data Network data Function Call up the "Service"... -
Page 408: Diagnose Control
Software - Installation and basic settings Diagnose Control 8.5 Displaying System data: 1. In the "Main menu", tap on the "Service" key. The "Service" window is displayed. 2. Tap on the "Diagnostics" key. The "Diagnostics" window is displayed. 3. - Page 409 Software - Installation and basic settings 8.5 Diagnose Control Function Call up the "Service" window Call up "Diagnostics" window Call up "Diagnostic control" window Call up "Main menu" Buttons for calling up the "Diagnostic control" window Carry out diagnoses: 1. In the "Main menu", tap on the "Service" key. ...
- Page 410 Software - Installation and basic settings Diagnose Control 8.5...
-
Page 411: Yarns And Stitch Tension
Yarns and stitch tension 9.1 Economic production and the influencing factors 9 Yarns and stitch tension 9.1 Economic production and the influencing factors The requirements for a knitting machine can be divided into two main groups: the machine related goals and the business goals. The knitting machine is to work with maximum speed with every knitting mode, every stitch tension, regardless of the yarn. - Page 412 Yarns and stitch tension Economic production and the influencing factors 9.1 The influencing factors Structure of the pattern (knitting mode, Flexible Running reliability Gauge, ...) Carriage speed Stitch length (stitch tension) Yarn quality (friction coefficient, elasticity, twisting, moisture, hairiness , bobbin setup, tensile strength) ...
-
Page 413: Stitch Tension Range
The information in the table show the minimum and maximum NP values. Valid for: CMS 933 CMS 822 CMS 530 CMS 520 CMS ADF-3 min. NP max. NP min. NP (Split) max. NP (Split) 16.7 15.6 E 3,5 16.7... -
Page 414: Stitch Lengths
Yarns and stitch tension Stitch lengths 9.3 9.3 Stitch lengths The specified values serve as a guideline. Depending on the yarn, these values may differ, as the quality and the specific weight of the material influence the stitch length. E 3.5 E 4 E 10 E 10 E 12... - Page 415 Yarns and stitch tension 9.3 Stitch lengths E 14 E 16 E 18 E E 2,5.2 E 2,5.2 2,5.2 m.4L m.3L 3,5.2 3,5.2 m.4L 6.26 5.29 10.55 5.48 6.96 6.06 4.36 10.55 5.48 7.52 6.91 5.71 11.80 5.48 1.88 8.22 7.68 7.06 13.05...
- Page 416 Yarns and stitch tension Stitch lengths 9.3 E 5.2 E 6.2 E 6.2 E 7.2 E 7.2 E 8.2 E 9.2 (knit and (knit and wear) wear) 3.54 2.14 1.77 3.86 2.47 2.07 2.14 1.58 1.57 1.61 4.66 3.02 2.57 2.58 1.99 1.91...
-
Page 417: Yarn Table
Yarns and stitch tension 9.4 Yarn table 9.4 Yarn table The specified values serve as a guideline. The quality and the specific weight of a yarn must also be taken into account. Instead of a simple yarn, we recommend twisted yarn. With coarser machines it is advisable to use several twisted threads. - Page 418 Yarns and stitch tension Yarn table 9.4 Gauge assembled processing Final count [Nm] [Nm] 1 x 48/2 20 - 30 1 x 54/2 1 x 60/2 1 x 54/2 20 - 40 1 x 60/2 1 x 80/2 1 x 80/2 20 - 40 2,5.2 3 x 28/2...
- Page 419 Yarns and stitch tension 9.4 Yarn table Gauge assembled processing Final count [Nm] [Nm] 1 x 20/2 8 - 12 (all needles) 2 x 28/2 3 x 28/2 3 - 4,5 (each 2nd needle) 4 x 28/2 2 x 44/2 10 - 16 (all needles) 1 x 28/2...
-
Page 420: Conversion Table
Yarns and stitch tension Conversion table 9.5 9.5 Conversion table The following table is used for the conversion of one yarn gauge to another. The named yarn gauges mean: TEX (Tt) Grams per kilometer COTTON (NeC) Number of strands at 840 yds. per lb. WORSTED (NeW) Number of strands at 560 yds. -
Page 421: Machine Management Tools
Machine Management Tools 10.1 Machine Management Tools window 10 Machine Management Tools In our world the fast exchange of information has achieved a high level of significance. In order that the knitting machines lives up to the growing requirements, a series of auxiliary tools in the software have been taken up with the control OKC that can prove to be more efficient while working with the knitting machine and they are referred under the "Machine Management Tools"... - Page 422 Machine Management Tools Machine Management Tools window 10.1 Function Call up the "Service" window Call up "Diagnostics" window Call up "Machine Management Tools" window Keys for calling up the machine management tools Call up machine management tools: 1. In the "Main menu", tap on the "Service" key. 2.
-
Page 423: Display The Virtual Keyboard
Machine Management Tools 10.2 Display the virtual keyboard 10.2 Display the virtual keyboard For inputs that are not integrated in the user interface, an external keyboard or a virtual keyboard is required. Display the virtual keyboard Function Call up the "Service" window Call up "Diagnostics"... -
Page 424: Remote Control With The Software Vnc
Machine Management Tools Remote control with the software VNC 10.3 10.3 Remote control with the software VNC You can use the remote control VNC to control a networked machine (VNC Server) by a remote computer (VNC client) as if you were standing in front of the machine and entering data via the touch screen. -
Page 425: Activating The Remote Control Vnc On The Machine
Machine Management Tools 10.3 Remote control with the software VNC 10.3.1 Activating the remote control VNC on the machine The remote control VNC is deactivated on the knitting machine by default. Function Call up the "Service" window Call up "Diagnostics" window Call up "Machine Management Tools"... -
Page 426: Configuring The Remote Control Vnc On The Machine
Machine Management Tools Remote control with the software VNC 10.3 10.3.2 Configuring the remote control VNC on the machine ✔ The remote control VNC is activated on the machine. ✔ The "Machine Management Tools" window is displayed. 1. Tap on the "Remote operation - settings" switch. ... -
Page 427: Determine The Ip Address Of The Machine
Machine Management Tools 10.3 Remote control with the software VNC 10.3.3 Determine the IP address of the machine Function Call up the "Service" window Call up "Diagnostics" window Call up the "System info" window Call up "Main menu" Keys for determining the IP address of the machine ✔... -
Page 428: Remote Control With The Vnc Viewer
Machine Management Tools Remote control with the software VNC 10.3 10.3.5 Remote control with the VNC Viewer 1. Start the software VNC Viewer on the computer. The "VNC Viewer: Connecting Details" window opens. "VNC Viewer: Connection Details" window 2. - Page 429 Machine Management Tools 10.3 Remote control with the software VNC The "VNC Viewer: Connection Details" window opens. 8. Click on the "OK" button. Now the user interface of the selected machine gets displayed. Display of the user interface of the machine 9.
-
Page 430: Remote Control Via A Web Browser
Machine Management Tools Remote control with the software VNC 10.3 10.3.6 Remote control via a web browser When the Java Runtime Engine from Sun Microsystems Inc. is installed on the controlling computer (client), the access to a machine can be also be done through the web browser without the software VNC Viewer being installed. - Page 431 Machine Management Tools 10.3 Remote control with the software VNC The "VNC Viewer: Connection Details" window opens. "VNC Viewer: Connection Details" window 5. In order that all colors are displayed, activate the "Full (all available colours)" option on the "Encoding and Colour Level:". 6.
-
Page 432: Send Email Directly From The Machine
Machine Management Tools Send email directly from the machine 10.4 10.4 Send email directly from the machine In the "Send email" window emails can be written and sent directly from the machine. For this purpose the machine must be connected to the internet or to a network with a mail server. - Page 433 Machine Management Tools 10.4 Send email directly from the machine The "Send email" window opens. "Send email" window on the machine Inputs Explanation "Delete all entries" key (except the entry in the "from" field). "Send email" key. Sender of message. From The machine name is entered here as a sender as standard....
- Page 434 Machine Management Tools Send email directly from the machine 10.4 Inputs Explanation "Delete marked entry" key (in the "File name " field). "Mail attachment" key: Opens the "Mail attachment" window for selection of files (for example bitmaps, log files, zip files) that can be attached to the message.
- Page 435 Machine Management Tools 10.4 Send email directly from the machine Attach files to the email You can attach any files to an email which are sent with the message. In order to reduce the size of the file, the files to be attached can be zipped (compressed).
- Page 436 Machine Management Tools Send email directly from the machine 10.4...
-
Page 437: Key Word Directory
Key word directory 11 Key word directory Carriage speed Economic production and the influencing factors, 411 Additional needle bed Following machine stop, 154 Repair, 313 Outside SEN area (MSECOS), 154 Adjusting With open safety doors, 154 Carriage speed, 106 With small knots, 151 Fabric take-down, 118 Cleaning Fabric take-down menu (WMF), 121... - Page 438 Key word directory Threading up thread into yarn carrier, 73, 102 E-mail, 432 Emergency-stop switch, 48 Wrong selection (needle selection displacement), 354, 360 End of work Switch off knitting machine automatically, 85 Feed wheel Switch on and off, 147 Engaging rod, 49 Ethernet File Copying, 205...
- Page 439 Key word directory Impulse sensor, 39 Language Input unit, 52 Setting, 149 Internet address, 12 Setting (Startup), 158 Library Load and save, 196 Loading, 62 KnitLAN, 220 Lighting Knitting areas (SEN) Switching on and off, 128, 147 Adjusting, 117 Loading Knitting machine File, 196 Automatic switching off at end of work, 85...
- Page 440 Key word directory Power failure, 156 Power supply 40 V, 297 Power supply unit, 345 Needle bed Production Clean thoroughly, 282 Economic production and the influencing Needle bed parameters, 153 factors, 411 Removing, 311 Measure running time, 91 Repair, 313 Monitor running time, 87 Structure, 41 Program test, 211...
- Page 441 Key word directory Replacing Cycle counter, 124 Comb hook, 337 Date, time and time zone, 372 Drive belt (friction feed wheel), 335 Fabric take down (releasing during switch-off), Electronic card, 350 Fabric take-down (control), 119, 151 Friction roller (friction feed wheel), 335 Fabric take-down values, 118 Fuses, 351 Language, 149...
- Page 442 Key word directory Software, see also Operating system System Control Unit (SCU), 366 Advanced adjustments (Enhanced Settings), System crash Save pattern after a big fault, 382 Basic Settings, 370 System data, 407, 408 Configure network, 374 System info, 407, 408 Diagnose Control, 408 Direct installation, 386 Direct/indirect installation, 385...
- Page 443 Key word directory Winding plate, 47 Worms, 62, 186 Yarn Conversion table, 420 Economic production and the influencing factors, 411 Threading up, 69 Yarn table, 417 Yarn carrier Adjusting, 173 Call up assignment, 69 Replacing, 341 Staggering, 114 Threading up, 73, 102 Yarn carriers Moving yarn carriers manually, 72, 299 Yarn control device...
- Page 444 Key word directory...
Need help?
Do you have a question about the CMS ADF-3 and is the answer not in the manual?
Questions and answers