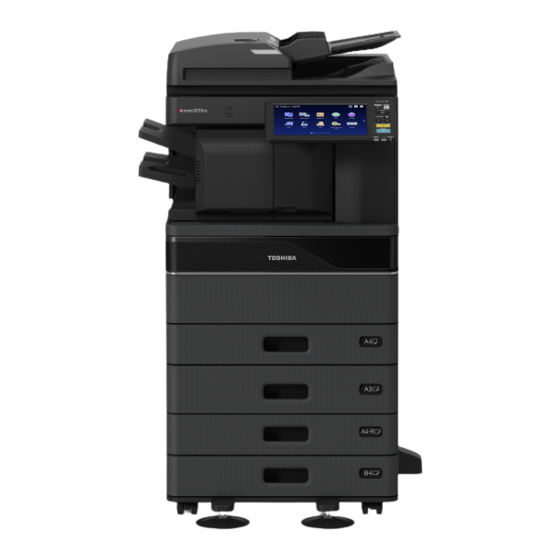
Toshiba E-STUDIO 2020ac Information
Multifunctional digital color systems / multifunctional digital systems
Hide thumbs
Also See for E-STUDIO 2020ac:
- Frequently asked questions manual (82 pages) ,
- Troubleshooting manual (104 pages)

Related Manuals for Toshiba E-STUDIO 2020ac


Summary of Contents for Toshiba E-STUDIO 2020ac
- Page 1 MULTIFUNCTIONAL DIGITAL COLOR SYSTEMS / MULTIFUNCTIONAL DIGITAL SYSTEMS Information About Equipment...
- Page 2 © 2021 Toshiba Tec Corporation All rights reserved Under the copyright laws, this manual cannot be reproduced in any form without prior written permission of Toshiba Tec Corporation.
-
Page 3: Preface
Preface Thank you for purchasing our product. This manual presents information about this equipment. How to read this manual Symbols in this manual In this manual, some important items are described with the symbols shown below. Be sure to read these items before using this equipment. -
Page 4: Recommended Toner Cartridges
Recommended Toner Cartridges For optimal printing performance, we recommend that you use genuine Toshiba toner cartridges. If you use a Toshiba-recommended toner cartridge, the following functions are available. Cartridge detection: Notifies you if the toner cartridge is incorrectly installed. -
Page 5: Table Of Contents
CONTENTS Preface..............................3 How to read this manual ............................3 Recommended Toner Cartridges ..........................4 Chapter 1 Information About Equipment Description of Components ........................8 e-STUDIO6525AC Series, e-STUDIO6528A Series ....................... 8 Control Panel ................................13 Motion Sensor ................................14 Names and Functions on the Home Screen ......................16 Using the Touch Panel............................... - Page 6 6 CONTENTS...
-
Page 7: Information About Equipment
Information About Equipment... -
Page 8: Description Of Components
Description of Components e-STUDIO6525AC Series, e-STUDIO6528A Series Front / Right Sides 13, 14 Reversing Automatic Document Feeder or Dual Scan Document Feeder Scans both sides of the original one sheet at a time. Specifications - SPECIFICATIONS OF OPTIONS USB terminal (4-pin) Connects to a computer with a commercially available USB cable. - Page 9 1.Information About Equipment 12. Front cover Open when replacing the toner cartridge. 13. Alarm lamp (Orange) Lights when a paper misfeed has occurred in the Reversing Automatic Document Feeder or Dual Scan Document Feeder. 14. Document lamp (Blue) Lights when originals are placed in the Reversing Automatic Document Feeder or Dual Scan Document Feeder. ...
- Page 10 1.Information About Equipment Cleaner Cleans the LED print head or slit glass for color printers. Troubleshooting - TROUBLESHOOTING FOR THE HARDWARE - Cleaning the Inside of the Equipment Exit tray Holds printouts. 10. Paper exit stopper Prevents ejected paper from falling. Open when you print on a larger size of paper such as A3 and LD. 11.
- Page 11 1.Information About Equipment MJ-1113 Upper receiving tray Stapling control section Hole Punch Unit MJ-6107E Front cover Sub-tray Lower receiving tray Tray holder Open the tray holder when an attempt to output paper, which has a length longer than that of A3, is made or if the paper on the upper receiving tray does not align itself neatly.
- Page 12 1.Information About Equipment Lower receiving tray Tray holder Open the tray holder when an attempt to output paper, which has a length longer than that of A3, is made or if the paper on the upper receiving tray does not align itself neatly. The output paper will be more likely to be aligned properly.
-
Page 13: Control Panel
1.Information About Equipment Control Panel Make for various operations and settings. [HOME] button Displays the home screen. P.16 “Names and Functions on the Home Screen” [POWER] button Turns the power on or off. MAIN POWER lamp Turns on when the power cable is connected. [ENERGY SAVER] button Enter or recover from energy saving mode. -
Page 14: Motion Sensor
1.Information About Equipment Adjusting the angle of the control panel You can adjust the angle of the control panel between 7 and 90 degrees from the horizontal position. Be careful not to catch your hands in the gap between the equipment and the control panel. This could cause an injury. - Page 15 1.Information About Equipment The sensing range can be changed with the switch located on the left front side of the equipment. When the switch is shifted to the upwards, the sensing range is set to close. When the switch is shifted to the downwards, the sensing range is set to far.
-
Page 16: Names And Functions On The Home Screen
1.Information About Equipment Names and Functions on the Home Screen This screen appears when you turn the equipment on or press the [HOME] button. Buttons for various functions are displayed. Recall button Register functions, templates, URLs, etc. and recall them. Home Data Sync button Synchronize the data on the home screen. -
Page 17: Using The Touch Panel
1.Information About Equipment Using the Touch Panel The touch panel supports swipe and pinch operations. Press (Tap) Lightly press buttons on the screen with your finger and lift it immediately. Swipe Press the screen with your finger and slide it in one direction. Turns pages on the home screen and scrolls up and down in a list. - Page 18 1.Information About Equipment Drag & Drop You can replace the RECALL button on the home screen. Press the button with your finger, drag it to another place, and lift your finger. Pinch (pinch and spread) Press the screen with two fingers, pinch them together or spread them apart on the screen. You can use this operation in the preview functions, etc.
-
Page 19: Turning On/Off
Turning On/Off This section explains how to turn the power on and off as well as the energy saving mode. Turning on Press the [POWER] button. The equipment starts warming up. The message is displayed to inform you that the equipment is warming up. This may take longer than normal depending on the status and condition. -
Page 20: Saving Energy When Not In Use - Energy Saving Modes
1.Information About Equipment When turning the equipment back on after turning it off, wait for approximately 30 seconds. Saving energy when not in use – energy saving modes – The following modes are available; Automatic Energy Save mode, Sleep mode, and Super Sleep mode. The table below shows the procedures to switch modes manually and conditions under which it enters into or recovers from each mode. - Page 21 1.Information About Equipment For the European version Contact your service representative to change the default settings. When the set time for switching to the Automatic Energy Save mode is the same as the Sleep mode or Super Sleep mode, the equipment enters into the Sleep mode or Super Sleep mode. If an original is placed on the original glass during energy saving mode, the size is not detected even when the equipment recovers from this mode.
-
Page 22: Items Included With This Equipment
Items Included with this Equipment The following items are included with the equipment. Check that you have them all. Contact your service technician or representative if any are missing or damaged. Items included with this equipment Describes the necessary precautions for use. Read this booklet first. Safety Information Describes the basic operations of the equipment. -
Page 23: Advanced Applications
Advanced Applications Various applications are available to enhance the functionality of your equipment. The availability of applications varies by region. For details, contact your service technician or representative. Applications available for this equipment Through the use of Google Drive (the cloud service of Google), you can upload scan e-BRIDGE Plus for Google data from this equipment to Google Drive, and can download and print a file in Drive... -
Page 24: Applications Available For Use In An Ios/Android Mobile Device
1.Information About Equipment Applications available for use in an iOS/Android mobile device Through an iOS or Android terminal, you can perform printing or scanning in this e-BRIDGE Print and Capture equipment. 24 Advanced Applications... -
Page 25: Options
Options The following are sold separately, and upgrade the performance of the equipment. For details, contact your service technician or representative. e-STUDIO6525AC Series, e-STUDIO6528A Series e-STUDIO2020AC/2520AC e-STUDIO2020AC/2520AC, e-STUDIO2528A/3028A e-STUDIO2525AC/3025AC/3525AC/ 4525AC/5525AC/6525AC, e-STUDIO3528A/4528A/5528A/6528A e-STUDIO2525AC/3025AC/3525AC/ 4525AC/5525AC/6525AC, e-STUDIO2528A/3028A/3528A/4528A/ 5528A/6528A e-STUDIO2020AC/2520AC/2525AC/ 3025AC/3525AC/4525AC/5525AC/6525AC, e-STUDIO2528A/3028A/3528A/ 4528A/5528A/6528A e-STUDIO2020AC/2520AC, e-STUDIO2525AC/3025AC/3525AC/4525AC, e-STUDIO2528A/3028A/3528A/4528A... - Page 26 1.Information About Equipment 11. Large Capacity Feeder (KD-1073) Allows you to feed up to 2000 sheets (80 g/m or 20 lb. Bond) of A4 or LT paper. 12. Additional Drawer Module (MY-1052) This can be added to the Paper Feed Pedestal. 13.
-
Page 27: Using The Accessible Arm
1.Information About Equipment External Interface Enabler (GS-1020) Allows you to use the EWB function. Unicode Font Enabler (GS-1007) Allows you to print from the SAP environment using Unicode font. Multi Station Print Enabler (GS-1090) Allows you to use the Multi Station Print function. USB Hub (GR-1420) Allows you to add a USB port to connect a USB storage device. -
Page 28: Using The Accessory Tray
1.Information About Equipment Using the Accessory Tray You can use an accessory that weighs up to 3 kg (6.6 lb.) with a width of up to 236 mm (9.29″), a depth of up to 125 mm (4.92″), and a height of up to 15 mm (0.59″). ... -
Page 29: Logging In
Logging in When the equipment is controlled under department or user management, you can perform copying and other functions by following the procedure below to log in. Department management Restricts users or manage copy volumes allowed for an individual group or department in your company. When the equipment is controlled under the department code, turn the power on and enter the code. - Page 30 1.Information About Equipment After the operation To prevent unauthorized use of the equipment, log out following the procedure below. Perform either of the operations below. - Press the [ACCESS] button on the control panel. - Press the [FUNCTION CLEAR] button on the control panel twice. On the confirmation screen, select [Yes].
-
Page 31: Confirming Job Statuses Of Printing/Copying/Scanning/Faxing
Confirming Job Statuses of Printing/Copying/Scanning/Faxing You can confirm print/copy/scan/fax jobs in progress or ones in waiting on the touch panel. Also, you can delete, pause or resume jobs in waiting, and change their order. You can also confirm the history of jobs performed, the status of drawers and the amount of toner remaining in the toner cartridges. -
Page 32: Confirming Jobs In Progress Or Ones In Waiting
1.Information About Equipment Confirming jobs in progress or ones in waiting You can confirm the jobs in progress or the ones in waiting on the touch panel. To view them, press [Job Status]. Press the job type you want to check on the [Jobs] tab. The job list appears. - Page 33 1.Information About Equipment Deleting jobs You can delete jobs that you no longer need. Select the desired job on the job list, and then press [Delete]. You can select more than one job. Press [Delete]. The job is now deleted. Confirming Job Statuses of Printing/Copying/Scanning/Faxing 33...
- Page 34 1.Information About Equipment Pausing jobs All print jobs can be held in the queue (Pausing). Press [All Pause] on the job list. Resuming the paused job Press [All Resume]. Select a job whose status is “Wait” and press [Pause]. The selected job can be paused. To resume the paused job, press [Resume].
- Page 35 1.Information About Equipment Changing the job order You can change the job order. Jobs which are stopped or paused cannot have their order changed. Enabling and disabling can be switched for interrupting jobs. For details, see the references below: User Functions - SETTING ITEMS (Admin) - General - Setting the job control TopAccess - [Administration] - [Setup] Item List - General settings - Setting up Job Control Select the desired job on the job list, and then press [Interrupt/Priority].
- Page 36 1.Information About Equipment Confirming the information of a skipped job Jobs may not be performed for the reason including the shortage of specified paper or staples. These will be automatically skipped and the next job will be performed (Job Skip function). Check on the touch panel how you can recover the suspended jobs.
-
Page 37: Confirming Job History
1.Information About Equipment Confirming job history You can confirm the history of jobs performed on the touch panel. Press [Job Status] > the [Log] tab. Select the type of job you want to confirm. The log list appears. Copy jobs appear on the print log list as well as print jobs. Concerning fax and internet fax, Send and Receive are displayed individually. -
Page 38: Confirming The Status Of Drawers
1.Information About Equipment On the log list, you can confirm the icon of the job type, the name of the user who performed the job, the date and time the job was printed, the paper size and the number of pages or copy/print sets. To print the history displayed on [Send Log] or [Receive Log], press [Journal]. -
Page 39: Confirming Amount Of Toner Remaining
1.Information About Equipment When [Job Status] blinks When the paper in the drawer has run out during printing, [Job Status] on the touch panel blinks. In this case, press [Job Status] so that the menu for displaying the printing status will appear and the button for the drawer whose paper has run out will blink on this menu. -
Page 40: How To Back Up The Data
How to back up the data The data shown below are stored in the internal storage device in the equipment. MFP Setting User Management (User, Group, Role, Quota, Department Code, Address Book, Project Code, Home Setting) Mailbox ... -
Page 41: Index
INDEX Original glass ..............9 Original scale ..............10 [ACCESS] button.............. 13 Additional Drawer Module..........8 Alarm lamp ..............9, 13 Paper feed cover..............8 Applications..............23 Paper Feed Pedestal ............8 Automatic duplexing unit ..........8 Paper size indicator............8 Platen sheet............... - Page 42 42 INDEX...
- Page 43 FC-2020AC/2520AC FC-2525AC/3025AC/3525AC/4525AC/5525AC/6525AC DP-2528A/3028A/3528A/4528A/5528A/6528A...
- Page 44 MULTIFUNCTIONAL DIGITAL COLOR SYSTEMS / MULTIFUNCTIONAL DIGITAL SYSTEMS Information About Equipment 1-11-1, OSAKI, SHINAGAWA-KU, TOKYO, 141-8562, JAPAN OME21001600 R210220X5200-TTEC © 2021 Toshiba Tec Corporation All rights reserved Ver00 F1 Issued in Dec. 2021 Patent; http://www.toshibatec.com/en/patent/...
Need help?
Do you have a question about the E-STUDIO 2020ac and is the answer not in the manual?
Questions and answers
請問如何掃描不在已設定尺寸之文件?例如長85cm、闊120cm的文件。