Table of Contents

Subscribe to Our Youtube Channel
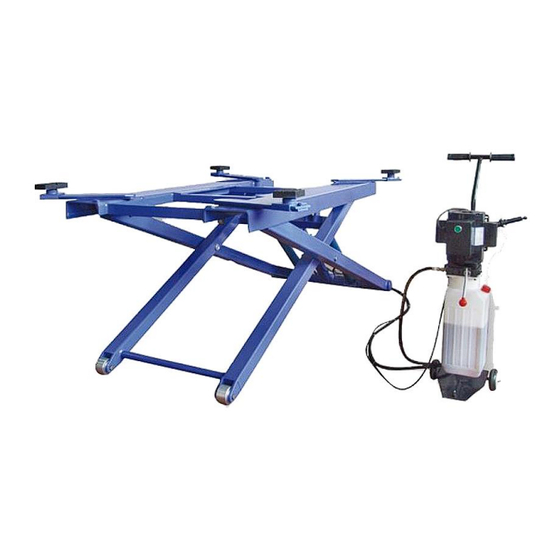
Related Manuals for Castex QJY-S3


Summary of Contents for Castex QJY-S3
- Page 1 Scissor lift QJY-S3 TO HELP PREVENT SERIOUS INJURY AND / OR DEATH, READ AND UNDERSTAND ALL WARNINGS AND INSTRUCTIONS BEFORE USE. Autoryzowany dystrybutor: CASTEX Anna Bednarz ul. Ludwikowo 2C 85-502 Bydgoszcz www.castex.pl...
-
Page 2: Table Of Contents
Scissor Lift QJY-S3 ONTENTS 1 Safety ........................3 Introduction .......................... 3 Work area..........................3 Personal safety ........................3 Tool use and care......................... 3 Servie ..........................4 Electrical ..........................4 1.6.1 Electrical safety ..................... 4 1.6.2 Grounding ......................5 1.6.3... -
Page 3: Safety
Scissor Lift QJY-S3 1 Safety Introduction Thoroughly read this manual before operating the lift and comply with the requirements of safety instructions. Always display the manual in a conspicuous location. Personal injury and property damage incurred due to non-compliance with these safety instructions are not covered by the product liability regulations. -
Page 4: Servie
Scissor Lift QJY-S3 and must be repaired or replaced. Disconnect the Power Cord Plug from the power source before making a n y adjustments, changing accessories, or storing the power equipment. Such preventive safety measures reduce the risk of starting the equipment accidentally. -
Page 5: Grounding
Scissor Lift QJY-S3 Do not expose power tools to rain or wet conditions. Water entering a p o w e r tool will increase the risk of electric shock. Do not abuse the Power Cord. Never use the Power Cord to carry the tools o r pull the Plug from an outlet. -
Page 6: Extension Cords -115Volt
Scissor Lift QJY-S3 FIGURE A 1.6.3 Extension cords -115volt 115 volt Double Insulated power equipment can use either a two or t h r e e wire 115 volt extension cord. As the distance from the supply outlet increases, you must use a h e a v i e r gauge extension cord. -
Page 7: Symbology
Scissor Lift QJY-S3 REQUIRED MINIMUM EXTENSION CORD GAUGE-115 Volt NAMEPLATE EXTENSION CORD LENGTH AMPERES (At Full Load) FEET FEET FEET FEET FEET 0-2.0 2.1-3.4 3.5-5.0 5.1-7.0 7.1-12.0 12.1-16.0 16.1-20.0 Based on limiting the line voltage drop to five volts at 150% of the rated amperes. -
Page 8: Specific Safety Rules
Scissor Lift QJY-S3 Specific safety rules DANGER! Make sure you know the weight of the vehicle you a r e going to lift before using the Scissor Lift. Do not exceed the maximum lift capacity (6,000) pounds at 48” elevation) for the scissor lift. Overloading Scissor Lift could cause personal injury and/or property damage. - Page 9 Scissor Lift QJY-S3 Never leave the scissor lift unattended when the lift is under a l o a d . Whenever the scissor lift is under a load there is a very large amount of force that has been stored in the Outside/Inside Scissors (24B,25B) which must be controlled until the load is relaxed.
-
Page 10: Product Specifications
Scissor Lift QJY-S3 factors which cannot be built into this product, but must be supplied by the operator. Environmental condition and specifications 2.1 Ambient temperature of normal operation The normal operating temperature of the equipment is 5℃ ~ +40℃. The equipment operates normally at 30% ~ 80% RH without condensation. -
Page 11: To Attach The Hydraulic Pump To The Scissor Lift
Scissor Lift QJY-S3 3. Make sure to allow a minimum space of 14 feet in front and behind the scissor lift to accommodate all vehicles. Certain allowance should be made for special vehicle requirements or unusual floor plans. To attach the Hydraulic Pump to the Scissor Lift 1. -
Page 12: To Fill The Oil Tank With Hydraulic Oil
Scissor Lift QJY-S3 3. One end of the brake steel cable (10B) has been pre-attached to the scissor lift by the manufacturer. The brake lever assembly (13B) is located on the remaining end of the brake steel cable, and must be attached to the handle (11B) of the dolly. To do so, slide the brake lever assembly onto the handle. -
Page 13: To Position, Lift And Lower A Vehicle On The Scissor Lift
Scissor Lift QJY-S3 through 11C) is engaged. CAUTION! If the safety lock assembly does not engage, fully lower the scissor lift and have a qualified service technician immediately repair the safety lock assembly. ( See Figure E and F.) 7. Should the safety lock assembly (1C through 11C) not operate as described in step 6, raise the scissor lift slightly to take pressure off the safety catches. - Page 14 Scissor Lift QJY-S3 5. Move the plates (42B) outward, and position the rubber saddles (39B) to contact the vehicle lifting points. (See Figure F and G.) WARNING! Do not lift the vehicle if you cannot establish secure and level lifting points.
-
Page 15: Inspection, Maintenance And Cleaning
Scissor Lift QJY-S3 12. Move the rubber saddles (39B) and plates (42B) inward, out of the path of the vehicle. (See Figure F.) 13. Disengage the vehicle parking brake. Start the vehicle’s engine, and drive the vehicle off the scissor lift slowly and carefully. -
Page 16: Iagram
Scissor Lift QJY-S3 6 Diagram Assembly diagram A PART# DESCRIPTION QTY. PART# DESCRIPTION QTY. Motor Safety Valve Assy Nut(M20*1.5) Valve Seat Pressure Relief Valve Handle 1 Gear Pump Oil Fill Cap Bolt Release Valve Assy Oil Tank Check Valve Assy... -
Page 17: Assembly Diagram B
Scissor Lift QJY-S3 Assembly diagram B PART# DESCRIPTION QTY. PART# DESCRIPTION QTY. Table Cylinder Pin Retaining Ring(18) Scissor Pin Locking Nut (M20) Outer Scissor Oil Pipe Connector (3) Inner Scissor Branch Inlet Pipe Wheel Pin Oil Pipe Connector (2) Large Wheel... -
Page 18: Assembly Diagram C
Scissor Lift QJY-S3 Assembly diagram C PART DESCRIPTION PART DESCRIPTION Bolt (M8) Spring Steel Wire Cable Lock Block Lock Sheath Lock Pole Washer (12) Lock Wheel Bolt (M12) Nut M (8) NOTE: Some parts are listed and shown for illustration purpose only, and are not available individually as replacement parts. - Page 19 QJY-S3 Dear Customer! CASTEX would like to thank you and congratulate you on your purchase. Please be advised that the product purchased by you is guaranteed 12 months from the date of purchase. This Warranty Card is valid only with the proof of sale or the signature and stamp of the seller.
- Page 20 Scissor Lift QJY-S3 Service Repairs Lp. Repair description Date, signature and stamp *) The owner of the equipment submitting claims under the warranty is obliged to provide personal data, in accordance with Art. 23 section 1 point 3 of the Act on the Protection of...
- Page 21 Scissor Lift QJY-S3 PROTOCOL OF RECEIPT OF GOODS I hereby confirm the receipt of the device according to the following specifications on........The received device is complete and in accordance with the order. Contract specifications Pieces Date Stamp and signature …...
- Page 22 Scissor Lift QJY-S3 Warranty conditions CASTEX, hereinafter referred to as the Guarantor, provides a guarantee for the efficient operation of the above-mentioned equipment within 12 months from the date of purchase. This guarantee includes: Spare parts Structural elements of the device Arrival of an authorized CASTEX service technician to remove defects.
- Page 23 Recipient is obliged to immediately report this fact to CASTEX or the Distributor. You should write a damage report with the Courier delivering the device at the time of delivery.
Need help?
Do you have a question about the QJY-S3 and is the answer not in the manual?
Questions and answers