Advertisement
- 1 Controls and Indicators
- 2 Introduction
- 3 Operation and Setup
- 4 Special Features
- 5 Installation
- 6 Troubleshooting
- 7 Videos
- 8 Documents / Resources
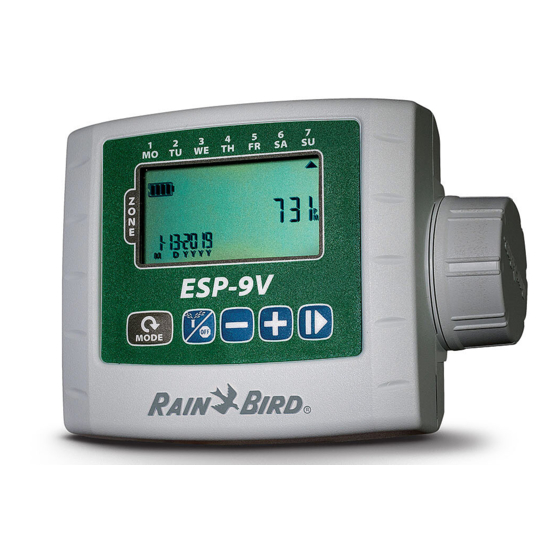
Controls and Indicators

- Battery Indicator
Shows the remaining battery life - Mode Button
Cycles through Operating Modes ![]() Button
Button
Cycles through Manual Watering, Off and Auto mode![]() Button
Button
Advance to the next setting- One-touch Manual Start
Water all zones immediately according to their scheduled run times - + or – Buttons
Adjust settings
 Button
 Button
Operating Modes
- Set Date - Set the current Date.

- Set Time - Set the current Time of day.

- Set Start Times - Set up to six Start Times for each Zone.

- Select Watering Days - Set Watering Day options (Custom, Cyclic, Even or Odd) for each Zone.

- Set Run Times - Set Run Times for each Zone.

- Seasonal Adjust - Increase or decrease watering duration (Run Times) by a percentage for all Zones.

- Auto Run - Watering occurs automatically according to programmed irrigation schedules.

Manual Watering / Off
- Manual Watering - Start watering immediately for ALL Zones or for any ONE Zone.

- Off - Stops any active watering and disables automatic irrigation.


Introduction
Thank you for choosing Rain Bird's ESP-9V Battery-Operated Controller. The ESP-9V is designed to provide worry-free automatic irrigation in the absence of AC power or in areas where installing new field wires is not practical.
Operation and Setup
Contractor Rapid ProgrammingTM
At initial programming, the controller automatically copies the start times and watering days from Zone 1 to all other zones.
 NOTE: If multiple zones have the same or overlapping watering times, the controller will water the zones in sequence (multiple zones will not run at the same time).
NOTE: Changes to a zone's schedule made after initial programming will only affect the zone being modified.
NOTE: You may re-activate the Contractor Rapid ProgrammingTM feature by resetting factory defaults.
Set Date
Press the MODE button until the Set Date screen is displayed. The last two digits of the year will begin to flash.

- Press + or – to set the year (YYYY); then press
![]()
- Press + or – to set the month (M), press
![]()
- Press + or – to set the day (D).
- Press the MODE button again to enter the Set Time screen.


Set Time
Press the MODE button until the Set Time screen is displayed.

- Press + or – to set the hour (ensure that AM/PM setting is correct); then press
![]()
- Press + or – to set the minutes.
- Press the MODE button again to enter the Watering Start Times screen.
Set Zone Watering Start Times
Press the MODE button until the Watering Start Times screen is displayed.

- Press + or – to select the Zone Number; then press
![]()
- Press + or – to set the 1st Start Time for the selected Zone; then press
![]()
- Press + or – to set the next Start Time, or press
![]() again to select another Zone.
again to select another Zone.
![]() REPEAT to set additional Start Times, up to six for each Zone.
REPEAT to set additional Start Times, up to six for each Zone. - Press the MODE button again to enter the Watering Days screen.
 REPEAT to set additional Start Times, up to six for each Zone.
NOTE: Adjustments are set in 10 minute increments.
NOTE: To remove a Start Time, press + or – until -:- (OFF) is displayed. (-:- is just before 12:00 AM.)
NOTE: The controller will not water multiple zones at the same time. If two or more zones have the same (or overlapping) start times, the controller will wait until the first zone is finished watering before starting the rest of the zones in sequence. This method is called "start time stacking".
Set Zone Watering Days
Press the MODE button until the Watering Days screen is displayed.

Custom Days
- Press + or – to select the Zone Number; then press
![]()
- Press + (to enable) or – (to disable) the blinking Selection Day.
The cursor will automatically advance to the next Selection Day.
![]() REPEAT to set each day of the week.
REPEAT to set each day of the week.
![]() REPEAT for additional Zones as desired.
REPEAT for additional Zones as desired. - Press the MODE button again to enter the Watering Run Times screen.
 REPEAT to set each day of the week.
Watering Day Options
Additional Watering Day options are also available:
- Cyclic Days (1-30)
- Odd Days (Will NOT water on the 31st of the month)
- Even Days
To change a zone's watering day type, simply press the + and – buttons at the same time while setting Zone Watering Days.

Cyclic Days

- Press + or – to select the Zone Number; then press
![]()
- Press + or – button to set the number of days in the watering cycle; then press
![]()
- Press + or – to set the next Watering Day; then press
![]()

Odd Days

- Press + or – to select the Zone Number; then press
![]()
- When ODD 1,3,5...29 is blinking, press
![]()
NOTE: ODD schedules will not water on the 31st of the month.
Even Days

- Press + or – to select the Zone Number; then press
![]()
- When EVEN 2,4,6...30 is blinking, press
![]()

Set Zone Watering Run Times
Press the MODE button until the Watering Run Times screen is displayed.

- Press + or – to select the Zone Number; then press
![]()
- Press + or – to set the Run Time (in minutes); then press
![]()
![]() REPEAT for additional Zones as desired.
REPEAT for additional Zones as desired.
![warning]() NOTE: Run Times can be set between 1 to 240 minutes.
NOTE: Run Times can be set between 1 to 240 minutes. - When programming is complete, press the MODE button until the AUTO RUN screen is displayed.

 REPEAT for additional Zones as desired.
Auto Run
Press the MODE button until the AUTO RUN screen is displayed.

In AUTO RUN mode, the ESP-9V will irrigate each zone per its pro grammed schedule. If any zones are scheduled to run at the same time and day, your controller will place those zones in a queue and irrigate one valve at a time, starting with the lowered numbered zone first.
NOTE: After 5 minutes of inactivity, the controller will revert to AUTO RUN mode (unless the controller is in OFF) and turn off the display. Press any key to turn the display back on.
Off
Press the  button until the OFF screen is displayed.

Selecting the OFF mode will cancel any active watering and prevent any irrigation from starting automatically.
NOTE: Select the AUTO RUN mode to resume normal operation. Programmed irrigation schedules will NOT run if the controller is left in OFF mode.
NOTE: If you intend to stop automatic irrigation only for a few days, we suggest you use the "Delay Watering" feature described.
NOTE: To re-initiate watering, press the button again to return to AUTO RUN mode.
Manual Watering
Press the button until the Manual Watering screen is displayed.

- Press + or – to select ALL Zones or ONE zone; then press
![]()
- Press + or – to set the Run Time for the selected Zones; then press
![]() to begin watering.
to begin watering.
NOTE: To water the scheduled runtime for each zone: Press – when setting manual runtime until the screen shows "SCH" MIN.
One-touch Manual Start
Water ALL zones immediately according to their previously scheduled run times:

- With the controller in AUTO RUN mode, press and hold
![]() for 3 seconds to begin watering all zones that have a programmed runtime.
for 3 seconds to begin watering all zones that have a programmed runtime.
Seasonal Adjust
Press the MODE button until the Seasonal Adjust screen is displayed.

The SEASONAL ADJUST mode allows you to increase or decrease the run times for all zones by a certain percentage (10% to 200%).
- Press + or – to increase or decrease the setting.
![warning]() NOTE: SEASONAL ADJUST applies to ALL automatic watering.
NOTE: SEASONAL ADJUST applies to ALL automatic watering.
Special Features
Delay Watering
Delay automatic irrigation for up to 9 days.
- Press the MODE button until the AUTO RUN screen is displayed. (Unit must NOT be watering.)

- Press and hold + for 3 seconds, then press + or – to select the number of DAYS to delay irrigation, up to 9 days.
- To cancel, press – until DAYS is set to 0. (Controller will revert to AUTO RUN.)
![]() SYMBOL and DAYS remaining are displayed while Rain Delay is in effect.
SYMBOL and DAYS remaining are displayed while Rain Delay is in effect.

 SYMBOL and DAYS remaining are displayed while Rain Delay is in effect.
Contractor Default Save
Save irrigation schedules for future retrieval.
- Press the
![]() button until the OFF screen is displayed.
button until the OFF screen is displayed. - Press and release both
![]() and + buttons at the same time.
and + buttons at the same time. - The "OFF" symbol will flash briefly to confirm schedules are saved.
 button until the OFF screen is displayed.
Contractor Default Restore
Restore previously saved irrigation schedules.
- Press the
![]() button until the OFF screen is displayed.
button until the OFF screen is displayed. - Press and release both + and
![]() buttons at the same time.
buttons at the same time. - The "OFF" symbol will flash briefly to confirm schedules are restored.
Factory Default Restore
Restore the controller's factory default settings.

All programmed irrigation schedules currently stored in memory will be lost. However, Contractor Default settings remain stored in separate memory and are not affected by Factory Default Restore, and can be recalled after restoring Factory Defaults.
- Press the MODE button until the Seasonal Adjust screen is displayed.
- Press and release both
![]() and
and ![]() buttons at the same time.
buttons at the same time.
Rain Sensor Bypass
Set sensor to Active or Bypass for all zones.
- Press the MODE button until the AUTO RUN screen is displayed.
- Press and release both – and
![]() buttons at the same time to toggle between OBEY and IGNORE.
buttons at the same time to toggle between OBEY and IGNORE.
![]() SYMBOL is displayed when IGNORE is selected.
SYMBOL is displayed when IGNORE is selected.
 SYMBOL is displayed when IGNORE is selected.
Installation
Valve Wiring
Wires may be extended up to 100 feet (30 meters) (18 AWG / 0.75 mm² minimum wire size) from the controller. All wire connections should be made using appropriate water-proof splice kits (not provided).
- Attach the black wires from each solenoid to the black (common) wire(s) on the ESP-9V.
- Attach one red wire from each solenoid to the appropriate zone wire on the ESP-9V.
- Connect an optional Master Valve.

NOTE: The ESP-9V can be mounted on a DC latching solenoid using the included solenoid bracket, or on a wall using the optional wall-mount bracket (Model: 9VMOUNT).

Batteries
The Rain Bird ESP-9V uses two alkaline 9-Volt batteries (not included) to operate. Your controller will function using either one or two 9-Volt batteries. Under normal conditions, the expected life is 1 year for a single battery and two years when using two 9-Volt batteries.
Replacing Batteries
- Remove the battery compartment cap.
- Install one or two 9-Volt alkaline batteries on the battery clips provided.
- Re-install the battery compartment cap.
NOTE: Do not mix new batteries with old ones. Doing so could reduce the battery life and cause the controller to stop working prematurely.
Optional Rain Sensor
- Cut the yellow loop in half and remove about 1/2" of insulation
![warning]() NOTE: Cut the yellow wire loop only when installing a rain sensor.
NOTE: Cut the yellow wire loop only when installing a rain sensor. - Connect the sensor to the terminals with waterproof connectors.
BACK OF CONTROLLER

Troubleshooting
| Problem | Possible Cause | Possible Solution |
No Display | Display is in sleep/power save mode. | Press any key to wake up display. |
| Batteries are dead. | Replace batteries. | |
Automatic irrigation not starting | Missing start time, run time or watering days. | Set start time, run time and watering days. |
| Sensor wire loop cut but no rain sensor installed. | Re-connect the sensor wires or bypass the sensor operation. | |
| Rain Delay is set. | De-activate rain delay. | |
Automatic irrigation started but | No water pressure. | Turn on main water supply. |
| Faulty wiring. | Check for open/short circuits in wiring. | |
| Faulty Solenoid. | Replace solenoid. | |
| Incompatible Solenoid. | Must use a 9V-latching solenoid (Rain Bird K80920) or other compatible DC latching solenoid. | |
Controller is watering more than | Excessive Start Times, Run Times or Watering Days. Modify Start Times, Run Times or Watering Days as desired. | |
| Seasonal adjust set. | Reduce the seasonal adjust value as needed. | |
"Manual Watering ALL" is not watering some zones or isn't available as an option | One or more zones don't have a programmed start time or run time. | Program a start time and run time for all desired zones. |
Rain Bird Corporation
6991 East Southpoint Road
Tucson, AZ 85756
EE. UU.
Tel.: (520) 741-6100
Fax: (520) 741-6522
Rain Bird International
1000 West Sierra Madre Avenue
Azusa, CA 91702
EE. UU.
Tel.: +1 (626) 963-9311
Fax: +1 (626) 852-7343
Rain Bird Europe SNC
900, rue Ampère, B.P. 72000
13792 Aix en Provence Cedex 3
FRANCIA
Tel.: (33) 4 42 24 44 61
Fax: (33) 4 42 24 24 72
Rain Bird France SNC
900, rue Ampère, B.P. 72000
13792 Aix en Provence Cedex 3
FRANCIA
Tel.: (33) 4 42 24 44 61
Fax: (33) 4 42 24 24 72
Rain Bird Ibérica. S.A.
Polígono Ind. Pinares Llanos
C/ Carpinteros, 12, 2ºC
28670 Villaviciosa de Odón, Madrid
ESPAÑA
Tel.: (34) 91 632 48 10
Fax: (34) 91 632 46 45
Rain Bird Deutschland GmbH
Königstraße 10c
70173 Stuttgart
DEUTSCHLAND
Tel.: +49 (0)711 222 54 158
Fax: +49 (0)711 222 54 200
Rain Bird Sverige AB
C/O Matrisen
Stortorget 29
211 34 Malmö
Tel.: (46) 42 25 04 80
Fax: (46) 42 20 40 65
Rain Bird Türkiye
Çamlık Mh. Dinç Sokak Sk. No.4 D:59-60
34775 Ümraniye, İstanbul
TÜRKİYE
Tel.: (90) 216 443 75 23
 2015 Rain Bird Corporation
 Registered trademark of Rain Bird Corporation
www.rainbird.
www.rainbird.eu
P/N: 690235-01 EN 02JL15

VideosRain Bird ESP-9V - How to Program (video)
Documents / Resources
References
Download manual
Here you can download full pdf version of manual, it may contain additional safety instructions, warranty information, FCC rules, etc.
Advertisement


Need help?
Do you have a question about the ESP-9V and is the answer not in the manual?
Questions and answers