Advertisement

PLEASE READ BEFORE OPERATING CLEANER
- SAFETY INSTRUCTIONS
- WHAT TO EXPECT
- QUICK START
- POWER SUPPLY
- HOW TO GUIDE
- TROUBLESHOOTING
WARNINGS & SAFETY PROCEDURES
- A Ground Fault Current Interrupter (GFCI) outlet must be installed to protect your electric outlet and prevent any possible electric shock.
- The connection to the branch circuit should be consistent with local and national wiring electrical codes.
- To prevent possible electric shock hazard this unit must be connected to an RCD (Residual Current Device) with a related residual operating current not exceeding 30mA.
- Do not turn the Power Supply on, unless the pool cleaner is in the water.
- Operating the cleaner out of water will immediately cause severe damage and will result in loss of warranty.
- The Power Supply must be placed at least 12 feet / 4 meters from the pool's edge at all times! See diagram below.
- The Power Supply should not be subject to standing water, puddles or rain.
- If the cable is damaged, it must be replaced by the manufacturer's authorized service agent or a qualified and trained person in order to avoid hazards.
- To avoid a possible electrical shock, do not use this product if the floating cable appears to be damaged.
- Allow the cleaner to remain in the pool for 20 minutes following the end of its cleaning cycle. This will allow the motors to cool adequately. Following this period remove the cleaner from the pool - Do not leave the cleaner in the pool.
- Always remember to turn the power supply "OFF" and unplug it from the power outlet before removing the cleaner from the pool.
![]() Do not operate your machine while people swimming in the pool.
Do not operate your machine while people swimming in the pool.- For use in residential swimming pools only
- Before performing any troubleshooting maintenance procedures, your Cleaner should be disconnected from the Power Supply (transformer) and the Power Supply should be unplugged from the electrical outlet to prevent the possibility of personal injury or damage to your Cleaner!
OPERATION AND STORAGE TEMPERATURES:
Please be sure to always keep temperatures in mind when storing or using your pool cleaner:
- Proper Storage Temperature Ranges: 10ºC – 40ºC (50ºF – 104ºF). This will keep the motors, plastics and seals protected.
- Minimum / Maximum Usage Temperature Ranges: 13°C to 35°C (55°F to 95°F).
- Optimal Usage Temperature Ranges: 22°C and 32°C (72°F and 90°F)
USE OF THE CLEANER IN A VINYL LINER POOL:
Some vinyl liner patterns are specifically susceptible to rapid surface wear and pattern removal caused by objects coming into direct contact with the vinyl surface, including pool brushes, pool toys, floats, fountains, chlorine dispensers, and automatic pool cleaners. Vinyl liner patterns can be seriously scratched or abraded simply by rubbing the surface with a pool brush. Additionally, ink from the pattern can also rub off during the installation process or when it comes into contact with objects in the pool. The manufacturer is not responsible for, and the Limited Warranty does not cover, pattern removal, abrasion, cuts or markings on vinyl liners.


This appliance is not intended for use by persons (including children) with reduced physical, sensory or mental capabilities, or lack of experience and knowledge, unless they have been given supervision or instruction concerning use of the appliance by a person responsible for their safety. Children should be supervised to ensure that they do not play with the appliance.
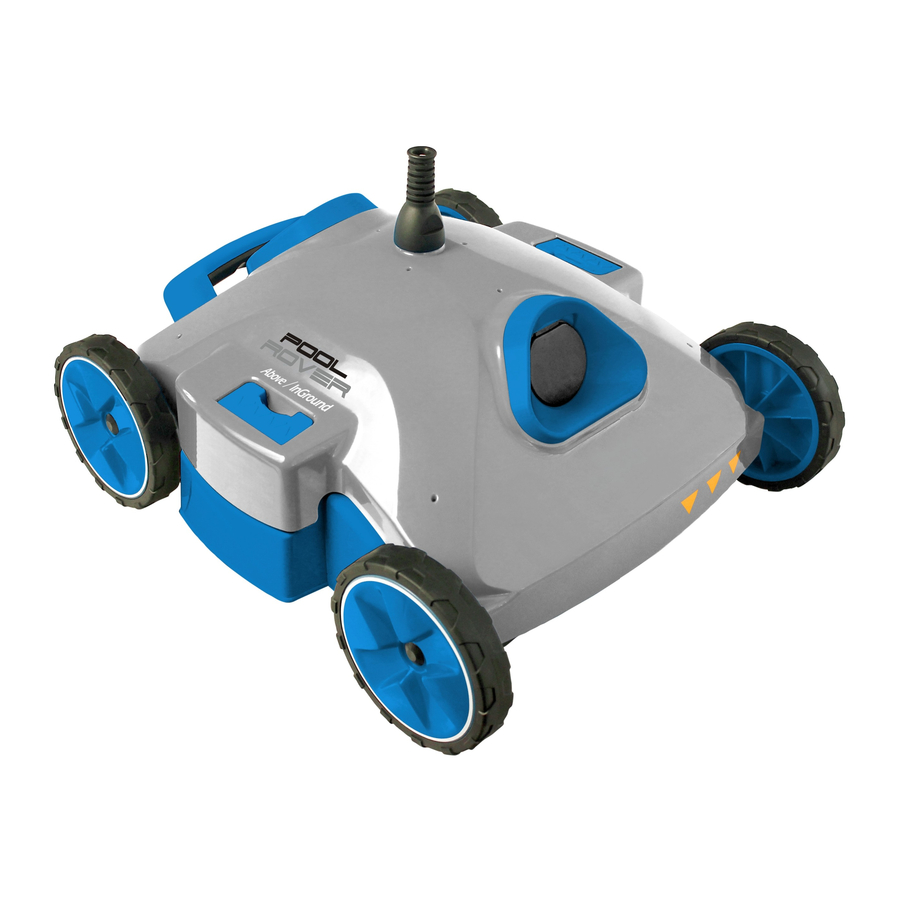
WHAT TO EXPECT
YOUR ROBOT'S TYPICAL CLEANING METHOD
Your robotic pool cleaner is designed to clean the dirt and debris from the pool bottom; and in some pools the cove and lower wall. Below is the typical pattern your cleaner will attempt in your pool. Pool dimensions and cleaning surfaces vary from pool to pool so coverage and cleaning patterns may vary.
![]() In pools that have 90 degree pool floor to wall transitions, this cleaner will clean the pool floor.
In pools that have 90 degree pool floor to wall transitions, this cleaner will clean the pool floor.![]() In pools that have a radius of at least 6 inches from the pool floor to wall, this cleaner will also clean the pool cove and lower wall.
In pools that have a radius of at least 6 inches from the pool floor to wall, this cleaner will also clean the pool cove and lower wall.
 In pools that have 90 degree pool floor to wall transitions, this cleaner will clean the pool floor.
 In pools that have a radius of at least 6 inches from the pool floor to wall, this cleaner will also clean the pool cove and lower wall.
CLEANER'S MOVEMENT
The robot uses a back/forth motion to clean your pool. Because the axle is able to be positioned on an angle, this helps the cleaner move in a wider / tighter curve on it's return path. The illustrations highlight this pattern. The amount of time it takes for the cleaner to make a pass in either direction is set and cannot be overridden. You may, however, adjust the duration of the overall cleaning cycle via the power supply.

CLEANER'S PERFORMANCE
Your cleaner is vacuuming at a rate that is over 75 gallons per minute. This means that it's picking up a lot of debris and it is recommended to keep the filter bags clean at all times. For optimal performance the filter bags should be cleaned after each cleaning cycle.
IMPORTANT: OPENING YOUR POOL
If you're opening your pool for the first time this season, we recommend that you clean your pool manually to rid the pool of the heavy debris first and then use the robotic pool cleaner to maintain your clean pool.
The reason: If your pool collects a massive amount of debris during the off-season, putting the robot in first will cause the filter bags to fill much faster which means they will need to be cleaned more often.
Sometimes when using the cleaner to vacuum an area that has heavy debris, it is normal to see a small portion of the debris leave the exit valve and go back into the pool or get pushed aside due to the small wave of water caused by the cleaner's movement. After the cleaner's cycle is complete, it is suggested to wait a few hours for the remaining debris in your pool to settle to the bottom and run the cleaner again to vacuum it up completely.
QUICK START
- Plug power supply into a GFCI outlet (Ground Fault Circuit Interrupter) (Power Supply must be 12 ft. from the pool's edge)

- Straighten out the floating cable. Then lift the flap on the power supply. Plug in the cable.

- Place the cleaner in your pool in the shallow end and turn upside down to remove any air bubbles. Let the cleaner fall to the bottom of the pool right side up.

- Use only as much cable as you need to reach the furthest wall. This will help prevent cable tangling.

- Turn power supply ON

- Set the cleaning cycle and let the cleaner go!


*See 'How To' section for pool coverage and cable tangling solutions.
POWER SUPPLY OPERATION
STANDARD POWER SUPPLIES
Your cleaner is equipped with one of the power supplies illustrated in this section

(A78002)

(A78080)
- Press this button first to activate the power supply This button turns the power supply ON / OFF.

- Press the SELECT Button after turning the power supply ON. The Select button activates the Large Pool / Small Pool cleaning cycles. When the cleaning cycle is running, the indicator light will stay lit on either Large Pool or Small Pool. (solid light)
SMALL POOL = 1 HOUR SHUT-OFF
LARGE POOL = 2 HOUR SHUT-OFF


(A7176DC)
Press the switch into the ON position. The light will illuminate red on the switch.
The cleaning cycle will run a for two (2) hours and automatically turn off when complete.
STANDARD POWER SUPPLY + EXTERNAL RUN BUTTON FEATURE
(select models)

(A78003)
If your power supply has an EXTERNAL RUN button, then it is capable of connecting to any *external timer. It is recommended to do the following (in order) to run this feature:
- Connect the external timer to your GFCI outlet, then the power supply to the external timer.

- Turn the power supply ON

- Press the SELECT button for either the Large Pool or Small Pool cycle.

- After the cleaner starts, press the EXTERNAL RUN button and the light for the cleaning selection you've made should now be blinking. This indicates the cleaning cycle will now perform the pre-selected 1 or 2 hour program at the programmed start time which your external timer is set to run.


To exit this mode, simply press the EXTERNAL RUN button again and the cleaning cycle durations will be set to their original factory settings. The light should stay continuous and not blink anymore.
*Please note that the external timer is not included with the cleaner and must be purchased separately.
 Blinking Light: ACTIVATED
 Solid Light: DE-ACTIVATED
HOW TO...
ENSURE POOL COVERAGE & PREVENT CABLE TANGLING
To change the angle and direction of the cleaning path simply alternate the pins located underneath the bottom of the cleaner. We recommend to change the direction every cleaning cycle to ensure the cleaner is covering the whole pool as well as to prevent cable tangling.


Adjustable Pin


Fixed Pin

CLEAN THE FILTERS
- ALL MODELS
Push tabs down and outward. This will remove the cover and expose the filter *bags.(*Select models have baskets)

- FILTER BAG MODELS
Remove filter bags from inside cleaner by gently pulling on the elastic band around the suction ports. Turn bag inside out.

- FILTER BASKET MODELS
Press in tab on side of basket to expose the inside of the compartment.

- FILTER BAG MODELS
Pull tabs to undo Velcro® and turn the filter bag inside out to ensure a thorough cleaning.

- ALL MODELS
Use a garden hose to clean filter bag / basket. We recommend cleaning the filter bags after every cleaning cycle.


RETRIEVE CLEANER FROM POOL
- GENTLY pull the cable and bring the cleaner toward you.

- Should your cleaner have a Swivel: Grab cable between the cleaner and swivel. DO NOT grab swivel

- Lift cleaner by using the handle attached to the cleaner. DO NOT lift cleaner by the cable.


To avoid a possible electrical shock, do not use this product if the floating cable appears to be damaged.
CABLE DETANGLER
(Select Products)

The Detangler is a feature that will help untangle the floating cable should this occur. This feature should be used outside of the pool. Make sure that the floating cable is disconnected from the power supply! Now grab the large part of the grip on the floating cable. Using one hand, pull towards the direction that is between you and the power supply and walk away from the cleaner. As you move further from the cleaner, the floating cable will untangle itself and straighten out.
If your product does not have a Detangler, please refer to Troubleshooting Section labeled "Floating Cable is Coiled Up".
EXTEND THE LIFE OF YOUR CLEANER
Your pool cleaner does a lot of work behind the scenes during the season. To help you get the most out of your product, we've listed some important tips on how to extend the life of your pool cleaning investment. Take care of your robot and it'll take care of you.
TIP #1: DO NOT DROP THE UNIT OR POWER SUPPLY!
Dropping your cleaner or power supply will cause damage and your robot will not work properly.

TIP #2: CLEAN THE FILTER BAGS!
Make sure to clean your robot's filter bags or baskets! Cleaning these keeps your robot running smoothly, quickly, prevents clogging, and keeps re-circulated water crystal clear! "My robot isn't picking up debris..." - Clean. The. Filter.

TIP #3: POOL COVERAGE / PREVENT CABLE TANGLING
Your cleaner is equipped with an adjustable pin / axle option. Adjust it in the opposite direction after every cleaning cycle. This will ensure your cleaner reaches all areas of the pool and it really helps to prevent cable tangling. "My cable keeps getting tangled..." - Adjust the pins / axle configuration.

TIP #4: GIVE IT A RINSE
After use, remove your Aquabot from the pool and rinse the outside AND inside thoroughly. Doing so will help prolong the life of the product by rinsing off any pool water that probably contains chlorine. Rinse off its internal components as well.
Note: It is recommended to leave the cleaner in the pool for 20 minutes after each cycle to let the motor cool down properly.

TIP #5: STORAGE WHEN NOT IN USE
DO NOT leave your cleaner in the pool when not in use! Store it and the power supply in a dry / shaded area. Coiling the floating cable underneath the cleaner helps keep the integrity of the cable. A shaded area prevents any prolonged exposure to the hot summer heat. Removing the cleaner from the water prevents any over-exposure to pool water during the swimming season. Even whales come up for air once in a while, so should your pool cleaner. If storing your cleaner in a box, make sure cleaner is dry.
During the winter months it is important to make sure your cleaner is completely dry and kept at proper storage temperatures ranging from 10ºC – 40ºC (50ºF – 104ºF). This will keep the motors, plastics and seals protected.

TROUBLESHOOTING
MOVES SLOWLY OR DOESN'T SEEM TO BE VACUUMING
- The solution is to make sure that the filter bag is clean.
- Check to see that the suction ports are not clogged or blocked.
ALL LED LIGHTS ARE BLINKING ON THE POWER SUPPLY
- Check to see if the unit is out of water.
- Check to see if the filter bag is stuck in the motor protection screen.
- Check to see if the propeller is stuck.
- To restart, press the power button once. Cleaning program will resume from where it left off.
THE FLOATING CABLE IS COILED UP
- Change the axle set-up. Unit is most likely turning too sharply or in the same direction for too many cycles.
- Use the Detangler to straighten out the cable (certain models).
- Let the tangled cable lay flat in the sun; this will make it more pliable and easier to straighten.
- Never place more cable in the pool than it takes to get to the other side. (TIP: Mark the cable with black electric tape at correct length)
UNIT IS NOT SUCKING UP DEBRIS
- Check to see that you've properly set-up the unit and the power supply is ON.
- Check to see if the propeller is stuck.
- Adjust the suction ports on the bottom of the unit.
- Make sure the filter bag is clean.
UNIT IS STUCK IN THE MIDDLE OF THE POOL BUT THE UNIT STILL PUMPS OUT WATER
- Check to see that there is nothing obstructing the cleaner or that the cleaner is not stuck on any loose objects in the pool.
- The suction ports are far too low to the pool bottom. Adjust as necessary.
UNIT LOOKS LIKE IT IS MOVING IN THE SAME AREA OF THE POOL AND DOES NOT CLEAN OTHER AREAS
- Change the axle set up by adjusting the pin configuration. This will help move the cleaner in a different direction to clean.
- Always start your cleaner in the shallow end of your pool.
- Select the appropriate power supply setting be it Large or Small pool (certain models).
UNIT DOES NOT COVER THE ENTIRE POOL
- Check to see that the filter bag is thoroughly clean.
- Adjust the timing cycle on the power supply (certain models).
- Check to see that the axle area is not blocked.
- Check and change your pin configuration.
For any additional questions or concerns please call 1-800-221-1750

280 Grove Avenue
Cedar Grove, NJ 07009
1-800-221-1750
www.aquaproducts.com
Documents / Resources
References

Download manual
Here you can download full pdf version of manual, it may contain additional safety instructions, warranty information, FCC rules, etc.
Advertisement


Need help?
Do you have a question about the Pura 4X and is the answer not in the manual?
Questions and answers