dji OSMO ACTION Manual
- User manual (109 pages) ,
- Safety manuallines (92 pages) ,
- Quick start manual (9 pages)
Advertisement
 Searching for Keywords
Search for keywords such as "battery" and "install" to find a topic. If you are using Adobe Acrobat Reader to read this document, press Ctrl+F on Windows or Command+F on Mac to begin a search.
 Navigating to a Topic
View a complete list of topics in the table of contents. Click on a topic to navigate to that section.
 Printing this Document
This document supports high resolution printing.
Using this Manual
Legend
 Important
 Hints and Tips
Read Before First Use
Read the following documents before using OSMO™ Action:
- User Manual
- Disclaimer and Safety Guidelines
It is recommended to watch all tutorial videos on the official DJI™ website (www.dji.com/osmo-action) or in the DJI Mimo app and read the user manual and the disclaimer and safety guidelines before using for the first time.
Downloading the DJI Mimo App

Scan the QR code or search for "DJI Mimo" on the App Store or Google Play.
The Android version of DJI Mimo is compatible with Android v6.0 and later. The iOS version of DJI Mimo is compatible with iOS v10.0 and later.
Introduction
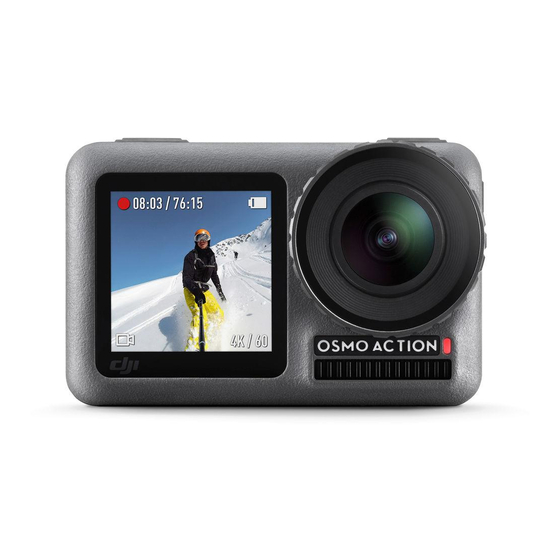
Osmo Action is a dual screen action camera equipped with DJI's latest RockSteady EIS technology and can shoot sharp 12MP photos, capture stable video at up to 4K/60fps, and is also able to record HDR video. The back screen is a hyper-responsive touchscreen that enables users to change settings while the front screen helps to take the perfect selfie. Complete with voice control, custom modes, a Quick Switch button and SnapShot feature, users can power on and take photos and record videos within a couple of seconds. Osmo Action is also waterproof, allowing it to be used at depths of up to 11 m. It is also compatible with several accessories so users can expand their creative possibilities using Osmo Action.
Overview

- Shutter/Record Button
- Status LED I
- Lens Filter Cap
- Front Screen
- Lens
- Ventilation Area
- Status LED II
- microSD Card Slot
- USB-C Port
- Cover Release Button
- USB-C Cover
- Quick Switch Button
- Power Button
- Microphone I
- Touchscreen
- Speaker
- Air Pressure Balance Hole
- Microphone II
- Battery Release Button I
- Battery Release Button II
- Battery
- The Lens filter cap and ventilation area may become hot during use. To avoid scalding, DO NOT touch.
- For the best waterproof performance, do not detach the lens filter cap unless necessary.
Attaching the Battery
The camera frame is mounted by default and must be removed before attaching the battery.

Insert the battery as shown. Press both sides of the battery to make sure it is properly inserted. Note that if the battery is properly inserted, the orange marks on either side of the battery are not visible.


Activating Osmo Action
When using Osmo Action, activation is required through DJI Mimo. Follow the steps below to activate.
- Press and hold the power button to power on.

- Enable Bluetooth on your mobile device.
- Launch DJI Mimo and tap
![]() in the top-left corner, and follow the instructions to activate Osmo Action.
in the top-left corner, and follow the instructions to activate Osmo Action.


Charging Osmo Action
Press the cover release button on the USB-C cover and slide the cover down.

To charge Osmo Action, connect a USB adapter (not included) to the USB-C port using the power cable (included). The status LEDs are solid red while charging. The battery is fully charged when the status LEDs turn off.

Charging time: approx. 1 hour 30 minutes (using a USB adapter of 5 V/2 A)*
If charging Osmo Action with the camera frame mounted, it is recommended to detach the USB-C cover for convenience. To remove, pull the USB-C cover towards the Quick Switch button until it detaches.
*Charging time is for reference only.
Operation
Button Features
Power Button

When Osmo Action is powered off, press the power button to power on.
When Osmo Action is recording or connected to DJI Mimo, press the power button to turn off the touchscreen. Press again to turn on the touchscreen. Note that if Osmo Action is recording when the touchscreen is turned off, it will continue to record.
When Osmo Action is idle while powered on and not connected with DJI Mimo, press the power button to enter sleep mode. Press again to exit sleep mode.
When Osmo Action is powered on, press and hold the power button to power off.
Shutter/Record Button

Press to take photos or to start or stop recording.
SnapShot: available when the device is powered off or in sleep mode. SnapShot mode can be set in SnapShot settings. Refer to the Operating the Touchscreen section for more information.
Quick Switch Button

In camera view, press to select the shooting mode and the Quick Switch menu will appear. Tap an icon to select a shooting mode.
In setting pages or playback, press to return to camera view.
Press and hold to switch between the front screen and touchscreen camera view.*
* If the screen is switched while recording a video, the video will stop recording and a new video recording will begin.
Operating the Touchscreen
The following instructions are only applicable to the touchscreen. They will not work on the front screen.

Swipe Down
Create/Manage Custom Mode
Tap  and tap the icon again to save the current configuration as a custom mode. Up to five custom modes can be saved. Swipe left and right to choose a saved custom mode. Tap Delete in the bottomright corner to delete a mode.
Brightness
Tap  and move the slider to adjust the brightness.
Screen Lock
Tap  to lock the screen. To unlock the screen, tap on the screen and move the slider.
Settings
Quick Actions
- Voice Control: enable voice control to use Osmo Action with voice commands. Voice commands include Start Recording, Stop Recording, Take Photo, Screen Switch, and Shut Down. English and Chinese Mandarin are supported.
- SnapShot: when Osmo Action is powered off or in sleep mode, use SnapShot to quickly power on and begin shooting. Supported shooting modes include Video, Photo, Slow Motion, HDR Video, Burst, Timed, AEB, Custom mode, and Timelapse.
- Quick Switch: use Quick Switch to quickly swap between modes, and custom settings. Shooting modes supported include Video, Photo, Slow Motion, HDR Video, Burst, Timed, AEB, Custom mode, and Timelapse.
General
- Wireless Connection: tap to check the camera name and password in Wireless Info, set the Wi-Fi Frequency, and reset the Wi-FI password and all connections in Reset Connection.
- Wind Noise Reduction: tap to enable or disable wind noise reduction.
- Sounds: choose from high, medium, low, and off.
- Grid: tap to enable or disable grid.
- Face-Oriented Exposure: when a face is detected, exposure on the face is prioritized.
- Anti-Flicker: prevent the flickering of lights by selecting the frequency according to local regulations.
- Screen Auto Sleep: tap to set the time before Osmo Action enters sleep mode.
- Auto Power Off: tap to set the time before Osmo Action powers off automatically.
- LED: turn the two status LEDs on Osmo Action on or off.
- Language: set the language to English, Simplified Chinese, Traditional Chinese, Japanese, Korean, German, or French.
- Date/Time: tap to set date and time.
- Format SD Card: tap to format microSD card.
- Factory Reset: tap to reset default settings.
- About: tap to view name, serial number, firmware version, and regulatory info.
Screen Flip
Tap  to switch the screen orientation to up, down, or automatic.
Spot Metering
Tap  to enable or disable spot metering. Tap and hold the screen to use spot metering. Tap again to enable AE lock, and tap and hold the screen to disable AE lock.
Voice Control
Tap  to enable or disable voice control.
Front Screen Settings
Tap  to switch between full screen and letterbox display.
Swipe Up
Swipe up and then swipe left or right to set parameters such as photo ratio, countdown time, and resolution. In Video mode, tap RockSteady* to enable or disable electronic image stabilization. Note that the parameters depend on the shooting mode and that RockSteady is unavailable in certain resolutions.
* RockSteady requires a firmware update.
Swipe Left
 Exposure Parameter Settings
In Auto mode, the EV and Max. ISO value can be set. The ISO value is adjusted automatically within the setting range during use.
In Manual mode, the shutter speed and ISO value can be set. Note that the Max. ISO value can only be set when the ISO value is set to auto.
 Image/Video Settings
Set white balance, select the color mode between Normal and D-Cinelike*, turn Dewarp on or off, and choose format.
* D-Cinelike provides greater data retention of color and brightness, which allows for more flexibility in post-production.
Swipe Right
Swipe right and then swipe left or right to scroll through photos and videos. Tap to playback videos. Tap the corresponding icon to add favorites or delete photos or videos. Tap  at the top left top to view photo and videos by category.
When viewing a photo, move the slider on the left side of the screen up or down to adjust the brightness. Tap the icon  in the bottom-middle to view timed and burst photos.
When viewing a video, move the slider on the left side of the screen up or down to adjust the brightness and move the slider on the right side to adjust the volume. Drag the progress bar to watch the video.
Tap
Tap the icon  on the bottom-left corner on camera view to select shooting modes.
Double Tap with Two Fingers
Double tap the touchscreen on camera view with two fingers to switch between the front and touchscreen.
Storing Photos and Videos
The footage shot on Osmo Action can be stored on a microSD card (not included). A UHS-I Speed Grade 3 rating microSD card is required due to the fast read and write speeds necessary for highresolution video data. Refer to the recommended microSD card list at www.dji.com/osmo-action for more information.
Insert the microSD card into the microSD card slot as shown.

Status LED Descriptions
There are two status LEDs on Osmo Action, which indicate the same information. The status LEDs can be turned on and off.
| Blinking Patterns | Descriptions |
| Solid green | Ready to use. |
| Off | No microSD card detected or insufficient microSD card storage. Osmo Action is powered on while charging. |
| Solid red | A USB is connected to Osmo Action or Osmo Action is powered off while charging. |
| Blinks red twice quickly | High-temperature warning, low battery level warning, battery abnormality, or microSD card abnormality (no microSD card detected, microSD card storage is full, or microSD card error.) |
| Blinks red and green alternatively | Updating firmware. |
| Blinks red for one second | Battery inserted, USB-C port connected, or Osmo Action is powering on or off. |
| Temporarily off | While taking photo. |
| Blinks once every second (Countdown: 10 s – 4 s) Blinks twice every second (Countdown: 3 s – 2 s) Solid red (Countdown: 1 s – 0 s) Temporarily red (After countdown) | Osmo Action is counting down to take a photo. |
| Blinks once every second | Osmo Action is recording a video or taking a timed photo. |
DJI Mimo App

 Camera View: tap to connect to Osmo Action. Once connected, DJI Mimo enters camera view.
 Home: tap to return to Home.
 Edit: tap to edit photos or video from Osmo Action or import and edit from a mobile device.
 Profile: register or log in to a DJI account. View works and settings, check likes and followers, send messages to other users, and connect with the DJI Store.
 Academy: tap to watch tutorials and manuals.
Camera View

- Home
![]() : tap to return to home page.
: tap to return to home page. - Wi-Fi
![]() : displays Wi-Fi connection.
: displays Wi-Fi connection. - Battery Level
![]() : displays current battery level of Osmo Action.
: displays current battery level of Osmo Action. - microSD Card Information
![]() : according to the shooting mode, displays either the remaining number of photos that can be taken or the duration of video that can be recorded.
: according to the shooting mode, displays either the remaining number of photos that can be taken or the duration of video that can be recorded. - AE Lock
![]() : tap to enable or disable AE lock after enabling spot metering.
: tap to enable or disable AE lock after enabling spot metering. - Shutter/Record Button
![]() : tap to take a photo or to start or stop recording video.
: tap to take a photo or to start or stop recording video. - Shooting Mode
Scroll to select the shooting mode. Choose between Timelapse, Slow Motion, HDR Video, Video, and Photo. - Playback
![]() : tap to preview photos and videos.
: tap to preview photos and videos. - Shooting Mode Settings
![]() : display the shooting mode settings.
: display the shooting mode settings. - Settings
![]()
* RockSteady requires a firmware update.Shooting Mode Settings Timelapse Dewarp, Format, White Balance, ISO Max, Anti-Flicker, Grid, Overexposure Alert, and Histogram Slow Motion Video Format, White Balance, ISO Max, Color, Grid, Overexposure Alert, and Histogram HDR Video Dewarp, Video Format, White Balance, Grid, Overexposure Alert, and Histogram Video Dewarp, RockSteady*, Video Format, White Balance, ISO Max, Color, Anti-Flicker, Grid, Overexposure Alert, and Histogram Photo Dewarp, Photo Format, Photo Ratio, Metering, White Balance, ISO Max, Color, Anti- Flicker, Grid, Overexposure Alert, and Histogram
General Settings: Device Management, SD Card Capacity, Format SD Card, Screen Flip, Noise Reduction, Voice Control, Voice Language, Command List, Wi-Fi Settings, Switch Wi-Fi Frequency, Firmware Version, and About. - Camera Settings
Shooting Mode Settings Timelapse Resolution and FPS, Video Frame Rate, ISO, Shutter, and EV Slow Motion Resolution and FPS, Speed, ISO, Shutter, and EV HDR Video Resolution and FPS and Video Frame Rate Video Resolution and FPS, Video Frame Rate, ISO, Shutter, and EV Photo AEB, Single Shot, Burst, Timed, ISO, Shutter, and EV
 : tap to return to home page.
 : displays Wi-Fi connection.
 : displays current battery level of Osmo Action.
 : according to the shooting mode, displays either the remaining number of photos that can be taken or the duration of video that can be recorded.
 : tap to enable or disable AE lock after enabling spot metering.
 : tap to take a photo or to start or stop recording video.
 : tap to preview photos and videos.
 : display the shooting mode settings.
Updating Firmware
The firmware of Osmo Action can be updated by using DJI Mimo or a microSD card.
Using DJI Mimo
An alert appears in DJI Mimo when new firmware is available. Follow the instructions to update the firmware.
Using a microSD Card
Download the latest firmware on the official DJI website to the root directory of a microSD card.
- Insert the microSD card and power on Osmo Action. The update starts automatically once a new firmware is detected.
- During the update, the status LED indicators blink red and green alternatively and a reminder will remain on the screen. No operation is required.
- Osmo Action restarts automatically once the update is complete.
- A microSD card is required to update firmware.
- Make sure the battery level of Osmo Action is at least 15% before updating firmware.
Maintenance
Underwater Usage Notes
- Make sure the battery and battery compartment are dry and clean before inserting the battery. Otherwise, it may affect the battery contacts and waterproofing. Make sure the battery is properly inserted during use. Note that if the battery is properly inserted, the orange marks on either side of the battery cannot be seen.
- Make sure the USB-C cover is clean and closed before using. Otherwise, it will affect the device's waterproofing ability.
- Make sure the lens filter cap is in good condition and undamaged. If there is any damage, replace it immediately. Make sure the lens filter cap and lens are dry and clean. Sharp or hard objects may damage the lens and affect the waterproofing. Make sure the lens filter cap is properly tightened during use.
- Osmo Action is not waterproof unless the battery is properly inserted, the USB-C cover is closed, and the lens filter cap is attached.
- Osmo Action can be used underwater at depths of up to 11 m. When using a waterproof case, the maximum depth underwater is 60 m.
- DO NOT jump into the water with Osmo Action.
- DO NOT use Osmo Action in a hot spring.
- Clean Osmo Action with water after using underwater. Allow it to dry naturally before using again.
Clean Notes
- Clean the lens filter cap with water, a lens cleaning pen, a lens air blower, or a lens cleaning cloth.
- Clean the lens with a lens cleaning pen, a lens air blower, or a lens cleaning cloth.
- Clean the holes on the camera and ventilation area with water if there is any object inside before usage. DO NOT poke the holes. Contact DJI support if they cannot be cleaned.
- Clean the battery and battery compartment with a clean, dry cloth.
- All the holes on Osmo Action have built-in waterproof material. DO NOT remove the waterproof material or poke the holes. Otherwise, Osmo Action will no longer be waterproof.
Specifications
| Model | AC001 |
| Wi-Fi | |
| Operating Frequency | 2.400-2.4835 GHz, 5.725-5.850 GHz* (FCC/CE/SRRC) 2.400-2.4835 GHz (MIC) |
| Transmitter Power (EIRP) | 2.4 GHz: ≤19 dBm (FCC/CE/SRRC/MIC) 5.8 GHz: ≤13 dBm (CE), ≤19 dBm (FCC/SRRC) |
| Protocol | 802.11a/b/g/n/ac |
| Bluetooth | |
| Operating Frequency | 2.400-2.4835 GHz |
| Transmitter Power (EIRP) | 4 dBm |
| Protocol | BLE 4.2 |
| Battery | |
| Capacity | 1300 mAh |
| Voltage | 3.85 V |
| Charging Limit Voltage | 4.4 V |
| Type | LiPo 1S |
| Energy | 5.005 Wh |
* 5.8 GHz is not supported in some regions. Observe local laws and regulations.
After-Sales Information
Visit https://www.dji.com/support to learn more about after-sales service policies, repair services, and support.

For online support, please scan this code with Facebook Messenger
This content is subject to change.
Download the latest version from www.dji.com/osmo-action

OSMO is a trademark of DJI.
Copyright © 2019 DJI OSMO All Rights Reserved.
VideosDJI Osmo Action - How to Setup Video
Documents / Resources
References
Download manual
Here you can download full pdf version of manual, it may contain additional safety instructions, warranty information, FCC rules, etc.
Advertisement


Need help?
Do you have a question about the OSMO ACTION and is the answer not in the manual?
Questions and answers