Advertisement

Features
Power-on
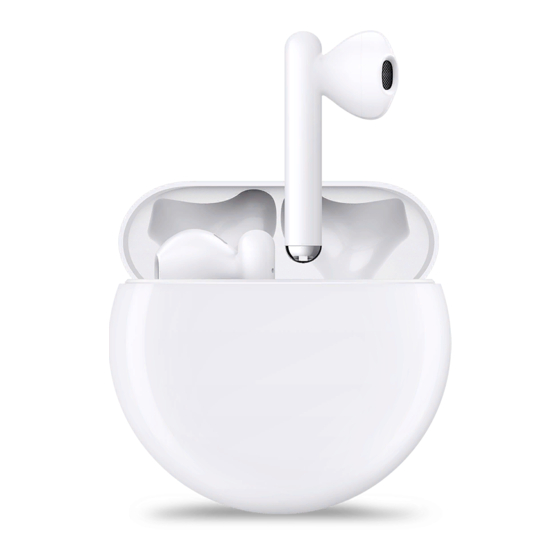
Open the charging case and press and hold the Function button for 2 seconds to power on the charging case.

Pairing
Preparations:
Ensure that the earphones are inside the charging case. Open the charging case and place your phone within 50 cm of the earphones.
Bluetooth pairing: Press and hold the Function button for 2 seconds until the inner indicator light flashes white.

- Proximity pairing: When your phone screen is on, a pairing prompt will be automatically displayed when your phone is close to the earphones. Touch CONNECT to complete the one-step pairing.
![Huawei - FreeBuds 3 - Pairing Step 2 Pairing Step 2]()
A prompt will be displayed if the pairing is successful.
![Huawei - FreeBuds 3 - Pairing Step 3 Pairing Step 3]()
 NOTE
NOTE
This feature is only supported on EMUI 10.0 or later.
Audio Control
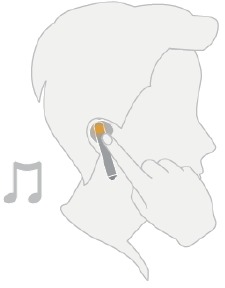
During music playback, double-tap the upper part of the right earbud handle to skip to the next song.
 NOTE
NOTE
You can set double-tap functions in the Huawei AI Life app. For details, see section 2.4 Setting Double-tap Functions.
Active Noise Cancellation
Double-tap the upper part of the left earbud handle to enable or disable ANC mode.
 NOTE
NOTE
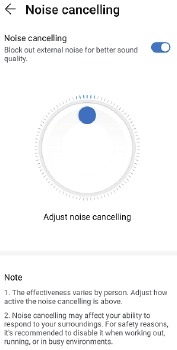
Use the Huawei AI Life app to adjust the ANC level as needed. For details, see section 2.3 ANC Settings.

Charging the Earphones
To charge the earbuds, place them in the charging case to initiate automatic charging.

Charging the Charging Case
To charge the charging case, use a Type-C charger or place it on a compatible wireless charger with the back side facing up.

Factory Settings Restoration
If the earphones fail to connect, play no sound, or cannot be found when searching on your phone, restore the earphones to their factory settings for troubleshooting:
Ensure that the earphones are inside the charging case, open the case, and press and hold the Function button for 7 seconds until the inner indicator light flashes red. When the indicator light flashes white, the earphones have been restored to their factory settings, and they will then enter Pairing mode.
Indicator Lights
- Inner indicator light

| State | Description |
| Turns green | The battery level of the earphones is higher than 60%. |
| Turns yellow | The battery level of the earphones is between 20% and 60%. |
| Turns red | The battery level of the earphones is lower than 20%. |
| Flashes white | The earphones have entered Pairing mode. |
| Flashes red | The earphones have been restored to their factory settings. |
- Outer indicator light

| State | Description | |
| The charging case is being charged | Turns green | The battery level is higher than 90%. |
| Turns yellow | The battery level is less than 90%. | |
| The charging case is not being charged | Turns green | The battery level is higher than 60%. |
| Turns yellow | The battery level is between 20% and 60%. | |
| Turns red | The battery level is lower than 20%. | |
More Functions
Installing the Huawei AI Life App
Use the browser on your phone to scan the QR code or use Huawei AppGallery to download and install Huawei AI Life. Pair with FreeBuds 3 and add it to the device list. You can then use the app to adjust the ANC level, set double-tap functions, and perform firmware updates when a new version is available.
Adding FreeBuds 3 to the Device List
Preparations:
- Download and install the Huawei AI Life app. For details, see section 2.1 Installing the Huawei AI Life App.
- Pair the FreeBuds 3 with your phone, or ensure that your FreeBuds 3 are in Pairing mode (to do this, press and hold the Function button for 2 seconds).
- Your phone is already connected to a Wi-Fi network.
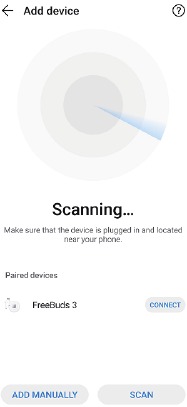
Step 1 Open the Huawei AI Life app, touch the + icon in the upper right corner, and touch Add device. The app will automatically scan all devices in the Wi-Fi network.
Step 2 In the list of scanned devices, find the earphones' device name and touch CONNECT on the right side to add this device.
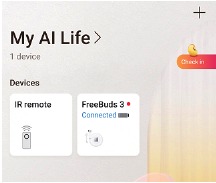
Go to the home screen of the AI Life app, touch Home to view the added devices, and use the app to adjust settings for the devices.
----End
ANC Settings
Preparations:
- Download and install the Huawei AI Life app. For details, see section 2.1 Installing the Huawei AI Life App.
- Add FreeBuds 3 to the device list in AI Life. For details, see section 2.2 Adding FreeBuds 3 to the Device List.
Step 1 Open the Huawei AI Life app. Go to the home screen of the app and touch Home to add FreeBuds 3 to the device list.
Step 2 Touch Noise cancelling to see more details.

Step 3 Then enable Noise cancelling.
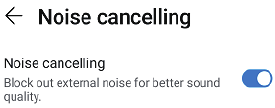
Step 4 Move the blue dot on the dial to adjust the ANC level to a more comfortable level.
----End
Setting Double-tap Functions
Preparations:
- Download and install the Huawei AI Life app. For details, see section 2.1 Installing the Huawei AI Life App.
- Add FreeBuds 3 to the device list in the AI Life app. For details, see section 2.2 Adding FreeBuds 3 to the Device List.
Step 1 Open the Huawei AI Life app. Go to the home screen of the app and touch Home to add FreeBuds 3 to the device list.
Step 2 Touch Shortcuts.
Step 3 Set the double-tap functions for the earbuds as needed.

----End
Software Update
Preparations:
- Add FreeBuds 3 to the device list in AI Life. For details, see section 2.2 Adding FreeBuds 3 to the Device List.
- Pair the FreeBuds 3 with your phone, or ensure that your FreeBuds 3 are in Pairing mode (to do this, press and hold the Function button for 2 seconds).
- Your phone is already connected to a Wi-Fi network.
Step 1 Open the Huawei AI Life app. Touch Home, and select the device FreeBuds 3.
Step 2 Touch Check for updates.
----End
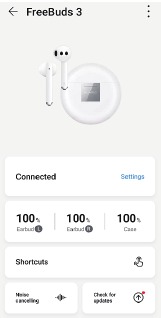
- The current version will be displayed if a new version is not available.

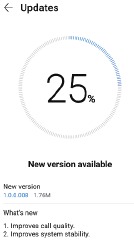
- An update prompt will be displayed if a new version is available.
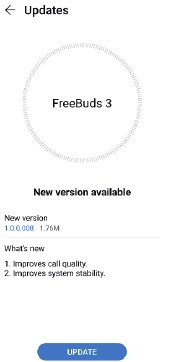
- Touch UPDATE.
![Huawei - FreeBuds 3 - Software Update Step 4 Software Update Step 4]()
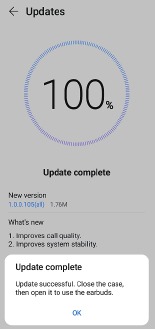
- Touch OK when the update is complete and perform the operations as prompted.
![Huawei - FreeBuds 3 - Software Update Step 5 Software Update Step 5]()
Huawei Technologies Co., Ltd.
Address:
Huawei Industrial Base
Bantian, Longgang
Shenzhen 518129
People's Republic of China
Website: http://www.huawei.com
Email: support@huawei.com
Trademarks and Permissions
 and other Huawei trademarks are trademarks of Huawei Technologies Co., Ltd.
All other trademarks and trade names mentioned in this document are the property of their respective holders.
Notice
The purchased products, services and features are stipulated by the contract made between Huawei and the customer. All or part of the products, services and features described in this document may not be within the purchase scope or the usage scope. Unless otherwise specified in the contract, all statements, information, and recommendations in this document are provided "AS IS" without warranties, guarantees or representations of any kind, either express or implied.
The information in this document is subject to change without notice. Every effort has been made in the preparation of this document to ensure accuracy of the contents, but all statements, information, and recommendations in this document do not constitute a warranty of any kind, express or implied.

Copyright © Huawei Technologies Co., Ltd. 2019. All rights reserved.
No part of this document may be reproduced or transmitted in any form or by any means without prior written consent of Huawei Technologies Co., Ltd.
VideosHuawei FreeBuds 3 Real World Test Video
Documents / Resources
References
Download manual
Here you can download full pdf version of manual, it may contain additional safety instructions, warranty information, FCC rules, etc.
Advertisement




Need help?
Do you have a question about the FreeBuds 3 and is the answer not in the manual?
Questions and answers