Yealink SIP-T54W Prime Business Phone Quick Start Guide
- Quick start manual (45 pages) ,
- Admin manual (13 pages) ,
- Quick reference user manual (2 pages)
Advertisement
PACKAGING CONTENTS
The following items are included in your package. If you find anything missing, contact your system administrator:
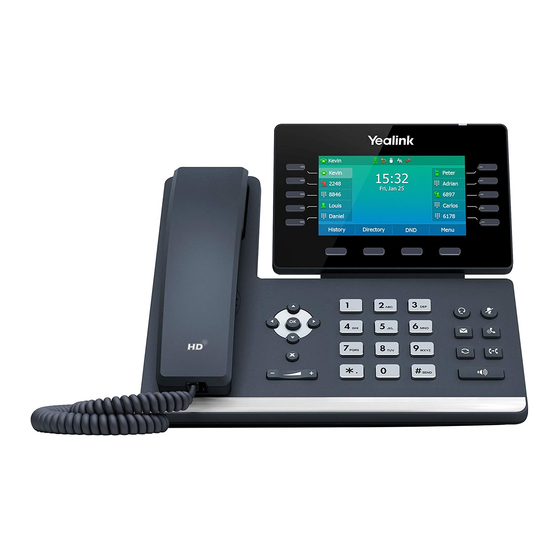
Phone

Handset

Handset Cord

Quick Start Guide

Ethernet Cable
(2m CAT5E FTP Cable)
")
Power Adapter (Optional)
")
Stand

Wall Mount Bracket (Optional)
")
Note:
- We recommend that you use the accessories provided or approved by Yealink. The use of unapproved third-party accessories may result in reduced performance.
ASSEMBLING THE PHONE
1. Attach the stand, as shown below:

Note: You can also mount the phone to a wall.
2. Connect the handset and optional headset, as shown below:

Note:
- The headset should be purchased separately.
3. Connect the USB flash driver, as shown below:

Note:
- The USB port can also be used to connect other USB devices, such as EXP50, USB headset and so on.
4. Connect the network and power, as shown below:
You have two options for network and power connections. Your system administrator will advise you which one to use.

Note:
- The IP phone should be used with Yealink original power adapter (5V/2A) only. The use of the third-party power adapter may cause the damage to the phone. If you are connecting a PC to your phone, we recommend that you use the Ethernet cable provided by Yealink. If inline power (PoE) is provided, you don't need to connect the power adapter. Make sure the hub/switch is PoE-compliant.
STARTING THE PHONE
After the IP phone is connected to the network and supplied with power, it automatically begins the initialization process. After startup, the phone is ready for use. You can configure the phone via web user interface or phone user interface.

CONFIGURING YOUR PHONE
CONFIGURING VIA WEB USER INTERFACE
Accessing the web user interface:
1. Press the OK key when the phone is idle to obtain the IP address of the phone.
2. Open a web browser on your computer, enter the IP address into the address bar (e.g., "http://192.168.0.10" or "192.168.0.10"), and then press the Enter.
3. Enter the user name (default: admin) and password (default: admin) in the login page and click Login.
Network Settings: Click on Network->Basic->IPv4 Config
You can configure the network settings in the following ways:
DHCP: By default, the phone attempts to contact a DHCP server in your network to obtain its valid network settings, e.g., IP address, subnet mask, gateway address and DNS address.
Static IP Address: If your phone cannot contact a DHCP server for any reason, you need to configure them manually.
Note:
- The IP phone also supports IPv6, but IPv6 is disabled by default.
- Wrong network settings may result in inaccessibility of the phone and may have an impact on the network performance. Contact your system administrator for more information.
Account Settings: Click on Account->Register->Account X (X=1, 2, 3...15, 16)
Parameters of the account:
| Register Status: | It shows the register status of the current account. |
| Line Active: | You can select Enabled/Disabled to enable/disable the account. |
| Label: | It is shown on the LCD screen to identify the account. |
| Display Name: | It is shown as Caller ID when placing a call. |
| User Name: | It is provided by ITSP for registration (required). |
| Register Name: | It is an authenticated ID for authentication provided by ITSP (required). |
| Password: | It is provided by ITSP for registration (required). |
| Server Host: | It is provided by ITSP for registration (required). |
Register status icons on the LCD screen:
 (Green) Registered
 (Yellow) Registering
 (Gray) Register Failed
Note:
- Check with your system administrator if any error appears during the registration process or a specific configuration is required for your registration.
CONFIGURING VIA PHONE USER INTERFACE
Configuring Network Settings:
Navigate to Menu->Advanced (default password: admin)->Network->WAN Port->IPv4.
Account Settings:
Navigate to Menu->Advanced (default password: admin)->Accounts.
Note:
- For more information on account parameters, refer to Configuring via web user interface above.
BASIC CALL FEATURES
PLACING A CALL
Using the handset:
1. Pick up the handset.
2. Enter the number, and then press the Send.
Using the speakerphone:
1. With the handset on-hook, press 
2. Enter the number, and then press the Send.
Using the headset:
1. With the headset connected, press  to activate the headset mode.
2. Enter the number, and then press the Send.
Note:
- During a call, you can alternate between the headset, hands-free speakerphone and handset modes by pressing Reject, pressing the HEADSET key, the Speakerphone key or by picking up the handset. Headset mode requires a connected headset.
ANSWERING A CALL
Using the handset:
Pick up the handset.
Using the speakerphone:
Press 
Using the headset:
Press .
Note:
- You can reject an incoming call by pressing the Reject soft key.
ENDING A CALL
Using the handset:
Hang up the handset or press the End Call soft key.
Using the speakerphone:
Press  or End Call.
Using the headset:
Press the End Call.
REDIALING A CALL
• Press  to enter the Placed Calls list, press
  or
or  to select the desired entry, and then press or Send.
• Press twice when the phone is idle to dial out the last dialed number.
MUTING AND UN-MUTING A CALL
• Press  to mute the microphone during a call.
• Press again to un-mute the call.
HOLDING AND RESUMING A CALL
To Hold a call:
Press  or Hold during an active call.
To Resume the call, do one of the following:
• If there is only one call on hold, press or Resume.
• If there is more than one call on hold, press or to select the desired call, and then press or Resume.
TRANSFERRING A CALL
You can transfer a call in the following ways:
Blind Transfer
1. Press  or Transfer during an active call. The call is placed on hold.
2. Enter the number you want to transfer to.
3. Press the B Transfer.
Performing a Semi-Attended Transfer
1. Press or Transfer during an active call. The call is placed on hold.
2. Enter the number you want to transfer to, and then press Send.
3. Press or Transfer when you hear the ring-back tone.
Performing an Attended Transfer
1. Press or Transfer during an active call. The call is placed on hold.
2. Enter the number you want to transfer to, and then press Send.
3. Press or Transfer when the second party answers.
FORWARDING A CALL
To enable call forward:
1. Navigate to Menu->Features->Call Forward.
2. Select the desired forward type:
Always Forward----Incoming calls are forwarded unconditionally.
Busy Forward----Incoming calls are forwarded when the phone is busy.
No Answer Forward----Incoming calls are forwarded if not answered after a period of time.
3. Enter the number you want to forward to. For No Answer Forward, press  or
or  to select the desired ring time to wait before forwarding from the After Ring Time field.
4. Press Save to accept the change.
INITIATING A CONFERENCE CALL
1. Press Conference during an active call. The call is placed on hold.
2. Enter the number of the second party, and then press Send.
3. Press Conference again when the second party answers. All parties are now joined in the conference.
4. Press End Call to disconnect all parties.
Note:
- You can split the conference call into two individual calls by pressing the Split.
CONFIGURING AND USING SPEED DIAL
To configure a speed dial key:
1. Navigate to Menu->Features->Dsskey.
2. Select the desired DSS key, and then press Enter.
3. Select Speed Dial from the Type field, select the desired line from the Account ID field, enter a label in the Label field, enter the number in the Value field.
4. Press the Save to accept the change.
To use the speed dial key:
Press the speed dial key to dial out the preset number.
LISTENING TO VOICE MAILS
Message waiting indicator on the idle screen indicates that one or more voicemail messages are waiting at the message center. The power indicator LED slowly flashes red.
To listen to voice messages:
1. Press  or Connect.
2. Follow the voice prompts to listen to your voicemail messages.
CUSTOMIZING YOUR PHONE
MANAGING CALL HISTORY
1. Press History.
2. Press or to select an entry from the list.
2. Do the following:
• Press Send to call the entry.
• Press Delete to delete the entry from the list.
• Press Option, you can do the following:
- Select Detail to view detailed information about the entry.
- Select Add to Contact to add the entry to the local directory.
- Select Add to Blacklist to add the entry to the blacklist.
- Select Delete All to delete all entries from the list.
MANAGING CONTACT DIRECTORY
Adding a contact:
1. Press Directory, and then select All Contacts.
2. Press Add to add a contact.
3. Enter a unique contact name in the Name field and contact numbers in the corresponding fields.
4. Press Save to accept the change.
Editing a contact:
1. Press Directory, and then select All Contacts.
2. Press or to select the desired contact, press the Option and then select Detail from the prompt list.
3. Edit the contact information.
4. Press Save to accept the change.
Deleting a contact:
1. Press the Directory, and then select All Contacts.
2. Press or to select the desired contact, press the Option and then select Detail from the prompt list.
3. Press OK when the LCD screen prompts "Delete selected item?".
Note:
- You can add contacts from call history easily. For more information, refer to Call History above.
VOLUME ADJUSTMENT
• Press  to adjust the volume.
SETTING RING TONES
1. Navigate to Menu->Basic->Sound->Ring Tones.
2. Press or to select Common or the desired account and then press Enter.
3. Press or to select the desired ring tone.
4. Press Save to accept the change.
Regulatory Notices


Technical Support
Visit Yealink WIKI (http://support.yealink.com/) for the latest firmware, guides, FAQ, Product documents, and more. For better service, we sincerely recommend you to use Yealink Ticketing system (https://ticket.yealink.com) to submit all your technical issues.

YEALINK (XIAMEN) NETWORK TECHNOLOGY CO., LTD.
Web:
www.yealink.com
Copyright © 2018 YEALINK (XIAMEN) NETWORK TECHNOLOGY CO., LTD. All rights reserved.

VideosYealink SIP T54W 10 Line VOIP Phone Unboxing & Review Video
Documents / Resources
References
Yealink Support
Yealink Ticket
Yealink | UC&C terminal, video collaboration, conference phone, IP phone
Download manual
Here you can download full pdf version of manual, it may contain additional safety instructions, warranty information, FCC rules, etc.
Download Yealink SIP-T54W Prime Business Phone Quick Start Guide
Advertisement


Need help?
Do you have a question about the SIP-T54W and is the answer not in the manual?
Questions and answers