Table of Contents
Advertisement
Available languages
Available languages
Quick Links
Advertisement
Table of Contents

Related Manuals for Ancona AN-4808


Summary of Contents for Ancona AN-4808
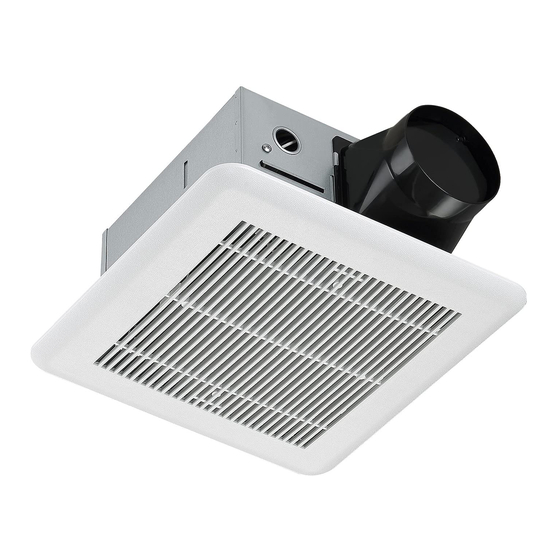
- Page 1 Bathroom exhaust fan User Manual & Installation Instructions IMPORTANT SAFETY INSTRUCTIONS Carefully read the important information regarding installation, safety and maintenance. Keep these instructions for future reference. MAAN4808-01 2020-07-17...
-
Page 2: Safety Information
Safety Information READ AND SAVE THESE INSTRUCTIONS WARNING — TO REDUCE THE RISK OF FIRE ELECTRIC SHOCK OR INJURY TO PERSONS, OBSERVE THE FOLLOWING: a. Use this unit only in the manner intended by the manufacturer. If you have questions, contact the manufacturer. -
Page 3: Pre-Installation
Pre-Installation PLANNING FOR SUCCESSFUL INSTALLATION When installing the ventilation fan in a new construction site, install the main body of the fan and duct work during the rough-in construction of the building. The grille should be installed after the nished ceiling is in place. -
Page 4: Package Contents
Pre-Installation Package contents 1 × grille 1 × housing 1 × blower 1 × damper 1 × screw kit 3 × bracket — 4 —... - Page 5 Installation - New Construction CAUTION: Make sure power is switched off at service panel before installation. Do not install in cooking area. Choose the location of your fan to ensure the best air and sound performance. It is recommended that the length of ducting and the number of elbows be kept to a minimum, and that insulated hard ducting be used.
-
Page 6: Wiring Diagrams
Installation - New Construction Wiring diagrams AN-4808 / AN-4809 AN-4810 Red (Auto) Black Black (Manual) White White Green Green STEP 5 Attach the grille Rotate the blower wheel by hand to ensure it spins freely. Plug the motor cord back into receptacle. - Page 7 Measure the ceiling opening to make sure it is large enough to accommodate the new fan body. If this fan is not replacing an old fan, please enlarge the opening. The size of the opening for AN-4808 fan should be 9.7 in. × 8.7 in. (24.6 cm × 22.1 cm).
- Page 8 Installation - Existing Construction STEP 7 Attach conduit with wiring from control, to the fan housing STEP 8 Mount the fan housing to ceiling structure 1. Reattach the damper back to the metal housing through the hole in the housing. 2.
- Page 9 Humidity Sensor Operation (Humidity Sensing Models Only) The humidity sensing fan is equipped with a humidity sensor that can turn on the fan automatically when the humidity level in your bathroom rises above your setting point (40 ~ 80 RH % continuously adjustable). CAUTION: Humidity tolerance is about ±10%.
-
Page 10: Specifications
Specifications Model AN-4808 AN-4809 AN-4810 Duct 4 in. (10.1 cm) 4 in. (10.1 cm) 4 in. (10.1 cm) Sound level 0.7 sones 1.4 sones 1.4 sones Airflow (CFM@0.1’’ SP) For bathroom size up to 75 sq. ft. (6.9 m2) 105 sq. ft. (9.7 m2) 105 sq. - Page 11 Please register your product warranty by visiting the Ancona Home website. Canada & USA Phone: 1-800-350-4562 Fax: 800-350-8563 Email: service@anconahome.com Website: www.anconahome.com MAAN4808-01 © 2020 Copyright of Ancona Home. All rights reserved. This material may not be reproduced, displayed, modi ed or distributed. — 11 —...
- Page 12 Ventilateur de salle de bain Manuel de l'utilisateur instructions d'installation INSTRUCTIONS IMPORTANTES DE SÉCURITÉ Lire attentivement l’importante information concernant la sécurité, l’installation et l’entretien. Conserver ces instructions pour référence future. MAAN4808-01 2020-08-10...
-
Page 13: Consignes De Sécurité
Consignes de sécurité MISE EN GARDE- AFIN DE REDUIRE LE RISQUE D'INCENDIE, CHOC ELECTRIQUE OU BLESSURES DES PERSONNES, SUIVEZ LES INSTRUCTIONS SUIVANTES: a. Utilisez cet appareil uniquement de la manière prévue par le fabricant. Si vous avez des questions, contactez le fabricant. b. - Page 14 Pré-Installation PRÉPARATION POUR UNE INSTALLATION RÉUSSIE Lors de l'installation du ventilateur d'aération dans une nouvelle construction, installez le corps principal du ventilateur et le conduit d'aération pendant la phase de plomberie brute de la construction du bâtiment. La grille devrait être installée une fois que le plafond ni est en place. Lors de l'installation du ventilateur dans une construction existante, utilisez les dimensions à...
-
Page 15: Contenu De L'emballage
Pré-Installation Contenu de l'emballage 1 × grille 1 × boîtier 1 × ventilateur 1 × registre 1 × ensemble de vis 3 × supports — 4 —... - Page 16 Installation — Nouvelle construction AVERTISSEMENT : Assurez-vous de bien couper l’alimentation au tableau électrique avant d’effectuer l’installation. N’installez pas l’appareil dans un endroit où se fait la cuisson. Choisissez un emplacement qui assurera une circulation aisée de l’air et un niveau minimal de bruit. On recommande de réduire au minimum la longueur des conduits et le nombre de coudes articulés, et d’utiliser des conduits rigides isolés.
-
Page 17: Schémas De Câblage
Installation — Nouvelle construction Schémas de câblage AN-4808 / AN-4809 AN-4810 Arrêt Rouge (auto) Phase Noir En marche Phase Noir (manuel) Arrêt Blanc En marche Ventilateur Neutre Ventilateur Blanc Neutre Vert Terre Vert Terre ÉTAPE 5 Installer la grille Plafond Faites tourner la roue du ventilateur à... - Page 18 Mesurez l’ouverture dans le plafond pour vous assurer qu’elle est suf samment grande pour accueillir le nouveau ventilateur. Si ce n’est pas le cas, veuillez agrandir l’ouverture. Pour le ventilateur AN-4808, l’ouverture doit être de 24,6 cm × 22,1 cm (9,7 po × 8,7 po). Le côté...
- Page 19 Installation — Construction existante Boîtier ÉTAPE 7 Raccorder le conduit de câblage au boîtier Conduit de câbles du ventilateur ÉTAPE 8 Fixer le boîtier du ventilateur à la structure au plafond 1. Fixez de nouveau le registre au boîtier métallique en passant par le trou du boîtier.
-
Page 20: Guide De Dépannage
Mode d’emploi du capteur d’humidité (seulement les modèles comprenant un capteur d’humidité) Le capteur d’humidité permet de mettre en marche automatiquement le ventilateur lorsque le niveau d’humidité dans la salle de bain dépasse le niveau réglé (de 40 à 80 %, humidité relative; réglable). AVERTISSEMENT : L’appareil af che une tolérance d’humidité... -
Page 21: Caractéristiques
Caractéristiques Modèle AN-4808 AN-4809 AN-4810 Conduit 10,1 cm (4 po) 10,1 cm (4 po) 10,1 cm (4 po) Niveau sonore 0,7 sones 1,4 sones 1,4 sones Débit d’air (0,1 pi3/min, pression statique) Dimensions maximales 75 pieds carrés (6,9 m ) 105 pieds carrés (9,7 m ) - Page 22 Canada et États-Unis Téléphone : 1-800-350-4562 Télécopieur : 800-350-8563 Courriel : service@anconahome.com Site Web : www.anconahome.com MAAN4808-01 © 2020 Droit d'auteur Ancona Home. Tous droits réservés. Ce matériel ne peut être reproduit, af ché, modi é ou distribué. — 11 —...
Need help?
Do you have a question about the AN-4808 and is the answer not in the manual?
Questions and answers