Table of Contents
Advertisement
Available languages
Available languages
Quick Links
Advertisement
Chapters
Table of Contents

Related Manuals for Hoover HTSI9CBK5XWIFI


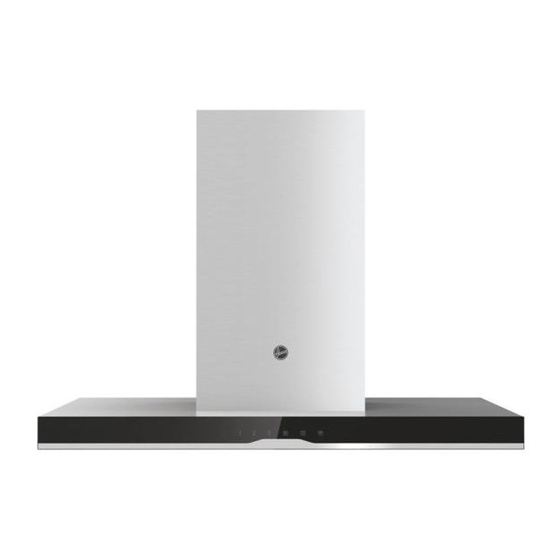
Summary of Contents for Hoover HTSI9CBK5XWIFI
- Page 1 INSTALLATION AND USER’S MANUAL ENGLISH DEUTSCH EINBAU- UND BEDIENUNGSANLEITUNG NEDERLANDS HANDLEIDING VOOR INSTALLATIE EN GEBRUIK FRANÇAIS MANUEL D'INSTALLATION ET D'UTILISATION ČEŠTINA NÁVOD K INSTALACI A POUŽITÍ SLOVENČINA INŠTALAČNÁ A POUŽÍVATEĽSKÁ PRÍRUČKA...
-
Page 3: Table Of Contents
INSTALLATION AND USER’S MANUAL CONTENT INTRODUCTION SAFETY PRECAUTION SPECIFICATION INSTALLATION DESCRIPTION OF COMPONENTS OPERATION MAINTENANCE TROUBLESHOOTING CONFORMITY WITH DIRECTIVES ENVIRONMENTAL PROTECTION... -
Page 4: Introduction
Hereby, Candy Hoover Group Srl declares that the radio equipment is in compliance with Directive 2014/53/EU and with the relevant Statutory Requirements (for the UKCA market). - Page 5 - These shall be adequate ventilation of the room when the range hood is used at the same time as appliances burning gas or other fuels(not applicable to appliances that only discharge the air back into the room); - the details concerning the method and frequency of cleaning. - there is a fire risk if cleaning is not carried out in accordance with the instructions;...
- Page 6 Standard Installation Accessories List Spec. Illustration Picture Casing Upper Chimney 600mm Lower Chimney 600mm Hanging Board Screws M6×60 φ8 Rawl Plugs φ8×φ6 white color Screws ST6.0×40 φ7.2 Screws ST4.0×8 Screws M5x12 Washers Nuts...
-
Page 7: Installation
CEILING MOUNTING INSTALLATION Position the hanging plate on the ceiling and then mark the position of the screw holes. The hanging plate should be securely fixed to the ceiling, 11 x ST6 (40 mm)screws for wooden ceiling 8 x expansion bolts for cement ceiling 2) Fix the angle bars to the hanging plate, using the 8 x M5 screws. - Page 8 5) If the glass canopy has not been pre-assembled by the factory, then it should be fixed to the top of the main body of the cooker hood at this stage. 6) Lift the main body of the cooker hood onto the angle bar and then fix it into position using the 16 x M5 screws.
-
Page 9: Description Of Components
DESCRIPTION OF COMPONENTS OPERATION STANDBY MODE. After plug in, all lighting, system in STANDBY MODE. Low Speed button It’s used for Ventilation on the kitchen. It is suitable for simmering and cooking which do not make much steam. Medium Speed button Airflow speed is ideally for ventilation in standard cooking operation. - Page 10 First of all, you should download hOn APP and install to your portable device. Then enroll your hood. NOTE ENROLLMENT HOOVER HOOD The image of the hood has the only purpose of presenting it. May not be perfectly representative. 1- Press the WiFi button until the icon starts blinking When the pairing is...
-
Page 11: Maintenance
MAINTENANCE Before cleaning switch the unit off and pull out the plug. I. Regular Cleaning Use a soft cloth moistened with hand-warm mildly soapy water or household cleaning detergent. Never use metal pads, chemical, abrasive material or stiff brush to clean the unit. II. - Page 12 TROUBLESHOOTING Fault Cause Solution Light on, but The fan blade is Switch off the unit and repair by fan does not jammed. qualified service personnel only. work The motor is damaged. Both light and Replace the bulb with correct Halogen light bulb burn. fan do not rating.
- Page 13 CUSTOMER ASSISTANCE SERVICE If you cannot identify the cause of the operating anomaly, switch off the appliance and contact the Assistance Service. PRODUCT SERIAL NUMBER. Where can I find it? It is important you to inform the Assistance Service of your product code and its serial number (a 16 character code which begins with the number 3);...
- Page 15 EINBAU- UND BEDIENUNGSANLEITUNG INHALT EINLEITUNG SICHERHEITSVORKEHRUNGEN SPEZIFIKATION INSTALLATION BESCHREIBUNG DER KOMPONENTEN BETRIEB WARTUNG FEHLERBEHEBUNG VEREINBARKEIT MIT DEN RICHTLINIEN UMWELTSCHUTZ...
-
Page 16: Einleitung
Ausgestattet mit einem großen, starken Elektromotor und einem Zentrifugalgebläse bietet sie starke Saugleistung, geräuscharmen Betrieb, einen austauschbaren Fettfilter sowie die einfache Montage. Hiermit erklärt die Candy Hoover Group Srl, dass die Funkausstattung der Richtlinie 2014/53/EU und den einschlägigen gesetzlichen Anforderungen (für den UKCA-Markt) entspricht. - Page 17 Sorgen Sie insbesondere für eine ausreichende Belüftung, wenn die Abzugshaube zusammen mit Geräten betrieben wird, die Gas oder Benzin verbrennen (gilt nicht für Geräte, die die abgesaugte Luft zurück in den Raum leiten). Halten Sie die im Abschnitt „Reinigung und Wartung“ angegebenen Anweisungen zur Reinigung und deren Häufigkeit unbedingt ein.
- Page 18 Standardmäßiges Montagezubehör Spez. Abbildung Menge Gehäuse Oberer Abzug 600 mm Unterer Abzug 600 mm Aufhängeblech Schrauben M6x60 φ8 Dübel φ8xφ6 weiß Schrauben ST6.0x40 φ7.2 Schrauben ST4.0x8 Schrauben M5x12 Unterlegscheiben Muttern...
- Page 19 ANLEITUNGEN FÜR DIE DECKENMONTAGE 1) Halten Sie das Aufhängeblech an die Decke und markieren Sie die Schraubenlöcher. Das Aufhängeblech muss sicher an der Decke befestigt werden. ⚫ 11 x ST6 (40 mm) Schrauben für Holzdecken. ⚫ 8 x Dehnschrauben für Holzdecken. 2) Die Winkeleisen mithilfe der 8 x M5-Schrauben am Aufhängeblech befestigen.
- Page 20 5) Falls der Glaskörper nicht ab Werk vor- montiert sein sollte, muss er nun am Haupt- korpus der Abzugshaube befestigt werden. 6) Heben Sie den Hauptkorpus der Abzugs- haube auf das Winkeleisen und befestigen Sie ihn mit den 16 x M5-Schrauben. ⚫...
-
Page 21: Beschreibung Der Komponenten
BESCHREIBUNG DER KOMPONENTEN BETRIEB STANDBY-MODUS. Nach der Verbindung mit der Stromquelle ist das Gerät im STANDBY-MODUS. Taste „Niedrige Geschwindigkeit“ Für die Belüftung der Küche. Geeignet für das Sieden und Garen mit geringer Dunstentwicklung. Taste „Mittlere Geschwindigkeit“ Die ideale Luftstromgeschwindigkeit für normales Kochen/Garen. Taste „Hohe Geschwindigkeit“... - Page 22 Laden Sie zunächst die hOn-APP herunter und installieren Sie sie auf Ihrem Handy oder Tablet. Registrieren Sie anschließend Ihre Dunstabzugshaube. HINWEIS REGISTRIERUNG DER HOOVER-DUNSTABZUGSHAUBE Die Abbildung der Dunstabzugshaube dient nur zu Illustrationszwecken. Sie weicht möglicherweise vom gekauften Produkt ab. 1 – Drücken Sie die WLAN-Taste, bis das Symbol zu blinken beginnt. Wenn das Pairing...
-
Page 23: Wartung
WARTUNG Vor der Reinigung muss das Gerät ausgeschaltet und der Stecker gezogen werden. Regelmäßige Reinigung Verwenden Sie ein weiches Tuch, angefeuchtet mit handwarmem, milden Seifenwasser oder einem Haushaltsreiniger. Das Gerät niemals mit Metallpads, Chemikalien, Scheuermitteln oder einer harten Bürste reinigen. Monatliche Reinigung des Fettfilters WICHTIG: Um Brandgefahr zu vermeiden, sollte der Filter monatlich gereinigt werden. -
Page 24: Fehlerbehebung
FEHLERBEHEBUNG Fehler Ursache Lösung Licht an, aber Das Gerät ausschalten; die Reparatur Gebläseschaufel blockiert. Gebläse läuft muss qualifiziertem Kundendienst- Der Motor ist beschädigt. nicht. personal vorbehalten sein. Beide Lichter Halogenleuchte Gegen eine Leuchte mit identischer an, aber durchgebrannt. Leistung austauschen. Gebläse läuft Stromkabel lose. -
Page 25: Umweltschutz
KUNDENDIENST Falls Sie die Ursache des Fehlers nicht ermitteln können, schalten Sie das Gerät bitte aus und wenden Sie sich an den Kundendienst. PRODUKT-SERIENNUMMER Wo finde ich sie? Es ist wichtig, dass Sie dem Kundendienst Ihren Produktcode und die Seriennummer nennen (ein 16-stelliger Code, der mit „3“... - Page 27 HANDLEIDING VOOR INSTALLATIE EN GEBRUIK INHOUD INLEIDING VEILIGHEIDSMAATREGELEN SPECIFICATIES INSTALLATIE BESCHRIJVING VAN DE ONDERDELEN BEDIENING ONDERHOUD PROBLEMEN OPLOSSEN OVEREENSTEMMNG MET RICHTLIJNEN MILIEUBESCHERMING...
-
Page 28: Inleiding
Dit garandeert een sterke zuigkracht, een geluidsarme werking, een vetfilter dat niet kleverig wordt en een gemakkelijke installatie. Candy Hoover Group Srl verklaart hierbij dat de radioapparatuur voldoet aan Richtlijn 2014/53/EU en aan de desbetreffende wettelijke voorschriften (voor de UKCA [‘UK Conformity Assessed’]-markt). - Page 29 Zorg voor voldoende ventilatie van de ruimte wanneer de afzuigkap gelijktijdig wordt gebruikt met apparaten die gas of andere brandstoffen verbranden (niet van toepassing op apparaten die de lucht alleen terug de ruimte invoeren); De details met betrekking tot manier en frequentie van reinigen. Er bestaat brandgevaar als de reiniging niet conform de instructies wordt uitgevoerd.
-
Page 30: Specificaties
Lijst van accessoires voor standaardinstallatie Benaming Afbeelding Aantal Behuizing Bovenste afvoerpijp 600 mm Onderste afvoerpijp 600 mm Ophangplaat Schroeven M6 x 60 Pluggen φ8 φ8xφ6 wit Schroeven ST6.0x40 Schroeven φ7,2 ST4.0x8 Schroeven M5x12 Onderlegringen Moeren... -
Page 31: Installatie
INSTALLATIE MET PLAFONDMONTAGE 1) Plaats de ophangplaat tegen het plafond en markeer de positie van de schroefgaten. De ophangplaat moet stevig aan het plafond worden bevestigd, ⚫ 11 x schroeven ST6 (40 mm) voor houten plafond ⚫ 8 x expansiebouten voor betonnen plafond 2) Bevestig de hoekijzers aan de ophangplaat;... - Page 32 5) Als de glazen kap af fabriek niet is voor- gemonteerd, moet hij nu bovenop de romp van de afzuigkap worden bevestigd. 6) Til de romp van de afzuigkap op tot tussen de hoekijzers en bevestig de romp op zijn plaats met de 16 M5-schroeven.
-
Page 33: Beschrijving Van De Onderdelen
BESCHRIJVING VAN DE ONDERDELEN BEDIENING STAND-BYMODUS. Nadat de spanning is aangesloten gaat alle verlichting en het systeem in STAND-BYMODUS. Knop lage snelheid Deze wordt gebruikt om de keuken te ventileren. Deze stand is geschikt voor sudderende gerechten en voor gerechten waarbij niet veel stoom vrijkomt. Knop middelhoge snelheid Deze stromingssnelheid van de lucht is ideaal voor afzuiging bij standaardkookwerkzaamheden. - Page 34 Allereerst moet u hOn-app downloaden en op uw draagbare toestel installeren. Registreer vervolgens uw afzuigkap. OPMERKING REGISTRATIE HOOVER-AFZUIGKAP De afbeelding van de afzuigkap is uitsluitend ter illustratie. Het kan zijn dat het niet een perfecte weerspiegeling van uw apparaat is.
-
Page 35: Onderhoud
ONDERHOUD Alvorens het apparaat te reinigen, zet u het uit en haalt u de stekker uit het stopcontact. Normale reiniging Gebruik een zachte doek die in een handwarm mild sopje of een schoonmaakproduct voor het huishouden is bevochtigd. Gebruik nooit metalen voorwerpen, chemische, schurende materialen of harde borstels om het apparaat te reinigen. -
Page 36: Problemen Oplossen
PROBLEMEN OPLOSSEN Fout Oorzaak Oplossing Verlichting Het waaierblad van de Zet het apparaat uit en laat het brandt, maar de ventilator zit vast. uitsluitend door gekwalificeerd ventilator werkt onderhoudspersoneel repareren. De motor is beschadigd. niet Het halogeenlampje is Vervang het lampje door een ander met De verlichting defect. -
Page 37: Overeenstemmng Met Richtlijnen
SERVICEAFDELING/KLANTENSERVICE Als u de oorzaak van de afwijkende werking niet kunt vinden, het apparaat uitzetten en contact opnemen met de klantenservice. SERIENUMMER VAN HET PRODUCT. Waar vind ik dat? Het is belangrijk dat u aan de klantenservice de productcode en het serienummer (een uit 16 tekens bestaande code die begint met een 3) van uw product doorgeeft;... - Page 39 MANUEL D'INSTALLATION ET D'UTILISATION SOMMAIRE INTRODUCTION CONSIGNES DE SÉCURITÉ CARACTÉRISTIQUES INSTALLATION DESCRIPTION DES COMPOSANTS FONCTIONNEMENT ENTRETIEN DÉPANNAGE CONFORMITÉ AUX DIRECTIVES PROTECTION DE L’ENVIRONNEMENT...
-
Page 40: Introduction
à graisses anti-adhésif et elle est facile à installer. Par la présente, Candy Hoover Group Srl déclare que l'équipement radio est conforme à la directive 2014/53/UE et aux exigences réglementaires applicables (pour le marché UKCA). - Page 41 Il doit y avoir une ventilation appropriée dans la pièce si la hotte est utilisée en même temps que d’autres appareils brûlant du gaz ou d’autres carburants (ne s'applique pas aux appareils qui ne rejettent que l'air dans la pièce). Les détails intéressant la méthode et la fréquence du nettoyage.
- Page 42 Liste des accessoires d'installation standard Caract. Image d'illustration Qté Carter Cheminée supérieure 600 mm Cheminée inférieure 600 mm Panneau suspendu Vis M6x60 Chevilles φ8 φ8xφ6 couleur blanche ST6.0x40 Vis φ7,2 ST4.0x8 Vis M5x12 Rondelles Écrous...
- Page 43 INSTALLATION AU PLAFOND 1) Positionnez la plaque suspendue au plafond et marquez la position des trous des vis. La plaque suspendue doit être solidement fixée au plafond. ⚫ 11 vis ST6 (40 mm) pour plafond en bois ⚫ 8 boulons d'expansion pour plafond en ciment 2) Fixez les barres d'angle sur la plaque suspendue à...
- Page 44 5) Si la partie vitrée n'a pas été en usine, elle doit alors être fixée en haut du corps principal de la hotte aspirante à ce stade. 6) Soulevez le corps principal de la hotte aspirante sur la barre d'angle, puis fixez-le à sa place à...
-
Page 45: Description Des Composants
DESCRIPTION DES COMPOSANTS FONCTIONNEMENT MODE ATTENTE. Une fois branché, le système s'éclaire et se met en MODE ATTENTE. Touche faible vitesse Elle sert à aérer la cuisine. Elle peut être utilisée pour faire mijoter ou cuisiner en créant peu de vapeur. Touche moyenne vitesse La vitesse de l'air est parfaite pour aérer la cuisine en condition normale de cuisson. - Page 46 Tout d’abord vous devez télécharger l’application hOn et l’installer sur votre dispositif portable. Ensuite, effectuez l’enregistrement de votre hotte. REMARQUE ENREGISTREMENT DE LA HOTTE HOOVER L'image de la hotte a pour seul but de la présenter. Elle pourrait ne pas être parfaitement représentative.
-
Page 47: Entretien
ENTRETIEN Avant le nettoyage éteignez l’unité et débranchez la fiche. Nettoyage ordinaire Utilisez un chiffon doux imbibé d'eau tiède légèrement savonneuse ou avec un détersif à usage domestique. N'utilisez jamais d'éponge abrasive, de poudre à récurer ni de brosse rigide pour nettoyer l'appareil. Nettoyage mensuel du filtre à... -
Page 48: Dépannage
DÉPANNAGE Problème Cause Solution La lumière La pale du ventilateur est s'éclaire mais coincée. Éteignez l'appareil et faites-le réparer le ventilateur ne uniquement par un technicien qualifié. Le moteur est endommagé. fonctionne pas L'ampoule halogène est Remplacez l'ampoule par une ampoule La lumière et grillée. -
Page 49: Protection De L'environnement
SERVICE APRÈS-VENTE Si vous n’arrivez pas à identifier la cause de l’anomalie de fonctionnement, éteignez l’appareil et contactez le service après-vente. NUMÉRO DE SÉRIE DU PRODUIT. Où puis-je le trouver ? Il est important que vous communiquiez au service après-vente la référence de votre produit et son numéro de série (un code à... - Page 51 NÁVOD K INSTALACI A POUŽITÍ OBSAH ÚVOD BEZPEČNOSTNÍ PRAVIDLA TECHNICKÉ ÚDAJE INSTALACE POPIS SOUČÁSTÍ PROVOZ ÚDRŽBA ŘEŠENÍ PROBLÉMŮ SHODA S PŘEDPISY OCHRANA ŽIVOTNÍHO PROSTŘEDÍ...
- Page 52 Tento spotřebič se snadno instaluje. Společnost Candy Hoover Group Srl tímto prohlašuje, že rádiové zařízení je v souladu se směrnicí 2014/53/EU a s příslušnými zákonnými požadavky (pro trh ve Velké...
- Page 53 Pokud je používán odsavač par nad sporákem současně se spotřebiči spalujícími plyn nebo jiná paliva, musí být místnost dostatečně odvětrávána (neplatí pro spotřebiče, které pouze vypouštějí vzduch zpět do místnosti); podrobnosti týkající se způsobu a četnosti čištění; pokud není prováděno čištění podle pokynů, existuje riziko požáru; pod odsavačem par neflambujte;...
- Page 54 Seznam standardního instalačního příslušenství Počet Ilustrační obrázek Specifikace Plášť Horní část ventilační šachty 600 mm Dolní část ventilační šachty 600 mm Závěsná deska Šrouby M6 60 φ8 hmoždinky φ8xφ6 bílá barva Šrouby ST6.0x40 φ7.2 šrouby ST4.0x8 Šrouby M5x12 Podložky Matice...
- Page 55 MONTÁŽ NA STROP 1) Přiložte závěsnou desku na strop a vyznačte místa pro otvory pro šrouby. Závěsná deska by měla být bezpečně připevněna ke stropu. ⚫ 11 x ST6 (40 mm) šrouby v případě dřevěného stropu ⚫ 8x kotva v případě betonového stropu 2) Pomocí...
- Page 56 5) Pokud skleněná stříška nebyla předem namontována z výroby, měla by být v této fázi připevněna k horní části hlavního těla odsavače. 6) Zvedněte hlavní tělo odsavače par na úhelníky a poté jej upevněte pomocí šroubů 16 x M5. ⚫ DŮLEŽITÉ: Tuto fázi instalace MUSÍ provádět dvě...
- Page 57 POPIS SOUČÁSTÍ PROVOZ POHOTOVOSTNÍ REŽIM. Po zapojení vše svítí, systém je v POHOTOVOSTNÍM REŽIMU. Tlačítko nízkých otáček Používá se k větrání kuchyně. Je vhodné pro vaření, při kterém nevzniká mnoho páry. Tlačítko středních otáček Rychlost odsávání je ideální pro běžné vaření. Tlačítko vysokých otáček Pokud vzniká...
- Page 58 Stáhnout aplikaci hOn Ze všeho nejdříve byste si měli stáhnout aplikaci hOn a nainstalovat ji do svého mobilního zařízení. Poté svůj odsavač par zaregistrujte. POZNÁMKA REGISTRACE ODSAVAČE PAR Obrázek odsavače par je pouze ilustrativní. Nemusí jej úplně vystihovat. 1- Stiskněte tlačítko WiFi, dokud nezačne blikat. Po dokončení párování se ikona WiFi rozsvítí.
- Page 59 ÚDRŽBA Nejprve vypněte spotřebič a vytáhněte zástrčku ze zásuvky. I. Pravidelné čištění Použijte měkký hadr namočený do vody s rozpuštěným mýdlem nebo kuchyňským mycím prostředkem. Při čištění jednotky nikdy nepoužívejte drátěnky, chemikálie, drsné materiály nebo hrubé kartáče. II. Čištění tukového filtru jednou za měsíc DŮLEŽITÉ: Čištění...
- Page 60 ŘEŠENÍ PROBLÉMŮ Závada Příčina Řešení Zaseknutá lopatka Světlo svítí, Vypněte jednotku a požádejte ale ventilátor ventilátoru. o opravu kvalifikovaného servisního Poškozený elektromotor. nefunguje technika. Spálená halogenová Vyměňte žárovku za novou se Nefunguje ani žárovka. stejnými parametry. světlo ani ventilátor Uvolněný kabel napájení. Zapojte jednotku znovu do zásuvky. Vypněte jednotku a požádejte Poškozená...
- Page 61 ZÁKAZNICKÁ ASISTENČNÍ SLUŽBA Pokud nemůžete zjistit příčinu provozní anomálie, vypněte spotřebič a kontaktujte asistenční službu. SÉRIOVÉ ČÍSLO VÝROBKU. Kde ho najdu? Je důležité, abyste asistenční službě sdělili kód výrobku a jeho sériové číslo (16znakový kód začínající číslicí 3), které najdete v záručním listě nebo na výrobním štítku umístěném na spotřebiči.
- Page 63 INŠTALAČNÁ A POUŽÍVATEĽSKÁ PRÍRUČKA OBSAH ÚVOD BEZPEČNOSTNÉ OPATRENIE ŠPECIFIKÁCIA INŠTALÁCIA OPIS OVLÁDACÍCH PRVKOV PREVÁDZKA ÚDRŽBA RIEŠENIE PROBLÉMOV ZHODA SO SMERNICAMI OCHRANA ŽIVOTNÉHO PROSTREDIA...
- Page 64 Spoločnosť Candy Hoover Group Srl vyhlasuje, že rádiové zariadenie spĺňa požiadavky smernice 2014/53/EÚ a príslušné zákonné požiadavky (pre trh UKCA). Úplné znenie vyhlásenia o zhode je k dispozícii na nasledovnej internetovej adrese: www.candy-group.com.
- Page 65 Ak sa kuchynský odsávač používa súčasne so spotrebičmi spaľujúcimi plyn alebo iné palivá, treba zaistiť dostatočné vetranie miestnosti (nevzťahuje sa na spotrebiče, ktoré späť do miestnosti vypúšťajú iba vzduch); podrobné informácie o postupoch a intervaloch čistenia; ak sa nevykonáva čistenie v súlade s pokynmi, hrozí nebezpečenstvo požiaru;...
- Page 66 Štandardný zoznam príslušenstva na inštaláciu Špecifikácia Množ- Ilustračný obrázok stvo Plášť Horný komín 600 mm Dolný komín 600 mm Závesná doska Skrutky M6 60 φ8 Zástrčky Rawl φ8xφ6 biela farba Skrutky ST6.0x40 φ7.2 Skrutky ST4.0x8 Skrutky M5x12 Podložky Matice...
- Page 67 MONTÁŽ NA STROP 1) Umiestnite závesnú dosku na strop a potom označte polohu otvorov pre skrutky. Závesná doska by mala byť pevne pripevnená k stropu, ⚫ 11 x ST6 (40 mm) skrutky pre drevený strop ⚫ 8 x rozpínacie skrutky pre cementový strop 2) Pripevnite uhlové...
- Page 68 5) Ak nebola dodaná sklenená strieška zmontovaná, treba ju v tomto štádiu pripevniť k hornej časti hlavného tela digestora. 6) Zdvihnite hlavné telo digestora na uhlovú lištu a potom ho upevnite do polohy pomocou 16 x M5 skrutiek. ⚫ DÔLEŽITÉ: Túto fázu procesu inštalácie MUSIA dokončiť...
- Page 69 OPIS OVLÁDACÍCH PRVKOV PREVÁDZKA POHOTOVOSTNÝ REŽIM. Po zapojení do zásuvky svietia všetky svetlá, systém je v POHOTOVOSTNOM REŽIME. Tlačidlo nízkej rýchlosti Používa sa na ventiláciu v kuchyni. Je vhodný pri miernom dusení a varení, pri ktorom sa nevytvára veľa pary. Tlačidlo strednej rýchlosti Rýchlosť...
- Page 70 V prvom rade by ste si mali stiahnuť APLIKÁCIU hOn a nainštalovať ju do svojho prenosného zariadenia. Potom zaregistrujte odsávač. POZNÁMKA REGISTRÁCIA ODSÁVAČA HOOVER Obrázok odsávača slúži iba na ilustráciu. Nemusí zodpovedať skutočnosti. 1- Podržte stlačené tlačidlo WiFi, kým ikona nezačne blikať Po dokončení...
- Page 71 ÚDRŽBA Pred čistením vypnite spotrebič a vytiahnite zástrčku zo zásuvky. I. Pravidelné čistenie Používajte mäkkú handričku navlhčenú v miernej teplej mydlovej vode alebo v čistiacom prostriedku na čistenie domácností. Nikdy nepoužívajte na čistenie jednotky kovové podložky, chemické, brúsne materiály a ani tuhé kefy. II.
- Page 72 RIEŠENIE PROBLÉMOV Príčina Riešenie Porucha Lopatka ventilátora je Vypnite spotrebič a opravu zverte Svetlo svieti, ale ventilátor zaseknutá. len kvalifikovanému servisnému personálu. Motor je poškodený. nefunguje Halogénová žiarovka sa Vymeňte ju za rovnaký typ Svetlo a vypálila. s menovitými údajmi. ventilátor Napájací...
- Page 73 SERVISNÉ SLUŽBY PRE ZÁKAZNÍKOV Ak neviete identifikovať príčinu prevádzkovej anomálie, vypnite spotrebič a kontaktujte servis. SÉRIOVÉ ČÍSLO VÝROBKU. Kde ho nájdem? Je dôležité, aby ste servisu poskytli kód výrobku a jeho sériové číslo (16-miestny kód začínajúci číslom 3). Nájdete ich na záručnom liste alebo na štítku s údajmi, ktorý...
Need help?
Do you have a question about the HTSI9CBK5XWIFI and is the answer not in the manual?
Questions and answers