
Subscribe to Our Youtube Channel
Related Manuals for Hoover HDSVI985B


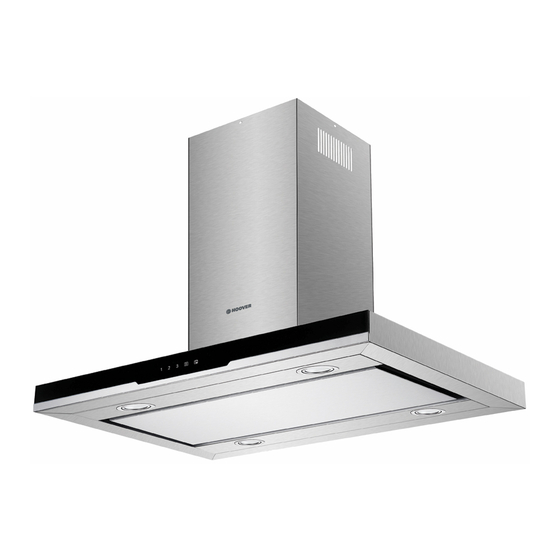
Summary of Contents for Hoover HDSVI985B
-
Page 1: Table Of Contents
INSTALLATION AND USER’S MANUAL CONTENT INTRODUCTION SAFETY PRECAUTION SPECIFICATION INSTALLATION DESCRIPTION OF COMPONENTS OPERATION MAINTENANCE TROUBLESHOOTING CONFORMITY WITH DIRECTIVES ENVIRONMENTAL PROTECTION... -
Page 2: Introduction
INTRODUCTION Thank you for choosing this cooker hood. This instruction manual is designed to provide you with all required instructions related to the installation, use and maintenance of the appliance. In order to operate the unit correctly and safety, please read this instruction manual carefully before installation and usage. -
Page 3: Specification
Standard Installation Accessories List Spec. Illustration Picture Casing Upper Chimney 600mm Lower Chimney 600mm Hanging Board Screws M6×60 φ8 Rawl Plugs φ8×φ6 white color Screws ST6.0×40 φ7.2 Screws ST4.0×8 Screws M5x12 Washers Nuts... -
Page 4: Installation
CEILING MOUNTING INSTALLATION 1)Position the hanging plate on the ceiling and then mark the position of the screw holes. The hanging plate should be securely fixed to the ceiling, 11 x ST6 (40 mm)screws for wooden ceiling 8 x expansion bolts for cement ceiling 2) Fix the angle bars to the hanging plate, using the 8 x M5 screws. - Page 5 5) If the glass canopy has not been pre-assembled by the factory, then it should be fixed to the top of the main body of the cooker hood at this stage. 6) Lift the main body of the cooker hood onto the angle bar and then fix it into position using the 16 x M5 screws.
-
Page 6: Description Of Components
DESCRIPTION OF COMPONENTS STANDBY MODE. After plug in, all lighting, system in STANDBY MODE. Low Speed button It’s used for Ventilation on the kitchen. It is suitable for simmering and cooking which do not make much steam. Medium Speed button Airflow speed is ideally for ventilation in standard cooking operation. -
Page 7: Maintenance
MAINTENANCE Before cleaning switch the unit off and pull out the plug. I. Regular Cleaning Use a soft cloth moistened with hand-warm mildly soapy water or household cleaning detergent. Never use metal pads, chemical, abrasive material or stiff brush to clean the unit. II. -
Page 8: Troubleshooting
TROUBLESHOOTING Fault Cause Solution Light on, but The fan blade is Switch off the unit and repair by fan does not jammed. qualified service personnel only. work The motor is damaged. Both light and Replace the bulb with correct Halogen light bulb burn. fan do not rating. -
Page 9: Environmental Protection
ENVIRONMENTAL PROTECTION Waste electrical products should not be disposed of with household waste. Please recycle where facilities exist. Check with your Local Authority or retailer for recycling advice. 2012/19/EU This appliance is marked according to the European directive on Waste Electrical and Electronic Equipment (WEEE). By ensuring this product is disposed of correctly, you will help prevent potential negative consequences for the environment and human health, which could otherwise be caused by inappropriate waste handling of this... - Page 10 Notice d’installation et d’utilisation Sommaire INTRODUCTION 11-12 Conseils pour la sécurité Installation 14 -15 Description des composants Fonctionnement Entretien Dépannage Cahier des charges Service après ventes Protection de l’environnement...
-
Page 11: Introduction
Introduction Merci d‘avoir choisi cette hotte. Ce manuel d'instructions est conç u pour vous fournir toutes les instructions requises relatives à l'installation, l'utilisation et l'entretien de l'appareil. Afin de faire fonctionner l'appareil correctement et en toute sécurité, merci de lire attentivement ce manuel avant l'installation et l'utilisation. - Page 12 Cet appareil n’est pas destiné à être utilisé par des personnes (notamment les enfants) incapables, irresponsables ou sans connaissance sur l’utilisation du produit, à moins qu’elle ne soit surveillées ou instruites sur l’utilisation de l’appareil par une personne responsable de leur sécurité ...
-
Page 13: Conseils Pour La Sécurité
Liste d’accessoires pour l’installation Caractéristiques Visuels Base Cheminée supérieure 600mm Cheminée inférieure 600mm Plaque s'accrochant Vis M6×60 φ8 Chevilles φ8×φ6 blanches ST6.0×40 φ7.2 Vis ST4.0×8 Screws M5x12 Washers Nuts... -
Page 14: Installation
Installation de votre hotte ilot. Placer la plaque s'accrochant au plafond et marquez la position des trous de vis, puis vissez. La plaque doit être solidement fixée au plafond. 11 vis ST6 pour les plafonds en bois 8 vis d'expansion pour les plafonds en ciment 2)Fixer les barres angulaires à... - Page 15 5) Si votre hotte aspirante va être utilisé e en mode évacuation externe, vous devez connecter le tuyau canalisation à l'adaptateur de plafond. 6) Soulever la partie principale de la hotte aspirante sur la barre angulaire et fixez ensuite la hotte à...
-
Page 16: Description Des Composants
Description du bandeau de commande MODE VEILLE. Après prise en, tout l'é clairage, le système en mode veille. Touche à basse vitesse Il est utilisé pour la ventilation de la cuisine. Il est adapté pour faire mijoter et la cuisine qui ne font pas beaucoup de vapeur. Bouton de vitesse moyenne La vitesse du flux d'air est idéal pour la ventilation en mode de cuisson standard. -
Page 17: Fonctionnement
Maintenance Avant de nettoyer votre hotte, débranchez la prise de courant. 1.Nettoyage ré gulier Utilisez un chiffon doux humide avec un produit nettoyant. N’utilisez jamais d’éponge du côté grattant, de produit chimique ou n’importe quel autre matériel abrasif pour nettoyer votre hotte. 2. -
Page 18: Dépannage
Dépannage Erreur Cause Solution Eteignez l’appareil et Lumière La turbine de allumée ventilateur est faî tes intervenir un professionnel pour la mais coincée aucune réparation Le moteur est ventilation endommagé L’ampoule est grillée Remplacez l’ampoule Aucune lumière, avec le bon modèle aucune Cordon d’alimentation Rebranchez le cordon... -
Page 19: Protection De L'environnement
Protection de l’environnement Cet appareil est produit conformé ment à la directive 2012/19/EU européenne concernant la mise au rebut des déchets d’équipements électriques et électroniques. Le fait que cet article ait été réalisé en conformité avec les normes en vigueur, contribue à prévenir toute consé quence nuisible pour l’environnement et la santé, la simple mise au rebut de cet appareil provoquerait en revanche de graves dommages.
Need help?
Do you have a question about the HDSVI985B and is the answer not in the manual?
Questions and answers