Table of Contents
Advertisement
Quick Links
Advertisement
Table of Contents

Related Manuals for Titan TN-1341


Summary of Contents for Titan TN-1341
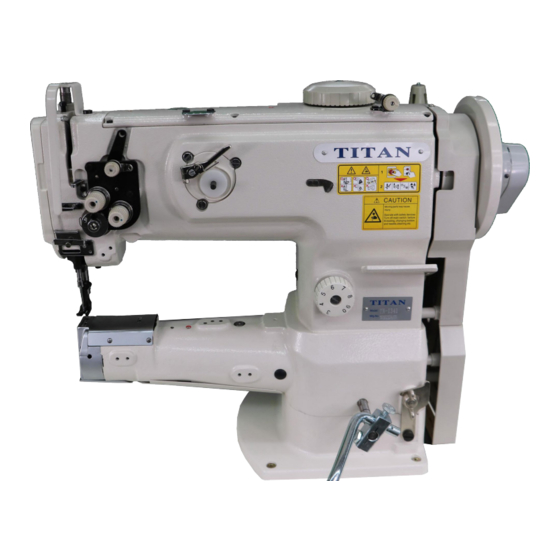
- Page 1 TITAN TN-1341 INSTRUCTION MANUAL...
-
Page 2: For Safe Operation
CAUTION Note that safety devices such as “eye guard”, “finger guard”, etc. may be omitted from the illustrations in this Instruction Manual for easy explanation. When operating the machine, be sure not to remove these safety devices. TN-1341 INSTRUCTION MANUAL... -
Page 3: Table Of Contents
THREAD TAKE-UP SPRING (CHECK SPRING) ..................24 STITCH LENGTH AND REVERSE ......................25 PRESSER FOOT LIFTER .......................... 26 ADJUSTING THE PRESSER FOOT PRESSURE ..................27 ADJUSTING PRESSER FOOT ALTERNATION ..................28 SEWING SPEEDS ........................... 29 SAFETY CLUTCH ............................ 30 WARRANTY............................31 TN-1341 INSTRUCTION MANUAL... -
Page 4: Specifications
Tex 45 ~ Tex 210 Hook Vertical-axis 2.0-fold capacity hook Lift of presser foot Hand lifter lever: 9 mm Knee lifter: 16 mm Safety device for hook Provided as standard Lubricating oil Virgin Mineral Oil 032ISO VG TN-1341 INSTRUCTION MANUAL... -
Page 5: Installation
In some unique cases, you may have purchased your machine “unassembled” and you will need to follow these steps to prepare your machine for sewing. With two people, lift your Titan TN-1341 onto the tabletop and align the machine into its correct position. - Page 6 INSTALLATION (Con’t) The Titan TN-1341 comes with a knee lifter unit that allows the operator to lift the presser foot with a knee controller. This is a standard feature but can be changed to a pneumatic lifter as an option (See option page).
-
Page 7: Belt And Belt Cover
BELT AND BELT COVER The TN-1341 is typically equipped with a 750W servo motor and while there are options for this on the Options page (needle positioner, speed reducer, etc.), the basic set up for the TN-1341 will be as follows: Figure 3 1. - Page 8 4. Fix belt cover (left) (Fig 4, Item 3) with screws 4, 5 and 6. 5. Fix belt cover, lower, (asm.) (Fig 4, Item 10) on the machine bed with setscrews 11 and 12. Figure 8 Figure 4 TN-1341 INSTRUCTION MANUAL...
-
Page 9: Thread Stand
Then install the lock washer and nut on Figure 5 the base of the stand and tighten until the thread stand no longer floats loose and freely. TN-1341 INSTRUCTION MANUAL... -
Page 10: Lubrication
LUBRICATION It is important to remember that Titan Sewing Machines are produced using some of the highest quality components and assembled and tested thoroughly to ensure the machines can handle factory operation day in and day out from multiple operators and shifts. Noting that, you may choose to alter your lubrication requirements based on the amount of use you are putting your machine through. - Page 11 (Fig 7, Item 1, 2 and 3) and to each felt and oil wick thru the oil wicking system. A and B are oil reservoirs. Be sure to add oil to the oil reservoir approximately once a week. Figure 7 TN-1341 INSTRUCTION MANUAL...
- Page 12 Figure 9 Notes on lubrication: • Always ensure to use virgin mineral oil on your Titan Sewing Machine • While under oiling your machine can cause damage to your machine, over oiling can be an issue to your sewing as well. If your machine is dripping oil onto your sewing project, consider reducing the amount and/or frequency of oiling to your machine.
-
Page 13: Needles And Thread
NEEDLES AND THREAD Like all sewing machines, Titan sewing machines work best when you work with not only the correct needle for the project and thread, but when you work within recommended guidelines of use when it comes to needles. Use the chart below to ensure you are matching the correct needle size to your threads. -
Page 14: The Needle
Not only that, but damage to your machine can be particularly bothersome considering the replacement price of the needles far outweighs the replacement parts on you machine and/or service related to this. Figure 10 TN-1341 INSTRUCTION MANUAL... -
Page 15: Changing The Needle
• If your machine skips stitches, or any other inconsistency, change the needle. Damage to needles can be hard to see and are not always obvious. Changing the needle is a great habit when trying to resolve issues. TN-1341 INSTRUCTION MANUAL... -
Page 16: Bobbin Winding
6. Then, tighten set screws 7. When the bobbin is filled Figure 13 up, the bobbin winder lever automatically releases the bobbin, and the bobbin winder stops. TN-1341 INSTRUCTION MANUAL... -
Page 17: Threading The Bobbin
Threading the bobbin correctly ensures that you will have consistent stitching and end up with a premium quality product. The Titan TN-1341 machine came with 2 versions of a vertical axis shuttle. The first is a capless shuttle that and the second is a shuttle with a cap. Depending on which your machine has, use the following instructions for threading the bobbin. -
Page 18: Threading The Upper Thread
THREADING THE UPPER THREAD The TN-1341 is equipped with a dual tension unit which allows the machine to not only expand the range of threads the machine can handle, but also offers the operator to have more control over thread tensions. - Page 19 6. Ensure the thread follows the path provided in Fig 18. Pay close attention to the thread guide (Fig 18, Item 13) that is just above the needle. This is commonly overlooked and can cause errors in sewing if not threaded. TN-1341 INSTRUCTION MANUAL...
-
Page 20: Threading With Thinner Threads
• Once the machine is threaded but before you thread the needle, a good habit to follow is simply pull the threads to ensure there is no tight points or thread incorrectly threaded that can cause the thread undue stress. TN-1341 INSTRUCTION MANUAL... -
Page 21: Adjusting Tensions
DECREASE your top tension or INCREASE your bobbin tension. To adjust your top tension, follow the instructions on “Adjusting upper tensions” To adjust your bottom tension, follow the instructions on “Adjusting bobbin tensions” TN-1341 INSTRUCTION MANUAL... -
Page 22: Adjusting Upper Tensions
This will help to try to keep your machine working correctly. • To Increase the upper tension, turn the tension units in the direction of A • To decrease the upper tension, turn the tension units in the direction of B. Figure 23 TN-1341 INSTRUCTION MANUAL... -
Page 23: Adjusting Bobbin Tensions
Figure 24 LATCH STYLE • To Increase the bobbin tension, turn the tension screw (2) in the direction of A • To decrease the bobbin tension, turn the tension screw (2) in the direction of B. Figure 25 TN-1341 INSTRUCTION MANUAL... -
Page 24: Thread Take-Up Spring (Check Spring)
• To increase the pressure, loosen nut (Fig 26, Item 5) and rotate the spring stud to the left. Then tighten nut 5 • To decrease the pressure, loosen nut (Fig 26, Item 5) and rotate the spring stud to the right. Then tighten nut 5 TN-1341 INSTRUCTION MANUAL... -
Page 25: Stitch Length And Reverse
• If your stitch length dial is hard to turn clockwise, you can release some pressure from the dial by pressing the reverse lever some and this will allow you to turn the dial easier. This happens because the Titan TN-1341 comes with a heavier duty spring in the stitch length mechanism. -
Page 26: Presser Foot Lifter
PRESSER FOOT LIFTER The Titan TN-1341 has a foot lifter on the backside of the machine head that allows the operator to lift and lock the foot in the up position. Figure 28 When you want to keep the foot lifted in the up position, pull the lever (Fig 28, Item 1) upwards into the locked position. -
Page 27: Adjusting The Presser Foot Pressure
ADJUSTING THE PRESSER FOOT PRESSURE The Titan TN-1341 has adjustment screws for both the inner and outer presser feet. While both can be adjusted independently, it is not a common adjustment to be made and should not require regular adjustment. -
Page 28: Adjusting Presser Foot Alternation
ADJUSTING PRESSER FOOT ALTERNATION The Titan TN-1341 is equipped with the Titan Climbing Device. This is the dial on the top of the machine that adjusts the alternation of the two presser feet. This is used primarily when climbing on and off material of different heights. -
Page 29: Sewing Speeds
While the maximum speed of the sewing machine is 2500 spm, this is only suggested when sewing within the parameters of the chart below. It is highly recommended that you adjust your speed accordingly when it comes to stitch length and alternation of the presser foot TN-1341 INSTRUCTION MANUAL... -
Page 30: Safety Clutch
SAFETY CLUTCH The Titan TN-1341 comes with a safety clutch release mechanism as a standard feature. The safety clutch is a “break-free” device that operates between the upper and lower shaft and when overloaded by a thread jam, machine jam or any excess stress, releases the connection between the two shafts. -
Page 31: Warranty
Therefore, it is recommended to ensure the machine and operation area is equipped with a stable ground and the power supply to the machine is the cleanest possible. Titan Sewing Machines www.titansewing.ca TN-1341 INSTRUCTION MANUAL...
Need help?
Do you have a question about the TN-1341 and is the answer not in the manual?
Questions and answers