Table of Contents
Advertisement
Advertisement
Table of Contents

Related Manuals for Hyster B267


Summary of Contents for Hyster B267
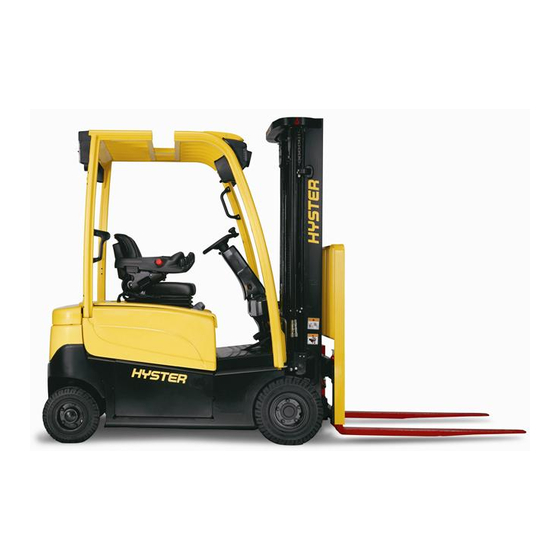
- Page 1 Hyster B267 (S50CT) Forklift Service Repair Manual...
- Page 2 ELECTRICAL SYSTEM S50CT [B267]; H2.0-2.5CT (H50CT) [B274] PART NO. 4120745 2200 SRM 1771...
- Page 3 • Keep the tools clean and in good condition. • Always use HYSTER APPROVED parts when making repairs. Replacement parts must meet or ex- ceed the specifications of the original equipment manufacturer. • Make sure all nuts, bolts, snap rings, and other fastening devices are removed before using force to remove parts.
-
Page 4: Table Of Contents
Seat Sensor (Operator Presence System) ......................16 Non-Suspension Seat ............................16 Remove ..............................16 Install ................................18 Full Suspension Seats ..........................18 Remove ..............................18 Install ................................18 Transmission Pressure Sensors (Transducers) ....................19 Remove ................................19 Install ................................19 Transmission Temperature Sensor ........................19 Remove ................................19 ©2014 HYSTER COMPANY... - Page 5 Remove ................................29 Install ................................30 LED Tail, Backup, and Brake Lights ......................30 Remove ................................30 Install ................................31 Reflectors ................................31 Remove ................................31 Install ................................31 This section is for the following models: (S50CT) [B267]; H2.0-2.5CT (H50CT) [B274]...
-
Page 6: General
2200 SRM 1771 General General The removal and replacement procedures for the following electrical components are covered in this manual: • Display Switch Cluster • Power Distribution Module (PDM) • Lights • Sensors and switches • Battery Some of the components used are made of plastic. When using screws to replace and install plastic components, the screws should be rotated counterclockwise until the screw thread turns over... -
Page 7: Engine Control Module (Ecm), Yanmar Diesel Engine
Engine Control Module (ECM), Yanmar Diesel Engine 2200 SRM 1771 Engine Control Module (ECM), Yanmar Diesel Engine REMOVE 3. Disconnect ECM connector from ECM. See Fig- ure 2. NOTE: ECM for Yanmar engine is located on left- hand side of frame. 4. -
Page 8: Display Switch Cluster
2200 SRM 1771 Display Switch Cluster Display Switch Cluster REMOVE 3. Remove upper steering column cover by pulling up on upper steering column cover to release NOTE: The Display Switch Cluster is a non-repair- the latches (one on either side), and pulling able part. - Page 9 Display Switch Cluster 2200 SRM 1771 Legend for Figure 4 1. HORN BUTTON 2. LOCK NUT 6. Disconnect the Display Switch Cluster harness from the Display Switch Cluster. Remove the four bolts securing the Display Switch Cluster. Slide the display panel off of the steering col- umn.
-
Page 10: Install
2200 SRM 1771 Display Switch Cluster INSTALL DIRECTION CONTROL LEVER 1. Install Display Switch Cluster onto steering Remove column. Install four bolts to secure panel to steering column tighten bolts NOTE: The direction control lever is located on left 19 N•m (168 lbf in). See Figure 5. side of Display Switch Cluster. -
Page 11: Install
Display Switch Cluster 2200 SRM 1771 NOTE: DISPLAY SWITCH CLUSTER SHOWN OUTSIDE OF LIFT TRUCK FOR CLARITY. FLAT-BLADE SCREWDRIVERS SHOWN. A. STEP 1 B. STEP 2 1. DIRECTION CONTROL LEVER 3. DISPLAY SWITCH CLUSTER 2. FLAT-BLADE SCREWDRIVER Figure 6. Direction Control and Turn Signal Removal KEY SWITCH 2. -
Page 12: Install
2200 SRM 1771 Display Switch Cluster 1. BEZEL 4. TORX HEAD SCREW 2. OVERLAY 5. INSERT SCREWDRIVER IN SLOT AT THIS LO- 3. KEY SWITCH CATION Figure 7. Display Switch Cluster Panel Bezel, Grid, and Key Switch Removal DISPLAY SWITCH CLUSTER PANEL 3. -
Page 13: Steering Column Repair
Steering Column Repair 2200 SRM 1771 Steering Column Repair REMOVE 1. Raise hood. Disconnect battery. 2. Remove floor mat and floor plate. See Frame 0100SRM1766 for removal procedure. Remove kick panel, dash panel, and seal plate. See Dash Panel, Kick Panel, and Seal Plate, Re- move and Install for procedures. -
Page 14: Disassemble
2200 SRM 1771 Steering Column Repair DISASSEMBLE 7. Disconnect Display Switch Cluster harness from display panel. Remove harness from steer- 1. Remove steering shaft retention clip. See Fig- ing column. ure 9. 8. Remove four bolts (1, Figure 9) holding steering 2. -
Page 15: Assemble
Steering Column Repair 2200 SRM 1771 ASSEMBLE 4. Install lower steering column cover and two screws onto steering column. See Figure 8. 1. Install steering shaft and install steering col- umn pivot bolts. See Figure 9. 5. Install instrument display panel and steering wheel. -
Page 16: Install
2200 SRM 1771 Sensors and Switches 2. Remove upper steering column cover. See sec- 5. Remove dash panel from cowl. tion Steering Column Repair for procedures. 6. Remove three capscrews from seal plate and re- 3. Remove five Allen Head screws securing the move seal plate. -
Page 17: Accelerator Pedal Position Sensor
Sensors and Switches 2200 SRM 1771 ACCELERATOR PEDAL POSITION NOTE: Tag electrical connectors prior to disconnect SENSOR to aid in correct reconnect. 4. Disconnect throttle position sensor from wiring Remove harness. 1. To access the battery, raise the hood. Discon- 5. -
Page 18: Install
2200 SRM 1771 Sensors and Switches 1. PAN-HEAD SCREW 4. THROTTLE BASE 2. LOCKWASHER 5. D SHAPED THROTTLE SHAFT END 3. THROTTLE POSITION SENSOR Figure 13. Throttle Position Sensor Install 7. Install lever bracket onto cowl. Install clevis and retention pins, and connect levers to con- 1. -
Page 19: Install
Sensors and Switches 2200 SRM 1771 1. Raise the hood. Disconnect the battery. Legend for Figure 14 2. Lower steering column to lowest position and 1. RESERVOIR SUPPLY HOSE 2. BRAKE FLUID RESERVOIR remove upper steering column cover (see Dis- 3. -
Page 20: Install
2200 SRM 1771 Sensors and Switches A. BRAKE PEDAL POSITION SENSOR (LEFT B. PARKING BRAKE POSITION SENSOR (RIGHT SIDE) SIDE) 1. BRAKE PEDAL POSITION SENSOR MOUNT- 4. BRAKE PEDAL POSITION SENSOR ING BRACKET 5. PARKING BRAKE POSITION SENSOR 2. TORX SCREW 6. -
Page 21: Parking Brake Position Sensor
Sensors and Switches 2200 SRM 1771 PARKING BRAKE POSITION SENSOR Install 1. Install new parking brake position sensor and Remove two torx screws and lockwashers onto parking 1. Raise the hood. Disconnect the battery. brake assembly. See Figure 15 and Figure 16. Tighten torx screws to 2.25 N•m (20 lbf in). - Page 22 2200 SRM 1771 Sensors and Switches NOTE: RIGHT SIDE SEAT HANDLE REMOVED NOTE: TOP VIEW OF HOOD SHOWN. FOR CLARITY. 1. MOUNTING HOLES, NON-SUSPENSION SEAT 1. CAPSCREWS 2. HOOD LATCH HANDLE 2. WASHER 3. HOOD 3. COVER PLATE 4. HOOD HINGE ASSEMBLY 4.
-
Page 23: Install
Sensors and Switches 2200 SRM 1771 2. Pull out two pins that secure bottom seat cush- ion to seat base. 3. Lift bottom seat cushion up and disconnect the seat harness from seat sensor. See Figure 20. 4. Use a small, flat-bladed screwdriver and re- move the seat sensor from seat base. -
Page 24: Transmission Pressure Sensors (Transducers)
2200 SRM 1771 Sensors and Switches TRANSMISSION PRESSURE SENSORS Install (TRANSDUCERS) 1. Install new transmission pressure sensors onto transmission. See Figure 21. Remove 2. Connect transmission pressure sensor connec- 1. Raise the hood. Disconnect the battery. tor to transmission wire harness as tagged dur- NOTE: Tag electrical connector prior to disconnect ing removal. -
Page 25: Install
Sensors and Switches 2200 SRM 1771 2. Disconnect rear horn button switch electrical connector from chassis harness. See Figure 23. 3. Remove two capscrews and inserts that attach rear horn button switch and handle to the right rear overhead guard leg. 4. -
Page 26: Engine And Fuel Sensors And Switches, Psi 2.4L Dual Fuel Trucks
2200 SRM 1771 Sensors and Switches ENGINE AND FUEL SENSORS, YANMAR 2. Install handle and switch assembly, two in- 2.6L DIESEL TRUCKS serts, and two capscrews onto overhead guard leg. See Figure 23. Engine Speed Sensor 3. Connect rear horn switch electrical connector to chassis harness as tagged during removal. -
Page 27: Install
Sensors and Switches 2200 SRM 1771 Install 2. Drain engine coolant from radiator before re- moving ECT sensor. See section Cooling Sys- 1. Install engine speed sensor and capscrew on en- tem - PSI 2.4L Engine 0700SRM1767 for in- gine. See Figure 24. structions. -
Page 28: Install
2200 SRM 1771 Sensors and Switches Install 1. Install new sensor into bottom of fuel filter ele- ment body. See Figure 25. 2. Connect sensor to wire harness. 3. Install new O-ring onto drain plug. Install drain plug into bottom of fuel/water separator sensor. - Page 29 Sensors and Switches 2200 SRM 1771 Legend for Figure 26 1. M TERMINAL 2. E TERMINAL 3. B TERMINAL 4. S TERMINAL Figure 26. Glow Plug Relay Terminals...
- Page 30 2200 SRM 1771 Sensors and Switches 1. B TERMINAL 5. NUT 2. M TERMINAL 6. S TERMINAL WIRING 3. M TERMINAL WIRING 7. E TERMINAL WIRING 4. WASHER 8. B TERMINAL WIRING Figure 27. Glow Plug Relay and Wiring...
-
Page 31: Install
Sensors and Switches 2200 SRM 1771 Legend for Figure 28 NOTE: ENGINE NOT SHOWN FOR CLARITY. 1. MOUNTING BRACKET 2. GLOW PLUG RELAY 3. NUT Install 1. Position glow plug relay on mounting bracket and install nuts. See Figure 28. 2. -
Page 32: Install
2200 SRM 1771 Power Distribution Module (PDM) and Component Parts 1. BATTERY 5. MAIN POWER CONNECTIONS 2. BATTERY TRAY 6. BOLT 3. PDM 7. BATTERY LOCKDOWN BAR 4. FUSE CLIP Figure 29. PDM Remove/Install 3. Connect the battery. Close the hood. Move the Install seat and steering column to original positions. -
Page 33: Power Distribution Module (Pdm) Components
Power Distribution Module (PDM) and Component Parts 2200 SRM 1771 POWER DISTRIBUTION MODULE (PDM) Legend for Figure 30 COMPONENTS 1. FRONT WORKLIGHT (20 AMP) 2. START RELAY Remove and Install 3. BATTERY (25 AMP) 4. STARTER (30 AMP) Turn key to ON position. Check all indicator lights 5. -
Page 34: Lights
2200 SRM 1771 Lights Lights WORK LIGHTS (FRONT AND REAR) Legend for Figure 31 NOTE: REAR WORK LIGHT SHOWN, FRONT NOTE: This lift truck has an option for LED style WORK LIGHT IS SIMILAR. work lights. They are non repairable and must be serviced as an assembly. -
Page 35: Install
Lights 2200 SRM 1771 Install 1. Install new strobe light assembly, light guard, capscrews, and nuts onto bracket. See Fig- ure 32. 2. Connect strobe light electrical connector to overhead guard harness as tagged during re- moval. See Figure 32. 3. -
Page 36: Install
2200 SRM 1771 Lights A. LED LIGHT ASSEMBLY B. REFLECTOR ASSEMBLY 1. LIGHT HARNESS 5. MOUNTING BRACKET 2. SCREW 6. REFLECTOR LENS 3. LED LIGHT 7. REFLECTOR BASE 4. CLIP NUT Figure 33. LED Tail, Backup, and Brake Lights Replacement Install 2. - Page 37 NOTES...
- Page 39 TECHNICAL PUBLICATIONS 2200 SRM 1771 12/14...
- Page 40 Thanks very much for your reading, Want to get more information, Please click here, Then get the complete manual NOTE: If there is no response to click on the link above, please download the PDF document first, and then click on it. Have any questions please write to me: admin@servicemanualperfect.com...
Need help?
Do you have a question about the B267 and is the answer not in the manual?
Questions and answers