Subscribe to Our Youtube Channel
Summary of Contents for Clarion Sirius DSH920S
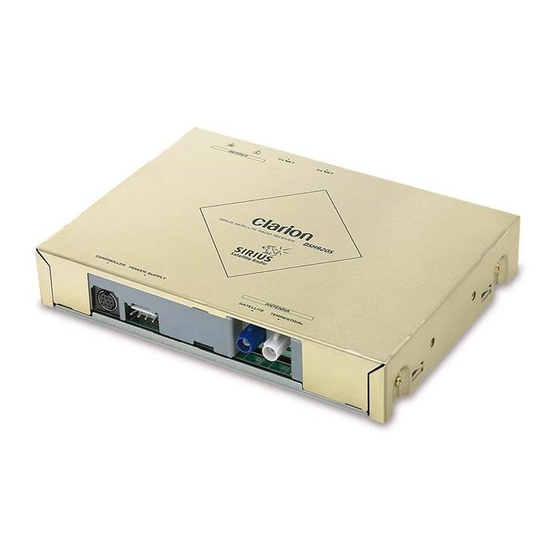
- Page 1 Owner’s manual Mode d’emploi Manual de instrucciones DSH920S SIRIUS SATELLITE RADIO RECEIVER RÉCEPTEUR RADIO SATELLITE SIRIUS SINTONIZADOR SIRIUS DE RECEPCIÓN RADIO VÍA SATÉLITE...
-
Page 2: Table Of Contents
Thank you for purchasing this Clarion product. Please read this owner’s manual in its entirety before operating this equipment. After reading this manual, be sure to keep it in a handy place (e.g., glove compartment). Check the contents of the enclosed warranty card and keep it carefully with this manual. -
Page 3: Precautions
OPERATION IS SUBJECT TO THE FOLLOWING TWO CONDITIONS : (1) THIS DEVICE MAY NOT CAUSE HARMFUL INTERFERENCE, AND (2) THIS DEVICE MUST ACCEPT ANY INTERFERENCE RECEIVED, INCLUDING INTERFERENCE THAT MAY CAUSE UNDESIRED OPERATION. EE-1195B 286- 286-9953-00 Clarion Co.,Ltd. Clarion Co.,Ltd. MADE IN MADE IN JAPAN DSH920S... -
Page 4: What Is Sirius Satellite Radio
All you have to do to obtain a sub- scriber contract and enable reception of Sirius Satellite Radio is to call the Sirius Service Cen- ter (888-539-SIRI) and inform us of your SIRIUS ID and a few other details. -
Page 5: Controls
[ D ] [ ADJ ] [ ROTARY ] [ FUNC ] [ ADJ ] [ DISP ] [ SC ] [ RD ] [ SAT ] [ DIRECT ] [ RDM ] [ BAND ] [ SCN ] DSH920S... - Page 6 Source unit display, example 1 Operation status indication : SIRIUS indication Preset channel indication Function mode indication : Manual indication Source unit display, example 2 Operation status indication Preset channel indication : Manual indication : Category indication : SIRIUS indication DSH920S...
-
Page 7: Channel Selection
1. Press the [a] or [d] button. The receiver seeks the next available chan- nel below or above the current channel. 2. Press and hold the [a] or [d] button. title artist name cat- text channel name … etc. DSH920S... -
Page 8: Recalling A Preset Station
2. Press and hold one of [DIRECT] buttons for 2 seconds or longer to store the current sta- tion into preset memory. DSH920S Notes: • When the name of a channel stored in memory is changed by a broadcasting station, the display may show a channel name that differs from the stored name. -
Page 9: Scan Function
1. Press and hold the [SCN] (SC) button for 1 second or longer to start a preset scan. 2. Press the [SCN] (SC) button, a [DIRECT] button, the [a] or [d] button to cancel a preset scan. Sirius operation DSH920S... -
Page 10: Installation And Wire Connection
• Locations where the unit may be exposed to rain or water. Accessories 1 Mounting bracket ... 2 pieces 2 Mounting screw ... 4 pieces DSH920S 3. Be sure to use the included screws and brackets. Screws other than those supplied could damage the unit. Case Case 8mm max. -
Page 11: Installation Example
Installation Example 1. Attach the mounting brackets 1 to the sides of the DSH920S using the screws 2 pro- vided. 2. Select the location on the floor mat. Drill holes in the floor mat to match the positions of the holes in the mounting brackets 1. - Page 12 SIRIUS antenna cable is connected. • Do not give a strong shock to the antenna con- nector. DSH920S 3. CeNET/STAND ALONE switch Be sure to check to see if the select switch located on the back side of the main unit is set to the “CeNET”...
-
Page 13: System Examples
Example 1 1 Main unit compatible with CeNET connection 2 CD changer compatible with CeNET connec- tion 3 CeNET cable (provided with the DSH920S) Using this cable, connect the DSH920S to the main unit. Note: • The longest wiring length of the CeNET cable is less than 20m. When you connect the CeNET cable, be careful not to execeed the wiring length of 20m. - Page 14 Example 2 1 SIRIUS controller (DSC920S, sold sepa- rately) 2 Connection cable (provided with the DSH920S) 3 Audio systems other than those compatible with the CeNET connection Connect the SIRIUS satellite radio output to the external input terminal. DSH920S 4 RCA pin (audio) cable (sold separately)
-
Page 15: Specifications
Power supply voltage: 14.4 V DC (10.8 to 15.6 V allowable), negative ground Power consumption: Less than 1 A (with antenna) Antenna current limit ; 0.2 A Weight : 0.55 kg Dimensions : 178 (W) 30 (H) 130 (D) mm DSH920S... - Page 16 DSH920S...


Need help?
Do you have a question about the Sirius DSH920S and is the answer not in the manual?
Questions and answers