Table of Contents
Advertisement
This Manual is Bookmarked
Operating Instructions and Parts Manual
8-inch Woodworking Jointer
Models JJ-8CS and JJ-8HH
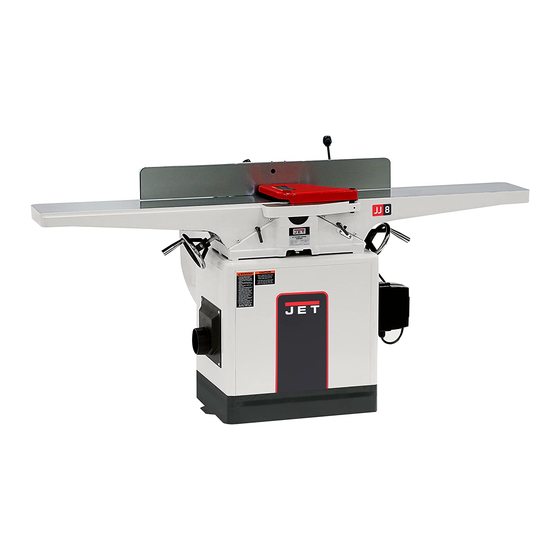
Model JJ-8CS
Model JJ-8HH
WMH TOOL GROUP, Inc.
2420 Vantage Drive
Elgin, Illinois 60124
Part No. M-708458
Ph.: 800-274-6848
Revision G 7/07
www.jettools.com
Copyright © 2007 WMH Tool Group, Inc.
Advertisement
Table of Contents

Related Manuals for Jet JJ-8CS


Summary of Contents for Jet JJ-8CS
- Page 1 This Manual is Bookmarked Operating Instructions and Parts Manual 8-inch Woodworking Jointer Models JJ-8CS and JJ-8HH Model JJ-8CS Model JJ-8HH WMH TOOL GROUP, Inc. 2420 Vantage Drive Elgin, Illinois 60124 Part No. M-708458 Ph.: 800-274-6848 Revision G 7/07 www.jettools.com Copyright © 2007 WMH Tool Group, Inc.
-
Page 2: Warranty And Service
WMH Tool Group is consistently adding new products to the line. For complete, up-to-date product information, check with your local WMH Tool Group distributor, or visit jettools.com. WARRANTY JET products carry a limited warranty which varies in duration based upon the product (MW = Metalworking, WW = Woodworking). WHAT IS COVERED? This warranty covers any defects in workmanship or materials subject to the exceptions stated below. -
Page 3: Table Of Contents
Parts List – Bed Assembly (all models)... 23 Stand and Motor Assembly (JJ-8CS only) ... 24 Parts List – Stand and Motor Assembly (JJ-8CS only) ... 25 Stand and Motor Assembly (JJ-8HH only) ... 26 Parts List – Stand and Motor Assembly (JJ-8HH only)... 27 Parts List –... -
Page 4: Warning
Warning 1. Read and understand the entire owners manual before attempting assembly or operation. 2. Read and understand the warnings posted on the machine and in this manual. Failure to comply with all of these warnings may cause serious injury. 3. -
Page 5: Introduction
Introduction This manual is provided by WMH Tool Group, Inc., covering the safe operation and maintenance procedures for the JET Model JJ-8CS and JJ-8HH Woodworking Jointers. This manual contains instructions on installation, safety precautions, general operating procedures, maintenance instructions and parts breakdown. This machine has been designed and constructed to provide years of trouble free operation if used in accordance with instructions set forth in this manual. -
Page 6: Levers And Controls
WMH Tool Group reserves the right to change specifications at any time and without prior notice, without incurring obligations. 8. On/Off Switch (Pedestal style on JJ-8HH) 9. Rabbeting Ledge 10. Table Lock Knob 11. Fence Tilt Lock Handle 12. Fence Control Handle 13. Belt Guard 14. Dust Chute JJ-8CS JJ-8HH... -
Page 7: Unpacking And Cleanup
Fence Handle Mounting Bolts 3/8" Lock Washers Operating Instructions and Parts Manual Warranty Card Tools Included with JJ-8CS 12/14mm Open End Wrench 8/10mm Open End Wrench Hex Wrenches (3, 4 and 5 mm) Knife Gauge Assembly Tools included with JJ-8HH:... -
Page 8: Installing Bed To Stand
Cutterhead dangerously extreme caution when cleaning. 4. Apply a thin layer of paste wax to the bright surfaces of the fence and tables to prevent rust. Installing Bed to Stand 1. Use an assistant or hoist mechanism to place bed assembly on top of stand. sure identification label on the bed faces the same direction as the label on the stand (Fig. -
Page 9: Installing Handwheels
Installing Handwheels 1. Remove protective tape from shaft, and remove screw and washer. 2. Press handwheel (A, Fig. 4) onto shaft, aligning the keyway with the key. necessary, use a hammer with a block of wood to tap the handwheel completely onto the shaft. -
Page 10: Installing Cutterhead Guard
Model JJ-8CS: Remove the cover of the switch box (A, Fig. 11) and mount the box to the right side of the stand using the two screws provided. -
Page 11: Extension Cords
The JJ-8CS and JJ-8HH jointers are rated at 230V, single phase only. Confirm that the power at the source is compatible with the jointer before inserting plug into the outlet. The jointer is designed to be used with a plug and outlet similar to that shown in Fig. -
Page 12: Fence Adjustment
The outfeed table and cutterhead are adjusted at the factory and should not require adjustment. 1. On the JJ-8CS Jointer, carefully number each blade with a magic marker to make them easier to differentiate. 2. Rotate the cutterhead by turning the cutterhead pulley and determine the 12 o’clock position of knife number one (or a... - Page 13 After the outfeed table has been set, the JJ- 8HH will need no further adjustments to the cutterhead – skip steps 6 through 9 below. The JJ-8CS must have its knives parallel with the outfeed table. Proceed as follows: 6. Bring the straight edge forward to the front...
-
Page 14: Removing And Replacing Knives (Jj-8Cs Only)
Removing and Replacing Knives (JJ- 8CS only) Disconnect the machine from power source before adjustment or repair. All knife lock bolts must be firmly tightened or risk ejection of the knife(s) and lock bar from the cutterhead! Failure to comply may cause serious injury! 1. -
Page 15: Gib Adjustment
so that you can keep track of the rotations. IMPORTANT: When removing inserts, clean saw dust from the screw, the insert, and the cutterhead platform. Dust accumulation between these elements can prevent the insert from seating properly, and may affect the quality of the cut. Before installing each screw, lightly coat the screw threads with machine oil and wipe off any excess. -
Page 16: Jointing Warped Material
three ways; into the fence to ensure a square cut, forward to advance the stock, and downward to avoid chatter and vibration. For jointing when the material is higher than the fence, the left hand applies pressure into the fence and down toward the table while the right hand pushes forward from behind. -
Page 17: Taper Cut
Taper Cut Taper cuts removal of the cutterhead guard. extreme caution when making taper cuts and replace guard immediately completion! Failure to comply may cause serious injury! One of the most useful jointer operations is cutting an edge to a taper. This method can be used on a wide variety of work;... -
Page 18: Maintenance
Failure to remove gum and pitch build-up may result in excessive friction and overheating. Sharpening the Knives (JJ-8CS only) When blades become dull, touch up blades. 1. Disconnect the machine from the power source. -
Page 19: Troubleshooting
Ripples on planed Feeding wood too fast. surface. Cutting blades are set too high above Kickbacks outfeed table, or they may not be level with outfeed table. (JJ-8CS) Motor Excessive motor noise. Pulley set screw is loose. Circuit overloaded with lights, tools, etc. -
Page 20: Replacement Parts
Replacement Parts Replacement parts are listed on the following pages. To order parts or reach our service department, call 1-800-274-6848, Monday through Friday (see our website for business hours, www.wmhtoolgroup.com). Having the Model Number and Serial Number of your machine available when you call will allow us to serve you quickly and accurately. -
Page 21: Fence Assembly (All Models)
Fence Assembly (all models) Parts List – Fence Assembly (all models) Index No. Part No. Description Size 1... JC-F01...Fence Body ... 1 2... JC-F02...Fence Link... 1 3... TS-0051061 ...Hex Head Screw ...5/16”-18 x 1-1/4”... 1 4... TS-0561021 ...Nut ...5/16”-18... 1 5... -
Page 22: Bed Assembly (All Models)
Bed Assembly (all models) -
Page 23: Parts List - Bed Assembly (All Models)
Parts List – Bed Assembly (all models) Index No. Part No. Description Size 1... JC-T01...Base... 1 2... JC-T02...Front Table... 1 3... JC-T03...Rear Table ... 1 4... JC-T04...Rabbeting Arm ... 1 5... JC-T05...Table Bracket ... 1 6... TS-0060071 ...Cap Screw...3/8”-16 x 1-1/2”... 4 7... -
Page 24: Stand And Motor Assembly (Jj-8Cs Only)
Stand and Motor Assembly (JJ-8CS only) -
Page 25: Parts List - Stand And Motor Assembly (Jj-8Cs Only)
Parts List – Stand and Motor Assembly (JJ-8CS only) Index No. Part No. Description Size 1... JC-M01W...Stand ... 1 2... JC-M02W...Motor Mount ... 1 3... JC-M03W...Cover ... 1 4... JC-M04...Screw... 1 5... JC-M05...Key... 1 7... TS-0561031 ...Hex Nut ...3/8”-16... 1 8... -
Page 26: Stand And Motor Assembly (Jj-8Hh Only)
Stand and Motor Assembly (JJ-8HH only) -
Page 27: Parts List - Stand And Motor Assembly (Jj-8Hh Only)
20... TS-0720091 ...Lock Washer ...3/8”... 3 21... JC-M03...Dust Chute ... 1 22... TS-081F032...Screw...1/4”-20x1/2”... 4 23... JJ8-917W ...Motor...2HP, 1Ph... 1 29... PG-M02 ...JET Label... 1 30... JC-T23...Warning Label ... 1 31... 5FK-C13 ...Key...5x5x35 ... 1 32... JJ6HH-316...Cord Protector... 2 33... JJ6HH-315...Switch Arm ... 1 34... -
Page 28: Parts List - Cutterhead Assembly (Jj-8Cs Only)
Parts List – Cutterhead Assembly (JJ-8CS only) Index No. Part No. Description Size 1... JC-C01 ...Cutterhead ... 1 2... JC-C02 ...Bearing Housing... 2 3... 5H-A104 ...Bearing... 2 4... JC-C03 ...Cutterhead Set Bolt ... 2 5... TS-0680041 ...Flat Washer...3/8”... 2 6... TS-0561031 ...Nut ...3/8”-16... 2 7... -
Page 29: Parts List - Cutterhead Assembly (Jj-8Hh Only)
Parts List – Cutterhead Assembly (JJ-8HH only) Index No. Part No. Description Size ... JJ8HH-CA...Cutterhead Assembly (Index # 1 thru 11) ... 1 ... 1791222-4 ...Helical Cutterhead Unit (Index # 1, 7, 8)... 1 1... JJ8HH-101...Helical Cutterhead ... 1 2... JC-C02 ...Bearing Housing... 2 3... -
Page 30: Electrical Connections (Jj-8Cs Only)
Electrical Connections (JJ-8CS only) -
Page 31: Electrical Connections (Jj-8Hh Only)
Electrical Connections (JJ-8HH only) - Page 32 WMH Tool Group, Inc. 2420 Vantage Drive Elgin, Illinois 60124 Phone: 800-274-6848 www.wmhtoolgroup.com...
Need help?
Do you have a question about the JJ-8CS and is the answer not in the manual?
Questions and answers