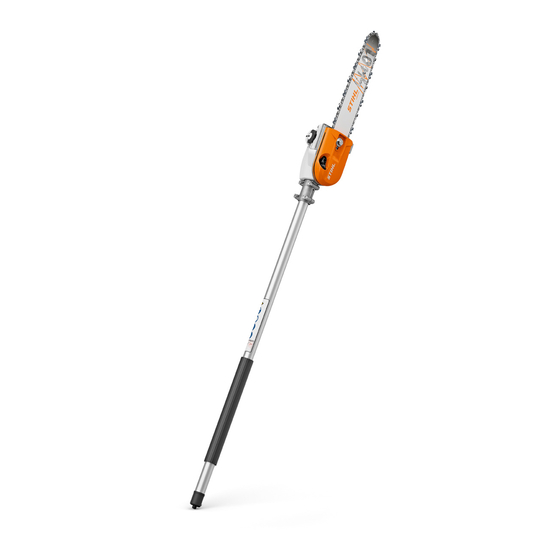
Stihl HT-KM Instruction Manual
Hide thumbs
Also See for HT-KM:
- Instruction manual (66 pages) ,
- Manual (28 pages) ,
- Quick reference (2 pages)
Table of Contents
Advertisement
Quick Links
Advertisement
Table of Contents

Related Manuals for Stihl HT-KM


Summary of Contents for Stihl HT-KM
- Page 1 HT-KM 2 - 27 Instruction Manual...
-
Page 2: Table Of Contents
Only use guide bars, saw chains, chain sprock‐ safe place for future reference. ets and accessories that are explicitly approved for this power tool model by STIHL or are techni‐ Guide to Using this Manual cally identical. If you have any questions in this respect, consult your dealer. - Page 3 To avoid damage, do not throw the machine to of a resistant material (e. g. leather). the ground when practicing. See also notes on "Before Starting" in the user manual of the KombiEngine you are using. STIHL can supply a comprehensive range of per‐ sonal protective equipment. 0458-473-0121-E...
- Page 4 English 3 Safety Precautions and Working Techniques Holding and guiding the machine Make sure you always have good balance and secure footing. 15m (50ft) Do not allow other persons within a radius of 15 m of your own position due to falling branches and ejected wood particles –...
- Page 5 3 Safety Precautions and Working Techniques English – Never use the machine with just one hand 3.5.2 Limbing Be particularly alert and cautious when wearing hearing protection because your ability to hear warnings (shouts, alarms, etc.) is restricted. Take breaks when you start getting tired or feel‐ ing fatigue –...
-
Page 6: Using The Unit
If branch is thick or heavy, make a relieving cut – STIHL recommends the use of genuine STIHL see chapter on "Using the Pole Pruner". replacement parts. They are specifically... - Page 7 4 Using the Unit English 4.4.2 Relieving cut should be extended to the most comfortable position. To avoid tearing the bark on thick branches, always start by performing a The shaft should always be held at an angle of ► relieving cut (1) on the underside of the 60°...
- Page 8 English 4 Using the Unit 4.4.3 Flush-cutting thick branches 4.4.4 Cutting above obstacles If the branch diameter is more than 10 cm (4 in), The machine's long reach makes it possible to first prune branches that are overhanging obstacles, ► perform the undercut (3) and then cross-cut at such as rivers or lakes.
-
Page 9: Approved Kombiengines
STIHL for use with the attachment. This KombiTool may be operated only in combi‐ nation with the following KombiEngines: STIHL KM 56 R, KM 85 R KM 94 R, KM 111 R, KM 131 R, KMA 130 R, KMA 135 R 0458-473-0121-E... -
Page 10: Mounting The Kombitool
English 7 Mounting the KombiTool NOTICE The plug may come out of the drive tube when you pull off the cap. Push it back into the shaft as far as it will go. Mounting the gearbox ► Line up the gearbox (1) so that the chain sprocket cover is exactly vertical and the lug (arrow) on the end of the drive tube faces up ►... -
Page 11: Cutting Attachment
8 Cutting Attachment English Cutting Attachment Mounting the Bar and Chain A cutting attachment consists of the saw chain, guide bar and chain sprocket. Removing the chain sprocket The cutting attachment that comes standard is cover designed to exactly match the pole pruner. ►... -
Page 12: Tensioning The Chain
English 10 Tensioning the Chain 10 Tensioning the Chain Fitting the saw chain Re-tensioning during cutting work: ► Shut off the engine ► Loosen nuts ► Raise the guide bar at the nose ► Use the screwdriver to turn the screw (1) to the right until the saw chain rests against the underside of the guide bar ►... -
Page 13: Chain Lubricant
Preparations NOTICE Biological chain oil must be resistant to aging (e.g. STIHL BioPlus), since it will otherwise quickly turn to resin. This results in hard deposits that are difficult to remove, especially in the area of the chain drive and chain. It may even cause the oil pump to seize. - Page 14 ► Fill up with chain oil Take care not to spill chain oil during refilling and do not overfill the tank. STIHL recommends use of the STIHL filling sys‐ tem for chain oil (special accessory). 13.4 To close: ► Close the bracket lock Clip is in an upright position: ►...
-
Page 15: Checking Chain Lubrication
English 14 Checking Chain Lubrica‐ contact your dealer for assistance if necessary. tion STIHL recommends that maintenance and repair work be carried out only by authorised STIHL dealers. 13.5 If the fuel cap will not lock onto the oil tank The base of the fuel cap is tilted in relation to the upper part. -
Page 16: Starting / Stopping The Engine
English 16 Starting / Stopping the Engine 15.1 Shoulder Strap 15.3 Disconnecting Machine from Shoulder Strap ► Press down the bar on the carabiner (1) and pull the carrying ring (2) out of the carabiner. 15.4 Throwing Off the Machine WARNING The machine must be quickly thrown off in the event of imminent danger. -
Page 17: Operating Instructions
17 Operating Instructions English 17 Operating Instructions ► Position the unit securely for starting: Put the powerhead on the ground so that it rests on 17.1 During Operation the engine support. Rest the hook on the cut‐ ting attachment on a raised support, e.g. a 17.1.1 Check chain tension frequently mound or branch. -
Page 18: Taking Care Of The Guide Bar
For periods of 30 days or longer ► Remove the saw chain and guide bar, clean them and spray with corrosion inhibiting oil. ► If you use a biological chain and bar lubricant, e.g. STIHL BioPlus, completely fill the chain oil tank. 0458-473-0121-E... -
Page 19: Maintaining And Sharpening The Saw Chain
Have the chain sprocket replaced by an author‐ ized dealer. The chain pitch (a) is marked on the depth gauge STIHL recommends that maintenance and repair end of each cutter. work be carried out only by authorized STIHL Mark (a) Chain pitch dealers. inch 21 Maintaining and Sharpen‐... - Page 20 English 21 Maintaining and Sharpening the Saw Chain STIHL saw chains are sharpened to a filing angle Use a STlHL filing gauge (special accessory, see of 30°. Exceptions are ripping chains with a filing table "Sharpening Tools"). This is a universal tool angle of 10°.
- Page 21 21 Maintaining and Sharpening the Saw Chain English All cutters must be the same length. If the cutters are not the same length, they will have different heights. This makes the chain run roughly and can cause it to break. ►...
-
Page 22: Maintenance And Care
English 22 Maintenance and Care WARNING The kickback tendency of the machine is increased if the depth gauges are too low. ► Place the filing gauge on the chain – the high‐ est point of the depth gauge must be level with the filing gauge. -
Page 23: Minimize Wear And Avoid Damage
Chain Sprocket Check Have replaced by serv‐ icing dealer Safety labels Replace STIHL recommends an authorized STIHL servicing dealer. 23 Minimize Wear and Avoid 23.1 Maintenance Work Damage All the operations described in the chapter on "Maintenance and Care" must be performed on a Observing the instructions in this manual and the regular basis. -
Page 24: Main Parts
6 Chain sprocket cover For further details on compliance with Vibration 7 Hook Directive 2002/44/EC, see 8 Chain scabbard www.stihl.com/vib 9 Chain sprocket 25.4.1 Sound pressure level L in accord‐ 10 Gauge bar ance with ISO 22868... -
Page 25: Maintenance And Repairs
27 Disposal 25.4.3 Vibration level a in accordance hv,eq with ISO 22867 Contact the local authorities or your STIHL serv‐ Handle, left Handle, icing dealer for information on disposal. right KM 56 R Improper disposal can be harmful to health and 6.8 m/s... -
Page 26: Ukca Declaration Of Conformity
D‑EG 16.00574/01 KM 94 R: Make: STIHL Series: HT-KM HT-KM with KM 111 R, KM 131 R, FR 131 T Serial identification num‐ 4182 ber: TÜV Süd Product Service GmbH (NB 0123) conforms to the relevant provisions of the UK... - Page 27 KMA 130 R: HT-KM with ITS UK MCR 41 KMA 135 R: Technical documents deposited at: ANDREAS STIHL AG & Co. KG The year of manufacture is indicated on the power tool. Waiblingen, 2022-03-31 ANDREAS STIHL AG & Co. KG Dr.
- Page 28 *04584730121E* 0458-473-0121-E...
Need help?
Do you have a question about the HT-KM and is the answer not in the manual?
Questions and answers