Table of Contents
Advertisement
Quick Links
Advertisement
Table of Contents

Related Manuals for Vertiv Liebert AHU Series


Summary of Contents for Vertiv Liebert AHU Series
- Page 1 Liebert® AHU Precision Air Conditioning Technical Manual...
- Page 2 No part of this document may be reproduced or transmitted in any form or by any means without the prior written consent of Vertiv Co.
- Page 3 Purpose of the Document This document applies to the series of precision air conditioners and cooling solutions which maintain optimal environmental control of technological ecosystems at minimal operating costs. This document gives an overview of the specifications, installation, commissioning, and maintenance procedures with troubleshooting from the user perspective. The figures used in this document are for reference only.
- Page 4 Use of a leak detection system for the unit and system supply lines are recommended by Vertiv.
-
Page 5: Table Of Contents
Vertiv™ | Liebert® AHU | Technical Manual Table of Contents 1 Product Overview ............................................1 1.1. Product Introduction ..........................................1 1.2. Model Description .............................................1 1.3. Model Nomenclature ..........................................2 1.4. Standard Configuration ........................................3 2 Operating & Storage Environment Requirements ..........................4 2.1. Operating Environment Requirements ................................4 2.2. - Page 6 Vertiv™ | Liebert® AHU | Technical Manual 4.1.6. Dual Power Supply- ATS ....................................13 4.1.7. Supply Air Temperature Sensor.................................. 13 4.1.8. Return Air Temperature & Humidity Sensor ..........................13 4.1.9. Filter ............................................... 13 4.1.10. Air Damper ........................................... 13 4.1.11. Belt type leak detector .......................................14 4.2.
- Page 7 Vertiv™ | Liebert® AHU | Technical Manual 6.4.1. Powering-On iCOM and Logging-in/Unlocking Controls ....................26 6.4.2. Powering-On the Thermal Management Unit ........................... 26 6.4.3. Powering-Off the Thermal Management Unit ........................... 28 6.4.4. Logging Out ..........................................28 6.4.5. Setting the Date and Time .................................... 28 6.4.6.
-
Page 8: Product Overview
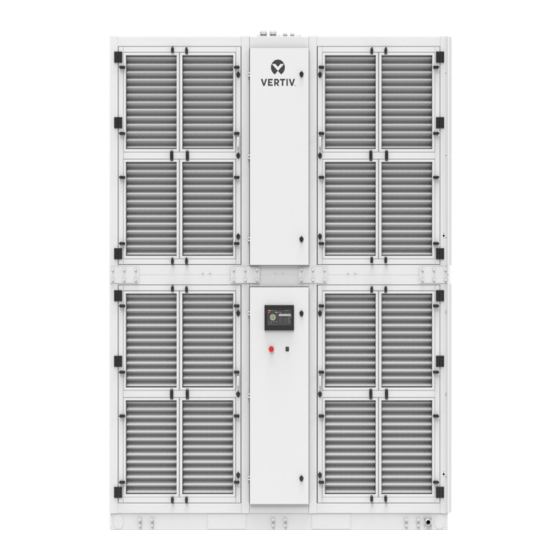
1 Product Overview 1.1. Product Introduction AHU is an ideal solution to handle large heat load along with larger air volume. AHU caters to several ecosystems such as data center and IT rooms wherein optimum cooling is required along with a high degree of reliability and variability. Changes in IT equipment technology have always been a primary driver in the development of critical infrastructure thermal management solutions. -
Page 9: Model Nomenclature
Digit 12 Display Airflow meter Global HMI 9inch Multi Sensors Digit 13 Re-Heating Digit 21 Packaging None Packaging-Standard Wooden Pallet and EPE package Electric heating Std 1 stage Electric heating Opt. 2 stage Vertiv™ | Liebert® AHU | Technical Manual... -
Page 10: Standard Configuration
20 21 24 2 5 Digit 22 Special Requirements Digit 24 Order Identifier SFA-None Factory Code Condensate Pump Digit 25 Order Identifier Digit 23 Order Identifier Factory Code Factory Code 1.4. Standard Configuration The Standard configuration for Cooling module and Fan module is mentioned in the following table in Table 1-2. -
Page 11: Operating & Storage Environment Requirements
Total transportation and storage time should not exceed six months. Otherwise, the Storage time performance needs to be re-calibrated. Contact Vertiv local representative for any of the following conditions: Note1: The unit voltage exceeds the operating voltage range. Note2: De-rating for altitude above 1000 m. -
Page 12: Technical Parameter
3 Technical Parameter This chapter details about the technical parameters of AHU. 3.1. Performance Parameters Table 3-1 provides the technical parameters for AHU. Table 3-1 Technical Parameters for AHU Technical data FA065HC1NE09020F1070P0000 FA065HC1NE09020M1070P0000 Frame Aluminum Sheet Metal Panel Color Steel & Galvanized Steel Sheet Metal Structure Type Insulation Materials... -
Page 13: Product Dimensions
Sound Power 81.3 Level(dB(LwA)) 3.2. Product Dimensions 3.2.1. Overall Dimensions The dimensions and weight of AHU are depicted in Figure 3-1, Figure 3-2, Figure 3-3 Table 3-2 respectively. Figure 3-1 AHU Outline Drawing Vertiv™ | Liebert® AHU | Technical Manual... - Page 14 Figure 3-2 Upper Section Figure 3-3 Lower Section Figure 3-4 Horizontal group installation...
-
Page 15: Position And Dimension Of Steel Base
The base dimensions are shown in Figure 3-5. Figure 3-5 Steel Base (unit: mm) 3.2.3. Position and Dimension of Top Cover The position and dimension of top cover are shown in Figure 3-6 Table 3-3 respectively. Vertiv™ | Liebert® AHU | Technical Manual... - Page 16 Figure 3-6 Top Cover Description Description Water pipe inlet DN80 Low voltage entrance M25 Water pipe outlet DN80 Condensate drain outlet G1-1/4 Incoming high voltage power supply entrance M40 Table 3-3 Dimensions of Top Cover (unit: mm) Figure 3-7 Inlet and Outlet Pipe Flange (unit: mm)
-
Page 17: Position And Dimensions Of Supply Air Side
16 filter screens are arranged at the return air outlet. The position and dimensions of air inlet are shown in Figure 3-9 respectively. Figure 3-9 The Position of Air Outlet on Unit (unit: mm) Vertiv™ | Liebert® AHU | Technical Manual... -
Page 18: Components & Features
4 Components & Features This section provides an overview of the key components, SFA components, and features of the AHU. 4.1. Components AHU includes EC Fan, Air Damper, Water Valve, ATS, Filter, Temperature Sensor, Coil, and iCOM Controller. Figure 4-1 AHU Device Layout 4.1.1. -
Page 19: Coil
AHU is available with 9-inch touch screen as a standard display, using multi-color 800×480 dot-matrix liquid crystal touch screen with white backlight as shown in Figure 4-3. The operation of the unit becomes simpler and more convenient, and the status view of the unit is more visualized. Vertiv™ | Liebert® AHU | Technical Manual... -
Page 20: Icom Controller
Figure 4-3 9-inch Color Display 4.1.5. iCOM Controller The iCOM Controller with an easy-to-use interface with “auto-restore on power-failure” feature can store up to 400 records at a given point of time. It comes with dual options, namely- a small display and a large display. It directly connects to the facility network (Ethernet) and enables communication with several AHU in a synchronous manner, establishing a high degree of reliability. -
Page 21: Belt Type Leak Detector
DC bus in a regulated process. The buffer modules are maintenance-free and have a similar life expectancy as power supplies. It is not necessary to regularly replace the capacitors as required for battery-based UPS systems. Vertiv™ | Liebert® AHU | Technical Manual... -
Page 22: Product Handling And Installation
This chapter mainly introduces the air conditioning works required to be conducted or focused after the product is arrival. The Vertiv standard AHU is delivered in two sections. The lower section should be positioned in the final operating location first. The upper section should be carefully lifted and mounted on the top following the instructions provided. Always ensure operator and equipment safety procedures are followed. - Page 23 This floor stand is also conducive to the connection of the AHU condensate drain pipe, so it is recommended that the height be above 100 mm. Figure 5-3 is a schematic diagram of the floor stand for customers’ reference. Figure 5-3 Schematic diagram of floor stand Vertiv™ | Liebert® AHU | Technical Manual...
-
Page 24: Upper Cabinet Hoisting
After completing the above preparations, please proceed to the next step: 1) Place the lower section on the preset position of floor stand. 2) Install the lower section on the floor stand, and then connect the base and the lower section with seismic restraint brackets (SRB). - Page 25 4) The unit needs to be protected before hoisting. Pad some thick EPE or other things between the sling and the frame of the unit. After completing the above steps, start hoisting. During the hoisting process, it is necessary to ensure that the force in all directions is consistent and the unit is stable. Vertiv™ | Liebert® AHU | Technical Manual...
-
Page 26: Unit Connection And Wiring
Note: It is necessary to protect the aluminum frame by some papers or wood. 5.4. Unit Connection And Wiring After the hoisting is completed, cabinet connection and wiring are required. 1) Install the connectors of the outside panel for the unit. 2) There is a plug-in box in the electrical box of the upper cabinet. - Page 27 Figure 5-9 Sheet metal Vertiv™ | Liebert® AHU | Technical Manual...
-
Page 28: Maintenance Space Requirements
5.5. Maintenance Space Requirements Note1: AHU is advanced precision air conditioner and the recommended way is to install them as a standalone equipment. Note2: Do not use the indoor unit in open and harsh outdoor environment. Note3: Avoid positioning the indoor unit in concave or narrow areas, which can baffle the airflow and shorten the cooling cycle resulting in short circuiting of air and air noise. -
Page 29: Controller Operation
• iCOM ships with default settings for efficient and effective operation of most cooling-units and it is easily configured to meet any requirement. • iCOM menus and displays are based on the options installed on the cooling units that it monitors and manages. Figure 6-1 Liebert iCOM Main Display Vertiv™ | Liebert® AHU | Technical Manual... - Page 30 Table 6-1 Main Display Controls and Options Description Alarms present: Displays the number of active alarms Menu icon: When unlocked, displays a menu for user or service option depending on which icon is selected User icon: When selected the user options are available on the main display and menu (Note: Unlock the display with the user Password to access the menu and options.
-
Page 31: Touchscreen Status Dial
Sensor reading is within threshold limits Sensor reading is above the threshold limit or the unit is in an alarm condition Unit is powered-off Sensor reading is below the threshold limits Figure 6-3 Dial Background Colors Vertiv™ | Liebert® AHU | Technical Manual... - Page 32 Table 6-2 Background Color Displayed by Selected Value and Threshold Limit Sensor/Value Selected Threshold Limit Background Color None Blue Return Temp High return temperature Low return humidity Blue Return Humidity High return humidity Low dew point Blue Dew Point High dew point Low supply temperature Blue Supply Temp...
-
Page 33: Control Header
1. Press then > Turn Unit On, then Unit On dialog box opens. 2. Press Turn Unit On, then cooling unit starts, and the operating status is displayed as shown in Figure 6-4. Vertiv™ | Liebert® AHU | Technical Manual... - Page 34 “On/Closed” or if one is “Off/Open”, the unit turns off. • Turned-off by remote monitoring system. MONITORING OFF • Check the remote monitoring device or call Vertiv technician support for assistance. Unit is non-operational, but EC fan is operating as a back-draft damper. BACK-DRAFT RESTART DELAY Not yet operational after a power cycle because the restart- delay time is active.
-
Page 35: Powering-Off The Thermal Management Unit
(the number of related entries is included in the option). The Parameter Directory opens. You may further refine the search in the directory. Note: User must be logged-in to access the display search. See Powering-on iCOM and Logging-in/ Unlocking Controls. Vertiv™ | Liebert® AHU | Technical Manual... -
Page 36: Using Context-Sensitive Help
6.4.7. Using Context-Sensitive Help Pressing the Help icon on the right-hand side of the display opens the Help drawer with information about the panel or dialog currently on the display. 1. You can use search and the topic index to find further information. 2. -
Page 37: User Menu
5. BMS & Teamwork Setup: Opens the BMS & Teamwork Setup menu: • U2U Setup • Teamwork/Standby • BMS Setup 6. Scheduler: Opens the SCHEDULER panel. 7. Options Setup: Opens the OPTIONS SETUP panel. Vertiv™ | Liebert® AHU | Technical Manual... -
Page 38: Advanced Menu
8. Auxiliary Device Setup: Opens the Auxiliary Device Setup menu: • Sensors • Analog Input • Modbus Devices • iCOM-DO • CapCom 9. Backup & Security: Opens the Backup & Security menu: • Control Upgrade • Control Backup/Replicate • Control Files •... -
Page 39: User Operation
Alarms panel and the LED stops flashing red. Note: Acknowledging alarm events does not clear them, to clear an issue, it must be corrected, reset automatically by the controller or reset manually. Vertiv™ | Liebert® AHU | Technical Manual... -
Page 40: Viewing The Event Log
To acknowledge alarms 1. On the ALARMS panel, press Acknowledge All: A check mark overlays the status indicator of the active alarms and warnings, and these automatically clears when the condition is no longer present. 2. If a critical event must be reset manually, then the acknowledged items are listed with a Reset All button on the ALARMS panel. -
Page 41: Managing Run Hours For A Component
Mode 2- Independent Teamwork Mode 3- Optimized Aisle Teamwork Figure 6-5 Teamwork icons Note: You must be logged-in with the Service Password to edit teamwork mode. Refer Powering-on iCOM and Logging- in/ Unlocking Controls Vertiv™ | Liebert® AHU | Technical Manual... -
Page 42: Appendix I: User Menu
08- Total Run Hours 09- Modbus Power Meters 10- Automatic Transfer Switch 01- EconoPhase 1 & 2 11- EconoPhase view 02- EconoPhase 3 & 4 12- About 13- Asset Report 14- Turn Unit On/Off Vertiv™ | Liebert® AHU | User Manual... - Page 43 Connect with Vertiv on Social Media https://www.facebook.com/vertiv/ https://www.instagram.com/vertiv/ https://www.linkedin.com/company/vertiv/ https://www.twitter.com/vertiv/...
- Page 44 Vertiv.com © 2022 Vertiv Group Corp. All rights reserved. Vertiv™ and the Vertiv logo are trademarks or registered trademarks of Vertiv Group Corp. All other names and logos referred to are trade names, trademarks or registered trademarks of their respective owners. While every precaution has been taken to ensure accuracy and completeness here, Vertiv Group Corp.
Need help?
Do you have a question about the Liebert AHU Series and is the answer not in the manual?
Questions and answers