Table of Contents
Advertisement
Quick Links
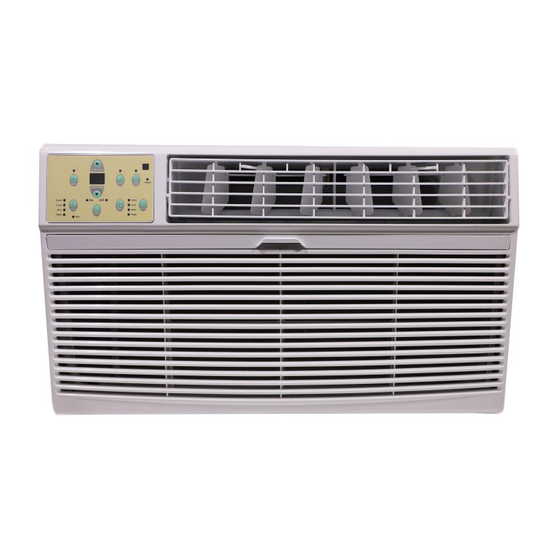
OPERATION AND INSTALLATION MANUAL
FOR MODELS:
TTW48A115X
TTW410A115X
TTW412A115X
TTW412A230X
TTW412AE230X STW412AEZX
950-0184-revB
THRU THE WALL
AIR CONDITIONER
STW48AYX
STW410AYX
STW412AYX
STW412AZX
COOLING
CAPACITY
8,000
10,000
12,000
11700/12,000
11700/12,000
HEATING
CAPACITY
N/A
N/A
N/A
N/A
8,600/10,600
3/12/2014
Advertisement
Table of Contents

Related Manuals for International Refrigeration Products TTW48A115X


Summary of Contents for International Refrigeration Products TTW48A115X
- Page 1 THRU THE WALL AIR CONDITIONER OPERATION AND INSTALLATION MANUAL FOR MODELS: COOLING HEATING CAPACITY CAPACITY TTW48A115X STW48AYX 8,000 TTW410A115X STW410AYX 10,000 TTW412A115X STW412AYX 12,000 TTW412A230X STW412AZX 11700/12,000 TTW412AE230X STW412AEZX 11700/12,000 8,600/10,600 950-0184-revB 3/12/2014...
-
Page 2: Table Of Contents
CONTENTS IMPORTANT INSTRUCTIONS ..........................1 INSTALLATION INSTRUCTIONS ..........................3 ITEMS IN KIT ..............................3 HOW TO INSTALL ............................. 4 FINISH INSTALLATION ............................. 6 CONTROL PANEL OPERATING ..........................7 TURN UNIT ON ..............................7 CHANGE TEMPERATURE SETTING ....................... 8 ADJUST FAN SPEED ............................8 SELECT HEAT MODE ............................ -
Page 3: Important Instructions
IMPORTANT INSTRUCTIONS WARNING: To reduce the risk of fire, electrical shock or injury when using your air conditioner, follow these basic precautions: Plug into a grounded 3 prong outlet. Do not use an extension cord. Do not remove ground prong. Unplug Air Conditioner before servicing. - Page 4 LCDI or AFCI Power Cords - Underwriters Laboratories and the National Electric Code (NEC) now require power cords that sense current leakage and can open the electrical circuit to the unit on units rated at 250 volts or less. In the event that unit does not operate, check the reset button located on or near the head of the power cord as part of the normal troubleshooting procedure.
-
Page 5: Installation Instructions
INSTALLATION INSTRUCTIONS NOTE: The air conditioner dimension is: 24” W x 14 1/2” H x 18 1/2” D without front case. To ensure that the unit operates safely and efficiently, it should be installed, operated, and maintained according to these installation and operating instructions and all local codes and ordinances, or, in their absence, with the latest edition of the National Electrical Code. -
Page 6: How To Install
HOW TO INSTALL SEA BREEZE TTW IN EXISTING SLEEVE Remove old air conditioner from wall sleeve and prepare wall sleeve as follows: · Clean interior but do not disturb seals. · Wall sleeve must be securely fastened in wall before installing air conditioner. Drill a 3/16”... - Page 7 Attach (2) 1”x3/8” x14” long seals to the left and right sides of the sleeve. Cut (2) 1”x3/4” x14” long seal vertically 3.5” from the left and vertically 3” from the other sides of the sleeve. Center unit and gently slide unit into sleeve. 10.
-
Page 8: Finish Installation
FINISH INSTALLATION 1. Install the 1”x1 1/2” x 84” long stuffer-seal (foam insulation) between the wall sleeve and the unit. 2. Assemble the trim frame by inserting top and bottom pieces into side pieces and snapping into place. 3. Pull cord through trim frame then slide over unit until flush with wall. -
Page 9: Control Panel Operating
CONTROL PANEL OPERATING Before you begin, thoroughly familiarize yourself with the control panel and remote as shown below and all its functions then follow the symbol for the functions you desire. The air conditioner can be controlled by the remote control or the control panel. -
Page 10: Change Temperature Setting
CHANGING TEMPERATURE SETTING Change Temperature: Press or hold either Up (▲) or Press to raise Down (▼) button until the desired set point. temperature set point is seen on the display. Temperature range is 62° F (17° C) Press to lower to 86°... -
Page 11: Select The Operating Mode
SELECTING THE OPERATING MODE Select Operating Mode: To choose operating mode, press the Mode button. Each time you press the button, a mode is selected in a sequence that goes from Auto, Cool, Dry and Fan. The indicator light beside the Mode button will Press the Mode be illuminated. -
Page 12: Timer: Auto Start/Stop Feature
TIMER: AUTO START/STOP FEATURE TIMER FUNCTION: Press the Timer button to select "On or Off". After the time is selected the unit will either turn on or off after the timer has timed out. Example: If the unit is operating and "Off' is selected the unit will turn off after the selected time times out. -
Page 13: Remote Control
REMOTE CONTROL Handling and location of the remote controller Use the remote control at a distance of 16 ft., or less, from the appliance. Point it towards the receiver on the air conditioner. Communication is confirmed with a beep. CAUTIONS ... -
Page 14: Function Buttons
FUNCTION BUTTONS - REMOTE CONTROL MODE button Press this button to select ON/OFF button the desired operation mode Operation starts when this AUTO, COOL, DRY, FAN button is pressed and and HEAT if unit is a heating stops when it is pressed model. -
Page 15: Remote Operating
REMOTE OPERATING Cooling/Heating/Fan operation Ensure the unit is plugged in and power is on. 1. Press the ON/OFF button to start the air conditioner. 2. Press the MODE button to select Cool, Heat (if unit is a heating model) or Fan mode. 3. - Page 16 REMOTE OPERATING (CONTIUNED) Dehumidifying (DRY) operation Ensure the unit is plugged in and power is 1. Press the ON/OFF button to start the air conditioner. 2. Press the MODE button to select DRY. 3. Press the TEMP UP/DOWN button to set the desired temperature.
- Page 17 REMOTE OPERATING (CONTIUNED) Timer operation Press the TIMER button to initiate the Auto-start and Auto-stop setting program of the unit. The time can be set for 0~24 hours. To set the Auto-start/stop time 1. Press the TIMER button, when the TIMER ON indicator displayed on the LED window of the air conditioner, it indicates the Auto Start setting program is initiated.
-
Page 18: Important Information
IMPORTANT INFORMATION The compressor has a 3 minute time delay if the unit is turned off and on quickly. The fan will continue to run during this time. The control is capable of displaying temperature in degrees Fahrenheit or degrees Celsius. To convert from one to the other, press and hold the Up (▲) and Down (▼) Temp/Timer buttons at the same time, for 3 seconds. -
Page 19: Air Conditioner Care
AIR CONDITIONER CARE Your new air conditioner is designed to give you many years of dependable service. This section tells you how to clean and care for your air conditioner properly. Call your local authorized dealer for an annual checkup. Remember, the cost of this service call is your responsibility. -
Page 20: Troubleshooting
TROUBLESHOOTING Before calling for service, try the suggestions below to see whether you can solve your problem without outside help. An extension cord is being used. Do not use an extension cord with this or any other appliance. Air conditioner will not operate You are trying to restart the air conditioner too soon after turning the unit off. - Page 21 Windows or doors to the outside are open. Close Air Conditioner cycles on and off too all windows and doors. often, or does not cool room in cooling mode The Vent control is set to open (on some models). Push the Vent control to CLOSED for maximum The air conditioner is not properly sized for your cooling and/or heating.
-
Page 22: Specifications
SPECIFICATIONS TTW48A115X TTW410A115X TTW412A115X TTW412A230X TTW412AE230X Models STW48AYX STW410AYX STW412AYX STW412AZX STW412AEZX 11700/12000 11700/12000 Cooling Capacity 8000 10000 12000 8600/10600 Heating Capacity EER Rating 2.537 2.537 Dehumidification (pints/hr) 1.903 2.325 2.537 283/247/216 295/272/247 286/262/241 Air Flow Max (CFM) (H/M/L) 282/245/211... -
Page 23: Warranty
WARRANTY International Refrigeration Products warrants that the product supplied is free from defects in material and workmanship. This warranty is valid as long as this product is properly handled, installed, operated and serviced in accordance with the installation and operating instructions shipped with this unit.
Need help?
Do you have a question about the TTW48A115X and is the answer not in the manual?
Questions and answers