Table of Contents
Advertisement
Available languages
Available languages
Quick Links
See also:
Service Manual
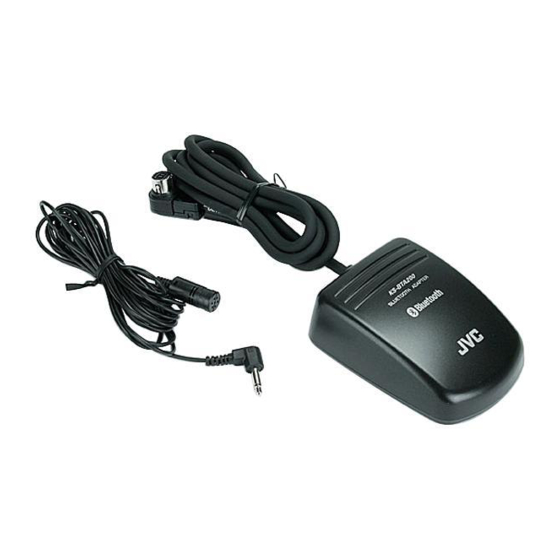
Bluetooth adapter
Bluetooth-Adapter / Adaptateur Bluetooth
Bluetooth adapter / Adaptador Bluetooth
Adattatore Bluetooth / Adaptador Bluetooth
KS-BTA200
MANUAL DE INSTRUCCIONES
ISTRUZIONI
INSTRUÇÕES
/
INSTRUCTIONS
BEDIENUNGSANLEITUNG
MANUEL D'INSTRUCTIONS
GEBRUIKSAANWIJZING
For customer Use:
Enter below the Model
No. and Serial No. which
are located on the top or
bottom of the cabinet.
Retain this information
for future reference.
Model No.
Serial No.
LVT1640-001A
[K]
Advertisement
Chapters
Table of Contents

Related Manuals for JVC KS-BTA200K


Summary of Contents for JVC KS-BTA200K
- Page 1 Bluetooth adapter Bluetooth-Adapter / Adaptateur Bluetooth Bluetooth adapter / Adaptador Bluetooth Adattatore Bluetooth / Adaptador Bluetooth KS-BTA200 INSTRUCTIONS BEDIENUNGSANLEITUNG MANUEL D’INSTRUCTIONS GEBRUIKSAANWIJZING MANUAL DE INSTRUCCIONES ISTRUZIONI INSTRUÇÕES For customer Use: Enter below the Model No. and Serial No. which are located on the top or bottom of the cabinet.
- Page 2 KS-BTA200 is in compliance with the essential requirements and other relevant provisions of Directive 1999/5/EC. Deutsch: Hiermit erklärt JVC, dass sich das Gerät KS-BTA200 in Übereinstimmung mit den grundlegenden Anforderungen und den übrigen einschlägigen Bestimmungen der Richtlinie 1999/5/ EG befindet. (BMWi) Hiermit erklärt JVC die...
- Page 3 KS-BTA200 står I överensstämmelse med de väsentliga egenskapskrav och övriga relevanta bestämmelser som framgår av direktiv 1999/5/EG. Íslenska: Hér með lýsir JVC yfir því að KS-BTA200 er í samræmi við grunnkröfur og aðrar kröfur, sem gerðar eru í tilskipun 1999/5/EC. Norsk: JVC erklærer herved at utstyret...
- Page 4 – Consult the dealer or an experienced radio/TV technician for help. Caution: Changes or modifications not approved by JVC could void the user’s authority to operate the equipment. Information for Users on Disposal of Old Equipment This symbol indicates that the product with this symbol should not be disposed as general household waste at its end-of-life.
-
Page 5: Introduction
JVC car audio (IN-CAR ENTERTAINMENT) dealer. • This adapter has been designed exclusively for use with JVC’s car receivers. Do not use this adapter with any other car receiver. Precautions •... -
Page 6: About Bluetooth
• The Bluetooth word mark and logos are owned by the Bluetooth SIG, Inc. and any use of such marks by Victor Company of Japan, Limited (JVC) is under licence. Other trademarks and trade names are those of their respective owners. -
Page 7: Table Of Contents
Contents Introduction Introduction ... 3 Warnings ...3 Precautions ...3 About Bluetooth ...4 General information ...4 Getting Started ... 6 Installation ...6 Connecting to the receiver ...8 Check the type of your receiver ...9 Menu structures ... 10 Connection Bluetooth Connection ...12 Selecting a Source ... -
Page 8: Getting Started
Getting Started Installation Warning Avoid installing the adapter unit and the microphone unit in the following places. – Where they would hinder your safety driving. – Where they would be exposed to direct sunlight or heat directly from the heater or placed in an extremely hot place. - Page 9 Installing the microphone unit Attach the microphone to the microphone clip. Microphone (supplied) Microphone clip (supplied) To adjust the microphone angle Install the microphone unit. To install on the sun visor To Interface adapter unit Secure the microphone cord using cord clamps (not supplied) if necessary.
-
Page 10: Connecting To The Receiver
Getting Started Connecting to the receiver Typical connection Turn off the power to the receiver and turn off the vehicle’s ignition switch before connecting or disconnecting the unit. CD Changer jack Receiver • You can connect the following external components to this adapter; - CD Changer - SIRIUS Satellite radio - XM Satellite radio... -
Page 11: Check The Type Of Your Receiver
Checking the type of your receiver Operating procedures through a receiver are different depending on the type of the receiver. Check the type of your receiver by the chart below. • If your answer is “Yes,” follow • If your answer is “No,” follow Is your receiver KD-NX5000? Is your receiver equipped with the built-in monitor? -
Page 12: Menu Structures
Getting Started Menu structures Indication language In this manual, English indications are used for purpose of explanation. You can change the indication language to other than English for some receivers. Refer to the instruction manual supplied with your receiver. Bluetooth Phone Dial / Dial Menu / DIAL * Select the method to make a call. - Page 13 Selectable only when the registered device is selected. Not selectable for “New Device“. If you wish to receive more information about Bluetooth, visit our JVC web site. automatically when the receiver is turned on. You can set the receiver to receive or reject the incoming calls automatically.
-
Page 14: Bluetooth Connection
Bluetooth Connection • For details of the menu operations, refer to the instruction manual supplied with your receiver. • Indications on the display (monitor) and button names vary among the receivers. 7: 7 / BACK ex. SOURCE: SRC Bluetooth Phone: Bluetooth PHONE, BT-PHONE New Device: New device, NEW DEVICE Preparation: Turn on the Bluetooth function of the Bluetooth device. - Page 15 for Type B While “Bluetooth Phone” or “Bluetooth Audio” is selected as the source, select “New Device.” Display the menu, then select “Bluetooth” ] “Open.” Enter the PIN (Personal Identification Number) Code. Refer to the instruction manual supplied with your receiver.
- Page 16 Bluetooth Connection Registering a Bluetooth device — Pairing (continued) To connect an available device from the unit Use “Search” to establish connection with a Bluetooth device from the unit. for Type A Display “Bluetooth Phone” screen or select “Bluetooth Audio” as the source.
- Page 17 Use the following buttons to enter the PIN (Personal Identification Number) Code of the device to be connected. 4/¢: Move the entry position. 5/∞: Select a number. Delete all entries. Enter the number. “Connected (and the device name)” appears on the display. for Type D While “Bluetooth Phone”...
- Page 18 Bluetooth Connection Registering a Bluetooth device — Pairing (continued) for Type C While “Bluetooth Phone” or “Bluetooth Audio” is selected as the source, select “New device.” Press MODE, then select “Special Device.” The list of special devices appears on the display. Select a device name you want to connect.
-
Page 19: Connecting/Disconnecting The Device
for Type C While “Bluetooth Phone” or “Bluetooth Audio” is selected as the source, select a registered device you want to delete. Press MODE, then select “Delete Pair.” Select “Yes” to delete the device. • If you select “No,” the procedure is canceled. for Type D While “Bluetooth Phone”... - Page 20 Bluetooth Connection Connecting/Disconnecting the device (continued) for Type D While “Bluetooth Phone” or “Bluetooth Audio” is selected as the source, press 4/¢ to select a registered device. Press ∞, then select “CONNECT” to connect a selected device. Note You can connect the Bluetooth cellular phone automatically when the receiver is turned on.
-
Page 21: Bluetooth Phone
Bluetooth Phone Operations • Before you use a Bluetooth device with your receiver, connect a Bluetooth device. See “Bluetooth Connection” on page 12. • When the sound is stopped or interrupted during the use of a Bluetooth device, try the following remedies. -
Page 22: Calling A Number In The Phone Book
Bluetooth Phone Operations Calling a number in the phone book You can call a number from the phone book in the connected cellular phone. Before you use this function, transfer the phone book memory of the cellular phone to this unit (Refer to the instruction manual supplied with your cellular phone). -
Page 23: Advanced Operations
Advanced Operations Calling by voice command If your cellular phone is equipped with the voice recognition system, you can make a call by your voice. for Type A Display “Bluetooth Phone” screen. Press and hold MENU. “Say” appears on the display. •... -
Page 24: Calling A Number From The Call History
Advanced Operations Calling a number from the call history This unit has three kinds of call histories — redial, received calls and missed calls. You can call a number using these call histories. for Type A Display the dial menu. Select a call history. -
Page 25: Calling The Last Call Number Directly - Redial
for Type C Display the dial menu. Select a call history. You can select from the following call histories; Redial: Calls recently made. Received Calls: Calls recently received. Missed Calls: Calls recently missed. Select a name (if acquired) or phone number, then press number button 1. -
Page 26: Using Preset Numbers
Advanced Operations Using preset numbers You can preset up to six phone numbers. To store a preset number for Type A Select a phone number you want to preset from the number list (Phonebook, Redial, Received Calls or Missed Calls.) Press and hold ENT to display the preset list. -
Page 27: Calling By Entering A Phone Number
Calling by entering a phone number You can make a call by entering a phone number on the receiver. for Type A Display the dial menu. Select “Phone Number.” Press 4/¢ /5/∞ to enter a phone number, then select “Dial.” 4/¢/5/∞: Select a number. - Page 28 Advanced Operations for Type C Display the dial menu. Select “PHONE NUMBER.” Press 4/¢ /5/∞ to enter a phone number, then press the number button 1. 4/¢: Move the entry position. 5/∞: Select a number. Delete all entries. Note You can store the entered phone number into the preset list.
-
Page 29: Receiving An Sms (Short Message Service)/ Text Message
Receiving an SMS (Short Message Service)/ Text Message If your cellular phone can use SMS (Short Message Service)/Text Message, you can read the messages on the display (monitor) of the receiver. When you receive a message, “Receiving Message/Receiving MSG/RCV MSG” appears on the display (monitor). - Page 30 Advanced Operations for Type B Select “Bluetooth” ] “Message Menu.” Select a message history. You can select one of the following message histories; Unread: Messages not read yet. Read: Messages already read. Unsent: Messages not sent yet. Sent: Messages already sent. Select a message you want to read.
-
Page 31: Bluetooth Audio
Bluetooth Audio Operations • Before you use a Bluetooth device on your receiver, connect a Bluetooth device. See “Bluetooth Connection” on page 12. • When sound is stopped or interrupted during the use of a Bluetooth device, try the following remedies. -
Page 32: Settings
Other Settings Basic procedure for Type A Display “Bluetooth Phone” screen or select “Bluetooth Audio” as the source. Select “Mode” ] “Setup” from the menu. Select an item. See “Setting items” on the next page. Press the following buttons to change the settings. -
Page 33: Setting Items
Setting items You can change the following items in Setting menu (_: initial): Auto Connect You can set to connect a Bluetooth device automatically when the receiver is turned on. Off: Does not connect any device automatically. Last: Connects with the last connected device. Order: Connects with the available registered device found at first. -
Page 34: Troubleshooting
Troubleshooting What appears to be trouble is not always serious. Check the following points before calling a service center. Symptoms Bluetooth device does not detect the unit. The unit does not detect the Bluetooth device. “Device Unfound/UNFOUND” appears on the display. The unit does not make pairing with the Bluetooth device. -
Page 35: Specifications
Sound is interrupted or skipped during playback of a Bluetooth audio device. The connected audio device cannot be controlled. Bluetooth information: If you wish to receive more information about Bluetooth, visit our JVC web site. Specifications GENERAL Power Requirement: Operating Voltage: DC 14.4 V (11 V to 16 V allowance) - Page 37 Einleitung Einleitung...
- Page 38 Einleitung...
- Page 39 Inhalt Einleitung Anschluss Bluetooth-Telefon Bluetooth-Audio ...29 Einstellungen Andere Einleitung...
- Page 40 Erste Schritte...
- Page 41 Einbau der Mikrofoneinheit Bringen Sie das Mikrofon am Mikrofonclip an. Microfon (mitgeliefert) Zur Schnittstellenadapter- Einheit Mikrofonclip (mitgeliefert) Zum Einstellen des Mikrofonwinkels Installieren Sie die Mikrofoneinheit. Zum Anbringen auf der Sonnenblende Mikrofoneinheit (mitgeliefert) Sichern Sie das Mikrofonkabel mit Kabelklemmen (nicht mitgeliefert), wenn erforderlich. Zum Anbringen an der Lenksäule Bringen Sie die Mikrofoneinheit an der Oberseite der Lenksäule an.
-
Page 42: Erste Schritte
Erste Schritte Schnittstellenadapter-Einheit Receiver... - Page 43 Typ A Typ B Typ C Typ D Typ A Typ B Typ C Typ D Einleitung...
- Page 44 Erste Schritte...
- Page 45 Einleitung...
- Page 46 Bluetooth-Verbindung für Typ A für Typ B/Typ C/Typ D für Typ A 4 ¢ 5 ∞ 5 ∞ 4 ¢ 5 ∞...
- Page 47 für Typ B für Typ C 4 ¢ 5 ∞ für Typ D 4 ¢ ∞ 4 ¢ ∞: Anschluss...
- Page 48 Bluetooth-Verbindung für Typ A 5 ∞ 4 ¢ 5 ∞ 5 ∞ 4 ¢ für Typ B für Typ C...
- Page 49 4 ¢ 5 ∞ für Typ D 4 ¢ ∞ 4 ¢ ∞: für Typ A 5 ∞ für Typ B Anschluss...
- Page 50 Bluetooth-Verbindung für Typ C für Typ D 4 ¢ ∞ für Typ A 5 ∞ für Typ B...
- Page 51 für Typ C für Typ D 4 ¢ ∞ für Typ A 5 ∞ für Typ B für Typ C 5 ∞ Anschluss...
- Page 52 Bluetooth-Verbindung für Typ D für Typ A 4 ¢ ∞ für Typ B für Typ C für Typ D ∞...
- Page 53 Bluetooth-Telefon-Bedienungen für Typ A für Typ B/Typ C/Typ D Typ A Typ B/Typ C/Typ D für das Sensorschirm-Modell Verbindung/Bluetooth-Telefon...
- Page 54 Bluetooth-Telefon-Bedienungen für Typ A für Typ B für Typ C für Typ D ∞...
- Page 55 Erweiterte Funktionen für Typ A für Typ B für Typ C für Typ D Bluetooth-Telefon...
- Page 56 Erweiterte Funktionen für Typ A für Typ B...
- Page 57 für Typ C für Typ D Nur an der Fernbedienung Typ A ∞ Typ B/Typ C/Typ D für das Sensorschirm-Modell Bluetooth-Telefon...
- Page 58 Erweiterte Funktionen für Typ A für Typ B für das Sensorschirm-Modell für Typ C/Typ D für Typ A/Typ B 5 ∞ für das Sensorschirm-Modell für Typ C/Typ D...
- Page 59 für Typ A für Typ B 4 ¢ 5 ∞ 4 ¢ 5 ∞: Bluetooth-Telefon...
- Page 60 Erweiterte Funktionen für Typ C für Typ D 4 ¢ 5 ∞ 4 ¢ ∞ 4 ¢: 5 ∞ 4 ¢:...
- Page 61 für Typ A für Typ A/Typ B für Typ C Für Typ D Bluetooth-Telefon...
- Page 62 Erweiterte Funktionen für Typ B für Typ C für Typ D...
- Page 63 Bluetooth-Audiobedienungen für Typ A für Typ B/Typ C/Typ D für Typ A/für Typ B ¢: für Typ C ¢ für Typ D ¢ Bluetooth-Telefon/Bluetooth-Audio...
- Page 64 Andere Einstellungen für Typ A 5 ∞ für Typ B für Typ C 5 ∞ für Typ D ∞ 4 ¢ ∞:...
- Page 65 Einstellungen...
- Page 66 Störungssuche...
-
Page 67: Technische Daten
Symptome Bluetooth-Information: Technische Daten ALLGEMEINES Betriebsstromanforderungen: Betriebsspannung: Erdungssystem: Aktuelle Leistungsaufnahme: Zulässige Betriebstemperatur: Abmessungen (B × H × T): Gewicht (ca.): Abhilfe BLUETOOTH-SEKTION Bluetooth-Version: Ausgangsleistung: Dienstbereich: Profil: Änderungen bei Design und technischen Daten bleiben vorbehalten. Andere... - Page 69 Introduction Introduction...
- Page 70 Introduction...
- Page 71 Sommaire Introduction Connexion Téléphone Bluetooth Audio Bluetooth Réglages ...31 Autres ...29 Introduction...
- Page 72 Pour commencer...
- Page 73 Introduction...
- Page 74 Pour commencer Adaptateur d’interface Autoradio...
- Page 75 Type A Type B Type C Type D Type A Type B Type C Type D Introduction...
- Page 76 Pour commencer...
- Page 77 Introduction...
- Page 78 Connexion Bluetooth pour le Type A pour le Type B/Type C/Type D pour le Type A 5 ∞ 4 ¢ 5 ∞ 4 ¢ 5 ∞...
- Page 79 pour le Type B pour le Type C 4 ¢ 5 ∞ pour le Type D ∞ 4 ¢ ∞: 4 ¢ Connexion...
- Page 80 Connexion Bluetooth pour le Type A 5 ∞ 4 ¢ 5 ∞ 5 ∞ 4 ¢ pour le Type B pour le Type C...
- Page 81 4 ¢ 5 ∞ pour le Type D ∞ 4 ¢ ∞: pour le Type A 4 ¢ pour le Type B 5 ∞ Connexion...
- Page 82 Connexion Bluetooth pour le Type C pour le Type D ∞ pour le Type A 4 ¢ pour le Type B 5 ∞...
- Page 83 pour le Type C pour le Type D ∞ pour le Type A 4 ¢ pour le Type B pour le Type C 5 ∞ 5 ∞ Connexion...
- Page 84 Connexion Bluetooth pour le Type D ∞ Vous pouvez connecter le téléphone portable Bluetooth automatiquement quand l’autoradio est sous tension. Référez-vous à “Auto Connect” à la page 31. pour le Type A 4 ¢ pour le Type B pour le Type C pour le Type D ∞...
- Page 85 Opérations du téléphone Bluetooth pour le Type A pour le Type B/Type C/Type D Type A Type B/Type C/Type D pour les modèles avec panneau tactile Vous pouvez régler l’autoradio pour recevoir ou refuser un appel automatiquement. Référez-vous à “Auto Answer” à la page 31. Connexion/Téléphone Bluetooth...
- Page 86 Opérations du téléphone Bluetooth pour le Type A pour le Type B pour le Type C pour le Type D ∞...
- Page 87 Opérations avancées pour le Type A pour le Type B pour le Type C pour le Type D Téléphone Bluetooth...
- Page 88 Opérations avancées pour le Type A pour le Type B...
- Page 89 pour le Type C pour le Type D ∞ Sur la télécommande uniquement Type A Type B/Type C/Type D pour les modèles avec panneau tactile Téléphone Bluetooth...
- Page 90 Opérations avancées pour le Type A pour le Type B pour les modèles avec panneau tactile pour le Type C/Type D pour le Type A/Type B 5 ∞ pour les modèles avec panneau tactile pour le Type C/Type D...
- Page 91 pour le Type A 4 ¢ 5 ∞ 4 ¢ 5 ∞: Vous pouvez mémoriser le numéro de téléphone entré dans la liste des préréglages. Choisissez “ pour afficher la liste des préréglages. Choisissez un numéro de préréglage sur lequel vous souhaitez mémoriser le programme, puis appuyez sur pour le Type B Vous pouvez mémoriser le numéro de téléphone entré...
- Page 92 Opérations avancées pour le Type C 4 ¢ 5 ∞ 4 ¢: 5 ∞ Vous pouvez mémoriser le numéro de téléphone entré dans la liste des préréglages. Maintenez pressée la touche numérique sur laquelle vous souhaitez stocker le préréglage. pour le Type D 4 ¢...
- Page 93 pour le Type A/Type B pour le Type C Pour le Type D Vous pouvez faire le réglage pour ignorer les messages quand vous recevez un SMS/Message textuel. Référez-vous à “Message Info” à la page 31. Pour le Type A Téléphone Bluetooth...
- Page 94 Opérations avancées pour le Type B pour le Type C pour le Type D...
- Page 95 Opérations audio Bluetooth pour le Type A pour le Type B/Type C/Type D pour le Type A/Type B ¢: pour le Type C ¢ pour le Type D ¢ Téléphone Bluetooth/Audio Bluetooth...
- Page 96 Autres réglages pour le Type A 5 ∞ pour le Type B pour le Type C 5 ∞ pour le Type D ∞ 4 ¢ ∞:...
- Page 97 Réglages...
- Page 98 Dépannage...
- Page 99 Spécifications La conception et les spécifications sont sujettes à changement sans notification. Autres...
- Page 101 Introductie Introductie...
- Page 102 Introductie...
- Page 103 Inhoudsopgave Introductie ... 3 ... 3 ... 4 ... 4 ...6 ... 6 ... 8 ...10 Verbinding Bluetooth telefoon Bluetooth Audio Instellingen ... 9 Overige Introductie...
- Page 104 Starten...
- Page 105 Introductie...
- Page 106 Starten Interface-adapter Receiver...
- Page 107 Type A Type B Type C Type D Type A Type B Type C Type D Introductie...
- Page 108 Starten...
- Page 109 Introductie...
- Page 110 Bluetooth verbinding 7: 7 / BACK SOURCE: SRC Bluetooth Phone: Bluetooth PHONE, BT-PHONE New Device: New device, NEW DEVICE voor type A MENU Bluetooth Audio voor type B/type C/type D Bluetooth Phone Audio SOURCE Bluetooth Phone Bluetooth Audio Open MENU: AV MENU, AV Menu voor type A Mode ] Open Bluetooth...
- Page 111 voor type B Bluetooth Phone Bluetooth Audio New Device Bluetooth ] Open Connected voor type C Bluetooth Phone Bluetooth Audio New Device MODE Open 4 ¢ 5 ∞ Connected voor type D Bluetooth Phone Bluetooth Audio 4 ¢ ∞ 4 ¢ VOLUME +/–...
- Page 112 Bluetooth verbinding Search voor type A Bluetooth Phone Bluetooth Audio 5 ∞ New Device Mode ] Search 4 ¢ 5 ∞ 5 ∞ 4 ¢ ENT: Connected voor type B Bluetooth Phone Bluetooth Audio Bluetooth ] Search Connected voor type C Bluetooth Phone Connect Bluetooth Audio...
- Page 113 4 ¢ 5 ∞ Connected voor type D Bluetooth Phone Bluetooth Audio 4 ¢ ∞ SEARCH 4 ¢ VOLUME +/– ∞: CONNECT voor type A Bluetooth Phone Bluetooth Audio 5 ∞ New device Mode ] Special Device Open Search voor type B Bluetooth Phone Bluetooth Audio New device...
- Page 114 Bluetooth verbinding voor type C Bluetooth Phone Bluetooth Audio New device MODE Special Device Open Search voor type D Bluetooth Phone Bluetooth Audio 4 ¢ ∞ SPECIAL OPEN SEARCH voor type A Bluetooth Phone Bluetooth Audio 5 ∞ Mode ] Delete Pair voor type B Bluetooth Phone Bluetooth Audio...
- Page 115 voor type C Bluetooth Phone Bluetooth Audio MODE Delete Pair voor type D Bluetooth Phone Bluetooth Audio 4 ¢ ∞ DELETE voor type A Bluetooth Phone Bluetooth Audio 5 ∞ Mode ] Connection voor type B Bluetooth Phone Bluetooth Audio Bluetooth ] Connect voor type C Bluetooth Phone...
- Page 116 Bluetooth verbinding voor type D Bluetooth Phone Bluetooth Audio 4 ¢ ∞ CONNECT De Bluetooth mobiele telefoon kan automatisch worden verbonden wanneer de receiver wordt ingeschakeld. Zie “Auto Connect” op bladzijde 31. voor type A Bluetooth Phone Bluetooth Audio Mode ] Disconnection voor type B Bluetooth Phone Bluetooth Audio...
- Page 117 Bediening voor Bluetooth telefoon voor type A voor type B/type C/type D Type A Type B/type C/type D voor een model met aanraakpaneel U kunt de receiver instellen voor het automatisch ontvangen of negeren van een binnenkomend gesprek. Zie “Auto Answer” op bladzijde 31. Verbinding/Bluetooth telefoon...
- Page 118 Bediening voor Bluetooth telefoon voor type A voor type B voor type C voor type D ∞...
- Page 119 Geavanceerde bediening voor type A voor type C voor type D voor type B Bluetooth telefoon...
- Page 120 Geavanceerde bediening voor type A voor type B...
- Page 121 voor type C voor type D ∞ Alleen met de afstandsbediening Type A Type B/type C/type D voor een model met aanraakpaneel Bluetooth telefoon...
- Page 122 Geavanceerde bediening voor type A voor type B voor een model met aanraakpaneel voor type C/type D voor type A/type B 5 ∞ voor een model met aanraakpaneel voor type C/type D...
- Page 123 voor type A 4 ¢ 5 ∞ 4 ¢ 5 ∞: U kunt het ingevoerde nummer in de voorkeurlijst vastleggen. Kies “ ” in stap 3 om de voorkeurlijst te tonen. Kies het voorkeurnummer waaronder u het wilt vastleggen en druk vervolgens op voor type B U kunt het ingevoerde nummer in de voorkeurlijst vastleggen.
- Page 124 Geavanceerde bediening voor type C 4 ¢ 5 ∞ 4 ¢: 5 ∞ U kunt het ingevoerde nummer in de voorkeurlijst vastleggen. Houd de cijfertoetsen waaronder u het wilt vastleggen even ingedrukt. voor type D 4 ¢ ∞ 4 ¢: U kunt het ingevoerde nummer in de voorkeurlijst vastleggen.
- Page 125 voor type A/type B voor type C Voor type D U kunt instellen dat de boodschap na ontvangst van een SMS/tekstboodschap wordt genegeerd. Zie “Message Info” op bladzijde 31. voor type A Bluetooth telefoon...
- Page 126 Geavanceerde bediening voor type B voor type C voor type D...
- Page 127 Bediening van Bluetooth Audio voor type A voor type B/type C/type D voor type A/voor type B ¢: voor type C ¢ voor type D ¢ Bluetooth Telefoon/Bluetooth Audio...
- Page 128 Overige instellingen voor type A Bluetooth Phone Bluetooth Audio Mode ] Setup 5 ∞ ENT: voor type B Bluetooth ] Settings voor type C MODE Settings 5 ∞ voor type D Bluetooth Phone Bluetooth Audio ∞ 4 ¢ SETTINGS VOLUME +/– ∞:...
- Page 129 Instelbare onderdelen U kunt de volgende onderdelen in het Setting menu veranderen (_: basisinstelling): Auto Connect U kunt bepalen of een Bluetooth apparaat automatisch moet worden verbonden wanneer de receiver wordt ingeschakeld. Off: Geen automatisch verbinding met apparatuur. Last: Het laatst verbonden apparaat wordt weer verbonden.
- Page 130 Oplossen van problemen...
-
Page 131: Technische Gegevens
Symptomen Bluetooth informatie: Technische gegevens ALGEMEEN Stroomvereisten: Bedrijfsvoltage: Aardingssysteem: Stroomverbruik: Toegestane bedrijfstemperatuur: Afmetingen (B × H × D): Gewicht (bij benadering): Oplossingen BLUETOOTH GEDEELTE Bluetooth versie: Uitgangsvermogen: Gebruiksgebied: Profiel: Ontwerp en technische gegevens zijn zonder voorafgaande kennisgeving wijzigbaar. Overige... - Page 133 Introducción Introducción...
- Page 134 Introducción...
- Page 135 Contenido Introducción ... 3 ... 3 ... 4 ... 4 ... 6 ... 8 ...10 Conexiones Teléfono Bluetooth Bluetooth Audio ...6 Ajustes ... 9 Otros ...29 ...31 Introducción...
- Page 136 Procedimientos iniciales...
- Page 137 Introducción...
-
Page 138: Procedimientos Iniciales
Procedimientos iniciales Unidad de adaptador de interfaz Receptor... - Page 139 Tipo A Tipo B Tipo C Tipo D Tipo A Tipo B Tipo C Tipo D Introducción...
- Page 140 Procedimientos iniciales...
- Page 141 Introducción...
- Page 142 Conexión Bluetooth Para obtener detalles sobre las operaciones de los menús, consulte el manual de instrucciones entregado con su receptor. Las indicaciones en la pantalla (monitor) y los nombres de los botones varían según los distintos receptores. 7: 7 / BACK Ej.
- Page 143 para el Tipo B Bluetooth Phone Bluetooth Audio New Device Bluetooth ] Open Connected para el Tipo C Bluetooth Phone Bluetooth Audio New Device MODE Open 4 ¢ 5 ∞ Connected para el Tipo D Bluetooth Phone Bluetooth Audio 4 ¢ ∞...
- Page 144 Conexión Bluetooth Registrando un dispositivo Bluetooth — Apareamiento (continuación) Para conectar un dispositivo disponible desde la unidad Utilice “Search” para establecer la conexión con un dispositivo Bluetooth desde la unidad. para el Tipo A Visualice la pantalla “Bluetooth Phone” o seleccione “Bluetooth Audio”...
- Page 145 4 ¢ 5 ∞ Connected para el Tipo D Bluetooth Phone Bluetooth Audio 4 ¢ ∞ SEARCH 4 ¢ VOLUME +/– ∞: CONNECT para el Tipo A Bluetooth Phone Bluetooth Audio 5 ∞ device Mode ] Special Device Open Search para el Tipo B Bluetooth Phone Bluetooth Audio...
- Page 146 Conexión Bluetooth para el Tipo C Bluetooth Phone Bluetooth Audio New device MODE Special Device Open Search para el Tipo D Bluetooth Phone Bluetooth Audio 4 ¢ ∞ SPECIAL OPEN SEARCH para el Tipo A Bluetooth Phone Bluetooth Audio 5 ∞ Mode ] Delete Pair para el Tipo B...
- Page 147 para el Tipo C Bluetooth Phone Bluetooth Audio MODE Delete Pair para el Tipo D Bluetooth Phone Bluetooth Audio 4 ¢ ∞ DELETE para el Tipo A Bluetooth Phone Bluetooth Audio 5 ∞ Mode ] Connection para el Tipo B Bluetooth Phone Bluetooth Audio Bluetooth ]...
- Page 148 Conexión Bluetooth para el Tipo D Bluetooth Phone Bluetooth Audio 4 ¢ ∞ CONNECT Es posible conectar automáticamente un teléfono celular Bluetooth al encender el receptor. Vea “Auto Connect” en la página 31. para el Tipo A Bluetooth Phone Bluetooth Audio Mode ] Disconnection...
- Page 149 Operaciones del teléfono Bluetooth • • • • 7: 7 / BACK SOURCE: SRC Bluetooth Phone: Bluetooth PHONE, BT-PHONE New Device: New device, NEW DEVICE Antes de operar la función telefónica Bluetooth, cambie la fuente a “Bluetooth Phone”. para el Tipo A MENU para el Tipo B/Tipo C/Tipo D SOURCE...
- Page 150 Operaciones del teléfono Bluetooth para el Tipo A para el Tipo B para el Tipo C para el Tipo D ∞...
- Page 151 Operaciones avanzadas para el Tipo A para el Tipo B para el Tipo C para el Tipo D Teléfono Bluetooth...
- Page 152 Operaciones avanzadas para el Tipo A para el Tipo B...
- Page 153 para el Tipo C Visualice el menú de marcación. Seleccione un historial de llamada. Podrá seleccionar entre los siguientes historiales de llamadas; Redial: Llamadas realizadas recientemente. Received Calls: Llamadas recibidas recientemente. Missed Calls: Llamadas perdidas recientemente. Seleccione un nombre (si está disponible) o número de teléfono y, a continuación, pulse el botón numérico 1.
- Page 154 Operaciones avanzadas Utilización de los números de ajuste previo Puede memorizar hasta seis números telefónicos. Para guardar un número preajustado para el Tipo A Seleccione el número telefónico que desea memorizar de la lista de números (Phonebook, Redial, Received Calls o Missed Calls).
- Page 155 Llamando mediante entrada de número telefónico Podrá realizar una llamada introduciendo el número telefónico en el receptor. para el Tipo A Visualice el menú de marcación. Seleccione “Phone Number”. Pulse 4/¢ /5/∞ para ingresar un número telefónico y, a continuación, seleccione “Dial”.
- Page 156 Operaciones avanzadas para el Tipo C 4 ¢ 5 ∞ 4 ¢: 5 ∞ Podrá guardar el númerotelefónico introducido en la lista de preajustes. Pulse y mantenga pulsado los botones numéricos en que desea memorizar. para el Tipo D 4 ¢ ∞...
- Page 157 Recibiendo un SMS (Servicio de mensajes cortos)/ Mensaje de texto Si su teléfono celular puede usar SMS (Servicio de mensajes cortos)/Mensaje de texto, podrá leer los mensajes en la pantalla (monitor) del receptor. Cuando se recibe un mensaje, aparecerá “Receiving Message/Receiving MSG/RCV MSG”...
- Page 158 Operaciones avanzadas para el Tipo B para el Tipo C para el Tipo D...
- Page 159 Operaciones de audio Bluetooth • • • • 7: 7 / BACK SOURCE SRC Bluetooth Audio Bluetooth AUDIO, BT-AUDIO Antes de operar el dispositivo de audio Bluetooth, cambie la fuente a “Bluetooth Audio”. para el Tipo A Puede seleccionar “Bluetooth Audio” como la fuente.
- Page 160 Otras configuraciones para el Tipo A Bluetooth Phone Bluetooth Audio Mode ] Setup 5 ∞ ENT: para el Tipo B Bluetooth ] Settings para el Tipo C MODE Settings 5 ∞ para el Tipo D Bluetooth Phone Bluetooth Audio ∞ 4 ¢ SETTINGS VOLUME +/–...
- Page 161 Level 1, 2 , 3 Last Order Reject Auto Manual Ajustes...
- Page 162 Localización de averías Síntomas Soluciones...
- Page 163 Características técnicas El diseño y las especificaciones se encuentran sujetos a cambios sin previo aviso. Otros...
- Page 165 Introduzione Introduzione...
- Page 166 Introduzione...
- Page 167 Indice Introduzione Connessione Telefono Bluetooth Funzione audio Bluetooth Impostazioni Varie ...29 ...31 Introduzione...
- Page 168 Per iniziare...
- Page 169 Introduzione...
- Page 170 Per iniziare Adattatore Ricevitore...
- Page 171 Tipo A Tipo B Tipo C Tipo D Tipo A Tipo B Tipo C Tipo D Introduzione...
- Page 172 Per iniziare...
- Page 173 Introduzione...
- Page 174 Connessione Bluetooth con il tipo A con i tipi B, C e D con il tipo A 5 ∞ 4 ¢ 5 ∞ 4 ¢ 5 ∞...
- Page 175 con il tipo B con il tipo C 4 ¢ 5 ∞ con il tipo D 4 ¢ ∞ 4 ¢ ∞: Connessione...
- Page 176 Connessione Bluetooth con il tipo A 5 ∞ 4 ¢ 5 ∞ 5 ∞ 4 ¢ con il tipo B con il tipo C...
- Page 177 4 ¢ 5 ∞ con il tipo D 4 ¢ ∞ 4 ¢ ∞: con il tipo A 5 ∞ con il tipo B Connessione...
- Page 178 Connessione Bluetooth con il tipo C con il tipo D 4 ¢ ∞ con il tipo A 5 ∞ con il tipo B...
- Page 179 con il tipo C con il tipo D 4 ¢ ∞ con il tipo A 5 ∞ con il tipo B con il tipo C 5 ∞ Connessione...
- Page 180 Connessione Bluetooth con il tipo D 4 ¢ ∞ È possibile istruire il sistema affinché accenda automaticamente il telefono cellulare Bluetooth all’accensione del ricevitore. Si prega di vedere al riguardo la funzione “Auto Connect” descritta a pagina 31. con il tipo A con il tipo B con il tipo C con il tipo D...
- Page 181 Uso del telefono Bluetooth con il tipo A con i tipi B, C e D Tipo A con i tipi B, C e D con i modelli provvisti di pannello tattile È possibile istruire il ricevitore di ricevere oppure rifiutare automaticamente le chiamate in arrivo.
- Page 182 Uso del telefono Bluetooth con il tipo A con il tipo B con il tipo C con il tipo D ∞...
- Page 183 Operazioni avanzate con il tipo A con il tipo C con il tipo D con il tipo B Telefono Bluetooth...
- Page 184 Operazioni avanzate con il tipo A con il tipo B...
- Page 185 con il tipo C con il tipo D ∞ Solo dal telecomando Tipo A con i tipi B, C e D con i modelli provvisti di pannello tattile Telefono Bluetooth...
- Page 186 Operazioni avanzate con il tipo A con il tipo B con i modelli provvisti di pannello tattile con i tipi C e D con i tipi A e B 5 ∞ con i modelli provvisti di pannello tattile con i tipi C e D...
- Page 187 con il tipo A 4 ¢ 5 ∞ 4 ¢ 5 ∞: Il numero telefonico composto può essere salvato nell’elenco dei numeri telefonici preimpostati. Per visualizzare l’elenco dei numeri preimpostati è sufficiente selezionare “ ” al passo 3. Selezionare il numero da preimpostare e premere quindi con il tipo B Il numero telefonico composto può...
- Page 188 Operazioni avanzate con il tipo C 4 ¢ 5 ∞ 4 ¢: 5 ∞ Il numero telefonico composto può essere salvato nell’elenco dei numeri telefonici preimpostati. Premere a lungo il tasto numerico corrispondente al numero da preimpostare. con il tipo D 4 ¢...
- Page 189 con i tipi A e B con il tipo C con il tipo D È possibile istruire il ricevitore affinché ignori l’arrivo degli SMS o dei messaggi di solo testo. Si prega di vedere al riguardo la funzione “Message Info” descritta a pagina 31.
- Page 190 Operazioni avanzate con il tipo B con il tipo C con il tipo D...
-
Page 191: Comandi Di Riproduzione
Uso della funzione audio Bluetooth • Prima di usare le periferiche Bluetooth con il ricevitore è innanzi tutto necessario connetterle. Si prega di vedere al riguardo la sezione “Connessione Bluetooth” a pagina 12. • Se durante l’uso di una periferica Bluetooth il suono dovesse arrestarsi o subire interruzioni si suggerisce di: •... - Page 192 Altre impostazioni con il tipo A 5 ∞ con il tipo B con il tipo C 5 ∞ con il tipo D ∞ 4 ¢ ∞:...
- Page 193 Impostazioni...
-
Page 194: Risoluzione Dei Problemi
Risoluzione dei problemi Sintomo Provvedimenti... -
Page 195: Caratteristiche Tecniche
Caratteristiche tecniche L’aspetto e le caratteristiche sono soggetti a modifiche senza preavviso. Varie... - Page 197 Introdução Introdução...
- Page 198 Introdução...
- Page 199 Conteúdo Introdução Conexão Telefone Bluetooth Áudio Bluetooth Definições ...31 Outros ...29 Introdução...
- Page 200 Preparativos iniciais...
- Page 201 Introdução...
- Page 202 Preparativos iniciais Unidade do adaptador de interface Receptor...
- Page 203 Tipo A Tipo B Tipo C Tipo D Tipo A Tipo B Tipo C Tipo D Introdução...
- Page 204 Preparativos iniciais...
- Page 205 Introdução...
- Page 206 Conexão Bluetooth para Tipo A para Tipo B/Tipo C/Tipo D para Tipo A 5 ∞ 4 ¢ 5 ∞ 4 ¢ 5 ∞...
- Page 207 para Tipo B para Tipo C 4 ¢ 5 ∞ para Tipo D 4 ¢ ∞ 4 ¢ ∞: Conexão...
- Page 208 Conexão Bluetooth para Tipo A 5 ∞ 4 ¢ 5 ∞ 5 ∞ 4 ¢ para Tipo B para Tipo C...
- Page 209 4 ¢ 5 ∞ para Tipo D 4 ¢ ∞ 4 ¢ ∞: para Tipo A 5 ∞ para Tipo B Conexão...
- Page 210 Conexão Bluetooth para Tipo C para Tipo D 4 ¢ ∞ para Tipo A 5 ∞ para Tipo B...
- Page 211 para Tipo C para Tipo D 4 ¢ ∞ para Tipo A 5 ∞ para Tipo B para Tipo C 5 ∞ Conexão...
- Page 212 Conexão Bluetooth para Tipo D 4 ¢ ∞ Pode ligar o telefone celular Bluetooth quando o receptor estiver ligado. Consulte “Auto Connect” na página 31. para Tipo A para Tipo B para Tipo C para Tipo D ∞...
- Page 213 Operações com telefones Bluetooth para Tipo A para Tipo B/Tipo C/Tipo D Tipo A Tipo B/Tipo C/Tipo D para o modelo com painel de toque Pode configurar o receptor para receber ou rejeitar chamadas automaticamente. Consulte “Auto Answer” na página 31. Conexão/Telefone Bluetooth...
- Page 214 Operações com telefones Bluetooth para Tipo A para Tipo B para Tipo C para Tipo D ∞...
- Page 215 Operações avançadas para Tipo A para Tipo C para Tipo D para Tipo B Telefone Bluetooth...
- Page 216 Operações avançadas para Tipo A para Tipo B...
- Page 217 para Tipo C para Tipo D ∞ Somente no telecomando Tipo A Tipo B/Tipo C/Tipo D para o modelo com painel de toque Telefone Bluetooth...
- Page 218 Operações avançadas para Tipo A for Type B para o modelo com painel de toque para Tipo C/Tipo D para Tipo A/Tipo B 5 ∞ para o modelo com painel de toque para Tipo C/Tipo D...
- Page 219 para Tipo A 4 ¢ 5 ∞ 4 ¢ 5 ∞: Pode armazenar o número de telefone introduzido na lista de números predefinidos. Seleccione “ para visualizar a lista de números predefinidos. Seleccione um número predefinido no qual deseja memorizar o serviço e, em seguida, prima para Tipo B Pode armazenar o número de telefone introduzido na lista de números predefinidos.
- Page 220 Operações avançadas para Tipo C 4 ¢ 5 ∞ 4 ¢: 5 ∞ Pode armazenar o número de telefone introduzido na lista de números predefinidos. Mantenha premido o botão numérico no qual deseja armazenar. para Tipo D 4 ¢ ∞ 4 ¢: Pode armazenar o número de telefone introduzido na lista de números predefinidos.
- Page 221 para Tipo A/Tipo B para Tipo C Para Tipo D Pode configurar o receptor para que ignore a chegada de uma mensagem quando receber uma mensagem SMS/mensagem de texto. Consulte “Message Info” na página 31. para Tipo A Telefone Bluetooth...
- Page 222 Operações avançadas para Tipo B para Tipo C para Tipo D...
- Page 223 Operações de áudio Bluetooth • • • • 7: 7 / BACK SOURCE SRC Bluetooth Audio Bluetooth AUDIO, BT-AUDIO Antes de operar o dispositivo de áudio Bluetooth, altere a fonte para “Bluetooth Audio”. para Tipo A Pode seleccionar “Bluetooth Audio” como a fonte.
- Page 224 Outras definições para Tipo A 5 ∞ para Tipo B para Tipo C 5 ∞ para Tipo D ∞ 4 ¢ ∞:...
- Page 225 Definições...
- Page 226 Localização e solução de problemas Sintomas Soluções...
- Page 227 Especificações O desenho e as especificações estão sujeitos a modificações sem aviso prévio. Outros...
- Page 229 Εισαγωγή Εισαγωγή...
- Page 230 Εισαγωγή...
- Page 231 Περιεχόμενα Εισαγωγή Σύνδεση Τηλέφωνο Bluetooth Bluetooth Ήχου Ρυθμίσεις ...31 Άλλα ...29 Εισαγωγή...
- Page 232 Γρήγορα αποτελέσματα...
- Page 233 Εισαγωγή...
- Page 234 Γρήγορα αποτελέσματα Συγκρότημα προσαρμογέα διασύνδεσης ∆έκτης...
- Page 235 Tύπος A Tύπος Β Tύπος C Tύπος D Tύπος A Tύπος Β Tύπος C Tύπος D Εισαγωγή...
- Page 236 Γρήγορα αποτελέσματα...
- Page 237 Εισαγωγή...
- Page 238 Σύνδεση Bluetooth Τύπος A Τύπος B/Τύπος C/Τύπος D Τύπος A 4 ¢ 5 ∞ 5 ∞ 4 ¢ 5 ∞...
- Page 239 Τύπος Β Τύπος C 4 ¢ 5 ∞ Τύπος D 4 ¢ ∞ 4 ¢ ∞: Σύνδεση...
- Page 240 Σύνδεση Bluetooth Τύπος A 5 ∞ 4 ¢ 5 ∞ 5 ∞ 4 ¢ Τύπος Β Τύπος C...
- Page 241 4 ¢ 5 ∞ Τύπος D 4 ¢ ∞ 4 ¢ ∞: Τύπος A 5 ∞ Τύπος Β Σύνδεση...
- Page 242 Σύνδεση Bluetooth Τύπος C Τύπος D 4 ¢ ∞ Τύπος A 5 ∞ Τύπος Β...
- Page 243 Τύπος C Τύπος D 4 ¢ ∞ Τύπος A 5 ∞ Τύπος Β Τύπος C 5 ∞ Σύνδεση...
- Page 244 Σύνδεση Bluetooth Τύπος D Τύπος A 4 ¢ ∞ Τύπος Β Τύπος C Τύπος D ∞...
- Page 245 Λειτουργίες τηλεφώνου Bluetooth Τύπος A Τύπος B/Τύπος C/Τύπος D Tύπος A Τύπος B/Τύπος C/Τύπος D Μοντέλο με πίνακα αφής Σύνδεση/Τηλέφωνο Bluetooth...
- Page 246 Λειτουργίες τηλεφώνου Bluetooth Τύπος A Τύπος Β Τύπος C Τύπος D ∞...
- Page 247 Προηγμένες λειτουργίες Τύπος A Τύπος C Τύπος D Τύπος Β Τηλέφωνο Bluetooth...
- Page 248 Προηγμένες λειτουργίες Τύπος A Τύπος Β...
- Page 249 Τύπος C Τύπος D Στο τηλεχειριστήριο μόνο Τύπος A ∞ Τύπος B/Τύπος C/Τύπος D Μοντέλο με πίνακα αφής Τηλέφωνο Bluetooth...
- Page 250 Προηγμένες λειτουργίες Τύπος A Τύπος B Μοντέλο με πίνακα αφής Τύπος C/Tύπος D Τύπος A/Τύπος B 5 ∞ Μοντέλο με πίνακα αφής Τύπος C/Tύπος D...
- Page 251 Τύπος A Τύπος Β 4 ¢ 5 ∞ 4 ¢ 5 ∞: Τηλέφωνο Bluetooth...
- Page 252 Προηγμένες λειτουργίες Τύπος C Τύπος D 4 ¢ 5 ∞ 4 ¢ ∞ 4 ¢: 4 ¢: 5 ∞...
- Page 253 Τύπος A Τύπος A/Τύπος B Τύπος C Τύπος D Τηλέφωνο Bluetooth...
- Page 254 Προηγμένες λειτουργίες Τύπος C Τύπος Β Τύπος D...
- Page 255 Λειτουργίες Bluetooth Ήχου Τύπος A Τύπος B/Τύπος C/Τύπος D Τύπος A/Τύπος B ¢: Τύπος C ¢ Τύπος D ¢ Τηλέφωνο Bluetooth/Bluetooth Ήχου...
- Page 256 Άλλες ρυθμίσεις Τύπος A 5 ∞ Τύπος Β Τύπος C 5 ∞ Τύπος D ∞ 4 ¢ ∞:...
- Page 257 Ρυθμίσεις...
- Page 258 Αντιμετώπιση προβλημάτων...
- Page 259 Προδιαγραφές Ο σχεδιασμός και οι προδιαγραφές μπορεί να αλλάξουν χωρίς προειδοποίηση. Άλλα...
- Page 260 ขอขอบพระคุ ณ ที ่ เ ลื อ กซื ้ อ ผลิ ต ภั ณ ฑ์ ข อง JVC กรุ ณ าอ่ า นคำแนะนำทั ้ ง หมดโดยละเอี ย ดก่ อ นการใช้ ง าน เพื ่ อ ให้ เ ข้ า ใจชั ด เจน และเพื ่ อ ให้ ไ ด้ ร ั บ ประสิ ท ธิ ภ าพสู ง สุ ด ในการใช้ ง านผลิ ต ภั ณ ฑ...
-
Page 261: บทนำ
• อะแดปเตอร์ น ี ้ ไ ด้ ร ั บ การออกแบบให้ ใ ช้ ก ั บ อุ ป กรณ์ ร ั บ สั ญ ญาณในรถยนต์ ข อง JVC เท่ า นั ้ น อย่ า ใช้ อ ะแดปเตอร์ น ี ้ ก ั บ... -
Page 262: เกี ่ ย วกั บ Bluetooth
• อะแดปเตอร์ น ี ้ ร องรั บ เฉพาะอุ ป กรณ์ ร ั บ สั ญ ญาณในรถยนต์ ข อง JVC ที ่ พ ร้ อ มใช้ ง าน Bluetooth เท่ า นั ้ น • โปรดอ่ า นรายชื ่ อ (รวมอยู ่ ใ นกล่ อ ง) เพื ่ อ ดู ป ระเทศที ่ ค ุ ณ... - Page 263 สารบั ญ บทนำ บทนำ ...3 คำเตื อ น ...3 ข้ อ ควรระวั ง เบื ้ อ งต้ น ...3 เกี ่ ย วกั บ Bluetooth ...4 ข้ อ มู ล ทั ่ ว ไป ...4 การเริ ่ ม ต้ น ใช้ ง าน...6 การติ...
-
Page 264: การเริ ่ ม ต้ น ใช้ ง าน
การเริ ่ ม ต้ น ใช้ ง าน การติ ด ตั ้ ง คำเตื อ น หลี ก เลี ่ ย งการติ ด ตั ้ ง ชุ ด อะแดปเตอร์ แ ละไมโครโฟนในบริ เ วณ ต่ อ ไปนี ้ – บริ เ วณที ่ จ ะบดบั ง การขั บ ขี ่ อ ย่ า งปลอดภั ย ของคุ ณ –... - Page 265 การติ ด ตั ้ ง ชุ ด ไมโครโฟน ติ ด ไมโครโฟนกั บ ตั ว หนี บ ไมค์ ไมโครโฟน (จั ด ส่ ง ให้ ) ตั ว หนี บ ไมโครโฟน (จั ด ส่ ง ให้ ) การปรั บ มุ ม ตั ้ ง ไมโครโฟน ติ...
-
Page 266: การเชื ่ อ มต่ อ กั บ เครื ่ อ งรั บ สั ญ ญาณ
การเริ ่ ม ต้ น ใช้ ง าน การเชื ่ อ มต่ อ กั บ เครื ่ อ งรั บ สั ญ ญาณ การเชื ่ อ มต่ อ แบบทั ่ ว ไป ปิ ด เครื ่ อ งรั บ สั ญ ญาณและปิ ด สวิ ต ช์ ส ตาร์ ท รถยนต์ ก ่ อ นเชื ่ อ มต่ อ หรื อ ปลดการเชื ่ อ มต่ อ กั บ เครื ่ อ งนี ้ ช่... -
Page 267: ตรวจสอบประเภทของเครื ่ อ งรั บ สั ญ ญาณ
การตรวจสอบประเภทของเครื ่ อ งรั บ สั ญ ญาณ ขั ้ น ตอนการทำงานผ่ า นทางเครื ่ อ งรั บ สั ญ ญาณจะแตกต่ า งกั น ขึ ้ น อยู ่ ก ั บ ประเภทของเครื ่ อ งรั บ สั ญ ญาณ ตรวจสอบประเภทของเครื... -
Page 268: โครงสร้ า งเมน
การเริ ่ ม ต้ น ใช้ ง าน โครงสร้ า งเมนู ภาษาที ่ ร ะบุ ในคู ่ ม ื อ นี ้ ใช้ ก ารระบุ ด ้ ว ยภาษาอั ง กฤษเพื ่ อ จุ ด ประสงค์ ใ นการขยายความ คุ ณ สามารถเปลี ่ ย นภาษาที ่ ร ะบุ เ ป็ น ภาษาอื ่ น ที ่ ไ ม่ ใ ช่ ภ าษาอั งกฤษ... - Page 269 ไม่ ส ามารถเลื อ กได้ ส ำหรั บ “New Device” หากคุ ณ ต้ อ งการทราบข้ อ มู ล เพิ ่ ม เติ ม เกี ่ ย วกั บ Bluetooth โปรดเยี ่ ย มชมเว็ บ ไซต์ JVC ของเรา คุ ณ สามารถตั ้ ง ให้ เ ชื ่ อ มต่ อ อุ ป กรณ์ Bluetooth โดยอั...
-
Page 270: การเชื ่ อ มต่ อ Bluetooth
การเชื ่ อ มต่ อ Bluetooth • สำหรั บ รายละเอี ย ดเกี ่ ย วกั บ การใช้ เ มนู โปรดดู ค ู ่ ม ื อ คำแนะนำที ่ ใ ห้ ม าพร้ อ มกั บ เครื ่ อ งรั บ ของคุ ณ •... - Page 271 สำหรั บ ประเภท B ขณะที ่ เ ลื อ ก “Bluetooth Phone ” หรื อ “Bluetooth Audio” เป็ น แหล่ ง สั ญ ญาณ เลื อ ก “New Device” แสดงเมนู จากนั ้ น เลื อ ก “Bluetooth” ] “Open” ป้ อ นรหั ส PIN (หมายเลขระบุ เ ครื ่ อ ง) โปรดดู...
- Page 272 การเชื ่ อ มต่ อ Bluetooth การลงทะเบี ย นอุ ป กรณ์ Bluetooth — การจั บ คู ่ (ต่ อ ) ในการเชื ่ อ มต่ อ กั บ อุ ป กรณ์ ท ี ่ ว ่ า งอยู ่ จ ากเครื ่ อ ง ใช้...
- Page 273 ใช้ ป ุ ่ ม ต่ อ ไปนี ้ เ พื ่ อ ป้ อ นรหั ส PIN (หมายเลขระบุ เ ครื ่ อ ง) ของอุ ป กรณ์ ท ี ่ จ ะเชื ่ อ มต่ อ 4/¢: ย้ า ยไปที ่ ตำแหน่ ง การป้ อ น 5/∞: เลื...
- Page 274 การเชื ่ อ มต่ อ Bluetooth การลงทะเบี ย นอุ ป กรณ์ Bluetooth — การจั บ คู ่ (ต่ อ ) สำหรั บ ประเภท C ขณะที ่ เ ลื อ ก “Bluetooth Phone” หรื อ “Bluetooth Audio” เป็ น แหล่ ง สั ญ ญาณ เลื...
-
Page 275: การเชื ่ อ มต่ อ /ตั ด การเชื ่ อ มต่ อ อุ ป กรณ
สำหรั บ ประเภท C ขณะที ่ เ ลื อ ก “Bluetooth Phone” หรื อ “Bluetooth Audio” เป็ น แหล่ ง สั ญ ญาณ ให้ เ ลื อ กอุ ป กรณ์ ท ี ่ ล งทะเบี ย นไว้ ท ี ่ ค ุ ณ ต้ อ งการลบ กด... - Page 276 การเชื ่ อ มต่ อ Bluetooth การเชื ่ อ มต่ อ /ตั ด การเชื ่ อ มต่ อ อุ ป กรณ์ ( ต่ อ ) สำหรั บ ประเภท D ขณะที ่ เ ลื อ ก “Bluetooth Phone” หรื อ “Bluetooth Audio” กด 4/ เพื...
-
Page 277: การใช้ ง านโทรศั พ ท์ Bluetooth
การใช้ ง านโทรศั พ ท์ Bluetooth • ก่ อ นที ่ ค ุ ณ จะใช้ อ ุ ป กรณ์ Bluetooth กั บ เครื ่ อ งรั บ ให้ เ ชื ่ อ มต่ อ อุ ป กรณ์ Bluetooth โปรดดู ท ี ่ “การเชื ่ อ มต่ อ Bluetooth” ที... -
Page 278: การโทรโดยใช้ ห มายเลขในสมุ ด โทรศั พ ท
การทำงานพื ้ น ฐาน การโทรโดยใช้ ห มายเลขในสมุ ด โทรศั พ ท์ คุ ณ สามารถโทรออกโดยใช้ ห มายเลขในสมุ ด โทรศั พ ท์ ใ นโทรศั พ ท์ เ ซลลู ล าร์ ก่ อ นที ่ ค ุ ณ จะใช้ ฟ ั ง ก์ ช ั น นี ้ ให้ ถ ่ า ยโอนหน่ ว ยความจำสมุ ด โทรศั พ ท์ ข องโทรศั พ ท์ เ ซลลู ล าร์ ไ ปยั ง อุ ป กรณ์ น ี ้ (โปรดดู ค ู ่ ม ื อ คำแนะนำที ่ ใ ห้ ม า พร้... -
Page 279: การทำงานขั ้ น สู ง
การทำงานขั ้ น สู ง โทรออกโดยใช้ เ สี ย งสั ่ ง งาน ถ้ า โทรศั พ ท์ เ ซลลู ล าร์ ข องคุ ณ มี ร ะบบจดจำเสี ย งติ ด ตั ้ ง ไว้ คุ ณ จะสามารถโทรออกโดยใช้ เ สี ย งพู ด ของคุ ณ สำหรั... -
Page 280: การโทรโดยใช้ ห มายเลขจากประวั ต ิ ก ารโทร
การทำงานขั ้ น สู ง การโทรโดยใช้ ห มายเลขจากประวั ต ิ ก ารโทร อุ ป กรณ์ น ี ้ ม ี ป ระวั ต ิ ก ารโทรสามชนิ ด — เรี ย กซ้ ำ , เบอร์ ท ี ่ ร ั บ สาย และเบอร์ ท ี ่ ไ ม่ ไ ด้ ร ั บ สาย คุ ณ สามารถโทรออกโดยใช้ ป ระวั ต ิ ก าร โทรเหล่... -
Page 281: เรี ย กซ้ ำ
สำหรั บ ประเภท C แสดงเมนู โ ทรออก เลื อ กประวั ต ิ ก ารโทร คุ ณ สามารถเลื อ กจากประวั ต ิ ก ารโทรต่ อ ไปนี ้ Redial: เบอร์ ที ่ โ ทรออกล่ า สุ ด Received Calls: เบอร์ ท ี ่ ร ั บ สายล่ า สุ ด Missed Calls: เบอร์... -
Page 282: การใช้ ห มายเลขที ่ ก ำหนดไว้ ล ่ ว งหน้ า
การทำงานขั ้ น สู ง การใช้ ห มายเลขที ่ ก ำหนดไว้ ล ่ ว งหน้ า คุ ณ สามารถตั ้ ง เบอร์ โ ทรศั พ ท์ ล ่ ว งหน้ า ได้ ส ู ง สุ ด หกเบอร์ การจั ด เก็ บ เบอร์ ท ี ่ ก ำหนดไว้ ล ่ ว งหน้ า สำหรั... -
Page 283: การโทรโดยการกดหมายเลขโทรศั พ ท
การโทรโดยการกดหมายเลขโทรศั พ ท์ คุ ณ สามารถโทรออกด้ ว ยการป้ อ นเบอร์ โ ทรศั พ ท์ บ นเครื ่ อ งรั บ สำหรั บ ประเภท A แสดงเมนู โ ทรออก เลื อ ก “Phone Number” กด 4/¢ /5/∞ เพื ่ อ ป้ อ นเบอร์ โ ทรศั พ ท์ แล้... - Page 284 การทำงานขั ้ น สู ง สำหรั บ ประเภท C แสดงเมนู โ ทรออก เลื อ ก “PHONE NUMBER” กด 4/¢ /5/∞ เพื ่ อ ป้ อ นเบอร์ โ ทรศั พ ท์ แล้ ว กดปุ ่ ม ตั ว เลข 1 4/¢: ย้ า ยตำแหน่ ง รายการ 5/∞: เลื...
-
Page 285: การรั บ Sms (บริ ก ารข้ อ ความแบบสั ้ น )
การรั บ SMS/ (บริ ก ารข้ อ ความแบบสั ้ น )/ ข้ อ ความตั ว อั ก ษร ถ้ า โทรศั พ ท์ เ ซลลู ล าร์ ข องคุ ณ สามารถใช้ SMS (บริ ก ารข้ อ ความแบบสั ้ น )/ข้ อ ความตั ว อั ก ษร คุ ณ จะสามา รถอ่... - Page 286 การทำงานขั ้ น สู ง สำหรั บ ประเภท B เลื อ ก “Bluetooth” ] “Message Menu” เลื อ กประวั ต ิ ข ้ อ ความ คุ ณ สามารถเลื อ กหนึ ่ ง ในประวั ต ิ ข ้ อ ความต่ อ ไปนี ้ Unread: ข้...
-
Page 287: การใช้ ง านระบบเสี ย ง Bluetooth
การใช้ ง านระบบเสี ย ง Bluetooth • ก่ อ นที ่ ค ุ ณ จะใช้ อ ุ ป กรณ์ Bluetooth กั บ เครื ่ อ งรั บ ให้ เ ชื ่ อ มต่ อ อุ ป กรณ์ Bluetooth โปรดดู ท ี ่ “การเชื ่ อ มต่ อ Bluetooth” ที... -
Page 288: การตั ้ ง ค่ า อื ่ น ๆ
การตั ้ ง ค่ า อื ่ น ๆ ขั ้ น ตอนพื ้ น ฐาน สำหรั บ ประเภท A แสดงหน้ า จอ “Bluetooth Phone” หรื อ เลื อ ก “Bluetooth Audio” เป็ น แหล่ ง สั ญ ญาณ เลื อ ก “Mode” ] “Setup” จากเมนู เลื... -
Page 289: การตั ้ ง ค่ า รายการต่ า งๆ
การตั ้ ง ค่ า รายการต่ า งๆ คุ ณ สามารถเปลี ่ ย นรายการต่ อ ไปนี ้ ใ นเมนู ก ารตั ้ ง ค่ า (_: เริ ่ ม ต้ น ): Auto Connect คุ ณ สามารถตั ้ ง ให้ เ ชื ่ อ มต่ อ อุ ป กรณ์ Bluetooth โดยอั ต โนมั ต ิ เ มื ่ อ เปิ... -
Page 290: การแก้ ไ ขปั ญ หา
การแก้ ไ ขปั ญ หา ปั ญ หาที ่ เ กิ ด ขึ ้ น บางครั ้ ง อาจไม่ ใ ช่ ป ั ญ หาขั ้ น ร้ า ยแรง โปรดตรวจสอบดั ง ต่ อ ไปนี ้ ก ่ อ นที ่ จ ะติ ด ต่ อ ศู น ย์ บ ริ ก าร อาการ... -
Page 291: ข้ อ มู ล จำเพาะ
ไม่ ส ามารถควบคุ ม อุ ป กรณ์ เ สี ย งที ่ เ ชื ่ อ มต่ อ ได้ ข้ อ มู ล Bluetooth หากคุ ณ ต้ อ งการทราบข้ อ มู ล เพิ ่ ม เติ ม เกี ่ ย วกั บ Bluetooth โปรดเยี ่ ย มชมเว็ บ ไซต์ JVC ของเรา ข้ อ มู ล จำเพาะ... - Page 292 EN, GE, FR, NL, SP, IT, PR, GR, TH © 2006 Victor Company of Japan, Limited 1206MNMMDWJEIN...
Need help?
Do you have a question about the KS-BTA200K and is the answer not in the manual?
Questions and answers
ล้างค่าและปิดการใช้งาน