
Related Manuals for ECO-WORTHY ECO-SC60A


Summary of Contents for ECO-WORTHY ECO-SC60A
- Page 1 +44 20 7570 0328(EU) Tel: E-mail:customer.service@eco-worthy.com Web:www.eco-worthy.com 1-866-939-8222(US)
-
Page 2: Table Of Contents
Contents ............1 1.Safety Caution ..........1 2.Product Overview .........3 3.Components Description ..........7 4.Installation Guide ..........14 5.Fusing and Setting ........15 6.Testing and Troubleshooting ..............17 7.FAQ .............18 8.Maintenance ............19 9.Support... -
Page 3: Safety Caution
·Remove metal items such as rings, bracelets, and watches Product Overview ECO-WORTHY 400W Off-Grid Solar Power System, an electricity supply project, which is clean, quiet, and compatible with RV, trailer, shed and house roof. - Page 4 The complete kit contains: ·4 PCs 100 Watts Monocrystalline Solar Panel ·1 PC 1500W 24V DC-110V AC Pure-sine-wave Inverter ·1 PC 60A PWM Solar Charge Controller ·2 PCs 12V 50AH Lithium Battery ·1 Pair of 16ft 11AWG Solar-Controller Cable ·1 Pair of Y Branch Connector ·1 Pair of 1ft 10AWG Lithium Battery Cable ·1 Pair of 2.6ft 7AWG Battery-Inverter Cable ·1 Pair of 16.4ft 12AWG Solar Extension Cable...
-
Page 5: Components Description
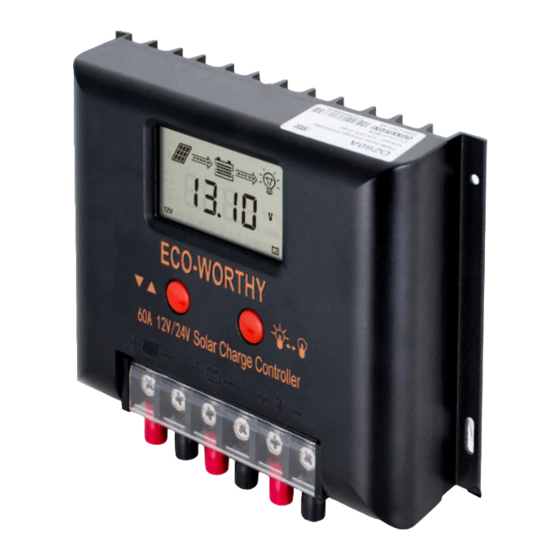
Components Description Solar Panel The solar panel is a set of solar photovoltaic modules that generate electricity based on sunlight. This system contains 4 pieces of 100W panels with monocrystalline solar cells. Electrical Data 100W Maximum Power at STC* Optimum Operating Voltage (Vmp) 5.55A Optimum Operating Current (Imp) 21.6V... - Page 6 1.4Ibs/650g Battery plate reverse connection protec- tion , a battery reverse connection protec- tion, charging battery board short circuit protection, charging the battery open circuit protection, charging over current protection, overload protection, load short-circuit protection controller and over temperature protection. 7.4*5.0*2.1in/189.3*128*53.1mm Pure-sine-wave Inverter The inverter transforms 24V battery DC power into 110/120V AC power,...
- Page 7 Batteries The complete system includes 2 pieces of 12V 50Ah rechargeable lithium batteries. For this is a 24V system, the batteries should be wired as a 24V battery bank. The total capacity of the battery bank is about 1280Wh. 12V 50Ah LiFePO4 Battery Battery Capacity 50Ah Battery Power...
- Page 8 Battery-Inverter Cable 2.6ft 7AWG ring-head cable for battery bank - inverter connection Battery-Controller Cable 4.92ft 11AWG cable for battery-controller connection Y-Branch Connecotr Split Y-shape cable for parallel connection of solar panels Z Mounting Brackets Mounting brackets for fixing panel to a flat surface. There are 4 brackets for each solar panel...
-
Page 9: Installation Guide
Installation Guide -Setup the battery bank The inverter in this system requires a 24V battery bank for running. With 2 pieces of batteries, the connection should be: Connect 2 batteries in series to form a 24V battery bank. Method: hook up each battery’s positive terminal to the other’s negative terminal. - Page 10 -Mount the solar panels Determine a location for the solar panel that is exposed in direct sunlight and clear of any shading such as trees, roof overhangs, etc. Ideally, the panels should be positioned to minimize the wiring distance between the solar panel and the combiner box.
- Page 11 5.1.1 Use Z-Brackets on an rv roof: “Flat Mount” When mounting a panel using Z-Brackets, a well-nut (also known as “expansion nut”) is often used on a pre-drilled hole. This procedure safely secures the panel on thin cabin roofs or RV roofs. Using a well-nut is recommended, as the rubber expansion prevents water leak- age.( The Z-Bracket set does not include well nuts) Step1:Attaching the Z-Bracket to a solar panel...
- Page 12 Step 3: Attaching the panel to the roof Figure picture below illustrates the correct way to use the well-nut. The rubber flange has to be flushed on the roofline. The Z-Bracket,along with the flat washer and lock washer, hold the well-nut in place when the screw is fastened.
- Page 13 Wiring method: 1.Connect each 2 panels in series to make 2 strings of 24V Each ECO-WORTHY Solar Panel has a pair of MC4 solar cable at the back of panel that consists of male and female connectors. This type of connector uses a “snap-in”...
- Page 14 2.Use 1 pair of Y-branch connector to wire 2 strings together in parallel. Diagram as below: -PV output to solar charge controller After all panels get wired by Y-branch connector, use the 16.4ft 8AWG solar-controller cable to connect the solar panel array output wire with the controller.
- Page 15 ·Please do not install the inverter in a humid, greasy, flam mable, explo- sive, dusty or other severe environments. ·During cabinet installation, sufficient space shall be reserved around the hybrid inverter for heat dissipation. ·The polarity of the battery input end of this product shall not be reversed, otherwise the device may be damaged easily or there may be some unpredictable dangers.
-
Page 16: Fusing And Setting
-Inverter to appliances Before booting the inverter, the AC OUT ports should be wired with the home socket or appliances first. -Turn on the inverter When all wirings are done, check if the battery type switcher is at Li-ion, since it’s connected with lithium battery bank. The final step is to boot the hybrid inverter by pressing the switch on its bottom. -
Page 17: Testing And Troubleshooting
On the other hand, even though the inverter has built-in fuse, it’s better to add one fuse in between it and the battery bank. For a 24V 1500W inverter, the current it receives from battery should be about 62A, so a 75A fuse is recommended. - Page 18 ·Determine the short-circuit current (Isc) of every series circuit. It can be measured directly by connecting the digital multimeter to the two termi- nals of the series circuit or module. Attention, the rated scale of the am- meter or the rated current of load should be more than 1.25 times of the rated short-circuit current of the series module.
-
Page 19: Faq
A1:The hybrid inverter is not working. The screen is not showing anything. Q1:For this situation, there are 3 things to check: (1)Check for loose, broken or corroded connections in the cables between the inverter and battery bank. (2)Check the fuses/breakers in the combiner box. (3)Verify battery voltage is sufficient to power up the inverter A2:Everything is hooked up correctly. -
Page 20: Maintenance
Maintenance The following maintenance is recommended to ensure optimum perfor- mance and longevity of the solar panel: •Clean the glass surface of the solar panel when necessary. Always use water and a soft sponge or cloth for cleaning. A mild, non-abrasive cleaning agent can be used to remove dirt. -
Page 21: Support
(without limitations) and suggestions do not constitute a warranty, expresses or implied. ECO-WORTHY reserves the right to change the manual, the PV prod- ucts, the specifications, or product information sheets without prior notice.
Need help?
Do you have a question about the ECO-SC60A and is the answer not in the manual?
Questions and answers
Hi, for some reason over the last 3 days my batteries have been overcharging and going up to over 40 V and then the system shuts down. I’ve no idea why this should happen all of a sudden could you please advise me? My system is done east west 4 panels on the east 4 panels on the west going to 2 separate charge controllers and from there to the batteries this system has worked fine for over three years until now. The charge controllers have never let the batteries get over 28 V Until now. Thanks Andy
Possible causes for the ECO-WORTHY ECO-SC60A charge controller overcharging batteries above 40 V after three years of normal operation include:
1. Defective bypass diodes causing incorrect voltage readings.
2. Bad electrical connections that result in voltage regulation issues.
3. Improper wiring or loose terminal connections.
4. Temperature-related changes affecting the open-circuit voltage of solar modules.
5. Internal component degradation or failure in the controller over time.
These issues can interfere with voltage regulation and cause the controller to charge batteries beyond safe limits.
This answer is automatically generated