Table of Contents
Advertisement
Quick Links
Advertisement
Table of Contents

Subscribe to Our Youtube Channel
Related Manuals for ECO-WORTHY 100W Solar Panel Kit


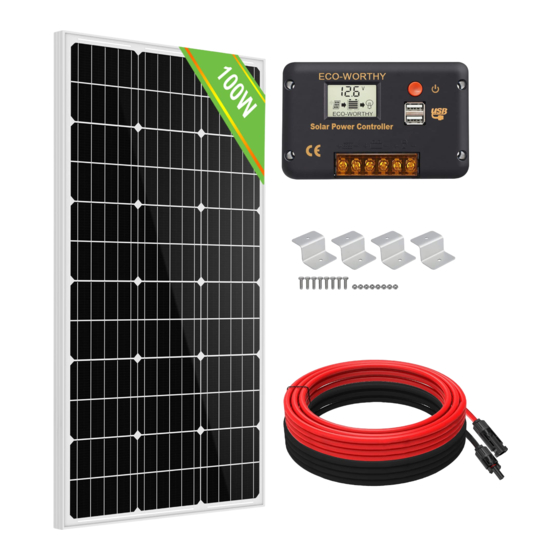
Summary of Contents for ECO-WORTHY 100W Solar Panel Kit
-
Page 2: Table Of Contents
Installation Introduction ............1 1.General Safety ............1 2.Introduction ........2 3.General Installation Guide ........2 4.Charge Controller Installation ...............2 4.1 Mounting location ................3 4.2 Installation ...........4 5.Solar Panel Installation .................4 5.1 Location ......5 5.1.1 Using Z-Brackets on an rv roof: “Flat Mount” ...........7 5.1.2 Well-nuts and blind holes ...............7 5.2 Solar panel connection... -
Page 3: General Safety
Congratulations on purchasing a high quality renewable energy product where building your own off-grid solar system. ECO-WORTHY 100W Solar Panel Kit is perfect for customers to get a start in solar energy, providing quiet power production and grid indepen- dence.This manual contains information regarding the installation for solar module kit. -
Page 4: General Installation Guide
3.General Installation Guidance 4.Charge Controller Installation 4.1 Mounting location Insure all terminating connections are clean and tight to prevent arcing and overheating.The controller must be installed in an area that satis- fies all of the following conditions: 1. Dry: Avoid any location where water can contact the controller 2. -
Page 5: Installation
The controller can be mounted on a vertical or horizontal surface. Be sure to orient the controller so that any open end of the controller (if applicable) is at the top. This will prevent foreign material from settling into the unit. 4.2 Installation Drill the holes and make sure that the holes are sized appropriately to avoid loose screws. -
Page 6: Solar Panel Installation
5.Solar Panel Installation 5.1 Location Determine a location for the solar panel that is in direct sunlight and clear of any shading by adjacent obstacles such as trees, roof over- hangs, etc. Ideally, the panels will be positioned to minimize the wiring distance between the solar panel and the charge controller. -
Page 7: Using Z-Brackets On An Rv Roof: "Flat Mount
5.1.1 Use Z-Brackets on a rv roof: “Flat Mount” When mounting a panel using Z-Brackets, a well-nut (also known as “expansion nut”) is often used on a pre-drilled hole. This procedure safely secures the panel on thin cabin roofs or RV roofs. Using a well-nut is recommended, as the rubber expansion prevents water leak- age.( The Z-Bracket set does not include well nuts) Step1:Attaching the Z-Bracket to a solar panel... - Page 8 Step 3: Attaching the panel to the roof Picture below illustrates the correct way to use the well-nut. The rubber flange has to be flushed on the roofline. The Z-Bracket,along with the flat washer and lock washer, hold the well-nut in place when the screw is fastened.
-
Page 9: Well-Nuts And Blind Holes
5.2 Solar panel connection Each ECO-WORTHY Solar Panel will have a pair of MC4 at the back of panel that consists of male and female connectors. This type of connec- tor system is easy to install and uses a “snap-in” type of safety locking clips to lock the two mating connectors. -
Page 10: Connect Solar Panels To Controller
5.2.1 Connect solar panels to controller Wire the panels’ positive and negative posts comes from the Y branch- es separately to the P&N posts of the controller with 1 pair of MC4- copper cable... -
Page 11: Maintenance
6.Maintenance The following maintenance is recommended to ensure optimum perfor- mance and longevity of the solar system: • Clean the glass surface of the solar panel when necessary. Always use water and a soft sponge or cloth for cleaning. A mild, non-abrasive cleaning agent can be used to remove dirt.
Need help?
Do you have a question about the 100W Solar Panel Kit and is the answer not in the manual?
Questions and answers