iOptron CEM40 Replacement
Board replacement
Hide thumbs
Also See for CEM40:
- Instruction manual (60 pages) ,
- Quick start manual (8 pages) ,
- Quick start manual (6 pages)
Table of Contents
Advertisement
Quick Links
May 17, 2019
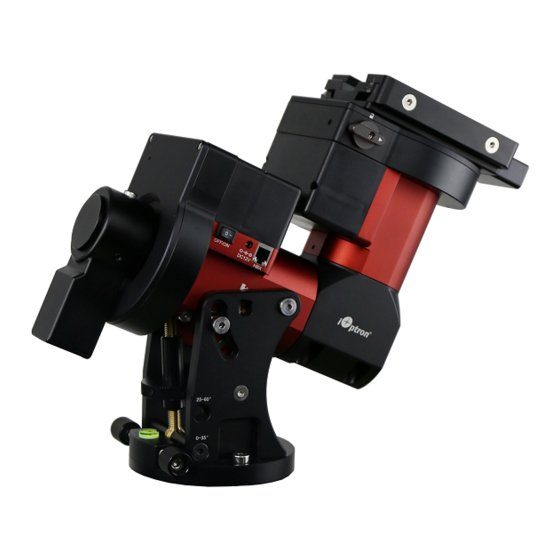
Due to the internal cable wiring, there will be some disassemble effort to perform this inspection.
Tool needed: Metric Allen wrench set
1. Rotate the mount RA axis to horizontal position as
shown below. Lock the Gear Switch. Use a 2.5mm
Allen wrench to release two DEC motor plastic
cover screws. Remove the DEC cover.
2. Remove the plastic cover. Check the 4-wire plug
marked Main on the side. Make sure it is plugged in
firmly. Power on the mount to see if the DEC
connection error disappears.
3. Remove the RA/Main board cover.
CEM40 Board Replacement
4. Unplug the RA board from the main board.
5. Unplug the cables from the RA board and PEC
6. Remove the RA motor by release three socket
RA Board
encoder cable from the mount. (EC model has a 6-
wire encoder cable)
screws.
PEC cable
Advertisement
Table of Contents

Related Manuals for iOptron CEM40


Summary of Contents for iOptron CEM40
- Page 1 CEM40 Board Replacement May 17, 2019 Due to the internal cable wiring, there will be some disassemble effort to perform this inspection. Tool needed: Metric Allen wrench set 1. Rotate the mount RA axis to horizontal position as 4. Unplug the RA board from the main board.
- Page 2 7. Carefully pull and lift the main board up from the 10. Connect the cables and insert RA board back to the compartment. Disconnect the DEC and power main board. Pay attention to two sets of pins on the cables bottom.
Need help?
Do you have a question about the CEM40 and is the answer not in the manual?
Questions and answers