Advertisement
Quick Links
Advertisement

Related Manuals for Gree GDN30AQ-A3EBA1A


Summary of Contents for Gree GDN30AQ-A3EBA1A
- Page 1 OWNER’S MANUAL Dehumidifier Model: GDN30AQ-A3EBA1A GDN45AQ-A3EBA1B Thank you for choosing our product. For proper operation, please read this manual carefully and keep it for future reference. Code GREE : 13-06099/098 00755_09/05/2016 © Copyright, GREE Canada, 2016...
- Page 2 OPERATION NOTICES ● Unit Placement..................1 ● Safety Precautions..................2 ● Parts ..................... 3 ● Check Before Operation.................4 OPERATION INSTRUCTIONS ● Operation Method...................5 ● Drainage Option..................8 MAINTENANCE ● Cleaning and Maintenance..............10 MALFUNCTION ● Troubleshooting..................12 ● Malfunction Codes................14 ● Warranty ....................15 Note: The images in this manual are only for reference. Please refer to actual products for specific details.
- Page 3 ● This dehumidifier is intended for indoor residential applications only. It should not be used for commercial or industrial applications. ● Place the dehumidifier on a smooth and level floor. ● A dehumidifier operating indoors will have no effect in drying an adjacent enclosed area, such as a closet.
- Page 4 ● Before operating, please check the power cord to make sure it complies with the requirement indicated on the nameplate. ● Before cleaning, please turn the unit off and unplug it. ● Make sure the power cord is not being compressed by any hard object. ●...
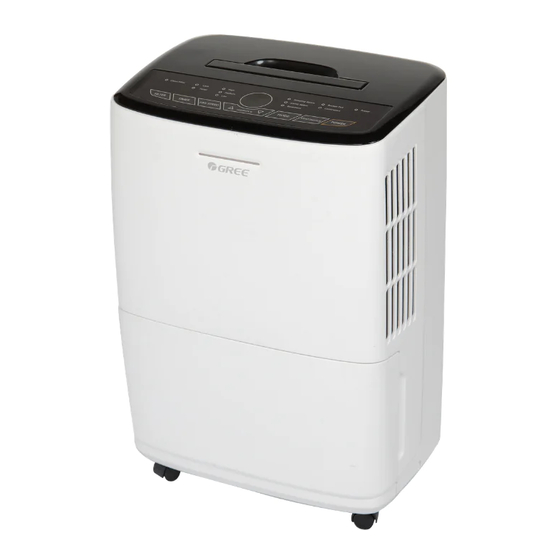
- Page 5 Front side CONTROL PANEL ON LIGHT FRONT GRILLE WATER BUCKET ROLLER Back Side FILTER POWER PLUG...
- Page 6 Before operating, please first check that the float is properly placed. Below are the steps to do this: 1. Hold the handles on both sides of the water bucket and pull out in the direction indicated by the arrows. 2. Check that the float in the water bucket is properly placed. It may have shifted during transportation.
-
Page 7: Basic Functions Of The Buttons
space indicator indicator indicator proper place operation on indicator indicator indicator ● The water bucket must be correctly installed for the dehumidifier to operate. Notes: ● Do not remove the bucket while the unit is in operation. ● If you want to use a drain hose to drain water away, please install the hose according to the section "Drainage method". - Page 8 will lock the buttons. If this function is turned on, the Button Locked Indicator will come on and the display window shows LC, which will blink 3 times. Then the ambient humidity is displayed again. To turn off this function, hold « + » and «...
-
Page 9: Other Instructions
Press this button to set continuous dehumidify. Continuous button Note: The drain hose must be installed to use the CO mode. Otherwise, unit will stop when the water bucket is full. Press this button to turn off the Filter Cleaning Indicator. (When the FILTER Button dehumidifier has been operating for 250 hours, the Filter Cleaning Indicator will light up to remind to clean the filter.) - Page 10 Option 1 Emptying Manually ● Do not remove the bucket when the unit is in operation or has just Notes stopped. This may cause the water to drip on the floor. ● Do not use the hose if using the water bucket to collect water. When the hose is connected, the water will drain out through it instead of into the bucket.
- Page 11 Other Instructions 1. The hose is not provided, so the user must procure it. [Size: The hose thread should have an outer diameter of 11/16 inches (1.0625 inches or 27.0mm), and a pitch of 11.5 TPI.] 2. Remove the bucket from the unit as instructed.
- Page 12 ● Before cleaning, turn off the dehumidifier and disconnect the power to Warning: avoid electric shock. ● Do not wash the dehumidifier with water to avoid electric shock. ● Do not use volatile liquid (such as thinner or gasoline) to clean dehumidifier. Otherwise it will damage unit's appearance.
-
Page 13: Long Term Storage
(3)After cleaning, replace the drain lid and handle and make sure the float in the water bucket is placed properly. The side with foam should be Float beneath the drain lid. Do not remove the foam from the float. The dehumidifier will remind you to clean the air 3. - Page 14 ● Not all the following problems are malfunctions. PROBLEM POSSIBLES CAUSES Dehumidifier is not operating. ● Unit is operating in an area where the temperature Controls cannot be set. is higher than 32°C or lower than 5°C. ● Bucket is full. Noise suddenly starts when ●...
- Page 15 ● Dehumidifier does not start. PROBLEM Possible causes Solutions When using the drain ● Power is not supplied to ● Check if power is lost. If the dehumidifier or the yes, wait for the power to hose, there is water in power plug is not well restore.
- Page 16 ● Unit's Malfunction Codes Malfunction Display Unit's Name Code Condition Possible Causes Display Window ● Ambient temperature sensor is loose or is poorly connected to the terminal of display board. ● An element of display board may have been put in upside Ambient down and caused short circuit.
-
Page 17: This Warranty Does Not Cover
ONE (1) year from the date of original purchase in Canada. During the warranty period, if the dehumidifier fails under normal use, GREE will, at its option, either repair the unit or replace it, free of charge, within a reasonable period of time after the dehumidifier is returned.
Need help?
Do you have a question about the GDN30AQ-A3EBA1A and is the answer not in the manual?
Questions and answers