Table of Contents
Advertisement
Advertisement
Table of Contents

Related Manuals for Gree G16-70ESDEHG-IP


Summary of Contents for Gree G16-70ESDEHG-IP
- Page 1 G16-70ESDEHG-IP Thank you for choosing our product. For proper operation, please read and keep this manual carefully. If you have lost the Owner’s Manual, please contact the local agent or visit www.gree.com or sent email to global@gree.com.cn for electronic version.
-
Page 2: Table Of Contents
Content Operation Notices ● Operation Area..................1 ● Safety Precautions..................2 ● Parts Name.....................3 ● Check Before Operation.................4 Operation Instructions ● Operation Method...................5 ● Drainage Option..................8 Maintenance ● Clean and Maintenance................10 Malfunction ● Troubleshooting..................12 ● Malfunction Codes................14 Note: Graphics in this manual are only for reference. Please refer to actual products for specific details. - Page 3 Explanation of Symbols Indicates a hazardous situation that, if not avoided, will result in death or serious injury. Indicates a hazardous situation that, if not avoided, could result in death or serious injury. Indicates a hazardous situation that, if not avoided, may result in minor or moderate injury.
-
Page 4: Operation Area
Operation Area not be used for commercial or industrial applications. enclosed area, such as a closet. temperature will not below 5°C or above 32°C. ● Allow at least 12-18 inches of air space on all sides of the unit. ● Close all doors, windows and other outside openings of the room to improve the working effect. -
Page 5: Safety Precautions
Safety Precautions ● This appliance is not intended for use by persons (including children) with reduced physical, sensory or mental capabilities, or lack of experience and knowledge, unless they have been given supervision or instruction concerning use of the appliance by a person respon- sible for their safety. -
Page 6: Parts Name
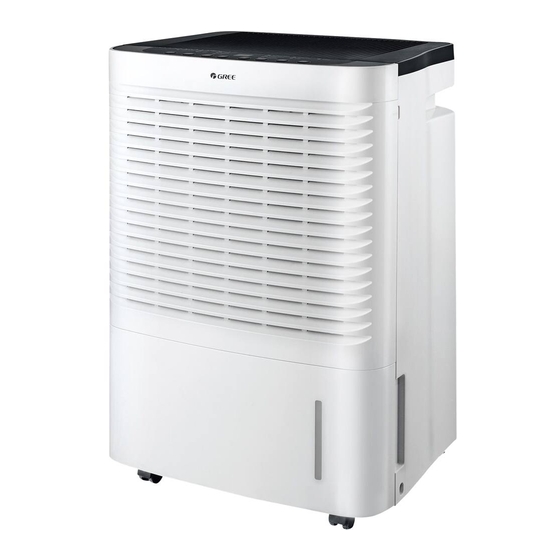
Parts Name Front Side Control Panel Air-in grille Cover plate (continous drainge) Water Bucket Castors Back Side Air outlet Rear case Power Plug... -
Page 7: Check Before Operation
Check Before Operation aced. Below are the checking steps: 1. Hold the handles on both sides of the water bucket and pull it out following the arrow direction. moved a little after long-time transportation. If it's not placed properly, move it to the correct position by hand. -
Page 8: Operation Method
Operation Method sleeping Bucket full light space indicates bucket lock on high, mid living space mode on needs to be emptied power on indicator and low fan mode on indicator or it is not in the indicator indicator light light indicator light indicator light light... - Page 9 ● When setting Timer On or Timer Off, press these buttons to adjust time. ● When unit is in operation, holding + and - button simultaneously for 3s can lock buttons. If this function is turned on, Button Locked Indicator will be on and display window shows LC, which will blink for 3 times.
- Page 10 MODE Button Press this button to select different kinds of working mode. After each pres- sing of this button, mode will switch among free drying, sleeping space, living space, basement and continuous drying modes, and the corresponding mode indicator will ON. When free drying, all mode indicators are OFF. CONTINUOUS Button When continuous dehumidification mode is selected, the corresponding con- tinuous dehumidify indicator will be on,the dehumidifier will operate continu-...
-
Page 11: Drainage Option
Drainage Option Option 1 Emptying Manually NOTICE: ● Do not remove the bucket when unit is in operation or has just stopped. ● Do not use the hose if using water bucket to collect water. When the hose is connected, water will be drained out through it instead of into the bucket. 1. - Page 12 Option 2 Gravity Drain Hose 1. Hose is not provided, so user shall prepare it in advance. [Size: The hose thread should have an outer diameter of 11/16 inches (1.0625 inches or 27.0mm), and a pitch of 11.5 TPI.] 2. Remove bucket from the unit as instructed. 3.
-
Page 13: Clean And Maintenance
Clean and Maintenance WARNING: may lead to electric shock. Otherwise it will damage unit's appearance. 1. Grille and Case To clean the case: When there is dust on the case, use soft towel to dust it off; When the case is very dirty(greasy), use mild detergent to clean it. - Page 14 (3) After cleaning, replace the drain lid and handle properly. The side with foam plastic should be Foam beneath the drain lid. Do not remove the foam Plastic Float 3. Air Filter when it has been operating for 250 hours. If it is used in dusty places, clean the air filter more often.
-
Page 15: Troubleshooting
Troubleshooting ● Not all the following problems are malfunctions. Problem Possible Causes ● Unit is operating in an area where temperature is higher than 32°C or lower than 5°C. Controls can not be set. ● Bucket is full. ● Noise will rise if compressor has just started. Noise suddenly rises during ●... - Page 16 Problem Possible Causes Solution ● Check if power is lost. If yes, wait for the power to restore. ● If not, check whether the ● Power is not supplied for power circuit or power socket Power indicator is has been damaged. power plug is not well not lit when power ●...
-
Page 17: Malfunction Codes
Malfunction Codes ● Unit's Malfunction Codes Display Code Malfunction Unit's Possible Causes Name Condition Display Window ● Ambient temperature sensor is loosen or is poorly connected with the terminal of display board. ● Some element of display board Ambient may have been put upside down Temperature and cause short circuit. - Page 18 Display Code Malfunction Unit's Possible Causes Name Condition Display Window Freon-lacking ● Refrigerant is leaking. protection ● System is blocked The compr- essor stops; ● Ambient operation condition is the fan mo- High-tempe- bad. tor keeps on rature over ● The evaporator and condenser running.
- Page 19 GREE ELECTRIC APPLIANCES, INC. OF ZHUHAI Add: West Jinji Rd, Qianshan, Zhuhai, Guangdong, China, 519070 Tel: (+86-756) 8522218 Fax: (+86-756) 8669426 E-mail: gree@gree.com.cn www.gree.com 66160000072...
Need help?
Do you have a question about the G16-70ESDEHG-IP and is the answer not in the manual?
Questions and answers