Table of Contents
Advertisement
Owner's manual & Installation manual
Mode d'emploi et manuel d'installation
Manual de instrucciones y de instalación
MAX675VDII
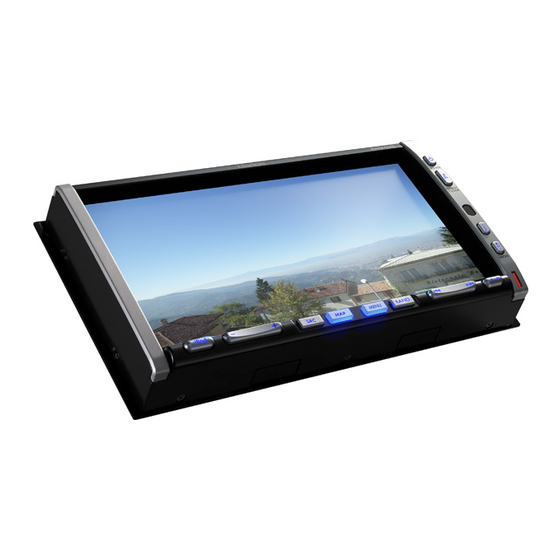
2-DIN DVD MULTIMEDIA STATION WITH CeNET &
7-inch TOUCH PANEL CONTROL
STATION MULTIMEDIA DVD 2 DIN AVEC COMMANDE
PAR ECRAN TACTILE 7 pouces & CeNET
EQUIPO DVD MULTIMEDIA 2-DIN CON CeNET y
PANEL DE CONTROL TÁCTIL DE 7 pulgadas
Advertisement
Chapters
Table of Contents

Related Manuals for Clarion MAX675VDII


Summary of Contents for Clarion MAX675VDII
-
Page 1: Controls/Commandes/Controles
Owner’s manual & Installation manual Mode d’emploi et manuel d’installation Manual de instrucciones y de instalación MAX675VDII 2-DIN DVD MULTIMEDIA STATION WITH CeNET & 7-inch TOUCH PANEL CONTROL STATION MULTIMEDIA DVD 2 DIN AVEC COMMANDE PAR ECRAN TACTILE 7 pouces & CeNET EQUIPO DVD MULTIMEDIA 2-DIN CON CeNET y PANEL DE CONTROL TÁCTIL DE 7 pulgadas... -
Page 2: Table Of Contents
We have made product registration simple with our easy to use website. The registration form is short and easy to complete. Once you’re registered, we can keep you informed of important product information. Register at www.clarion.com - it’s easy to keep your Clarion product up to date. Contents 1. FEATURES ... 3 Expanding Systems... - Page 3 ∗ 2:External equipment not connected with CeNET is not displayed. ∗ 3:This shows an example entering 107.9 MHz. MAX675VDII 1. FEATURES ■ Double Din Motorized 7" Widescreen LCD ■ CD-R/CD-RW/DVD R/DVD RW Compatible ■ Touch Panel Control ■ 5.1 Channel Decoder for DTS and Dolby ■...
- Page 4 Press the button again to resume playback. screen to switch the mode. • Keep pressing this button more than 1 second to mute the sound in the DVD PLAYER/iPod/ [+], [–] buttons changer modes. • Use these buttons to increase/decrease the •...
-
Page 5: Outline Of Button And Touchkey Operation
∗Screen during DVD mode when automobile moving. Note: ∗ 4:When displaying movies in DVD video mode, touching the screen surface will cause the DVD PLAYER mode screen to be displayed. ∗4 (DVD PLAYER mode screen) (Option menu) (DVD SETUP menu) - Page 6 Outline of Button and Touchkey Operation Adjusting audio feature settings ●When no surround decoder is connected (ADJUST mode menu) (AUDIO menu) (BAL/FAD screen) MAX675VDII (AUDIO EXT. menu) (BAL/FAD)
- Page 7 Outline of Button and Touchkey Operation ●When the 5.1 ch Surround Decoder is connected (ADJUST mode menu) (AUDIO menu) (STATUS screen) (AUDIO EXT. menu) (STATUS) (SPEAKER SEL menu) (SPEAKER SEL) MAX675VDII...
- Page 8 Outline of Button and Touchkey Operation Adjusting the other system settings (ADJUST mode menu) (CLOCK screen) (Hour, Minute, a.m./p.m.) (MONITOR ADJ) (Monitor Adjust screen) Bright Color •Switched by touching this key repeatedly. MAX675VDII (GENERAL menu) (MONITOR menu) (WALL COLOR screen) Dimmer (WALL COLOR)
-
Page 9: Remote Control
[ P.TIME ] [ SEARCH MODE ] [ MENU ] [ TOP MENU ] [ ISR ] [ 2-ZONE ] [ PBC ] [ RDM ] [ SLOW ] [ ANGLE ] AA (SUM-3, IECR-6/1.5V) Batteries Rear side MAX675VDII Rear cover... -
Page 10: Functions Of Remote Control Unit Buttons
Functions of Remote Control Unit Buttons You can use the remote control unit to control the MAX675VDII. When the 2-ZONE function is ON, the controls work upon the selected zone. Note: • The steering wheel remote control operations work upon the MAIN zone even when the SUB zone is selected. -
Page 11: Ipod Mode
• Keep pressing to perform fast-forward or fast- backward. CD changer mode [BAND] button • Press to switch discs. [DISC SEL] button • Press to show/hide the Disc List screen. [6] button • Press to play and pause the selected media. MAX675VDII... - Page 12 • Controls sound volume for MAIN zone source. [MUTE] button • Controls audio mute function for MAIN zone source. [ISR] button Not supported. CD changer mode • This mode is disabled when MAIN zone is set to an external equipment other than the CD changer. MAX675VDII...
-
Page 13: Cautions On Handling
• The touchkeys on the display operate when slightly touched. Do not press the touchkey screen with much force. • Do not push the case surrounding the touchkey panel with much force. This may cause malfunctioning of the touchkeys. MAX675VDII... -
Page 14: Handling Discs
If you try to play such a disc, you may not be able to get it back out of the DVD player or it may damage the DVD player. • Do not use discs that have large scratches, are misshapen, cracked, etc. -
Page 15: Dvd Video System
This low sound compression format delivers a large amount of data and makes it possible to reproduce a high quality sound. Menu screens Menus can be called up during DVD video playback to perform menu setting. • Example showing menu display MAX675VDII... -
Page 16: Discs
Macrovision. Reverse engineering or disassembly is prohibited. • Manufactured under license from Dolby Laboratories. MAX675VDII Discs that cannot be played back This DVD video player cannot play back DVD- Audio, DVD-RAM, Photo CDs, etc. Note: • It may also not be possible to play back CDs recorded on a CD-R unit and CD-RW unit. -
Page 17: Operations
1. When in the TUNER, Satellite Radio, VISUAL or TV mode, press the [p] button to turn the mute on and off. When in the DVD PLAYER, iPod or changer mode, keep pressing the [p] button more than 1 second to turn the mute on and off. -
Page 18: Adjusting The Audio
It will move, and stop at 30 . 2. Keep pressing the [7] (OPEN/CLOSE) button again. It will move, and stop at 0 . MAX675VDII Adjusting the AUDIO Note: • When the optional 5.1 ch Surround Decoder (DVH940N) is used, the following tone adjustments cannot be made. -
Page 19: Adjusting The Treble
2-1. Touch the [C] key to display the next menu screen. 3-1. Touch [ON] or [OFF] of the [M-B EX] item to turn the Magna Bass Extend effect on or off (The factory default setting is “OFF”). MAX675VDII... -
Page 20: Adjusting The Monitor
• The setting for the MONITOR ADJ item made in the NAVI mode automatically returns to “Auto” (the factory default setting) if the power is turned off or the vehicle’s illumination switch is operated. MAX675VDII Adjusting the brightness, color, hue and dimmer level Note: •... -
Page 21: Adjusting The General
3-1. Touch the [ON] or [OFF] key of the BLINK LED item to turn the function on or off (The factory default setting is “OFF”). • Setting the CATS function (see page 27) turns on the Blink LED function as well. MAX675VDII... - Page 22 MAX675VDII Note: • This function is not compatible with all cellular telephones. Contact your local authorized Clarion dealer for information on proper installation and compatibility. • When you set this function to “OFF”, disconnect the cellular phone from the cable or turn off the power of the cellular phone.
-
Page 23: Adjusting The Clock
“1:00 a.m.”). * The time is displayed in 12-hour format. Setting the anti-theft function (CATS) “CATS” is the acronym of “Clarion Anti-Theft System”. When you set a PIN code (called as “Personal Code”), a theft is prevented by disabling the operation of the unit at the theft. -
Page 24: Zone Function
• Navigation mode screen • Front monitor locked screen • CCD camera screen MAX675VDII Setting the 2-ZONE function • The factory default setting is “OFF”. * The function can also be switched by using the remote control unit. - Page 25 Visual Visual connection connection [NAVI] (*1) [OTHER] (*1) Displays image of Displays image of mode selected from device connected the Source menu in the MAIN zone to the Visual mode. terminal. Visual connection [NAVI] (*1) Visual connection [NAVI] (*1) MAX675VDII...
-
Page 26: Radio Operations
• When touching the [X] key, the station is sought in the direction of lower frequencies. MAX675VDII Selecting stations by entering frequency This function displays the Key Pad on the screen allowing you to tune by entering a frequency. -
Page 27: Manual Memory
TUNER mode and tune the selected radio station. “ISR” appears in the display. Press the [ISR] button again to return to the previous mode. * The [ISR] button is disabled when SUB zone is selected in the 2-ZONE mode. MAX675VDII... -
Page 28: Dvd Video Player Operations
Selecting the DVD SETUP menu 1. Press the [SRC] button, and touch the [DVD PLAYER] key. The DVD PLAYER mode screen is displayed. 2. Touch the [Option] key to display the Option menu. 3. Touch the [Setup] key to display the DVD SETUP menu. - Page 29 • The factory default setting of the password is “0000”. 4-3. Touch the [[] or []] key to select level 1 to 8, or 0 (no parental). • The factory default setting is “8”. MAX675VDII Input code 6765 8583 6583...
-
Page 30: Ejecting A Disc
Note: • For your safety, the MAX675VDII has a safety function which turns off the picture when the car is moving, so only the audio can be heard. The picture can only be watched when the car is stopped and the parking brake is applied. -
Page 31: Operating The Dvd Menu
Showing the DVD PLAYER mode screen The DVD PLAYER mode screen is used to control the playback mode from the screen. 1. Touch the screen. The DVD PLAYER mode screen is displayed. -
Page 32: Stopping Playback
When this button is pressed again within about 3 seconds, playback starts from the beginning of the previous chapter. • The unit may return to the DVD PLAYER mode screen when the [F] or [R] button is pressed. Fast forward and fast backward 1. -
Page 33: Using The Title Menu
3. Perform the same operation to turn off the repeat playback. TOP function The TOP function resets the DVD player to the first chapter of the current title. 1. Press the [BAND] button to play back the first chapter (chapter No. 1). -
Page 34: Switching Angles
On discs in which two or more audios or audio languages have been recorded, you can switch among the audio languages during playback. 1. Showing the DVD PLAYER mode screen, touch the [Option] key. 2. Touch the [Audio] key during playback. -
Page 35: Watching A Video Cd
1 second, and then 20-time faster 3 seconds later. Releasing the button resumes the normal speed playback. • The unit may return to the menu screen when the button is pressed. * No audio is reproduced during fast forward and fast backward operation. MAX675VDII Track Playback direction... -
Page 36: Listening To A Cd
The screen will automatically return to the playback screen in about 7 seconds, and the playback status will be displayed on the playback screen. MAX675VDII On/Off of Playback Control On Video CDs equipped with Play Back Control function, you can turn it on/off. -
Page 37: Fast Forward And Fast Backward
DVD Video Player Operations TOP function The TOP function resets the DVD player to the first track of the disc. 1. Press the [BAND] button to play back the first track (track No. 1). Fast forward and fast backward 1. Press and hold the [R] or [F] button during playback. -
Page 38: What Is Mp3/Wma
Playing files with a format not supported will be skipped, and the scan, random and repeat playback mode may be canceled. MAX675VDII ●Logical format (File system) 1. When writing an MP3/WMA file on a disc, please select “ISO9660 level 1 or level 2 (without including expansion format)”... -
Page 39: Pausing Playback
2. Input the number for the track or folder that you want to play back with [0] to [9] key. 3. Touch the [ENT] key. When you select the folder number, playback starts from track 1 of the input folder number. 4. Touch the [Back] key. MAX675VDII... - Page 40 3. To cancel the play, touch the key of the function to cancel. 4. Touch the [Back] key to return to the previous screen. MAX675VDII Displaying CD titles 1. Touch the [Title] key. 2. Touch the [X] key of the Folder, Track, Album, Artist or Title item to cause the respective display to scroll once.
-
Page 41: Other Functions
A title of a channel stored for the presets 1 to 6 or a channel number is displayed. 3. Touch the desired title key (1 to 6) to select. The selected broadcast station or disc is played. 4. Touch the [Back] key to return to the previous screen. MAX675VDII... - Page 42 • The factory default setting is “[F.WIDE]”. Note: • This function is not available while you are driving. • Switch to the DVD PLAYER (DVD video or video CD)/VISUAL/TV mode you see. 1. Touch the screen to display the mode menu, then touch “Display size”...
-
Page 43: Accessories
In this condition, the iPod cannot be played even if attached to the MAX675VDII. Also, the MAX675VDII’s recharging function cannot be used to recharge the iPod. As a result, when the iPod’s battery... - Page 44 ●Option menu screen operation keys List keys Play mode menu List keys Audio Books menu MAX675VDII Play mode menu • Uses to switch the shuffle mode and repeat mode. List keys • Displays the corresponding list screen. [Podcasts], [Artists], [Albums], [Genres], [Playlists], [Audio Books], [Composers] and [Songs] are available.
- Page 45 Note: • “AUDIO ONLY” is displayed when the automobile is moving. • Image data may not be played back according to the status of the iPod. MAX675VDII...
-
Page 46: Visual Operations
Switching to the VISUAL mode Note: • For your safety, the MAX675VDII has a safety function which turns off the picture when the car is moving, so only the audio can be heard. The picture can only be watched when the car is stopped and the parking brake is applied. - Page 47 The disc random play selects and plays individual tracks or discs automatically in no particular order. 3. To cancel the play, touch the key of the function to cancel. 4. Touch the [Back] key to return to the previous screen. MAX675VDII...
-
Page 48: Tv Operations
Watching TV Note: • For your safety, the MAX675VDII has a safety function which turns off the picture when the car is moving, so only the audio can be heard. The picture can only be watched when the car is stopped and the parking brake is applied. -
Page 49: Preset Scan
2. Touch the [ON] or [OFF] key of the TV DIVER item to turn this function on and off. [ON]: Sets reception emphasizing the visual. [OFF]: Sets the diver setting to OFF. 3. Touch the [Back] key to return to the previous mode. MAX675VDII... -
Page 50: Satellite Radio Operations
• A channel not covered by your contract: XM; “UPDATING”, SIRIUS; “CALL 888” “539 SIRI” (alternated) • When a channel is out of air time: “OFF AIR” MAX675VDII Confirming your Radio ID ●XM 1. Touch the [Search] key to display the Key Pad screen. -
Page 51: Recalling A Preset Station
• The category selection mode is canceled when no channel with the selected category can be found. • The [X] and [x] keys are not touched within 7 seconds, the category selection mode is canceled, and resumes to the normal seek mode. MAX675VDII... -
Page 52: Scan Function
●Preset scan A preset scan scans the channels (up to 18 channels) stored in the preset memory about every 10 seconds. 1. Touch the [List] key. 2. Touch and hold the [PS] key for more than 1 second. MAX675VDII... -
Page 53: Navi Operations
Note: • Hereafter in this section, the Navigation system will be called as “NAVI”. • When the Clarion NAVI NAX970HD is connected, the following functions are available: • Showing the NAVI display • Operation by using the panel side buttons •... -
Page 54: Connecting Other Company's Image Equipment
It is possible to change between the AV display and the external equipment display using the [MAP] button. 1. To switch from the AV screen to the NAVI screen, press the [MAP] button. 2. To return to the AV screen, press the [MAP] button again. MAX675VDII... -
Page 55: Ch Surround Decoder Operations
Touch the [[] or []] key to adjust the level between 0 and 6. The default level is “3”. [CENTER WIDTH]: Touch the [[] or []] key to adjust the level between 0 and 7. The default level is “3”. MAX675VDII... - Page 56 Each item is adjustable in the range –10 dB to +10 dB in 1 dB step increments. The default value is “0 dB”. MAX675VDII ●DELAY This function adjusts the timing of the speakers so that they are synchronized with front speaker output.
- Page 57 • The factory default setting is “1”. [GAIN]: Adjust the gain (output level) in the range of –6 dB to +6 dB. (1 dB step, 13 points) • The factory default setting is “0”. 4. Touch the [Back] key to return to the previous screen. MAX675VDII...
- Page 58 3-1. Touch the [[] or []] key of the CENTER VOL item to adjust to desirable level (Setting range: –6 to 0). • The factory default is “0”. MAX675VDII ●Balance/Fader adjustment 3-1. Touch the []] key of the BAL/FAD item. Touch the [{] or [}] key to adjust the fader level.
-
Page 59: Troubleshooting
Replace with a compact disc with no scratches. Let dry for about 1 hour with the power on. Check that the parking brake is engaged. Release the view limitation or change the parental level. See the subsection “Setting up the parental level” (page 33). Measure Measure MAX675VDII... - Page 60 There are red, green, and blue points in the display. MAX675VDII Cause Check that the parking brake is engaged. Adjust the brightness properly. The temperature inside the vehicle may be 0 C or lower. Set to an appropriate temperature (25 C or so) and check it again.
-
Page 61: Error Displays
(Scan, repeat and random playback mode may be canceled.) Cause This is a failure of CD changer’s mechanism and consult your store of purchase. Replace with a non-scratched, non-warped disc. Eject the disc then reload it properly. Measure Measure MAX675VDII... -
Page 62: Specifications
(input impedance 10 k or greater) Video input: 1.0 0.2 Vp-p (input impedance 75 Video Output Video output: 1.0 0.2 Vp-p (output impedance 75 MAX675VDII LCD Monitor Screen Size: 7-inch wide type 156.2 mm Width Display method: Transmission type TN liquid crystal display... -
Page 63: Installation And Wire Connection Manual
1. Do not open the case. There are no user- serviceable parts inside. If you drop anything into the unit during installation, consult your dealer or an authorized Clarion service center. 6 Bag for accessories (No. 2) Rubber cap (for RCA pin cord) -
Page 64: Cautions On Installation
Figure 3 4. If you have to do any modification on the car body, such as drilling holes, consult your car dealer beforehand. MAX675VDII 5. Use the included screws for installation. Using other screws can cause damage. (Figure 4) Chassis Chassis Max. -
Page 65: Installing The Main Unit
For TOYOTA vehicle Main Unit Mounting bracket (1 pair for the left and right sides) Figure 6 6-Spacer (thickness: 1 mm) 6-Flat head screw (M5 × 8) (attached to the main unit) MAX675VDII... -
Page 66: Installing The Main Unit In A Toyota Vehicle
●Removing the Main Unit When the main unit is to be removed, disassemble it in the reverse of the order in “INSTALLING THE MAIN UNIT” (see page 69). MAX675VDII Main Unit Figure 7 *3: If a hook on the installation bracket interferes with the unit, bend and flatten it with a nipper or similar tool. -
Page 67: Cautions On Wiring
* When the CeNET extension cable is extended or branches, use extension cable CCA-520 (2.5 m) or CCA-521 (0.6 m), or Y-adapter CCA-519 (each of them is sold separately). Slide cap CeNET cable (provided with the Figure 9 MAX675VDII CeNET terminal CD changer) -
Page 68: Wire Connection
Video output terminal Right Green Left White Yellow Video White Black Audio (left) Audio (right) MAX675VDII cable of the car battery. CCD terminal Radio antenna jack CeNET terminal Refer to the following page. Front audio output terminal Rear audio output... - Page 69 Rear left + Green/Black Rear left - Blue/White Amplifier turn-on cord Orange/White Illumination Blue Auto antenna Brown Phone interrupt (*1) Grass-green See next page for how to connect the parking brake cord. +12V main power Ground +12V accessory Parking brake cord MAX675VDII...
-
Page 70: Connecting The Accessories
When the Navigation System is to be connected, connect the CeNET connector and the RGB terminal. For detailed information, refer to the instruction manual of the Navigation System. MAX675VDII ●How to attach the electro-tap 1. Place the Parking brake cord at the stopper, and fold it back in the direction of the arrow. -
Page 71: Sample System
RCA video cable (included the TV tuner) Non fader output RGB cable (included the NAX970HD) 4-Channel Amplifier RCA cable (sold separately) Center speaker built-in amplifier (SRK5/SRK604) Powered subwoofer built-in amplifier (SRV303) CeNET CD Changer (DCZ625/CDC655Tz) Front Speakers Rear Speakers MAX675VDII... - Page 72 Clarion Co., Ltd. QZ-6070B All Rights Reserved.Copyright © 2007: Clarion Co., Ltd. 280-8510-00 Printed in japan / Imprimé au Japon / Impreso en Japón 2007/3 (Y-YI)
Need help?
Do you have a question about the MAX675VDII and is the answer not in the manual?
Questions and answers