Table of Contents
Advertisement
Quick Links
Advertisement
Table of Contents

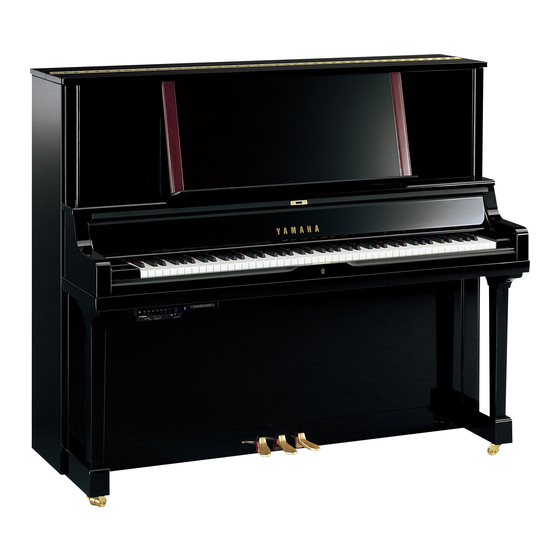
Summary of Contents for Yamaha TransAcoustic SHTA Series
- Page 1 MAINTENANCE HANDBOOK Upright Piano MHB33 Apr. 2014 Ver. 1.0...
-
Page 3: Table Of Contents
Foreword This handbook covers the maintenance for the Silent Piano™ 's TransAcoustic SHTA series released in April 2014. This handbook mainly focuses on information required for maintenance and overview mechanism the TA mode - the newly added function from the "SH series". Please refer to the User's manual for the information about operation, and please refer to the "SH series MAINTENANCE HANDBOOK"... -
Page 4: Unit Structure And Names
1. Unit Structure and Names ■ Main Unit and Pedals 1 Switch Box 2 Soft Pedal 3 Silent Pedal 4 Damper Pedal 5 AC IN Unit (Soundboard Side) 6 TD ASSY 7 Amp Unit ■ Switch Box [Front View] 1 POWER Button 2 PIANO Button 3 REC Button 4 STOP Button... -
Page 5: Summary Of Transacoustic Tm Technology
2. Summary of TransAcoustic Technology ■Characteristics of TransAcoustic Technology ・ The newly developed TransAcoustic Technology transmits digital sounds directly to the piano soundboard and makes the piano sound as speakers itself. ・ Since the sound comes directly from the soundboard, you do not need to connect the speakers. ・... -
Page 6: Delivery And Routine Adjustment Check
3. Delivery and Routine Adjustment Check Please execute the TA mode settings as follows once you tune and make some initial adjustments to the SHTA piano upon delivery or during regular tuning. TD Assy handling caution Since the magnetic force of the TD ASSY is strong, avoid close contact with your magnetic storage devices and mechanical watches. -
Page 7: Action Removal Caution
4. Action Removal Caution Please refer to the "SH series MAINTENANCE HANDBOOK (Page 6)". When removing the lower front board, remove the retaining screw from the lower front board spring and then remove the board. 5. Check Regulation and Adjustment Silent Mechanism Please refer to the "SH series MAINTENANCE HANDBOOK (Page 7)". -
Page 8: Peq Data Transfer Of Swbox Replacement
10. PEQ Data Transfer of SWBOX Replacement Before the SWBOX is replaced, please transfer the PEQ data to the new SWBOX by saving the PEQ data to the USB drive in test mode, then please return the PEQ data to the SWBOX after the replacement. Please refer to the "2. - Page 9 [Saving PEQ data from SWBOX to the USB drive] Operation Display Status ① Refer to "Start-up" Start-up ② Insertion of the USB drive Insert the USB drive in the USB port. Press the [+/YES] [‐/NO] button to select "SAv"and push the [PLAY] button to start up.
-
Page 10: Td Assy Replacement Procedure
11. TD ASSY Replacement Procedure Please replace the TD ASSY if malfunction occurs. The TD ASSY must be fixed in the correct position. If there was a flaw in the process, there is a possibility that the TA mode will not work correctly, in this case please follow the instructions below. - Page 11 1-3. Loosen the TD Shaft screw (rotate screw counterclockwise) using the Allen wrench. *Installation angle of Allen wrench. 1-4. Remove the six screws using the Philips driver, then remove the TD ASSY from the Bracket. Bracket * When you place the TD ASSY on the floor, please do not put the bobbin facing down. 2) Setting the new TD ASSY 2-1.
- Page 12 2-3. Adjustment position of the Bobbin. Pull Release Please check the TD ASSY for "resistance" by moving the bobbin in a push-pull motion. If this occurs, adjust the TD Shaft using the Allen wrench. Check again by pulling the bobbin gently and then release, tighten the TD Shaft using the Allen wrench once the bobbin has stopped in its natural position.
-
Page 13: Td Shaft Assy Replacement Procedure
12. TD Shaft Assy Replacement Procedure Procedures: 1) Removing the TD ASSY Please refer to the "11. TD ASSY Replacement Procedure (page 10)" 2) Removing and Setting the TD Shaft Assy 2-1. Remove the 3 screws then remove the TD Shaft Assy. Anchor TD Shaft Assy *Because anchor is glued to the soundboard, the exchange is not possible. -
Page 14: Error Code List Of Amp Unit's Led
13. Error Code List of AMP Unit’s LED The LEDs which are installed in the AMP unit indicate the error code when the AMP unit detects an error. If the LED is "Yellow", it indicates a "WARNING" of overheat or other minor problems of the TD unit. If the LED is "Red", it indicates a "FAILURE"... -
Page 15: Unit Connection Diagram
14. Unit Connection Diagram Key sensor unit AC-IN Unit TD ASSY L ch adaptor Amplifier Unit TD ASSY R ch DC-IN Switch Box Unit Soft Damper Pedal sensor Pedal sensor - 15 -... - Page 16 What do I do if we can't save the PEQ Please check the piano model and serial number, Other data from the broken SWBOX to the then contact with YAMAHA service department. USB drive? Possible. Is it a possible to boot up the SWBOX...
-
Page 17: Parts List
16. Parts List Parts No. Description Remarks E model U model ← SHUTTER ASSY 131EX V7978300 ← KEY SHUTTER GRAY SCALE UPS V797780R ← KEYSHUTTER GRAYSCALE BLOCK V797790R ← KEY SENSOR UNIT ZA576000 ← CIRCUIT BOARD ZA598200 ← SWITCH BOX UNIT ZJ445400 ←... - Page 18 ...


Need help?
Do you have a question about the TransAcoustic SHTA Series and is the answer not in the manual?
Questions and answers