
Subscribe to Our Youtube Channel
Related Manuals for SAIET LINK 4


Summary of Contents for SAIET LINK 4
- Page 1 LINK 4 Smart Senior Mobile Phone LARGE buttons and characters AMPLIFIED sound USER GUIDE SAIET Telecommunications Srl via M. Serenari, 1 40013 Castel Maggiore (BO), Italy tel. +39 051 706711...
-
Page 2: Table Of Contents
+39 051 706700 http://www.saiet.it - e-mail: sales@saiet.it 1. INTRODUCTION ..................7 1.1. Safety Information ................... 7 1.2. Package contents ..................9 1.3. Operational Elements ................10 1.4. Keys ......................13 1.5. LED ......................21 2. PUTTING THE PHONE INTO OPERATION ........22 2.1. - Page 3 3.6. Answering a Call ..................31 3.7. Speakerphone ..................31 3.8. Audio volume adjustment ..............32 3.9. Audio Amplification ................32 3.10. Hearing aids ..................33 3.11. Adjusting ringer volume ..............35 3.12. Silent mode ................... 35 3.13. Torch ...................... 35 3.14.
- Page 4 6.3. Speed dial ....................44 7. PHOTO CONTACTS ................45 8. WHATSAPP ....................47 9. SETTINGS ....................49 9.1. Date and time ..................49 9.2. Language ....................50 9.3. Favourite handwriting ................50 9.4. Display brightness ................. 50 9.5. Ringtone ....................51 9.6.
- Page 5 11.2. Entering SOS Numbers ..............54 11.3. SOS Message ..................55 11.4. SOS siren....................55 12. SIM BLOCK (PIN) .................. 56 13. PHOTOCAMERA ................... 57 14. GALLERY ....................58 15. ALARM ..................... 58 16. VOCAL NOTES ..................59 17. MAGNIFYING GLASS ................61 18.
- Page 6 21. BLUETOOTH ..................65 22. WI-FI ......................66 23. MOBILE DATA ..................66 24. APPENDIX ....................67 24.1. Health and safety information ............67 24.1.1. SAR information ................67 24.1.2. Protect your hearing ................ 68 24.2. Technical specifications ..............68 24.3.
-
Page 7: Introduction
INTRODUCTION In case of changes, you can download the manual from www.saiet.it. 1.1. Security Information Please read the following warnings, failure to comply with • them may be dangerous or illegal. Do not switch on the telephone when its use is •... - Page 8 Do not use a mobile phone while driving. In any case, follow • the current traffic regulations. Switch off the phone when refuelling. Do not use the • phone near fuels or chemicals. Switch off the phone in the vicinity of explosive materials. •...
-
Page 9: Package Contents
The product contains no serviceable parts, do not open the • container. In case of need, please contact specialised service personnel. Use only original battery chargers and accessories. The • use of unauthorised accessories could cause damage to the phone and be dangerous. Never use damaged batteries and chargers. -
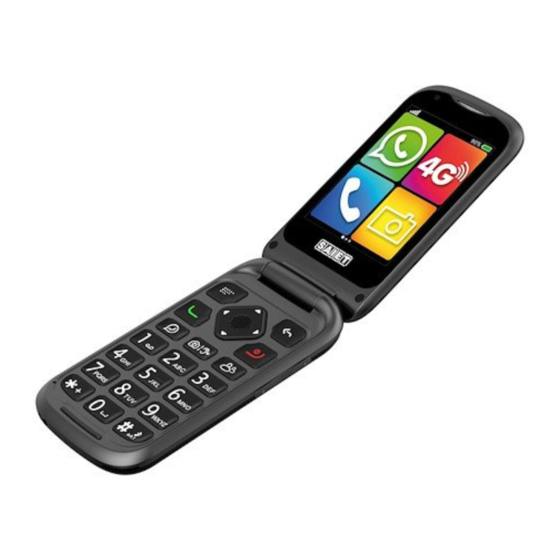
Page 10: Operational Elements
1.3. Operational Elements Fig.1... - Page 11 2Fig.3...
- Page 12 4Fig.5...
-
Page 13: Keys
1.4. Keys Name Function CALL - Call (green) - Answer - Call list CLOSE - Switch the phone on/off (press (red) and hold) - End call - Exiting the menu and returning to rest... - Page 14 RIGHT - Function shown on display FUNCTION - Back - Delete LEFT - Function shown on display FUNCTION - Options - UP navigation button...
- Page 15 DOWN - Navigation key DOWN RIGHT - Navigation button RIGHT...
- Page 16 LEFT - Navigation button LEFT - Navigation key OK...
- Page 17 - Activate emergency call (hold) VOLUME+ - Raising the audio in conversation TORCH - Raising the ringer at rest - Mute ringer during incoming call - Switch torch on/off (hold)
- Page 18 VOLUME- - Turning down the audio in conversation - Lowering the ringer at rest - Mute ringer during incoming call WHATSAPP - WhatsApp CHAMBER - Camera AMPLIFIES - Audio Amplifier (press in conversation)
- Page 19 PHOTO - Photo Contacts CONTACT - Asterisk key - Inserting symbols while writing - + (press twice) - Key 0 - Insert a space while writing...
- Page 20 - Delete key - Activate/deactivate Silent mode (press and hold) - During writing select mode: IT, It, R9, 123. - Button 1 - Answering machine (voice messages) (hold) - Keys 2-8 - Speed Dial (hold)
-
Page 21: Led
1.5. LED CHARGE - Flashes during charging - Switched on when fully charged - Flashes with low battery - Indicates new SMS and MESSAGE WhatsApp notifications - Indicates missed calls CALLS Note: To deactivate the LEDs: Settings/Common Functions/LED Settings, Status OFF. -
Page 22: Putting The Phone Into Operation
PUTTING THE PHONE INTO OPERATION 2.1. Insert SIM and battery 1. Pry into the bottom slot and open the battery compartment door (Fig.6). 2. Insert the SIM (nanoSIM) with the contacts of the card towards the phone (Fig.7). 3. Insert the battery by matching the battery contacts to the phone contacts (Fig.8). - Page 23 Fig.6...
- Page 24 Fig. 7...
- Page 25 Fig. 8...
-
Page 26: Insert Microsd Card (Optional)
2.2. Insert microSD card (optional) Slide the metal flap towards the upper side of the phone and open, insert the microSD memory (max. 32GB) with the contacts towards the phone (Fig.9), close the flap and slide it towards the underside of the phone to secure the closure. -
Page 27: Battery Charging
2.3. Battery charging 1. You can connect the charger to the phone case a) or use the charging base case b). a) Plug the charger connector into the socket on the left side of the phone (note the direction: the notches on the charger connector face the back of the phone). - Page 28 2. Connect the charger to a 230V ac mains socket. The battery icon on the display indicates charging, the CHARGE LED (red) flashes. When charging is complete, the icon on the display is fully lit. The CHARGE LED (red) is lit. 3.
-
Page 29: Telephone Use
TELEPHONE USE 3.1. Switching the phone on/off To switch the phone on/off, press and hold the [CLOSE] key. 3.2. Talking keys during composition To deactivate the voice announcement of the pressed key, see chapter "SETTINGS" paragraph "Talking keys". 3.3. How to make a call 1. -
Page 30: Speed Dialing Numbers
Note: To call a number in the phonebook, see chapter "PHONEBOOK" section "Searching for and dialling a number in the phonebook". 3.4. Speed Dialing Numbers Speed dial allows you to call the telephone number associated with the key on the keypad by holding down the key (keys 2 to 9). To enter numbers in speed dial, see section "speed dial". -
Page 31: Answering A Call
To enter Photo Contacts see chapter 'PHOTO CONTACTS'. 3.6. Answering a call 1. Press the [CALL] button or if opening answer (flip active) has been activated, open the flap (see chapter "SETTINGS" section "Answering the call by opening the flap". To silence the ringer, press the [VOLUME] buttons. -
Page 32: Audio Volume Adjustment
3.8. Audio volume adjustment During conversation, press the [VOLUME] buttons to adjust the volume. 3.9. Audio Amplification The [AMPLIFY] button activates amplification of the received audio. Attention: In order to activate amplification, it is first necessary to go to Settings/Special Functions/Amplification receiver volume and select ON. -
Page 33: Hearing Aids
To switch amplification off, press the [AMPLIFY] button again. With active amplification it is still possible to further adjust the sound level with the [VOLUME] buttons. Attention: When amplification is active, the sound level is particularly loud, as indicated by the Be careful, therefore, only activate amplification if necessary and do not listen to audio at high volume levels for long periods of time. - Page 34 The standard for hearing aid compatibility has two classifications with various levels. The compatibility level of this telephone is M4/T4. M: To use this mode, make sure the hearing aid is in M mode or hearing pair mode and place the telephone receiver close to the hearing aid microphone.
-
Page 35: Silent Mode
3.11. Ringer volume adjustment See chapter "SETTINGS" section "Ringer Volume". With the phone at rest, the ringer can also be adjusted to mute or vibrate by pressing the [VOLUME] keys. 3.12. Silent mode To activate/deactivate the silent mode, press and hold the [#] key. 3.13. - Page 36 Activates the siren, sends an SMS for help and an SMS with the coordinates of the location, calls the set telephone numbers. The call attempt rotates 3 times until one of the numbers answers. If one of the numbers answers, the phone activates the speakerphone and exits the emergency state.
-
Page 37: Menu
MENU 4.1. How to navigate the menu You can use the keyboard or the touchscreen. 1. Press navigation buttons [RIGHT], [LEFT], [DOWN], [UP], [OK] to scroll through screens and enter menus. Or touch the screen and scroll left and right, then touch the menus. 2. - Page 38 Menu items: WHATSAPP, MESSAGES, CALLS, PHOTOS CONTACTS, ADDRESS BOOK, CAMERA, GALLERY, ALARM CLOCK, VOICE NOTES, LENS, SOCIAL, MULTIMEDIA, SOS, TOOLS, SETS, APP.
-
Page 40: Notification Panel
4.2. Notification panel At the top of the screen is the Notification Panel, where information such as missed calls, new messages, events, device status etc. is displayed. Tap the top of the screen and scroll down to open the panel and see the detail of the notifications. -
Page 41: Messages
MESSAGES 5.1. Writing and sending a message 1. Select MESSAGES / NEW. 2. Select the Recipient field, enter the number or select the handset icon (next to the recipient) to search the address book, select the contact, then SAVE to enter it. 3. - Page 42 - By setting R9, intuitive writing, during writing the phone recognises words and proposes options. (e.g. to write HELLO press the keys on which the letters are located, C key [2], I key [4], A key [2], O key [6]. Press the [RIGHT] and [LEFT] keys to scroll through the alternatives and [OK] to choose the word.
-
Page 43: Rubric
RUBRIC 6.1. Inserting Contacts in the Address Book A contact can be placed on the SIM or in the phone. 1. Select DIRECTORY / OPTIONS / ADD CONTACT. 2. Select SIM or PHONE, enter name and number. - To enter characters see chapter "MESSAGES" section "writing and sending a message". - Page 44 - Registration of name for phonebook: select RECORD FOR NAME press [OK] key to start recording, speak into phone microphone, press [OK] key to end recording, press (DONE). By registering the name of the contact, the telephone announces the name when consulting the phonebook. - RINGING: select RINGING VOICE, SELECT FROM FILE, SELECT FROM RINGING, PREDEFINED.
-
Page 45: Speed Dial
6.2. Searching for and selecting a number in the Address Book 1. Select RUBRIC. 2. To search for the contact: a) Use the [DOWN] and [UP] buttons. b) Enter the name or initial of the name and use the [DOWN] and [UP] keys. - Page 46 store numbers in the other keys 2 to 9.
-
Page 47: Photo Contacts
CONTACT PHOTOS 1. Select PHOTO. 2. Press [RIGHT], [LEFT] to select the 8 Photo Contacts. 3. Press (OPTIONS) / EDIT, enter name and number. - To enter characters see chapter "MESSAGES" section "writing and sending a message". 4. Select PHOTO CALLER: - TAKE PHOTO to take the photo. - Page 48 By recording the name of the contact, the phone announces the name during the incoming call. Select RECORD VOICE to use the audio recorder, press the [OK] button to start recording, speak into the telephone microphone, press the [OK] button to end recording, select the green (V) symbol, select (SAVE).
-
Page 49: Whatsapp
WHATSAPP Insert a microSD memory card max 32GB (not supplied). Please note: to use WhatsApp, you need the touchscreen and to activate the data connection or a Wi-Fi network. For data select SETUP / MOBILE DATA set ON. Attention: the telephone operator may apply charges, make sure you have a tariff plan that includes data. - Page 50 3. On first activation, follow Whatsapp's instructions.
- Page 51 WhatsApp update In case it is required, follow the directions for updating. 1. On the Update WhatsApp screen, tap download. 2. Once the download is complete, tap on the box with the robot icon. 3. To authorise installation of unknown apps, tap SETTINGS, Allow from this source, press BACK.
-
Page 52: Settings
SETTINGS 9.1. Date and time 1. Select SET / DATE and TIME. 2. Select AUTOMATIC DATE AND TIME then: - USE OF TIME PROVIDED BY THE NETWORK, for automatic update activate data in SETUP / MOBILE DATA set ON. Caution: the telephone operator may apply charges, make sure you have a tariff plan that includes data. -
Page 53: Language
9.2. Language 1. Select SETUP / COMMON FUNCTIONS / LANGUAGE. 2. Select language. 9.3. Favourite writing 1. Select SETUP / COMMON FUNCTIONS / FAVOURITE WRITE 2. Select language, then write mode, Italian: en, It, IT, R9. 9.4. Display Brightness Select SETUP / COMMON FUNCTIONS / DISPLAY. 2. -
Page 54: Ringtone
9.5. Ringtone Use the touchscreen for setting. 1. Select SETUP / TONE AND VOLUME. 2. Select PHONE RINGER, select a ring tone, then select OK. To customise the ringtone with an mp3 song, go to MULTIMEDIA / MUSIC select the mp3 song and select SET AS RING TONE. 9.6. -
Page 55: Vibration
9.7. Vibration 1. Select SETUP / TONE AND VOLUME. 2. Select VIBRATION FOR CALLS to activate/deactivate. 9.8. Notification sound (messages) Use the touchscreen for setting. 1. Select SETUP / TONE AND VOLUME. 2. Select PREDEFINED NOTIFICATION SOUND. Select a sound, then select OK. -
Page 56: Answering The Call By Opening The Flap
9.10. Answer the call by opening the flap Allows the active FLIP to be set to answer by opening the flap. Select SET / FLIP ACTIVE to activate / deactivate. Restore factory settings Caution: Resetting the phone to factory settings will delete all data in the phone memory. -
Page 57: Sos
11. SOS This menu can be used to switch the SOS function on/off, set SOS numbers, the SOS message and the siren. 11.1. Switching the SOS function on/off Select SOS / ENABLE to switch on/off. 11.2. Enter SOS Numbers You can enter from 1 to 5 numbers: 1. -
Page 58: Sos Message
To delete a contact, select the contact, press the [RIGHT FUNCTION] button, select [OK]. Alternatively OPTIONS / DELETE. 11.3. SOS Message 1. Select SOS / EMERGENCY MESSAGE. 2. Enter or edit the message, select OK. 11.4. SOS siren Select SOS / ALARM TONE to activate / deactivate the local siren. - Page 59 SIM lock (PIN) If you activate the lock, you need to enter your PIN (provided by your SIM provider) and press [OK] when switching on the phone. To lock or unlock: 1. Select SETUP / ANDROID SYSTEM / SECURITY AND LOCATION.
- Page 60 Camera Insert a microSD memory card max 32GB (not supplied). 1. Select CAMERA or press the [CAMERA] button. 2. Press the [OK] button to take the picture. 3. Press (OPTIONS) and use the navigation buttons [RIGHT], [LEFT], [UP], [DOWN], [OK] to change the rear and front camera settings. 4.
-
Page 61: Gallery
Gallery 1. Select GALLERY. 2. Use the navigation buttons [RIGHT], [LEFT], [UP], [DOWN], [OK] or touch the screen to select and view photos and videos. 3. Display a photo and press the [LEFT FUNCTION] button to share, delete, change settings. 4. - Page 62 4. Select REPEAT, select days then (SAVE). 5. Select RING TONE, select a ring tone then (BACK). 6. Select VIBRATION, then ON or OFF. 7. Select (SAVE). Select (OPTIONS) to set a new alarm, SETTINGS to change the volume and Snooze. When it rings to switch off press (STOP), or (SNOOZE) to interrupt, the alarm will ring after the set time.
- Page 63 3. Select REMINDER SOUND press [OK] key to start recording, speak into phone microphone, press [OK] key to end recording, press (DONE). 4. Select EXPIRY DATE to set the date. 5. Select DEADLINE TIME to set the time. 6. Select REPEAT to set days. 7.
-
Page 64: Magnifying Glass
17. Magnifying glass Select LENS. Press the [*] and [#] keys to zoom. 18. Social To use Social requires the touchscreen and a data connection or a Wi-Fi network. For data select SETUP / MOBILE DATA set ON. Attention: the telephone operator may apply charges, make sure you have a tariff plan that includes data. -
Page 65: Multimedia
MULTIMEDIA 19.1. FM radio 1. Select MULTIMEDIA / FM RADIO. 2. Press the [RIGHT] and [LEFT] buttons to change stations. 3. Press the [VOLUME] buttons to adjust the listening level. 4. Select (OPTIONS), PAUSE or PLAY to interrupt or reactivate listening. -
Page 66: Video
1. Select MULTIMEDIA / MUSIC. 2. Select a song, select PLAY. 3. Use the navigation buttons [RIGHT], [LEFT], [UP], [DOWN], [OK] or touch the screen to start, stop playback, select a track, activate playback of all tracks in the list or of the same track, or random playback. -
Page 67: Calculator
20. Tools 20.1. Calculator Enter numbers from the keyboard or use the touchscreen. Use the [RIGHT], [LEFT], [UP], [DOWN] navigation buttons to select the operation. Press the [OK] key for the result. Press the [*] key to enter the comma. Press the [#] key to delete. -
Page 68: Bluetooth
Select the event to see details, select OPTIONS to edit or delete. 21. Bluetooth To search, pair and connect a Bluetooth device to the phone: 1. Select SET / BLUETOOTH / ON. 2. Select PAIR NEW DEVICE. When the search is complete, the phone displays the list of devices found. -
Page 69: Wi-Fi
Wi-Fi 1. Select SET / WLAN / ON. Once the search is complete, the phone displays the list of found Wi-Fi networks. 2. Select the network, enter the password and select CONNECT. 23. Mobile data To activate mobile data, select SETUP / MOBILE DATA / ON. Caution: Charges may be applied by the telephone operator, make sure you have a tariff plan that includes data. -
Page 70: Appendix
24. APPENDIX 24.1. Health and safety information SAR information 24.1.1. This mobile phone is a radio transceiver and has been designed not to exceed the limits of exposure to radio waves, as required by Directive 2014/53/EU. The relevant standards use the SAR Specific Absorption Rate unit of measurement. -
Page 71: Protect Your Hearing
Protect your hearing 24.1.2. Caution: To avoid possible hearing damage, do not listen to audio at high volume levels for long periods of time. Also be careful when holding the phone close to your ear while the loudspeaker is in use. 24.2. -
Page 72: Warranty Conditions
06.09.2005 No. 206 in favour of consumers who purchase the product for purposes unrelated to their professional or business activity and is valid for 24 months from purchase. - SAIET Telecomunicazioni as manufacturer grants the consumer (customer) a conventional guarantee under the conditions described below, without prejudice to the consumer's rights under the Consumer Code binding the seller. -
Page 73: Simplified Eu Declaration Of Conformity
24.4. Simplified EU Declaration of Conformity The manufacturer SAIET Telecomunicazioni Srl, declares that the type of radio equipment, cellular LTE model LINK 4 complies with Directive 2014/53/EU. The full text of the EU Declaration of Conformity is available at: www.saiet.it/uedocs... - Page 74 The user must therefore either take the above-mentioned end-of-life products to the appropriate separate collection centres, or return them to the retailer. SAIET Telecomunicazioni Srl, a company registered in the Register of Manufacturers of Electrical and Electronic Equipment (registration number IT080300004097) and in the National Batteries Register...
- Page 75 batteries and...
- Page 76 The information in this manual is believed to be reliable and accurate; however, SAIET assumes no liability for inaccuracies and omissions, for the user's use of the information, or for infringement of patents or other third party rights that may result from the use of the information.
Need help?
Do you have a question about the LINK 4 and is the answer not in the manual?
Questions and answers