Table of Contents
Advertisement
Quick Links
1
APPLICATION .................................................................................. 3
2
DESCRIPTION (FIG. A) ................................................................... 3
3
PACKAGE CONTENT LIST ............................................................. 3
4
DDITIONAL SAFETY INSTRUCTIONS ........................................... 4
4.1
Guard related warnings .......................................................................................... 4
4.2
Cutting procedures warnings ................................................................................. 4
4.3
Kickback causes and related warnings ................................................................. 4
4.4
Table saw operating procedure warnings ............................................................. 5
5
SAFETY EQUIPMENT ..................................................................... 5
5.1
Cleaving wedge ....................................................................................................... 5
5.2
Saw blade protector ................................................................................................ 5
5.3
Push stick ................................................................................................................ 5
6
UNPACKING AND ASSEMBLY ...................................................... 5
6.1
Assembly (Fig. 1) .................................................................................................... 6
6.2
Attaching the tilt protection (Fig. 2) ....................................................................... 6
6.3
Fitting the parallel fence (Fig. 3)............................................................................. 6
6.4
Mounting mitre angle stop (Fig. 4) ......................................................................... 6
6.5
Mounting the saw blade guard (Fig. 5) .................................................................. 6
6.6
Mounting the extraction hose (Fig. 6) .................................................................... 6
7
OPERATION ..................................................................................... 7
7.1
Check before starting the device! .......................................................................... 7
7.2
Operating elements ................................................................................................. 7
7.2.1
On/off switch ............................................................................................................. 7
7.2.2
Overload Protection (18) ........................................................................................... 7
7.2.3
Setting mechanism for the tilt angle ........................................................................... 7
7.2.4
Hand crank for setting the cutting height ................................................................... 7
7.3
Workpiece stops ..................................................................................................... 7
7.3.1
Mitre angle stop ........................................................................................................ 7
7.3.2
Mitre cuts (Fig. 7) ...................................................................................................... 8
7.3.3
Setting the stop rail of the parallel stop ...................................................................... 8
7.3.4
Parallel stop .............................................................................................................. 8
Copyright © 2020 VARO
POWX07595
P a g e
| 1
EN
www.varo.com
Advertisement
Table of Contents

Subscribe to Our Youtube Channel
Summary of Contents for VARO POWERPLUS POWX07595
-
Page 1: Table Of Contents
Workpiece stops ..................... 7 7.3.1 Mitre angle stop ......................7 7.3.2 Mitre cuts (Fig. 7) ...................... 8 7.3.3 Setting the stop rail of the parallel stop ..............8 7.3.4 Parallel stop ......................8 Copyright © 2020 VARO P a g e www.varo.com... - Page 2 Fitting and changing the saw blade (Fig. 9) ............. 10 8.3.2 Adjusting the cleaving wedge (Fig. 10) ..............10 STORAGE, TRANSPORTATION ..........10 Storage ........................10 Transportation ....................... 11 TECHNICAL DATA ................ 11 Copyright © 2020 VARO P a g e www.varo.com...
-
Page 3: Application
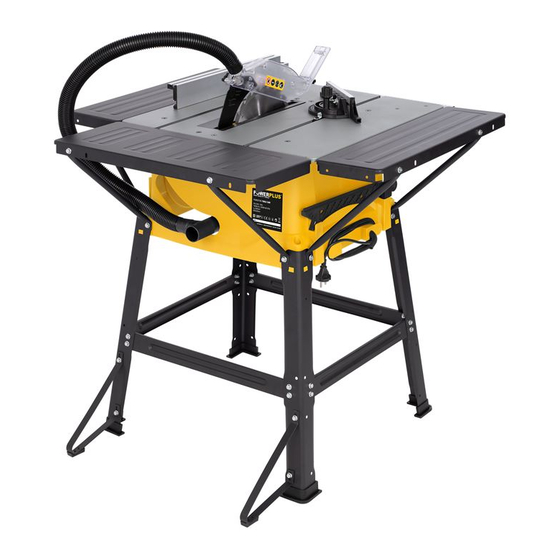
4 supporting legs 3 saw bench extenders change Operating Instructions 8 brackets Bag with small parts Hex key Parallel fence Vacuum hose If any parts are missing or damaged, please contact your dealer. Copyright © 2020 VARO P a g e www.varo.com... -
Page 4: Dditional Safety Instructions
Align the fence to be parallel with the saw blade.. ▪ Use a featherboard to guide the workpiece against the table and fence when making non- through cuts such as resawing cuts. Copyright © 2020 VARO P a g e www.varo.com... -
Page 5: Safety Equipment
Lower the saw blade underneath the table surface (see 8.4 Setting cutting height) Turn the saw table up-side down Note: If any of the parts is missing or damaged contact the retailer. Assembly parts packed in carton box under machine motor!!! Copyright © 2020 VARO P a g e www.varo.com... -
Page 6: Assembly (Fig. 1)
Place the vacuum hose (5) on the connecting piece of the saw blade guard (7). ▪ Put the vacuum hose (5) on the vacuum connecting piece (23) on the rear of the device Copyright © 2020 VARO P a g e www.varo.com... -
Page 7: Operation
Risk of injury! Do not push the stop (Fig. 4 A) too far in the direction of the saw blade. The gap between the stop (Fig. 4 A) and the saw blade should be approximately 2 cm. Copyright © 2020 VARO P a g e www.varo.com... -
Page 8: Mitre Cuts (Fig. 7)
The set tilt angle can be read from the scale (4). ▪ Tighten the fixing screw (3). Notes: In order to make use of the full range of 44° settings, the cutting height must be reduced accordlngry. Copyright © 2020 VARO P a g e www.varo.com... -
Page 9: Sawing
Risk of electric shock! Never splash with water or expose to water. Never use detergents or solvents to clean. These may cause irreparable damage to the unit The plastic pieces may be corroded by the chemicals. Copyright © 2020 VARO P a g e www.varo.com... -
Page 10: Unit Maintenance
Risk of injury! Store the unit in such a way that it cannot be started by unauthorised persons. Ensure that no one is able to injury themselves on the stored unit. Machine damage! Do not store unprotected in a damp environment. Copyright © 2020 VARO P a g e | 10 www.varo.com... -
Page 11: Transportation
Max. cutting depth at 90° 85 mm Max. cutting depth at 45° 63 mm Table size 563 x 583 mm Table height (+stand) 820 mm Dust extraction outlet Ø 35.5mm Copyright © 2020 VARO P a g e | 11 www.varo.com...


Need help?
Do you have a question about the POWERPLUS POWX07595 and is the answer not in the manual?
Questions and answers