
Subscribe to Our Youtube Channel
Related Manuals for Redarc RS Series


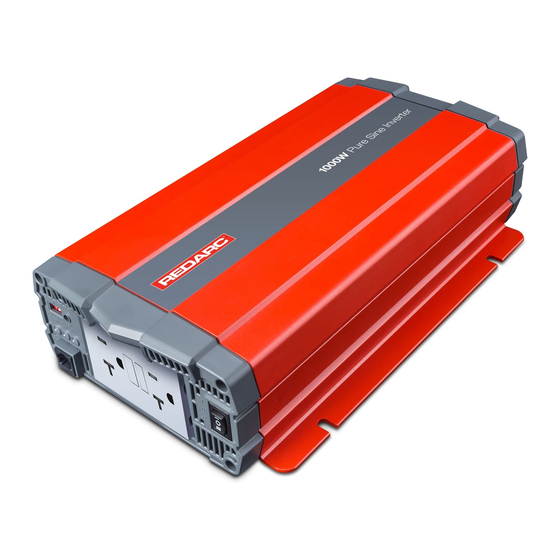
Summary of Contents for Redarc RS Series
- Page 1 RS Series 12 V Inverters R-12-1000RS-NA R-12-1500RS-NA R-12-2000RS-NA R-12-3000RS-NA...
-
Page 2: Rs Series Inverters
REDARC Pure Sine Wave Inverters produce a pure sine wave output. This means that the power output from a REDARC Pure Sine Wave Inverter is not only the same as the mains supply, it’s often better. The R-12-1000RS-NA and R-12-1500RS-NA are compliant for residential and industrial applications whereas the R-12-2000RS-NA and R-12-3000RS-NA are compliant for industrial applications only. - Page 3 AC frequency different to the inverter output may result in damage to your appliances. Output AC frequency is dip switch selectable, see Section 2.1.3 (page 14). • All RS Series Inverters are suitable for indoor use only. • The direction of fan air flow must be horizontal.
-
Page 4: Table Of Contents
CONTENTS RS SERIES INVERTERS WARNINGS AND SAFETY INSTRUCTIONS INTRODUCTION Specifications ��������������������������������������������������������������������������������������������������������������5 Voltage and Temperature Performance ����������������������������������������������������������������������������9 Dimensions ����������������������������������������������������������������������������������������������������������������10 USER GUIDE Front Panel Operation��������������������������������������������������������������������������������������������������11 2.1.1 Main Switch ����������������������������������������������������������������������������������������������������������������12 2.1.2 Indicator LED ���������������������������������������������������������������������������������������������������������������12 2.1.3 Function Switch �����������������������������������������������������������������������������������������������������������14 2.1.4 Power Saving Load Adjustment ���������������������������������������������������������������������������������������15 2.1.5 TRC Port (RJ45) �����������������������������������������������������������������������������������������������������������15... -
Page 5: Introduction
INTRODUCTION Specifications Model: R-12-1000RS-NA Max. Rated Input Current 105 A Voltage 12 V DC Over-Voltage Protection 16.5 ± 0.3 V DC Input Under-Voltage Protection 10.5 ± 0.3 V DC Characteristics Voltage Range 10.5 ~ 16.5 V DC No Load Current ≤ 1.5 A @ 12 V DC Power Saving Mode < 0.1 A @ 12 V DC Continuous Output Power 1000 W (VA) (± 3%) Maximum Output Power (1 min) - Page 6 INTRODUCTION Model: R-12-1500RS-NA Max. Rated Input Current 157 A Voltage 12 V DC Over-Voltage Protection 16.5 ± 0.3 V DC Input Under-Voltage Protection 10.5 ± 0.3 V DC Characteristics Voltage Range 10.5 ~ 16.5 V DC No Load Current ≤ 1.8 A @ 12 V DC Power Saving Mode < 0.1 A @ 12 V DC Continuous Output Power 1500 W (VA) (± 3%) Maximum Output Power (1 min) > 1500 ~ 1730 W (VA) (100% ~ 115%) Surge Power (<3 sec)
- Page 7 INTRODUCTION Model: R-12-2000RS-NA Max. Rated Input Current 209 A Voltage 12 V DC Over-Voltage Protection 16.5 ± 0.3 V DC Input Under-Voltage Protection 10.5 ± 0.3 V DC Characteristics Voltage Range 10.5 ~ 16.5 V DC No Load Current ≤ 1.8 A @ 12 V DC Power Saving Mode < 0.1 A @ 12 V DC Continuous Output Power 2000 W (VA) (± 3%) Maximum Output Power (1 min) > 2000 ~ 2300 W (VA) (100% ~ 115%)
- Page 8 INTRODUCTION Model: R-12-3000RS-NA Max. Rated Input Current 318 A Voltage 12 V DC Over-Voltage Protection 16.5 ± 0.3 V DC Input Under-Voltage Protection 10.5 ± 0.3 V DC Characteristics Voltage Range 10.5 ~ 16.5 V DC No Load Current ≤ 3.8 A @ 12 V DC Power Saving Mode < 0.4 A @ 12 V DC Continuous Output Power 3000 W (VA) (± 3%) Maximum Output Power (1 min) > 3000 ~ 3450 W (VA) (100% ~ 115%)
-
Page 9: Voltage And Temperature Performance
INTRODUCTION Voltage and Temperature Performance (3000 W) 200% (1000 W 175% 1 Sec 1500 W 2000 W) 115% 1 Min 100% 1 Sec Continuous 10.5 V 16 V 16.5 V Voltage (V) FIGURE 1.2.1: Output Power vs. Input Voltage (1000 – 3000 W) (3000 W) 200% (1000 W 175%... -
Page 10: Dimensions
INTRODUCTION Dimensions DC Input Side DC Input Side 1000 W 1500 / 2000 / 3000 W 14.65" 2.7" 7.7" 7.9" 0.3" 3.3" 7.25" 1000 W (372 mm) (69 mm) (196 mm) (200 mm) (7.0 mm) (83 mm) (184 mm) 16.6" 3.6" 7.7" 9.8" 0.3" 3.3" 9.1" 1500 W (421 mm) (92 mm) (196 mm) (248 mm) -
Page 11: User Guide
USER GUIDE Front Panel Operation WARNING: RISK OF ELECTRICAL SHOCK. DO NOT DISASSEMBLE THE INVERTER — THE INTERNAL CIRCUITRY CONTAINS HAZARDOUS VOLTAGES. ATTEMPTING TO SERVICE THE UNIT YOURSELF MAY RESULT IN ELECTRIC SHOCK OR FIRE AND WILL VOID THE UNIT WARRANTY. FIGURE 2.1.1: 1000 W Models FIGURE 2.1.2: 1500 / 2000 W Models FIGURE 2.1.3: 3000 W Models... -
Page 12: Main Switch
USER GUIDE 2.1.1 Main Switch The 3 stage switch is for turning the AC mains output to either ON, OFF or selecting the Remote mode. When setting the power switch to the first ON position or the second ON position (only to be used when operating the inverter through the REMOTE-RS inverter remote) the LEDs will glow GREEN. - Page 13 USER GUIDE Inverter Status and fault conditions: Status LED Status Remedies Power On / Normal Green Reduce Load Over Current / Over Load If output does not recover once load has been (AC output short and overload) reduced to within specification, try turning the inverter's power switch on and off again.
-
Page 14: Function Switch
USER GUIDE 2.1.3 Function Switch FIGURE 2.1.3.1: Dip Switch ON/OFF Positions Input Voltage Level: Dip Switch Function Switch 1 Output Voltage Select Swtich 2 Switch 3 Frequency Select Switch 4 Power Saving mode Select Output Voltage Selection (Switches 1 and 2): Output Voltage Switch 1 Switch 2... -
Page 15: Power Saving Load Adjustment
USER GUIDE 2.1.4 Power Saving Load Adjustment FIGURE 2.1.4.1: Power Saving Load Adjustment The user can adjust the potentiometer to set the input sleep and wake-up thresholds according to the load applied. The setting range is shown below: Minimum Maximum (Potentiometer turned fully (Potentiometer turned fully Model... -
Page 16: Ac Output Interface
USER GUIDE 2.1.6 AC Output Interface WARNING ALL ELECTRICAL WORK MUST BE PERFORMED IN ACCORDANCE WITH THE LOCAL AND NATIONAL ELECTRICAL CODES. THESE INSTRUCTIONS ARE FOR USE BY QUALIFIED PERSONNEL WHO MEET ALL LOCAL AND GOVERNMENT CODE REQUIREMENTS FOR LICENSING AND TRAINING FOR THE INSTALLATION OF ELECTRICAL POWER SYSTEMS WITH AC AND DC VOLTAGE UP TO 600 VOLTS. -
Page 17: Rear Panel Operation
USER GUIDE Rear Panel Operation FIGURE 2.2.1: 1000 W Models FIGURE 2.2.2: 1500 W / 2000 W Models FIGURE 2.2.3: 3000 W Models 1000 W 1500 W 2000 W 3000 W Remote Port (RJ11) Remote Control Green Terminal Chassis Ground DC Input Connector... -
Page 18: Remote Port (Rj11)
USER GUIDE 2.2.1 Remote Port (RJ11) The RS Series inverter can be used with the REMOTE-RS remote controls via RS-232 communication. To enable, set the main switch on the inverter to the REMOTE position. Pin Number Signal Description (1) Reserved... -
Page 19: Chassis Ground
USER GUIDE ON:INV. OFF:INV. ON:INV. BAT+ OFF:INV. BAT– + DC ON:INV. – POWER OFF:INV. FIGURE 2.2.2.2: Wiring configurations for Remote Control Green Terminal 2.2.3 Chassis Ground Use 16 AWG (1.5 mm²) or a thicker cable to connect the vehicle earth or chassis ground. Perform this connection prior to any other connection. -
Page 20: Installation
INSTALLATION Mounting Install the inverter in a well-ventilated area with reasonable clearance, avoid installing the inverter in a zero-clearance compartment or obstruct the ventilation openings, doing so may result in the inverter overheating and ultimately damage the inverter. The power inverter should be used in an environment that meets the following requirements: 1. -
Page 21: Safety Before Installing Dc Wiring Connections
INSTALLATION NOTICE Install the inverter in a well-ventilated area with reasonable clearance. Do not install the inverter in a zero-clearance compartment or obstruct the ventilation openings. Doing so may result in the inverter overheating and ultimately damage the inverter. Safety Before Installing DC Wiring Connections 3.3.1 Loads Are Disconnected Make sure all loads are disconnected from the inverter's AC output and ensure that the inverter main switch is set to the OFF position before connecting DC cables. -
Page 22: Chassis Ground Connection
INSTALLATION WARNING REVERSE POLARITY CONNECTION WILL BLOW THE INTERNAL FUSE AND MAY CAUSE PERMANENT DAMAGE TO THE INVERTER. RISK OF FIRE. THESE INVERTERS CAN DRAW VERY LARGE DC CURRENTS. A BATTERY TYPE AND CONFIGURATION MUST BE SELECTED THAT CAN SAFELY AND RELIABLY SUPPLY BOTH THE STEADY STATE AND PEAK TRANSIENT CURRENTS DRAWN BY THE INVERTERS. -
Page 23: Dc Wiring Connections
INSTALLATION DC Wiring Connections Before inserting DC cables, remove the bolts with attached washers in the terminal a. Insert the crimped/terminated DC cable lugs into the input terminals, ensuring that the DC cables are connected into the correct terminal, positive (+) DC cable into positive terminal and negative (−) DC cable into the negative terminal. -
Page 24: Ac Safety Grounding
INSTALLATION CAUTION ENSURE THAT ALL THE DC CONNECTIONS ARE TIGHT - TORQUE TO 1.5 FT-LBF (2.8 NM). LOOSE CONNECTIONS COULD RESULT IN OVERHEATING AND CAN BE A POTENTIAL HAZARD. DO NOT OPERATE THE INVERTER WITH DAMAGED OR SUBSTANDARD WIRING. SELECTING THE WRONG CABLE OR FUSE SIZE COULD RESULT IN HARM TO THE INSTALLER OR USER AND/OR DAMAGE TO THE INVERTER OR OTHER APPLIANCES INSTALLED IN THE SYSTEM. -
Page 25: Connecting
INSTALLATION Connecting AC If all LEDs are green, switch unit OFF, it is safe for installer to plug the AC cord(s) into the GFCI socket(s) connect loads to the Inverter AC output. Turn the inverter switch to ON. FIGURE 3.8.1: Safe Connection of AC Output for 1000 / 1500 / 2000 Model Maintenance Turn the unit OFF before cleaning. - Page 26 COMPLIANCE Compliance for 1000RS / 1500RS This device complies with Part 15 of the FCC rules. Operation is subject to the following two conditions: 1. This device may not cause harmful interference 2. This device must accept any interference that may cause undesired operation Note: This equipment has been tested and found to comply with the limits for a Class B digital device, pursuant to Part 15 of the FCC Rules.
- Page 27 UK and Europe +52 (558) 526 2898 +44 (0)20 3930 8109 Design and specifications are subject to change without notice. | Copyright © 2021 REDARC Electronics Pty Ltd. All rights reserved. REDARC® and THE POWER OF REDARC® are trademarks of REDARC Electronics Pty Ltd.
- Page 28 Standard Time, Monday to Friday, or send us an email. North America power@redarcelectronics.com www.redarcelectronics.com Australia (and other Global regions) power@redarc.com.au www.redarc.com.au 1300 REDARC (1300 733 272) New Zealand power@redarcelectronics.co.nz www.redarcelectronics.co.nz +64 9 222 1024 United States +1 (704) 247 5150...
Need help?
Do you have a question about the RS Series and is the answer not in the manual?
Questions and answers