
Related Manuals for Svantek SV 971A


Summary of Contents for Svantek SV 971A
- Page 1 USER MANUAL SV 971A POCKET-SIZE SOUND LEVEL METER & ANALYSER Copyright © 2021 SVANTEK. Warsaw, 2021-09-23 Rev. 1.00 All rights reserved.
- Page 2 Information in this document is subject to change without notice and does not represent a commitment on the part of Svantek. Svantek provides this document “as is”, without warranty of any kind, either expressed or implied, including, but not limited to, its particular purpose. Svantek reserves the right to make improvements and/or changes to this manual, or to the products and/or the programs described in this manual, at any time.
-
Page 3: Table Of Contents
SV 971A User Manual CONTENTS INDEX ................................9 INTRODUCTION ............................12 SV 971A & A ..................12 OUND EVEL ETER NALYSER SV 971A ......................13 ENERAL FEATURES OF ......................... 13 CCESSORIES INCLUDED ........................14 CCESSORIES AVAILABLE ....................... 14 IRMWARE OPTIONS AVAILABLE GENERAL INFORMATION ........................ - Page 4 SV 971A User Manual 4.5.2 Selecting results for logging – Logger Results ................40 4.5.3 Configuring Logger trigger – Logger Trigger ................41 4.5.4 Configuring signal recording – Wave Recording ................ 42 – R ....................45 ELECTING MEASUREMENT RANGE ANGE –...
- Page 5 SV 971A User Manual AUXILIARY SETTINGS – AUXILIARY SETUP ....................62 – L ..................62 ELECTING USER INTERFACE LANGUAGE ANGUAGE – F ..................62 ESTORING FACTORY SETTINGS ACTORY ETTINGS – C ......................63 OICE COMMENTS OMMENTS & L – L &...
- Page 6 13.4 ....................90 ILES DOWNLOADING AND DATA PROCESSING 13.4.1 Measurement with BA Assistant ....................90 13.4.2 Measurement with SV 971A without BA Assistant ..............91 13.4.3 Presentation of STIPA results ....................93 13.4.4 Changing background noise values ................... 94 13.4.5 Generating reports ........................
- Page 7 ......................206 TRUCTURE OF THE FILE ..........................206 ATE AND TIME APPENDIX C. TECHNICAL SPECIFICATIONS ....................207 SV 971A (SLM) ............... 207 PECIFICATION OF OUND EVEL ETER C.1.1 Specification of SV 971A as SLM in the standard configuration ............ 207...
- Page 8 SV 971A User Manual C.1.2 Effect of the SA 22 windscreen ...................... 227 C.1.3 Effect of the SA 271A outdoor microphone kit ................239 C.1.4 Effect of Vibration ......................... 239 SV 971A 1/1 O 1/3 O ............241 PECIFICATION OF...
-
Page 9: Index
SV 971A User Manual INDEX Default settings · 23 Deleting files · 56 Detector · 38, 75 Directory · 55 Display colour · 53 1/1-octave · 28, 69 Display mode · 19, 48, 71 1/3-octave · 28, 69 Display scale · 51, 72 Display settings ·... - Page 10 SV 971A User Manual Impulse · 77 Impulse method · 79 Impulse response method · 77 New directory · 55 Inactive parameters · 23 Noise margin · 78 Information screen · 22 Normal range · 45 Input/output · 15, 16 Instantaneous spectrum ·...
- Page 11 SV 971A User Manual SD card · 25, 55, 104 Total value · 69 Self vibration · 60 Trigger level · 41 Setup manager · 27, 56 Trigger source · 37, 41, 44 Shift key mode · 59 Trigger step · 44 Simple interface ·...
-
Page 12: Introduction
5 Hz ÷ 20 kHz ® “The Bluetooth word mark and logos are registered trademarks owned by Bluetooth SIG, Inc. and any use of such marks by SVANTEK is under license. Other trademarks and trade names are those of their respective owners. -
Page 13: General Features Of Sv 971A
SV 971A User Manual • Parallel Impulse, Fast and Slow detectors for the measurements with A, B, C, Z and LF frequency filters • Two measurement ranges 25 dBA LEQ ÷ 123 dB Peak (Low) and 30 dBA LEQ ÷ 140 dB Peak (High). -
Page 14: Accessories Available
RS232 interface option with external power supply plug • SC 91A/05 extension cable for SV 18A, 5 meters (for laboratory purposes) • SA 72 carrying case for SV 971A and accessories (waterproof) • SA 80 pocket soft bag • SA 271A outdoor microphone kit •... -
Page 15: General Information
SV 971A User Manual 2 GENERAL INFORMATION 2.1 M EASUREMENT CONFIGURATIONS The instrument's normal operating mode as SLM assumes operating with the preamplifier and microphone attached to the instrument and without a windscreen. Optionally the instrument can be operated with the windscreen attached to the microphone or with the preamplifier and microphone fitted in the outdoor microphone kit and connected with the instrument by the extension cable (see Appendix C for specification). -
Page 16: Input And Output Sockets Of The Instrument
– see Chapter 16.1. Note: The originally supplied Kingston Industrial memory card has been tested by SVANTEK and cards of this type are strongly recommended for use when the original card is going to be... -
Page 17: Instrument Power
SV 971A User Manual 2.3 I NSTRUMENT POWER SV 971A can be powered by one of the following sources: • Four AAA standard size batteries fitted internally. In the case of alkaline type, a new fully charged set can operate more than 12 h (6.0 V / 1.6 Ah). Instead of the ordinary alkaline cells, four AAA rechargeable batteries can be used (a separate external charger is required for charging them). -
Page 18: Control Keys On The Front Panel
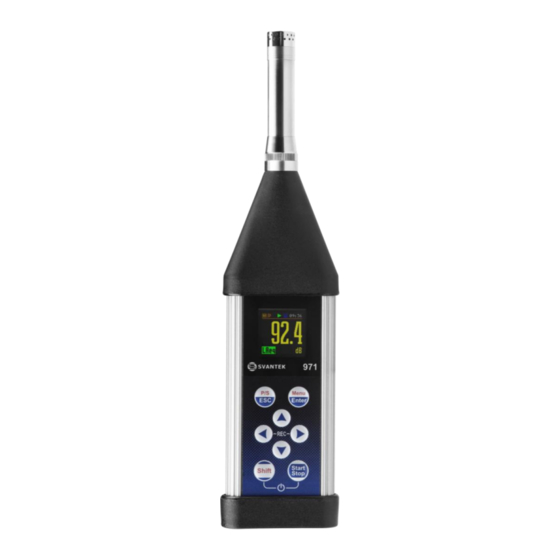
SV 971A User Manual 2.4 C ONTROL KEYS ON THE FRONT PANEL The instrument is controlled in a fully interactive way using the control keys and the configuration menu. The following control keys are located on the front panel of the instrument: •... -
Page 19: Working With The Instrument
SV 971A User Manual (▲ / ▼) These ▲ / ▼ keys used in conjunction with <Shift> allow you, in particular, to: • change view in the measurement mode, • change relationship between Y-axis and X-axis in the Logger and Spectrum views, •... -
Page 20: Configuration Mode
SV 971A User Manual In some views you can toggle sub-views by pressing the <Enter> key. <ENT> All icons are described in Chapter 2.7, other fields and view control functions - in Chapter 5. Starting measurements To start a measurement, press the <Start> key. The... - Page 21 SV 971A User Manual The Start/Stop mode limits the menu to only one User Interface position in the main menu and measurement screens. <Menu> Note: For parameters hidden in the Simple interface mode the instrument will use settings previously defined in the Advanced mode or default settings.
- Page 22 SV 971A User Manual If the parameter has a numerical value, you can speed up a selection by pressing the ◄ / ► key and keeping it pressed by more than 2 seconds. In this case, the parameter value starts changing automatically until you release the pressed button.
-
Page 23: Default Settings
SV 971A User Manual Help information In most screens, the last line or two lines contain help information: how to select or modify the parameter’s value, change the character in the text line etc. For example, Delete: Shift < means that you can delete the selected position with the ◄... -
Page 24: Description Of Icons
SV 971A User Manual 2.7 D ESCRIPTION OF ICONS Indicators of the instrument state Additional information about the instrument’s state gives the row of icons visible in the top line of the display. The real-time clock (RTC) is also displayed in the same line together with icons. -
Page 25: Overload And Underrange Detection
SV 971A User Manual “vibration” icon is displayed when high “USB” icon is displayed when there is self-vibration level is registered USB connection with the PC. “plug” icon is displayed when the “clock” icon is displayed when the timer instrument is powered through the USB is On. - Page 26 Files are saved in the directory, which was set as a working directory. The default working directory (after using Factory Settings function) is called SVANTEK. Note: During the measurement run with data logging to the logger file, the “logger” icon is displayed.
-
Page 27: Downloading And Uploading Files
SV 971A User Manual Saving setup files Setup files can be created by means of the Setup Manager or from the measurement screen with the <P/S> key (<Shift> pressed with <ESC>), when a measurement is not running. All Setup files are stored in the default directory SETUP <P/S>... -
Page 28: Measurement Functions And Calibration - Function
SV 971A User Manual 3 MEASUREMENT FUNCTIONS AND CALIBRATION – Function Function section, select measurement function (Meas. Funct) and perform the instrument calibration (Calibration). To open the Function section, press the <Menu> key, select the Function position and press <Enter>. -
Page 29: Calibration - By Measurement
A measurement cannot be in progress while the automatic calibration is being performed. Note: SV 971A has two different dynamic ranges – Normal and Low. In the SLM functions (Level Meter, 1/1 Octave, 1/3 Octave, RT60 and STIPA) both ranges can be used for measurement, but in the SEM functions (Dosimeter, 1/1.&Dose, 1/3.&Dose) –... -
Page 30: Last Calibration Record - Last Calibration
SV 971A User Manual During the calibration measurement, the level of the measured calibration signal is displayed. If the maximal difference between three consecutive 1-second LCeq results is less than 0.05dB, the calibration measurement will be stopped, and the calibration factor will be calculated. The measurement can be always stopped by the <Stop>... -
Page 31: Erasing Calibration Records - Clear History
SV 971A User Manual Note: Every time you return to factory settings without keeping the last calibration (see Chapter 8.2), the new record appears in the list stating the Factory calibration of the instrument. 3.2.4 Erasing calibration records – Clear History To erase all calibration records in the history, choose the position Clear Hist. - Page 32 SV 971A User Manual Generated by the calibrator sound pressure level starts the Automatic Calibration process if the difference between the Calibration Level value set up in the Calibration screen and the measured SPL level generated by the calibrator is in the range ±5 dB.
-
Page 33: Configuring Measurement Parameters - Measurement
SV 971A User Manual 4 CONFIGURING MEASUREMENT PARAMETERS – Measurement The Measurement section combines elements related to measurement parameters configuration. To open the Measurement section, press the <Menu> key, select the Measurement position and press <Enter>. <ENT> The content of the Measurement list depends on the... - Page 34 SV 971A User Manual Delay of measurement start The Start Delay parameter defines the delay period from the <Start/Stop> keystroke to the real start of the measurement (digital filters of the instrument constantly analyse the input signal even when the measurement is stopped). This delay period can be set from 0 second to 60 minutes.
-
Page 35: Setting Measurement Trigger - Measurement Trigger
SV 971A User Manual Note: In case of the infinite integration period or the infinite repetition cycles the measurement should be stopped manually with the <Stop> key. Day time limits The Day Time Limits parameter defines the day and night time limits required by the local standards. - Page 36 SV 971A User Manual Slope trigger The Slope+ / Slope– trigger starts the measurement/integration with the duration of the Integration Period on condition: rising value of the measured result (Source) integrated during 0.5 ms passes above/below the threshold value (Level).
-
Page 37: Setting Parameters For Profiles - Profiles
SV 971A User Manual Gradient trigger The Gradient+ trigger starts the 1-second measurement/integration under the condition: value of the RMS result (Source) integrated during 0,5 ms is greater than the threshold (Level) and the gradient of the Source value is greater than the gradient threshold (Gradient). -
Page 38: Setting Alarm Thresholds For Dose Meter - Alarm
SV 971A User Manual LEQ detector selection Available LEQ detectors (time constants): Impulse, Fast and Slow. Time constants are applied always to the Lmax, Lmin, L(SPL), Ltm3 and Ltm5 results and to the Leq, LE(SEL), LEPd and Lden results in case the Exponential LEQ detector is selected in the General Settings screen (see Appendix D). -
Page 39: Setting General Logging Parameters - Logger Setup
SV 971A User Manual The Logging list enables programming of the logging functions: recording of summary and logger results (measurement history) in a logger file and recording of audio signal in a wave file. Simple instrument interface mode, Logging list includes only of one position - Logger Set. -
Page 40: Selecting Results For Logging - Logger Results
SV 971A User Manual Note: In the Simple interface mode, the Logger Step parameter is hidden, but the instrument will use settings previously defined in the Advanced mode or default settings (1s). Logger file name The Logger Name position enables defining the logger file name, which consists of a prefix and a number. -
Page 41: Configuring Logger Trigger - Logger Trigger
SV 971A User Manual 4.5.3 Configuring Logger trigger – Logger Trigger In the Logger Trigger screen, you can configure the way the logger results are to be registered in the logger file. It is a context list of parameters in which the trigger can be switched Off or On by selecting its type (Level+ or Level–) in the Trigger position. -
Page 42: Configuring Signal Recording - Wave Recording
SV 971A User Manual Pre and post trigger logging In the Pre Trigger position, you can define the number of logger results which will be registered in the file before fulfilment of the first trigger condition. This number can be set in the range 0..10. - Page 43 SV 971A User Manual Slope trigger The Slope+ / Slope - trigger starts a signal recording under the condition: rising value of the Leq result (Source) integrated by 0.5 ms passes above/below the threshold level (Level). After pressing the <Start> key the instrument checks the trigger condition with steps, defined by the Tr.
- Page 44 SV 971A User Manual elapsed. The instrument checks the trigger condition also during the recording and if the condition is met the recording will continue for another Rec. Time. Integration period trigger When the Integr. Per trigger is selected, a signal recording is triggered every time the measurement starts, and recording will last minimum Rec.
-
Page 45: Selecting Measurement Range - Range
SV 971A User Manual Speed of source value changing Speed of triggering signal changing (Gradient) can be set in the range from 1 dB/ms to 100 dB/ms. Recording before trigger When the Pre Trigger parameter is switched on, the signal will be recorded before the first trigger. The interval of such recording is equal to the Trigger period (in the attached example, 0.5 s). -
Page 46: Setting Statistical Levels - Statistical Levels
SV 971A User Manual The Field Compensation position enables you to switch off (Off) the compensation filter or to select the compensation filter for sound measurements in the free- field (Free Field), diffuse field (Dif. Field) conditions or for the permanent outdoor monitoring application as a part of the SV 271 monitoring station: Environment ◄... -
Page 47: Example Of Timer Execution
SV 971A User Manual Measurement start and stop Start (hh:mm) Stop (hh:mm) positions determines times of measurement’s `start and stop. ` ► In the positions: Monday, Tuesday, …, Sunday; you can select days in a week when measurements should start. -
Page 48: Configuring Data Viewing - Display
SV 971A User Manual 5 CONFIGURING DATA VIEWING – Display The Display section contains elements for programming measurement result views and display parameters. The content of the Display list depends on the selected measurement function. To open the Display section, press the <Menu> key, select the Display position and press <Enter>. - Page 49 SV 971A User Manual Changing measurement results The measurement result displayed in this view can be changed with the ◄ / ► key. ► Changing viewed profile The profile results displayed in this view can be changed with the ▲ / ▼ key.
-
Page 50: Three Profiles View
SV 971A User Manual 5.1.2 Three profiles view In the 3 Profiles view, any three measurement results, selected in the Disp. Res list, may be presented for three profiles. You may change the 3 Profiles sub-view by pressing the <Enter> key. -
Page 51: Statistics View
SV 971A User Manual 5.1.4 Statistics view “Statistics” is the cumulative probability density function of exceeding the noise level during the measurement period. The X axis defines the probability of exceeding the noise level, statistical level Ln, and the axis Y defines the calculated noise level in dB. -
Page 52: Selecting Measurement Results For Presentation - Measurement Results
SV 971A User Manual Scaling the vertical axis The Dynamics position enables selecting the required dynamic range of the plot (Y-axis). It is possible to select the range from the set: 10dB, 20dB, 40dB, 80dB and 120dB. ◄ Switching grid on/off The Grid position enables switching On or Off the horizontal grid lines of the plot. -
Page 53: Configuring Power Saver - Screen Setup
SV 971A User Manual Logger results to be viewed: • Level Meter, 1/1 Oct. and 1/3 Oct. functions: Lpk(Lpeak), Lmax, Lmin, Leq, LR1, LR2 • Dosimeter function: Lpk(Lpeak), Lmax, Lmin, Leq, LAV ▼ – S 5.5 C ONFIGURING POWER SAVER... -
Page 54: Managing Files - File
SV 971A User Manual 6 MANAGING FILES – File The File section enables managing data files saved in the instrument’s memory. The memory structure and files saving methods are described in Chapter 2.9. To open the File section, press the <Menu> key, select the File position and press <Enter>. -
Page 55: Anaging Ffiles File Manager
SV 971A User Manual – F 6.1 M ANAGING FILES ANAGER Files are stored in directories, which are organised hierarchically. The File Manager enables access to files and directories on the SD-card. In the File Manager, file and directory names are of upper-case letters and have no extensions. -
Page 56: Renaming Files/Directories - Rename
SV 971A User Manual 6.1.2 Renaming files/directories – Rename To rename a file or a directory, select the file/directory you wish to rename and press <Enter>. Select the Rename position in the command list and press <Enter>. The screen with the text editor function in which you <ENT>... - Page 57 SV 971A User Manual The screen with the list of available commands on setup files is opened after pressing the <Enter> key on the marked (highlighted) setup file. <ENT> If the right-hand box of the setup file is marked, this...
-
Page 58: Configuring Instrument - Instrument
SV 971A User Manual 7 CONFIGURING INSTRUMENT – Instrument The Instrument section is mainly related to the configuration of the hardware components of the instrument. To open the Instrument section, press the <Menu> key, select the Instrument position and press <Enter>. -
Page 59: Checking Power - Battery
SV 971A User Manual – B 7.2 C HECKING POWER ATTERY The Battery position enables checking the power source condition. The instrument can be powered from four AAA rechargeable or standard alkaline batteries or from the USB-C interface. The view presented on the display depends on the current power source. -
Page 60: Automatic Power Off - Power Off
SV 971A User Manual – P 7.4 A UTOMATIC POWER OFF OWER The Power Off position enables setting the period after which the instrument will automatically turn itself off in the case no key was pressed during this period. If the Inf (infinitive) value is selected the instrument cannot be turned off automatically, only manually. -
Page 61: Self - Vibration Marker - Self Vibration
<ENT> Note: The contents of the Unit Label should be always sent to the Svantek service department or official representative in case of any problems faced by the user during the instrument’s normal operation. -
Page 62: Auxiliary Settings - Auxiliary Setup
SV 971A User Manual 8 AUXILIARY SETTINGS – Auxiliary Setup Auxiliary Setup section provides additional functions that allow, for instance, customization of the device interface to a specific user requirement and are not directly related to the hardware components of the instrument. -
Page 63: Voice Comments - Comments
SV 971A User Manual – C 8.3 V OICE COMMENTS OMMENTS The Comments position enables defining the file name for the voice comments recording. This position is available only in the Advanced interface mode. You can record voice comments in all ►... - Page 64 SV 971A User Manual If Power Off is active, then in the case the measurement is in progress, any attempt to switch off the instrument will be warned "Measurement in progress". You should stop the measurement to be able to turn off the unit. When the measurement is completed the warning "Power Off"...
-
Page 65: Printing Reports - Report
SV 971A User Manual 9 PRINTING REPORTS – Report The Report section enables configuring and printing measurement reports in the predefined format. To open the Report section, press the <Menu> key, select the Report position and press <Enter>. <ENT> The Report section contains following positions: Print allowing you to print measurement results on the default printer;... -
Page 66: Selecting Printing Options - Options
SV 971A User Manual SVANTEK (C) SV 971A S/N:39039 2017-05-22 13:59:24 T:00:00:05 Profile 1 Slow LCpeak: 82.9 55.9 LASmax: 77.0 LEPd 55.9 LASmin: 58.8 Ltm3 74.2 58.8 Ltm5 77.0 LAeq 55.9 62.9 Profile 2 Slow LCpeak: 82.9 60.8 LCFmax: 80.0 LEPd 60.8... -
Page 67: Selecting Results For The Report - Results
SV 971A User Manual You may include (Print) or exclude (Off) results for each profile (Profile x) from the report. You may exclude all main results (Results) from the report (Off), include them all (Print All) or select results for the report (Pr.Selected). In the last case the Results position appears in the Report menu. -
Page 68: Printer Settings - Printer
SV 971A User Manual – P 9.6 P RINTER SETTINGS RINTER The Printer position enables setting the number of characters in the report lines – from 20 to 500. Default value: 32. <ENT>... -
Page 69: 10 1/1- And 1/3-Octave Analyser
SV 971A User Manual 10 1/1- AND 1/3-OCTAVE ANALYSER The real-time 1/1-octave or 1/3-octave analysis is performed in parallel with the SLM or SEM measurements. All digital pass-band filters (eleven 1/1-octave with centre frequencies from 16 kHz down to 16.0 Hz and thirty five 1/3-octave with central frequencies from 20 kHz down to 8 Hz; in the “base ten”... -
Page 70: Selecting Measurement Range For 1/1- And 1/3-Octave Analysis - Range
SV 971A User Manual 10.2.2 Selecting measurement range for 1/1- and 1/3-octave analysis – Range For the 1/1 Octave or 1/3 Octave functions you can select the input ranges specified in Appendix C, named as Normal and Low. The selection of the input range is made in the Range screen of the Measurement list. -
Page 71: Configuring 1/1- And 1/3- Octave Spectra Views
SV 971A User Manual The Detector parameter defines the LEQ detector for the 1/1-octave or 1/3-octave analysis: Linear, Fast or Slow. <ENT> 10.3 C 1/1- 1/3- ONFIGURING OCTAVE SPECTRA VIEWS The Display section is used for setting various parameters, which are mainly intended for spectrum view control. -
Page 72: Adjusting Spectrum Graph Scale - Display Scale
SV 971A User Manual Spectrum view can be changed with the <Enter> key. Second spectrum view doesn’t have the Y scale and thus has wider bars. <ENT> Total values are calculated with the filters A, C and Z, and are displayed at... - Page 73 SV 971A User Manual Minimum and maximum spectra can be presented at the same view with the Averaged and Instantaneous spectrum when the Max or/and Min parameter is switched on. =>...
-
Page 74: Sound Exposure Meter - Dosimeter
SV 971A User Manual 11 SOUND EXPOSURE METER – DOSIMETER The instrument operates as a Sound Exposure Meter (SEM) or Dosimeter in a very similar way to the Sound Level Meter (SLM) and, in addition to the SLM results, measures also basic dose parameters. -
Page 75: Checking Measurement Range - Range
SV 971A User Manual LEQ detector Following LEQ detectors are available in the instrument: Imp., Fast and Slow. Dosimeter specific parameters can be set in accordance with the OSHA HC (Occupational Safety and Health Administration - Hearing Conversation), OSHA PEL (Occupational Safety and Health Administration – Permissible Exposure Level) and ACGIH standards. -
Page 76: Displaying Dosimeter Results
SV 971A User Manual Alarm is signalled on a special screen with flashing frame and Alarm text inside and exceeded profiles threshold. For example, with such settings, the alarm screen will look like this. => To exit the alarm screen, press any key. -
Page 77: Reverberation Time Measurements - Rt60
(A, C and Z weighted). Whole measurement process and calculations implemented in SV 971A fulfil the ISO 3382 standard. The reverberation time of the room can be obtained with the use of SV 971A by two measurement methods: Impulse Response Method (Impulse) and Interrupted Noise Method (Decay). The selection of the method depends on the type of the used sound source. - Page 78 SV 971A User Manual The Method parameter allows to choose the method for RT60 calculations: Decay or Impulse. Both methods are described in Appendix E. ► The Recording Time parameter defines the recording time of the measurement data (sound pressure level decay curve). Data registration starts in the moment of the trigger condition appearance.
-
Page 79: Starting Rt60 Measurements
SV 971A User Manual 12.3 S RT60 TARTING MEASUREMENTS Measurements using Decay method Set parameters for Decay RT60 measurements. Most used setup is as presented below. • Method: Decay • Recording Time: Auto • Time Step: • Averaging: • Noise Mar.: 10.0dB... -
Page 80: Viewing Rt60 Results
SV 971A User Manual Note: During collecting data all other sources of sound should be suppressed in the tested room to not affect the measurement results. 12.4 V RT60 IEWING RESULTS The RT60 measurement results for all 1/1 or 1/3-octave bands and three Total values are presented in a table form. -
Page 81: Sti Calculations - Stipa
STIPA calculations are realized in SV 971A in accordance with IEC 60268-16:2011. Note: In addition to the fact that measurements can be made using only SV 971A, Svantek also provides an application (BA Assistant) for mobile devices (smartphone, tablet) with Android 7.0 platform or higher, which performs STIPA measurements using SV 971A but has... -
Page 82: Stipa Measurement And Calculation Process
SV 971A User Manual 13.3 STIPA MEASUREMENT AND CALCULATION PROCESS STI measurements usually relate to objects (buildings), which may consist of several areas (rooms) in which measurements are made in a given number of points (in practice, from 1 up to several dozen). In addition, especially in case of assessing speech intelligibility in a room on the directly, i.e. - Page 83 SV 971A User Manual • Area summary view is a main STIPA view that presents summary results for the current area: Averaged STI or CIS index with consideration of the Ambient noise distortions. σ - standard deviation of measured STI indexes for the area.
-
Page 84: Project Structure
SV 971A User Manual To change columns, use the ◄ / ► key. In case the modulation ratios are greater than 1 due to errors or disruptions detected during measurement, they are given a value ► ► of 1, and the results for this band are highlighted in red. -
Page 85: Results Averaging
SV 971A User Manual 13.3.3 Results averaging STIPA measurements require averaging of STI/CIS indexes. This averaging concern two aspects: 1) averaging of results for a measurement point. Averaged STI/CIS for the measurement point is displayed in the first line of the Point view and in the measurement points list of the Area view. - Page 86 SV 971A User Manual 3. Go to the Area position and press the ► key. In the File Manager screen create a new area directory <New Dir.> or select the directory of the previously created Area in the selected Project.
-
Page 87: Considering Ambient Noise Distortions
SV 971A User Manual 7. In the Index position, choose the result STI or CIS to be displayed in the main STIPA views. ► 8. In the Source Calibration position, set the adjustment of the reference STIPA signal level to the level of a real voice signal in the tested area. - Page 88 SV 971A User Manual To start measurement, press the <Start> key. The Measurement view appears, showing measurement progress bar and STI index calculated with considered ambient noise (STI), measured STI index (Meas.), STI qualification band next to the index, LAeq and LAS results.
- Page 89 SV 971A User Manual If you choose Delete and press <Enter> the instrument will delete selected measurement from the measurement list and change the numeration in the Point view. At the same time the file with the measurement results will be deleted from the Point directory.
-
Page 90: Files Downloading And Data Processing
After taking measurements using the BA Assistant application and generating a report, the project file containing all the results obtained during the measurements will be automatically copied to the SV 971A instrument. Application project files are named BAxxx.ZIP and after launching the SvanPC++ program you can download them using the "SVAN Files"... -
Page 91: Measurement With Sv 971A Without Ba Assistant
- the file will be downloaded to the temporary folder and opened. 13.4.2 Measurement with SV 971A without BA Assistant During the STIPA measurement SV 971A generates files in the SVL format which are grouped in the Point directories belonged to the project “Project/Area/Source”. To download files, use the "SVAN Files"... - Page 92 SV 971A User Manual If you downloaded the file, you can open it with a double-click, if you downloaded the whole folder, need link downloaded data set. The easiest way to do this is to use the SvanPC++ project functionality. For this close the "SVAN Files"...
-
Page 93: Presentation Of Stipa Results
SV 971A User Manual 13.4.3 Presentation of STIPA results The STIPA results are grouped in one window with the appropriate division into areas, sources and points for the selected project. When opening a project from the BA Assistant application or creating a "Simple project" in SvanPC++, the STIPA window will be opened automatically. -
Page 94: Changing Background Noise Values
SV 971A User Manual 13.4.4 Changing background noise values The cells with the background noise results are editable, i.e. you can manually enter values for individual octaves (just double click on the selected background noise value). Such a change will automatically convert the results for a point and above. -
Page 95: Assistant Mobile Application
Assistant also signals alarms when the certain limits are exceeded. The unique feature of the application is functionality of sending an email or SMS on pre-programmed alarm conditions. The Assistant application supports also other Svantek instruments (e.g. SV 100A vibration whole-body dosimeters, SV 104B/BIS sound exposure meters and SV 973 sound level meters). -
Page 96: Control Via Bluetooth
SV 971A User Manual ® 14.3 C ONTROL VIA LUETOOTH The Assistant application has two main screens: scanning/status screen and result view/control screen. Tapping the fields inside the instrument frame you can go to the instrument’s results view and measurement control screen. -
Page 97: Instruments' Status Screen
SV 971A User Manual 14.3.1 Instruments’ status screen In the scanning/status screen you may observe the state of a set of instruments. Each instrument status is displayed in the frame that contain up to tree fields. First field displays the instrument name and serial number. -
Page 98: Results View / Control Screen
SV 971A User Manual 14.3.2 Results view / control screen The result view/control screen enables you viewing measured results of the particular instrument and controlling the measurement. As in the scanning/status screen the same icons in the upper screen line describe the instrument status. - Page 99 SV 971A User Manual In case of the Dosimeter function the view / control screen presents measurement results for three profiles. You can switch profiles by tapping the profile tab. You can change the results in the frames by tapping on them.
-
Page 100: Sms And E-Mail Notifications
SV 971A User Manual After pressing the button, the pop-up menu appears in which you can: • Identify corresponded instrument. • Disable the GPS marker (only for the Sound Level and 1/1 Octave / 1/3 Octave functions). • Turn the instrument off. -
Page 101: Checking The Software Version And Exiting The Application
SV 971A User Manual 14.1 C HECKING THE SOFTWARE VERSION AND EXITING THE APPLICATION To check the software version, tap the icon in the lower left corner and select the About command. To exit the application, tap the icon in the lower left corner and select the Exit command or press... -
Page 102: General Purpose And Special Software
Wave files playback Remote communication with instruments equipped with 3G/4G/LAN modems (optional) Downloading measurement results If your Svantek instrument is connected to a PC (via USB, RS232 interface or wireless connection) SvanPC++ offers simple tool for files downloading, files uploading and configuring settings of the instrument – SVAN Files. - Page 103 SV 971A User Manual Configuring instrument settings The Setup file editor is a function that gives you an easy access to Svantek instruments’ current settings, allows to configure instrument settings and upload them to the instrument. Markers & Block Generator The Marker Block Generator browses through the long logger files in search of events defined by the user.
- Page 104 SV 971A User Manual Wave Analyser Wave analyser is used for analysis of wave files. The module provides calculation of overall results such as Leq, Lmax, Lmin, Lpeak, noise statistics as well as 1/1-, 1/3-, 1/6 and 1/12-octave and FFT spectra or perform tonality analysis from 24 wave files in a single operation.
- Page 105 SV 971A User Manual Projects The Projects feature is a useful tool allowing for managing multiple files of various types and grouping them in a project file, modifying and saving data views, as well as creating reports using the measurement data contained in a project.
-
Page 106: Supervisor
SV 971A User Manual 15.2 S UPERVISOR The Supervisor software is designed to extend the functionality of some Svantek instruments dedicated for Health and Safety professionals. Main features of Supervisor: • Easy to use, intuitive interface • Managing multiple instruments via the inventory panel tool •... - Page 107 SV 971A User Manual Instrument inventory When a connected Svantek instrument is detected by Supervisor, it is added to the Inventory - a database of all Svantek instruments you used with Supervisor. This tool allows you to see group of selected instruments type.
-
Page 108: Ba Assistant
SV 971A User Manual 15.3 BA A SSISTANT Building Acoustics Assistant (BA Assistant) is an application for smartphones and tablets with the Android operating system, dedicated to assessments of airborne or impact sound insulation in buildings and of building elements in accordance with the next standards: •... - Page 109 Thanks to BA Assistant these measurements becomes easy and fast. To perform such measurements the user should have a Svantek measuring instrument (for example, SV 971A), test signal source (for example, Audio TalkBox) and a smartphone with the BA Assistant application.
- Page 110 SV 971A User Manual BA Assistant allows you to install connection with measuring instruments, create measurement project accordance with required standard, configure measurement points in the assessed area, perform measurements remotely and send the report to any address from your smartphone.
-
Page 111: Maintenance
16 MAINTENANCE 16.1 R EPLACING BATTERIES SV 971A is delivered with four AAA alkaline batteries, but the you may also use AAA rechargeable batteries. The “battery” icon shows the condition of the internal batteries. The instrument is not equipped with an internal charger; therefore, the rechargeable batteries can be charged only after removal them out of the instrument. -
Page 112: Resetting The Instrument
- will stop any pre-programmed auto-run modes, - will stop measurement run! 16.5 U PGRADING THE FIRMWARE SVANTEK is committed to continuous innovation path of development, and as such reserves the right to provide firmware enhancements based on user’s feedback. To update the instrument firmware: •... -
Page 113: Preservation Of Internal Batteries
• In the case the reset does not help call your Local Authorized Distributor or Svantek Service Office. Should your SVANTEK professional measurement equipment need to be returned for repair or for calibration, please contact the service office at the following number or contact via the SVANTEK website. -
Page 114: Glossary
SV 971A User Manual 17 GLOSSARY 17.1 M ODES AND EASUREMENT UNCTIONS Position Description Screen Reference Function The menu section that enables selecting the Chapter Measurement Function and performing Calibration of the instrument. Measurement Chapter Type of calculations the instrument currently... -
Page 115: Calibration
SV 971A User Manual 1/1.&Dose Measurement Function enabling calculation of Chapter Dose Meter results and 1/1-octave sound results in 3.1, accordance with Class 1 IEC 61260-1:2014. 1/1-octave results are presented as a spectrum graph - a function of result value vs central band frequency. - Page 116 SV 971A User Manual Calibration Level of the reference signal generated by used Chapter Level calibrator. 3.2.1 Calibration Difference between the new calibration factor and Chapter drift the previous one. 3.2.1, 3.2.6 Last Recent calibration record: measurement function Chapter Calibration for which calibration was performed (Level Meter or 3.2.2...
-
Page 117: Measured Results
SV 971A User Manual 17.3 M EASURED RESULTS Position Description Screen Reference Elapsed time Time from the measurement start, that is displayed Chapter under the result in the format ⌛mm:ss in the range 5.1.1 from 00:00 to 59:59, or in the format ⌛hh:mm:ss in the range from 01:00:00 to 99:59:59, or in format ⌛xxxh from 100h to 999h, and ⌛>999h if the... - Page 118 SV 971A User Manual Sound Exposure Level (SEL), the constant sound Appendix D level that has the same amount of energy in one second as the original noise event and is the subset of the Leq result so, for the integration time equal to 1 s, SEL is always equal to Leq.
- Page 119 SV 971A User Manual DOSE Quantity of noise received by the worker, expressed Appendix D as the percentage of the whole day acceptable value. D_8h Quantity of noise received by the worker for Appendix D 8 hours. PrDOSE Quantity of noise received by the worker during Appendix D exposure time.
- Page 120 SV 971A User Manual PTC result expressed in percent. Appendix D Time Weighted Average - average A-weighted Appendix D sound level for a nominal 8-hour workday with Time Weighting S and Exchange Rate 5. TWA is usually measured with A-weighting and Slow response detector type.
-
Page 121: Measurement Parameters
SV 971A User Manual First rolling Leq - Leq for the window of the last xx Appendix D seconds/minutes of the measurement moving with 1 second step. Second rolling Leq - Leq for the window of the last Appendix D yy seconds/minutes of the measurement moving with 1 second step. - Page 122 SV 971A User Manual Repetition Number of measurement/integration repetitions Chapter Cycles after the <Start> key pressure. This enables to make a series of measurements without pressing the <Start> key and save this series in the results file. Type of integration of RMS based results (RMS...
- Page 123 SV 971A User Manual Profiles Virtual broadband level meters, which calculate the Chapter set of results with own weighting filter (Filter) and 4.3, 11.3 exponential detector time constant (Detector). Profiles can be programmed together in the Profile screen if the instrument works in the Level Meter, 1/1 Octave or 1/3 Octave modes, or individually if the instrument works in the Dosimeter mode.
- Page 124 SV 971A User Manual Windscreen Digital filter that compensates the effect of the Chapter SA 22 windscreen. Range Position that enables selecting the linear operating Chapter range for the sinusoidal signal selection: Low or Normal. The calibration factor is always added to the range limits.
- Page 125 SV 971A User Manual Level+ Type trigger that starts 1-second Chapter measurement/ integration under the condition: value of the RMS result (Source) integrated during 0,5 ms is greater than the threshold value (Level). In other cases, the instrument continues checking the trigger condition every 0.5 ms.
- Page 126 SV 971A User Manual Statistical Screen that enables setting a boundary level (Ln) Chapter Levels surpassed by the temporary noise level values in not more than nn% of the observation period. The Appendix D user can define ten statistical levels, named from N1 to N10, to be calculated, displayed and saved in the files together with the main results.
- Page 127 SV 971A User Manual Summary Main measurement results: Leq, Lpeak, Lmax, Chapter Results Lmin, L, LE, Lden, LEPd, Ltm3, Ltm5, LR1, LR2 4.5.1 statistics Ln, EX, SD and OVL; that are measured, displayed saved in the file with the Integration Period step as many times as defined by the Repetition Cycles parameter.
- Page 128 SV 971A User Manual Level Threshold level of Source for triggering condition Chapter fulfilment. 4.5.3 Pre Trigger Period of additional logging before triggering Chapter condition fulfilment. 4.5.3 Post Trigger Period of additional logging after triggering Chapter condition fulfilment. 4.5.3 Wave Recording of the waveform signal in the wave file.
- Page 129 SV 971A User Manual Level+ Type of trigger that starts the signal recording for Chapter Recording Time under the condition: value of the 4.5.4 LEQ result (Source) integrated by the 0,5 ms period is greater than the threshold level (Level).
- Page 130 SV 971A User Manual Source Measured result that is compared with the threshold Chapter level for triggering (Level) – LEQ measured in the 4.5.4 first profile: Leq(1). Level Threshold level of the Source for the trigger Chapter condition fulfilment. 4.5.4 Trigger Period Time interval of checking the triggering conditions.
- Page 131 SV 971A User Manual Leq Sp. Position in the Logger Results screen that switches Chapter on/off the Leq spectra saving as a time-history in a 10.2.3 logger file. Filter Weighting filters for the 1/1 Octave and 1/3 Octave Chapter analysis: A, B, C, Z.
- Page 132 SV 971A User Manual Threshold level for calculation of ULT results. Chapter Threshold 11.3 Level Threshold level for calculation of PTC results. Chapter Threshold 11.3 Level RT60 Settings Screen that enables setting the reverberation time Chapter measurement parameters: Start Delay, Method, 12.2...
-
Page 133: Display Parameters
SV 971A User Manual Noise Mar. Margin value to the calculated noise level for RT60 Chapter calculations: 0 ÷ 20 dB. 12.2 Octave Type of spectrum (1/1-octave or 1/3-octave) based Chapter on which the RT60 analysis is performed. 12.2 Freq. Range... - Page 134 SV 971A User Manual One Result View of the one result. This view is always available Chapter view and cannot be disabled. 5.1.1 Running SPL View of the running SLP result. This view is used Chapter view before the measurement start for the noise level 2.5,...
- Page 135 SV 971A User Manual Dynamics Range of the plot scale: 10 dB, 20 dB, 40 dB, Chapter 80 dB, 100 dB and 120 dB. Grid Toggle of the grid on the graph views. Chapter Autoscale Switching automatic scale adjustment of the Y axis.
- Page 136 SV 971A User Manual Instantaneous Spectrum of instantaneous Leq results for the Chapter 1/1 Octave or 1/3 Octave bands. 10.3.3 Averaged Spectrum of averaged Leq results for the Chapter 1/1 Octave or 1/3 Octave bands. 10.3.3 Spectrum of Lmax results for the 1/1 Octave or Chapter 1/3 Octave bands.
-
Page 137: Instrument Parameters
SV 971A User Manual Dim Delay Screen dimming time delay in no activity after last Chapter key pressing. Col. Scheme Colour scheme of the screen. Chapter 17.6 I NSTRUMENT PARAMETERS Name Description Screen Reference Instrument Section in the Main Menu that enables setting the... - Page 138 SV 971A User Manual Battery Position in the Instrument list that enables checking Chapter of the instrument power source status. Keyboard Position in the Instrument list that enables setting of Chapter the Shift, Alt, Start/Stop keys functionality and programming of locking/unlocking the keyboard.
-
Page 139: Auxiliary Parameters
SV 971A User Manual Unit Label Information about the instrument type, its serial Chapter number, the current software version installed and the relevant standards, which the instrument fulfils. 17.7 A UXILIARY PARAMETERS Name Description Screen Reference Auxiliary Section in the Main Menu that enables customizing... -
Page 140: Report
SV 971A User Manual 17.8 R EPORT Name Description Screen Reference Report Section in the Main Menu that enables configuring Chapter and printing measurement reports in the predefined format and includes positions: Print, Options, Results, Statistics, Spectrum and Printer. Print... -
Page 141: Appendix A. Remote Control
SV 971A User Manual – Appendixes APPENDIX A. REMOTE CONTROL The USB 2.0 interface is the Type C serial interface working with 480 MHz clock which enables one to control remotely the unit. Its speed is relatively high, and it ensures the common usage of USB-C in most produced nowadays Personal Computers. - Page 142 1:1,C0:2,C2:3,C1:4,C0:5,C2:6,B0:1,B3:2,B15:3,b0,d1s,D10s,K5,L0,Y3,y0,XT0,XL100,XQ0,Xq0,XC115: 1,XC115:2,XC115:3,Xl115:1,Xl115:2,Xl115:3,XA0,XD-1:1,XD-1:2,XD-1:3,XD-1:4,XD-1:5,XD- 1:6,S0,T1,e480,c1:1,c1:2,c1:3,h0:1,h0:2,h0:3,x3:1,x3:2,x5:3,m0,s0,l100,O10,o0,t0; means that: • SV 971A is investigated (U971); see #7,US; command for unit subtype information; • its number is 1234 (N1234); • software version number is 1.05.1 (W1.05.1); • calibration factor is equal to 0.01 dB (Q0.01);...
-
Page 143: Function #2 - Measurement Results Read - Out In The Slm Mode
SV 971A User Manual – Appendixes • results are stored in a logger’s file every 1 second (d1s); • integration period is equal to 10 seconds (D10s); • the measurement has to be repeated 5 times (K5); • linear detector is selected to the Leq calculations (L0);... - Page 144 SV 971A User Manual – Appendixes I(nn) LEPd result (ccc – the value in dB, nn – the value of Exposure Time in minutes); Ltm3 result (ccc – the value in dB); Ltm5 result (ccc – the value in dB);...
- Page 145 SV 971A User Manual – Appendixes L(nn) value L of the nn statistics (ccc – the value in dB); PTC result (ccc – the counter value); PTP result (ccc – the value in %); ULT result (ccc – value in seconds);...
-
Page 146: Function #3 - Measurement Results Read - Out In 1/1- And 1/3- Octave Modes
SV 971A User Manual – Appendixes The exemplary answer: #2,T30,1,50.0Hz:0.36s,63.0Hz:0.41s,80.0Hz:0.20s,100Hz:--- ,125Hz:0.07s,160Hz:0.09s,200Hz:0.32s,250Hz:0.33s,315Hz:0.44s,400Hz:0.29s,500Hz:0.39s,630Hz:0.49 s,800Hz:0.44s,1.00k:0.47s,1.25k:0.46s,1.60k:0.34s,2.00k:0.42s,2.50k:0.40s,3.15k:0.42s,4.00k:0.42s,5. 00k:0.41s,TOT.A:0.42s,TOT.C:0.42s,TOT.Z:0.42s; A.2.3. Read-out the STIPA results #2,STI,CP; this command creates new project and returns new project name. #2,STI,CA; this command creates new area and returns new area name. -
Page 147: Function #4 - Setup File Read - Out
SV 971A User Manual – Appendixes #3,P; - peak spectrum The device responds, sending the last measured spectrum (when the instrument is in STOP state) or currently measured spectrum (when the instrument is in RUN state) in the following format: #3[,T<time>];<Status Byte>... -
Page 148: Function #5 - Statistical Analysis Results Read - Out
When an error is detected in the file specification or data, the instrument responds with: #4,?; Note: Current setup file placed in RAM is serviced by this command in SV 971A only. For data files access see A.1 Function #D – data files access. -
Page 149: Function #7 - Special Control Functions
SV 971A User Manual – Appendixes Counter of the class is a four-byte word containing the number of the measurements belonging to the current class. Note: The bytes in the words are sent <LSB> (least significant byte) first. Note: ASCII part of the response ends with semicolon “;”. Status byte, transmission counter and data bytes are coded in binary form. -
Page 150: Function #D - Data Files Access
SV 971A User Manual – Appendixes Note: #9 function is blocked during measurements running state (#1,S1;). Stop the measurements (#1,S0;) before using the function. #D – UNCTION DATA FILES ACCESS #D functions are used to access data files in the instrument’s storage like microSD card or USB Flash Disc with FAT file system. -
Page 151: Function #S - Direct Setup Access
SV 971A User Manual – Appendixes Response: #D,e; - command was executed #D,e,?; - command cannot be executed 7) #D,e; function enables to delete all files in the working directory. Response: #D,e; - command was executed #D,e,?; - command cannot be executed 8) #D,m,<address>,<dirName>;... -
Page 152: Control Setting Codes
Note: Some of the #S functions are blocked during measurements running state (#1,S1;). Stop the measurements (#1,S0;) before changing these settings. ONTROL SETTING CODES The control setting codes used in the SV 971A instrument are given in the below tables: Table A.1 Unit information Table A.2 Measurements settings and control Table A.3 Calibration and microphone settings... - Page 153 SV 971A User Manual – Appendixes Table A.1 Unit information Group name Code description code code code Unit type Returns unit subtype. Unit subtype 2 – SV 971A xxxxxx Serial number a.bb.c – firmware version a.bb.0c – beta firmware version...
- Page 154 SV 971A User Manual – Appendixes Group name Code description code code code nnh - nn number in hours infinity (measurement finished by pressing the Stop or remotely - by sending S0 control code) 24 hours 8 hours 1 hour...
- Page 155 SV 971A User Manual – Appendixes Group name Code description code code code gradient [dB] (1 100); default Measure trigger gradient 10dB/(trigger period) #7,AS,<e>,<HH>,<MM>,<hh>,<mm>,<dW>,<m R>; where: <e> - On (e=1), Off (e=0), <HH> - hour of the measurement start, <MM>...
- Page 156 SV 971A User Manual – Appendixes Group name Code description code code code – type of calibration: 0 - none, 1 - by measurement, 2 - by sensitivity, 3 - factory calibration, hh:mm:ss – time of calibration, DD/MM/YYYY – date of calibration, –...
- Page 157 SV 971A User Manual – Appendixes Group name Code description code code code #7,TS,<sn>; Where <sn> - microphone serial number, Load TEDS memory. Load TEDs Table A.4 Profile settings Group name Code description code code code Fk:n - k filter in profile n k: 1 - Z filter, 2 –...
- Page 158 SV 971A User Manual – Appendixes Table A.5 Spectrum settings Group name Code description code code code Z filter Filter type in 1/x OCTAVE A filter analysis C filter B filter Linear Detector type in 1/x OCTAVE Fast analysis Slow Table A.6 Dosimeter settings...
- Page 159 SV 971A User Manual – Appendixes Group name Code description code code code k exchange rate in profile n+1, n (0 2), k (2 6) xk:n - k threshold level in profile n, k (70 140) dB n: 1, 2, 3 –...
- Page 160 SV 971A User Manual – Appendixes Group name Code description code code code xxxxx - xxxxx up to 8 characters (permitted Area Name characters: 0-9, A-Z and '_') xxxxx - xxxxx up to 8 characters (permitted Source Name characters: 0-9, A-Z and '_')
- Page 161 SV 971A User Manual – Appendixes Group name Code description code code code hour (0 23) Pause 1 - start hour minute (0 59) Pause 1 - start minute hour (0 23) Pause 1 - stop hour minute (0 ...
- Page 162 SV 971A User Manual – Appendixes Group name Code description code code code Level– gradient+ manual integration period Format Extensible 48 kHz 24 kHz Sampling 12 kHz Z filter A filter Filter C filter B filter x gain [dB] used in 16 bit mode (0 40) Gain x level [dB] (24 ...
- Page 163 SV 971A User Manual – Appendixes Group name Code description code code code Note: this setting must be on in order to create a logger data file! Bx:n - x – sum of the following flags: b0 - logger with Lpeak values in profile n...
- Page 164 SV 971A User Manual – Appendixes Group name Code description code code code Split minute (0 59) for time number n-1, n (0 5) text – up to 128 characters of user text added each data file. Default text “ ”. Permitted...
- Page 165 SV 971A User Manual – Appendixes Group name Code description code code code 32 - Unlock Keyboard lock Lock Unlock Files lock Lock Normal Full Main View Mode Large Spectrum View Normal Spectrum View Mode Full 3-profiles View Normal 3-profiles View Mode...
- Page 166 SV 971A User Manual – Appendixes Group name Code description code code code Display Lden result in the main and 3-profile views Valid for function other than Dosimeter. Display LEPd result in the main and 3-profile views Valid for function other than Dosimeter.
- Page 167 SV 971A User Manual – Appendixes Group name Code description code code code Display D_8h result in the main and 3-profile views Valid for Dosimeter function. Display PrDose result in the main and 3-profile views Valid for Dosimeter function. Display Lav result in the main and 3-profile views Valid for Dosimeter function.
- Page 168 SV 971A User Manual – Appendixes Group name Code description code code code Display TWA result in the main and 3-profile views Valid for Dosimeter function. Display PrTWA result in the main and 3-profile views Valid for Dosimeter function. Display Lc-a result in the main and 3-profile views Valid for Dosimeter function.
- Page 169 SV 971A User Manual – Appendixes Group name Code description code code code 15 - 16 - 17 - x result in profile n+1, n (0 2) Time Lpeak Lmax Lmin Dose D_8h PrDOSE 10 - 11 - 12 -...
- Page 170 SV 971A User Manual – Appendixes Group name Code description code code code Display auto rotate Colourful Colour Scheme Black/White Warning: Logger Off On (default) Warning: Power Off On (default) Warning: Preamplifier On (default) disconnected Warning: Save changes On (default) Table A.14 Setup settings...
- Page 171 SV 971A User Manual – Appendixes Table A.15 Alarms settings (valid only in the Dosimeter function) Group name Code description code code code threshold in dB for profile n+1, n (0 2) Alarm Dose threshold threshold in dB for profile n+1, n (0 2) Alarm D_8h threshold threshold for profile n+1, n (0 ...
- Page 172 SV 971A User Manual – Appendixes Group name Code description code code code -1 - SD disk not ready SD card: version of Fat file FAT16 system 2 – FAT32 number of sectors. SD card: number of sectors Sector is 512 bytes in size number of free sectors.
- Page 173 SV 971A User Manual – Appendixes Group name Code description code code code where <bat>: 1 100 – battery state in [%] - external USB power supply volt - battery voltage [mV] multiplied by 10; Battery voltage volt - USB voltage [mV] multiplied by 10;...
- Page 174 SV 971A User Manual – Appendixes Group name Code description code code code Reading (response from the instrument): #7,RT,<hour>,<min>,<sec>,<day>,<month>,<ye ar>; Writing: #7,RT,<hour>,<min>,<sec>,<day>,<month>,<ye ar>; where hour (0 23) <hour> - min (0 59) <min> - sec (0 59) <sec>...
- Page 175 SV 971A User Manual – Appendixes Group name Code description code code code Print L profiles result Print Dose profiles result Print D_h8 profiles result Print PrDose profiles result Print Lav profiles result Print Leq profiles result Print LE profiles result...
- Page 176 SV 971A User Manual – Appendixes Group name Code description code code code Print SD profiles result print statistic for statistical level n, Print statistics n (0 9), Print 20Hz octave result Valid for or 1/3 Octave function. Print 25Hz octave result Valid for 1/3 Octave function.
- Page 177 SV 971A User Manual – Appendixes Group name Code description code code code Print 500Hz octave result Valid for 1/1 Octave or 1/3 Octave function. Print 630Hz octave result Valid for or 1/3 Octave function. Print 800Hz octave result Valid for 1/3 Octave function.
- Page 178 SV 971A User Manual – Appendixes Group name Code description code code code Print 20kHz octave result Valid for or 1/3 Octave function. Print total A result Valid for 1/1 Octave or 1/3 Octave function. Print total C result Valid for 1/1 Octave or 1/3 Octave function.
-
Page 179: Appendix B. Data File Structures
FILES Each file containing data from the SV 971A instrument consists of several groups of words. In the case of SV 971A (the internal file system rev. 1.05), there are two different types of files containing: • the results stored in the file in the instrument’s logger (cf. App. B.2);... - Page 180 SV 971A User Manual – Appendixes Table B.1.1. SvanPC file header Word number Name Comment “SvanPC” 0..2 reserved reserved reserved reserved 6..15 reserved reserved … … … Table B.1.2. File header Word Name Comment number [01, nn=header’s length] 0xnn01 1..4...
- Page 181 SV 971A User Manual – Appendixes Table B.1.4. Calibration settings Word Name Comment number [47, nn=header’s length] 0xnn47 type of calibration performed prior to measurement: 0 - none 1 - By Measurement (manual) PreCalibrType 2 - Remote 3 - Factory Calibration...
- Page 182 SV 971A User Manual – Appendixes Dosimeter 102 - 1/1 Octave & Dosimeter, 103 - 1/3 Octave & Dosimeter, RT60 19 - STIPA measurement input type: MeasureInput 2 - Microphone measurement range: 1 - Low Range 2 - Normal calibration flags:...
- Page 183 SV 971A User Manual – Appendixes method of viewing results Leq and Lav 0 - Both Leq & Lav 1 - Mutually exclusive (visibility depends of the EXCHANGE RATE parameter) compensating filter for microphones: 0 - switched off, MicComp 1 - switched on...
- Page 184 SV 971A User Manual – Appendixes 0 - off. 1 - on. Field Compensation: 0 – Off 1 – Free Field FieldCompensation 2 – Diffuse Field 3 – Outdoor Environmental 4 – Outdoor Airport profile threshold level for ULT calculation 70 ÷ 140 dB (*10) UL Th.
- Page 185 SV 971A User Manual – Appendixes mm – minute Pause[2] programmable pause no. 2. start time of the pause no. 2 in format 0xhhmm hh – hour PauseBegin[2] mm – minute end time of the pause no. 2 in format 0xhhmm: hh –...
- Page 186 SV 971A User Manual – Appendixes TriggerPre reserved TriggerPost reserved reserved TriggerSampling reserved TriggerRecTime trigger period given in 0.1 ms. If zero Step is equal to logger time- TriggerStep step (cf. Tab. B.1.15) reserved TriggerFilter reserved BitsPerSample reserved Range reserved...
- Page 187 SV 971A User Manual – Appendixes Table B.1.9. Wave-file recording parameters Word Name Comment number [2D, nn=block’s length] 0xnn2D trigger mode: 0 - Off, 1 - recording whole measurement 2 - recording on trigger Slope+ 3 - recording on trigger Slope–...
- Page 188 SV 971A User Manual – Appendixes detector type in the 1 profile: 0 - Imp., DetectorP[1] 1 - Fast, 2 - Slow filter type in the 1 profile: 1 - Z, 2 - A, FilterP[1] 3 - C 5 – B 6 –...
- Page 189 SV 971A User Manual – Appendixes filter type for Peak result calculation in the 2 profile: 1 - Z, 2 - A, FilterPeakP[2] 3 - C 5 – B 6 – LF reserved reserved [06, mm=sub-block’s length] 0xmm06 detector type in the 3 profile: 0 - Imp.,...
- Page 190 SV 971A User Manual – Appendixes Table B.1.11. Display settings of the main results Word Name Comment number [48, nn=header’s length] 0xnn48 0 – TIME result not displayed, 1 - TIME result displayed TIME 0 – Lxpeak result not displayed, 1 – Lxpeak...
- Page 191 SV 971A User Manual – Appendixes NofClasses[1] number of classes in the first profile (120) BottomClass[1] bottom class boundary (*10 dB) in the first profile ClassWidth[1] class width (*10 dB) in the first profile [0A, mm=sub-block’s length] 0xmm0A NofClasses[2] number of classes in the second profile (120)
- Page 192 SV 971A User Manual – Appendixes Table B.1.15. Header of the Summary Results Record (saved in Summary Results Record) Word Name Comment number [59, nn=header’s length] 0xnn59 1..2 RecNumber Summary Results Record number: 1.. … … … Table B.1.16_SLM. Main results in the SLM mode (saved in Summary Results Record)
- Page 193 SV 971A User Manual – Appendixes Result[2][6] Lxyeq value in the 2 profile (*100 dB) Result[2][7] Lden value in the 2 profile (*100 dB) Result[2][8] Ltm3 value in the 2 profile (*100 dB) Result[2][9] Ltm5 value in the 2 profile (*100 dB)
- Page 194 SV 971A User Manual – Appendixes Table B.1.16_DM. Main results in Dosimeter mode (saved in Summary Results Record) Word Name Comment number [07, nn=block’s length] 0xnn07 [used_profile, profile’s mask] 0x0307 [08, mm=sub-block’s length] 0xmm08 3..4 MeasureTime time of the measurement...
- Page 195 SV 971A User Manual – Appendixes UnderRes[2] under-range value in the 2 profile 39..40 ULTime[2] ULT value in the 2 profile (sec.) 41..42 PTC[2] PTC value in the 2 profile UnitFlags flags word for measurement cycle (definition in table B.1.6)
- Page 196 SV 971A User Manual – Appendixes number of the Ln statistics; 3+i*(pp+1) nn[i] i=0..N-1 value of the Ln statistics 3+i*(pp+1)+ Lnn[i,p] for profile p (p=1..pp) (*100 dB) … … … Table B.1.18. 1/1 Octave analysis results (saved in Summary Results Record)
- Page 197 SV 971A User Manual – Appendixes Table B.1.20. Results of the statistical analysis in profiles (saved in Summary Results Record) Word Name Comment number 0x010B [0B, prof_mask#1] SubblockLength 2 * number of classes in the first profile + 2 2..3...
- Page 198 SV 971A User Manual – Appendixes measure time in seconds MeasureTime reserved smoothing parameter (0 means no smoothing) DispSmooth noise margin level (*10 dB) NoiseMargin reserved Reserved number of averaged results AverNo … Table B.1.23. RT60 results Word Name Comment number [1B, 00= block’s length in the second word]...
- Page 199 SV 971A User Manual – Appendixes Table B.1.24. RT60 averaged results Word Name Comment number [1C, 00= block’s length in the second word] 0x001C BlockLength length of the block LowestFreq lowest 1/3 Octave frequency (*100 Hz) NTer number of 1/3 Octave values...
- Page 200 SV 971A User Manual – Appendixes area name length area name 6+N.. AreaName[M] point Id 6+N+M PointId source name length 7+N+M source name 8+N+M.. SourceName[K] 8+N+M+ Calibration factor level (*10 dB) CalibrLevel reserved … Table B.1.26. STIPA results Word Name...
-
Page 201: Structure Of The File Containing Results From Logger
SV 971A User Manual – Appendixes Table B.1.27. STIPA noise results Word Name Comment number [62, 00= block’s length in the second word] 0x0062 BlockLength length of the block STIPA analysis frequency count STIPA distortion table (*100 dB) Distortion[N] reserved …... - Page 202 SV 971A User Manual – Appendixes (1) flag record < flags > : b0: 1- the overload detected, 0 - the overload not detected b1: 1- the excessive self-vibration detected, 0 - the excessive self-vibration overload not detected (2) results of the measurement from the first profile if the corresponding LOGGER position was active (paths: Measurement / Logging / Logger Res.
-
Page 203: Record With The State Of The Markers
SV 971A User Manual – Appendixes B.2.1.2. Record with the state of the markers The record with the state of the markers consists of one word: <0x8nnn> in which 12 bits nnn denote the state of the markers: b11 = state of #12 marker... -
Page 204: Record With Summary Results
SV 971A User Manual – Appendixes B.2.1.6. Record with Summary Results The format of the data frame is as follows: HS L (optional) L (optional) where: starting header (1 word) length of the block (field is optional and occurs only when b7..b0 in header are set to zero) Summary Data: - Main results (cf. -
Page 205: Record With Gps Data
SV 971A User Manual – Appendixes The HEADER format is as follows: where: b15 - 1 b14 - 1 b13 - 0 b12 - 0, b11 - header type: 0 - HS 1 - HE b10 - 1 b9 - 0 b8 - 0 b15÷b8 –... -
Page 206: Structure Of The Setup File
SV 971A User Manual – Appendixes B.3 S SETUP TRUCTURE OF THE FILE SvanPC file header - cf. Tab. B.1.1. File header - cf. Tab. B.1.2. Unit and software specification - cf. Tab. B.1.3. Setup data - cf. Tab. B.1.23. -
Page 207: Appendix C. Technical Specifications
Specification of SV 971A as SLM in the standard configuration Statement of performance SV 971A working as SLM with all listed below accessories meets requirements of IEC 61672-1:2013 for the Class 1 Group X instruments. Configuration of the complete SLM... - Page 208 SV 971A User Manual – Appendixes Normal operating mode SV 971A in configuration with the SV 18A microphone preamplifier and ACO 7152 microphone with following settings: measurement range - Normal or Low (path: <Menu> / Measurement / Range – see Chapter 4.6), Microphone compensation - On, Field Compensation - Free Field, Windscreen compensation - Off (path: <Menu>...
- Page 209 SV 971A User Manual – Appendixes Table C.1.2. Linear operating ranges for the Low measurement range (for the sinusoidal signal and microphone sensitivity 32 mV/Pa) AS/F BS/F CS/F ZS/F AeqT BeqT CeqT Cpeak [dB] = 2 s) from from from...
- Page 210 SV 971A Diffuse Field compensation filter Note: Using special filters might change the frequency response and measuring ranges of SV 971A. Please check the below given specification. Linear operating ranges for LEQ measurements with the Diffuse Field filter The starting point at which tests of level linearity shall begin is 94.0 dB for the frequencies specifies below. For the Low measurement range and A weighting linearity test at 31.5 Hz, the starting point is 79 dB.
- Page 211 SV 971A User Manual – Appendixes RMS detector • Digital “True RMS“ with Peak detection, • Resolution 0.1 dB • Range 327.7 dB • Crest Factor unlimited (for signals in 20 kHz band). Overload detector The instrument has the built-in overload detectors. Both A/D converter and input amplifier overload conditions are detected.
- Page 212 SV 971A User Manual – Appendixes Typical stabilization time after change in 1 hour environmental conditions by 20C ≥ 1 sec Nominal delay between operating of the <Start> (Reset) key and beginning of a new measurement ≤ 1 sec Time...
- Page 213 SV 971A User Manual – Appendixes Table C.1.6. ACO 7152 Free Field correction for the electrostatic actuator and 0 deg incidence angle Frequency [Hz] [dB] 31.5 Correction 0.06 0.05 0.04 0.04 0.04 0.06 factors Uncertainty 0.25 0.25 0.25 0.25 0.25 0.25 0.25 0.25 0.25 0.25 0.25 0.25 0.25 0.25...
- Page 214 SV 971A User Manual – Appendixes SV18 preamplifier frequency response SV 18A typical frequency response 1000 10000 100000 1000000 1 V output 7 V output SV 971A frequency characteristics for 0 deg incidence angle...
- Page 215 SV 971A User Manual – Appendixes Effect of reflections and diffraction of the acoustic plane wave from the case of SV 971A (“Case Effect”) Table C.1.7. ACO 7152 and SV 971A typical frequency characteristics ACO 7152 typical SV 971A typical...
- Page 216 SV 971A User Manual – Appendixes ACO 7152 typical SV 971A typical SV 971A Uncertainty Frequency Free Field response Free Field response Case Effect (IEC 62585:2012) [Hz] [dB] [dB] [dB] [dB] 0.01 0.15 0.14 0.25 0.00 0.14 0.14 0.25 0.01 0.12...
- Page 217 SV 971A User Manual – Appendixes ACO 7152 typical SV 971A typical SV 971A Uncertainty Frequency Free Field response Free Field response Case Effect (IEC 62585:2012) [Hz] [dB] [dB] [dB] [dB] 2 239 -0.06 -0.01 0.05 0.25 2 304 -0.05 -0.03...
- Page 218 0.69 -0.02 0.35 19 953 0.61 0.48 -0.13 0.35 Table C.1.8. SV 971A Free Field corrections (combined: Microphone plus Case Effect) for electrostatic actuator and 0 deg incidence angle Frequency [Hz] [dB] 31.5 Correction -0,28 -0,35 -0,14 -0,18 -0,04 0,01...
- Page 219 SV 971A User Manual – Appendixes SV 971A directional characteristics Directional response of SV 971A with the ACO 7152 microphone and SV 18A preamplifier for specified frequencies. Typical total directional characteristics The round charts show the typical directional characteristic and the charts below shows the errors for angles.
- Page 220 SV 971A User Manual – Appendixes...
- Page 221 SV 971A User Manual – Appendixes...
- Page 222 SV 971A User Manual – Appendixes...
- Page 223 SV 971A User Manual – Appendixes...
- Page 224 SV 971A User Manual – Appendixes...
- Page 225 SV 971A User Manual – Appendixes Table C.1.9. SV 971A typical directional response Angle [ f [Hz] 0-10 10-20 20-30 30-40 40-50 50-60 60-70 70-80 80-90 90-100 0.03 0.03 0.03 0.04 0.04 0.05 0.06 0.06 0.07 0.08 0.02 0.03 0.03 0.04...
- Page 226 SV 971A User Manual – Appendixes f [Hz] 200-210 210-220 220-230 230-240 240-250 250-260 260-270 270-280 280-290 290-300 0.04 0.03 0.03 0.03 0.02 0.02 0.02 0.02 0.02 0.02 -0.05 -0.07 -0.08 -0.09 -0.10 -0.11 -0.11 -0.11 -0.11 -0.11 -0.03 -0.04 -0.05...
-
Page 227: Effect Of The Sa 22 Windscreen
SV 971A User Manual – Appendixes C.1.2 Effect of the SA 22 windscreen Note: When using the SA22 windscreen the Windscreen compensation filter must be On to ensure good tolerances margin of the SV 971A frequency response. SA 22 Windscreen Effect... - Page 228 SV 971A User Manual – Appendixes Frequency SA 22 typical Free Compensation Compensated SA 22 Uncertainty Field effect filter Free Field effect (IEC 62585:2012) [Hz] [dB] [dB] [dB] [dB] 0.20 -0.03 -0.04 -0.07 0.20 -0.03 -0.04 -0.07 0.20 -0.02 -0.04 -0.06...
- Page 229 SV 971A User Manual – Appendixes Frequency SA 22 typical Free Compensation Compensated SA 22 Uncertainty Field effect filter Free Field effect (IEC 62585:2012) [Hz] [dB] [dB] [dB] [dB] 0.47 -0.41 0.06 0.20 1 995 0.20 2 054 0.48 -0.42 0.06...
- Page 230 SV 971A User Manual – Appendixes Frequency SA 22 typical Free Compensation Compensated SA 22 Uncertainty Field effect filter Free Field effect (IEC 62585:2012) [Hz] [dB] [dB] [dB] [dB] 0.30 9 173 -0.04 -0.01 -0.05 0.30 9 441 -0.09 0.01 -0.08...
- Page 231 SV 971A User Manual – Appendixes Directional characteristics of SV 971A with SA 22 Directional response of SV 971A with the ACO 7152 microphone, SV 18A preamplifier and SA 22 windscreen for specified frequencies. Combined typical directional characteristics The round charts show the typical directional characteristic and the charts below shows the errors for angles.
- Page 232 SV 971A User Manual – Appendixes...
- Page 233 SV 971A User Manual – Appendixes...
- Page 234 SV 971A User Manual – Appendixes...
- Page 235 SV 971A User Manual – Appendixes...
- Page 236 SV 971A User Manual – Appendixes...
- Page 237 SV 971A User Manual – Appendixes Table C.1.11. Typical directional response of SV 971A with the SA 22 windscreen Angle [ f [Hz] 0-10 10-20 20-30 30-40 40-50 50-60 60-70 70-80 80-90 90-100 0.01 0.02 0.02 0.01 0.00 0.00 -0.01 -0.01...
- Page 238 SV 971A User Manual – Appendixes f [Hz] 200-210 210-220 220-230 230-240 240-250 250-260 260-270 270-280 280-290 290-300 -0.07 -0.06 -0.06 -0.06 -0.06 -0.05 -0.05 -0.04 -0.02 -0.01 -0.15 -0.16 -0.16 -0.16 -0.17 -0.17 -0.16 -0.16 -0.15 -0.14 -0.14 -0.16 -0.17...
-
Page 239: Effect Of The Sa 271A Outdoor Microphone Kit
Table C.1.13. Test conditions: SV 971A with microphone and preamplifier is mounted on the shaker. Ref 1. Vibration is applied in a direction perpendicular to the plane of the microphone diaphragm. - Page 240 SV 971A User Manual – Appendixes Table C.1.12. Typical effect of vibration perpendicular to the plane of the microphone diaphragm f (Hz) 15.6 31.25 62.5 1000 2000 [dB] Z filter 62.8 57.3 65.0 71.7 76.4 63.8 72.2 65.5 A filter 29.9...
-
Page 241: Specification Of Sv 971A As 1/1 Octave And 1/3 Octave Analyser
● SV 18A preamplifier throughout the ST 03 adapter ● Maximum input voltage: SV 971A meets the requirements of IEC 348 for the class 2 devices. The input voltage shall not exceed the limits between -10 V and +10 V. - Page 242 SV 971A User Manual – Appendixes Linear operating ranges Two measurement ranges are available: Normal and Low Table C.2.1. Linear operating range (with SV 18A preamplifier, ST 03 adapter) Linear operating range (with 10 dB margin from noise) (RMS for the sinusoidal signal at reference conditions @ 1 kHz, Range 0.0 dB calibration factor)
- Page 243 SV 971A User Manual – Appendixes Reference conditions as per IEC 61260-1:2014 • Reference temperature +23°C • Reference relative humidity • Static pressure 101.325 kPa Calibration (electrical) Calibration level 0.5 V < 0.2 dB (for the temperature T=+23°C 5°C for sinusoidal Basic accuracy in the band 5 Hz ÷...
-
Page 244: 1/1 And 1/3 Octave Filters
SV 971A User Manual – Appendixes Digital Filters Weighting filters meeting requirements of IEC 61672-1:2013 for the Class 1 “A” filters meeting requirements of IEC 61672-1:2013 for the Class 1 “C” filters meeting requirements of IEC 61672-1:2013 for the Class 1 “Z“ filters meeting IEC651 for the Class 1 filters See Chapter C.3 for the A, C, B and Z filters characteristics. - Page 245 SV 971A User Manual – Appendixes 8.0 kHz 1/1 octave filter 4.0 kHz 1/1 octave filter 2.0 kHz 1/1 octave filter...
- Page 246 SV 971A User Manual – Appendixes 1.0 kHz 1/1 octave filter 500 Hz 1/1 octave filter 250 Hz 1/1 octave filter...
- Page 247 SV 971A User Manual – Appendixes 125 Hz 1/1 octave filter 63.0 Hz 1/1 octave filter 31.5 Hz 1/1 octave filter...
- Page 248 SV 971A User Manual – Appendixes 16.0 Hz 1/1 octave filter 1/3 Octave filters 35 filters with centre frequencies from 8 Hz to 20 kHz (base 10), meeting IEC 61260-1:2014 standard for Class 1 1/3 octave filters for 16.0 kHz 1/1 octave filter...
- Page 249 SV 971A User Manual – Appendixes 1/3 octave filters for 4.0 kHz 1/1 octave filter 1/3 octave filters for 2.0 kHz 1/1 octave filter 1/3 octave filters for 1.00 kHz 1/1 octave filter...
- Page 250 SV 971A User Manual – Appendixes 1/3 octave filters for 500 Hz 1/1 octave filter 1/3 octave filters for 250 Hz 1/1 octave filter 1/3 octave filters for 125 Hz 1/1 octave filter...
- Page 251 SV 971A User Manual – Appendixes 1/3 octave filters for 63.0 Hz 1/1 octave filter 1/3 octave filters for 31.5 Hz 1/1 octave filter 1/3 octave filters for 16.0 Hz 1/1 octave filter...
- Page 252 SV 971A User Manual – Appendixes 1/3 octave filters for 8.00 Hz 1/1 octave filter Typical electrical noise floor for the 1/1 and 1/3 octave filters in the SV 971A instrument...
-
Page 253: Frequency Characteristics Of The Implemented Digital Filters
SV 971A User Manual – Appendixes C.3 F REQUENCY CHARACTERISTICS OF THE IMPLEMENTED DIGITAL FILTERS “A” filter Class 1 according to IEC 651& and IEC 61672-1:2013 “A” filter characteristics “C” filter Class 1 according to IEC 651 and IEC 61672-1:2013 “C”... - Page 254 SV 971A User Manual – Appendixes “Z” filter Class 1 according to IEC 61672-1:2013 “Z” filter characteristics...
-
Page 255: Msv 971A
Can be used typical Micro SD or Micro SDHC cards. Supported for up to 128 GB (provided that card was formatted as FAT32). Note: The originally supplied Kingston Industrial memory card has been tested by SVANTEK and cards of this type are strongly recommended for use when the original card is going to be replaced. - Page 256 Interface USB Type C The SV 971A USB-C 2.0 interface enables remote control of the instrument and data transfer with the speed up to that attainable with 480 MHz clock. Note: For effective operation with the USB, the High 480Mbps speed mode should be used, however when the interference RF field strength may exceed the value of 3V/m, then it is recommended to switch to the Full 12Mbps speed mode.
- Page 257 RS 232 interface (optional) The RS 232 interface option for SV 971A is provided by means of the SP 75 interface. It conforms to the EIA Standard RS 232C. It enables the user to programme remotely all instrument functions and the transmissions to and from the meter with the speed from 300 bit/s to 115200 bit/s.
- Page 258 Range: typically >50m line-of-sight and depending on local RF conditions. The instrument contains a wireless transmission module, BGM121 from Silicon Laboratories technologies. Copies of the modules regional approvals certificates may be obtained from Svantek or Silicon Laboratories. • Declaration ID: D033250, Controller Subsystem Qualified Design ID: 88831 FCC and ISEDC This product contains an FCC and Industry Canada certified Bluetooth®...
- Page 259 SV 971A User Manual – Appendixes This transmitter meets both portable and mobile limits as demonstrated in the RF Exposure Analysis and SAR test report. This transmitter must not be co-located or operating in conjunction with any other antenna or transmitter except in accordance with FCC multi-transmitter product procedures.
-
Page 260: Using The Sa 271A Outdoor Microphone Kit
0 deg means direction orthogonal to the membrane surface. 90 deg means direction parallel to the membrane surface. Frequency response of SV 971A with the SA 271A outdoor microphone kit is compensated by means of two digital filters which can be set in the Field Comp. - Page 261 On and the Field Compensation must be set to Environment or Airport (path: <Menu> / Measurement / Comp. Filter). Statement of performance SV 971A working as the SLM with SA 271A meets requirements of IEC 61672:2013 for the Class 1 Group X instruments. Linear operating ranges with the Environment filter The starting point at which tests of level linearity shall begin is 94.0 dB for the frequencies specifies below.
- Page 262 SV 971A User Manual – Appendixes Linear operating ranges with Airport filter The starting point at which tests of level linearity shall begin is 94.0 dB for the frequencies specifies below. For the Low measurement range and A weighting linearity test at 31.5 Hz, the starting point is 79 dB.
- Page 263 SV 971A User Manual – Appendixes ACO 7152 Free Field frequency response for 90 deg incidence angle Table C.5.7. ACO 7152 Free Field corrections for the electrostatic actuator for 90 deg incidence angle Frequency [Hz] [dB] 31.5 Correction 0.31 0.31 0.12...
- Page 264 SV 971A User Manual – Appendixes Free Field frequency characteristics of SV 971A with SA 271A for 90 deg incidence angle Table C.5.8. Typical Free Field frequency characteristics of SV 971A with SA 271A for 90 deg incidence angle Typical compensated...
- Page 265 SV 971A User Manual – Appendixes Typical compensated Compensated Case Compensation filter for response of SV 971A with Effect of SA 271A for Uncertainty Frequency 90 deg incidence angle SA 271A for 90 deg 90 deg incidence (IEC 62585:2012) “Environment”...
- Page 266 SV 971A User Manual – Appendixes Typical compensated Compensated Case Compensation filter for response of SV 971A with Effect of SA 271A for Uncertainty Frequency 90 deg incidence angle SA 271A for 90 deg 90 deg incidence (IEC 62585:2012) “Environment”...
- Page 267 SV 971A User Manual – Appendixes Typical compensated Compensated Case Compensation filter for response of SV 971A with Effect of SA 271A for Uncertainty Frequency 90 deg incidence angle SA 271A for 90 deg 90 deg incidence (IEC 62585:2012) “Environment”...
- Page 268 SV 971A User Manual – Appendixes Free Field frequency characteristics of SV 971A with SA 271A for 0 deg incidence angle Table C.5.9. Typical Free Field frequency characteristics of SV 971A with SA 271A for 0 deg incidence angle Compensation filter for...
- Page 269 SV 971A User Manual – Appendixes Compensation filter for SA 271A typical Compensated Case Uncertainty Frequency 0 deg incidence angle compensated response for Effect for 0 deg (IEC 62585:2012) “Airport” 0 deg incidence angle incidence angle [Hz] [dB] [dB] [dB] [dB] -0.05...
- Page 270 SV 971A User Manual – Appendixes Compensation filter for SA 271A typical Compensated Case Uncertainty Frequency 0 deg incidence angle compensated response for Effect for 0 deg (IEC 62585:2012) “Airport” 0 deg incidence angle incidence angle [Hz] [dB] [dB] [dB]...
- Page 271 -24.74 -25.45 0.35 19 953 -22.54 -30.56 -31.17 0.35 Table C.5.10. Free Field corrections for SV 971A with SA 271A (combined: Microphone plus Case Effect) for the electrostatic actuator Frequency [Hz] Correction factors [dB] 31.5 0 deg -0.28 -0.35 -0.14 -0.18 -0.04 0.01...
- Page 272 SV 971A User Manual – Appendixes Free Field directional characteristics of SV 971A with SA 271A Directional response of SV 971A with the ACO 7152 microphone, SV 18A preamplifier and SA 271A outdoor microphone kit for specified frequencies. Combined typical directional characteristics The round charts show the typical directional characteristics and the charts below shows the errors for 0 deg and 90 deg incidence angles.
- Page 273 SV 971A User Manual – Appendixes 0 deg 0 deg 90 deg 90 deg 0 deg 0 deg 90 deg 90 deg...
- Page 274 SV 971A User Manual – Appendixes 0 deg 0 deg 90 deg 90 deg 0 deg 0 deg 90 deg 90 deg...
- Page 275 SV 971A User Manual – Appendixes 0 deg 0 deg 90 deg 90 deg 0 deg 0 deg 90 deg 90 deg...
- Page 276 SV 971A User Manual – Appendixes 0 deg 0 deg 90 deg 90 deg 0 deg 0 deg 90 deg 90 deg...
- Page 277 SV 971A User Manual – Appendixes 0 deg 0 deg 90 deg 90 deg 0 deg 0 deg 90 deg 90 deg...
- Page 278 SV 971A User Manual – Appendixes 0 deg 0 deg 90 deg 90 deg 0 deg 0 deg 90 deg 90 deg...
- Page 279 SV 971A User Manual – Appendixes 0 deg 0 deg 90 deg 90 deg 0 deg 0 deg 90 deg 90 deg...
- Page 280 SV 971A User Manual – Appendixes 0 deg 0 deg 90 deg 90 deg Table C.5.11. Typical directional response of SV 971A with SA 271A for 0 deg incidence angle f [Hz] 0-10 10-20 20-30 30-40 40-50 50-60 60-70 70-80...
- Page 281 SV 971A User Manual – Appendixes 11 200 -0.51 -1.69 -2.62 -3.13 -3.68 -3.71 -3.66 -3.81 -3.32 -3.17 11 800 -0.68 -2.16 -2.53 -3.00 -3.32 -3.59 -3.70 -3.84 -3.27 -3.14 12 500 -0.85 -1.97 -2.38 -2.47 -2.69 -2.91 -3.13 -3.13 -2.39...
- Page 282 SV 971A User Manual – Appendixes 8 000 -1.41 -1.45 -2.02 -2.39 -2.98 -3.03 -3.00 -2.83 -2.54 -2.73 8 500 -1.41 -1.44 -2.20 -2.78 -2.86 -3.05 -2.89 -2.94 -2.86 -2.83 9 000 -0.84 -1.02 -1.80 -2.32 -2.81 -2.43 -2.71 -2.69 -2.70...
-
Page 283: Declaration Of Conformity
SV 971A User Manual – Appendixes ECLARATION OF CONFORMITY Manufacturer: SVANTEK Sp. z o. o Address: Strzyglowska 81 04-872 Warszawa Poland SOUND LEVEL METER – ANALYZER, Class 1 Kind of product: Type: SV 971A Directive: Directive 2014/53/EU of The European Parliament and of The Council of 16 April... -
Page 284: Appendix D. Definitions And Formulae Of Measured Values
SV 971A User Manual – Appendixes APPENDIX D. DEFINITIONS AND FORMULAE OF MEASURED VALUES ASIC TERMS AND DEFINITIONS Current time period of the measurement in seconds. Last second of the measurement. Exposure time in seconds (time period during which a person is exposed to the action of noise). -
Page 285: Efinitions And Formulas Of The
SV 971A User Manual – Appendixes Threshold sound level set in the Threshold Level parameter. The available values are as follows: None, 60dB up to 90dB in 5 dB steps. Criterion sound level set in the Criterion Level parameter. The available values are from 60dB up to 90dB in 5 dB steps. - Page 286 SV 971A User Manual – Appendixes L(A/C/Z)peak Peak sound level expressed in dB, for Peak frequency weightings A, C, Z, symbols are LApeak, LCpeak and LZpeak. Peak sound level is calculated for the given T.
- Page 287 SV 971A User Manual – Appendixes If <6h-18h> option is selected for the <Day Time Limits> in the instrument then: (day-time) starts from 6 am and ends at 6 pm, (evening-time) starts from 6 pm and ends at 10 pm, (night-time) starts at 10 pm and ends at 6 am.
-
Page 288: Efinitions And Formulas Of The Additional Osimeter Function Results
SV 971A User Manual – Appendixes Statistical level is the certain boundary see Chapter D.4 level surpassed by the temporary noise level values in not more than n% of the observation period Expected value. Calculated on the basis of 100ms Leq results. -
Page 289: Statistical Levels - L N Definition
SV 971A User Manual – Appendixes Amount of the acoustical energy received by the worker. 3600 E_8h The E_8h result (Exposition in 8 hours) represents the amount of the acoustical energy received by the worker during 8 hours. - Page 290 practice, value is strictly determined for the measuring instrument. For SV 971A, there are 240 classes and the width of each class is 0.5 dB. The histogram is the set of the class density values calculated for all classes.
-
Page 291: Appendix E. Reverberation Time Calculations
SV 971A User Manual – Appendixes APPENDIX E. REVERBERATION TIME CALCULATIONS E.1 I NTRODUCTION If an impulsive sound is generated in a room with reflecting boundaries, repeated reflections at the boundaries result in the rapid establishment of a more or less uniform sound field. This field then decays as the sound energy is absorbed by the bounding materials. -
Page 292: Reverberation Time
SV 971A User Manual – Appendixes (RT 60) is obtained using the slope coefficient of the decay curve. The type of the definition from which slope coefficient is calculated (EDT, RT 20, RT 30 or user defined) depends on the difference between levels L... - Page 293 SV 971A User Manual – Appendixes In case of the impulse method, the sound pressure level values between points t and t are approximated with the straight line (y = a · x + b) by the linear regression. The RT 20 value is calculated using the slope coefficient ‘a’...
-
Page 294: Description Of The Decay Curve Recording In Different Measurement Methods
SV 971A User Manual – Appendixes linear approximation 5 dB [dB] 30 dB noise margin t [s] Fig 4. The RT 30 evaluation E.3 D ESCRIPTION OF THE DECAY CURVE RECORDING IN DIFFERENT MEASUREMENT METHODS ➢ DECAY method This RT 60 measurement method requires omnidirectional sound source which emits pink noise in appropriate frequency band. - Page 295 SV 971A User Manual – Appendixes The measurement time in this method consists of: • The time between markers t and t in which the omnidirectional sound source emits acoustic power and the SVAN xxx analyser measures the actual sound pressure level.
- Page 296 SV 971A User Manual – Appendixes The graphical illustration of data registering in this method is presented in Figure 7. [dB] 10 dB t [s] trig registration time Fig 7. Data recording in the impulse method of the reverberation time evaluation The measurement time in this method consists of: •...
-
Page 297: Appendix F. Sa 271A Outdoor Microphone Kit Assembly Guide
SV 971A User Manual – Appendixes APPENDIX F. SA 271A OUTDOOR MICROPHONE KIT ASSEMBLY GUIDE F.1 P SA 271A kit: Tools: 1 - tube K - 3mm Allen key 2 - dummy microphone 3 - O-ring type gasket Spare parts: O1 - O-ring type gasket Ø35x1... - Page 298 SV 971A User Manual – Appendixes O-ring gasket locations inside...
-
Page 299: Assembly Of Sa 271A
SV 971A User Manual – Appendixes F.2 A SA 271A SSEMBLY OF 1. Secure preamplifier (A) with the dummy microphone (2) and connect the cable (C). 2. Pull tube (1) over the cable. - Page 300 SV 971A User Manual – Appendixes 3. Connect the clamp halves (4) to the connector and insert O-ring gasket (3) on the lightning signed place. 4. Apply the upper, conical part (5) on the preamplifier. Note: Do not use preamplifier without the dummy microphone. It can cause damage of the O-...
- Page 301 SV 971A User Manual – Appendixes 5. Screw the tube on the cone by rotating the tube – so as to not twist the cable. 6. Replace the dummy microphone (2) with the ½” microphone cartridge (B).
- Page 302 SV 971A User Manual – Appendixes 7. Calibrate the complete system using SVANTEK acoustic calibrator. 8. Install the microphone protection tube (6). Use the Allen key (K) as a pin at protecting tube orifice.
- Page 303 SV 971A User Manual – Appendixes 9. Mount windscreen (8) and the anti-bird spikes (7). 10. Slide the desiccator (9) inside the tube.
- Page 304 SV 971A User Manual – Appendixes 11. Place the cable in the slot and connect the bottom part (12) by three screws (10) with washers (11). Use the Allen key (K). 12. Mount the completed system on the dedicated tripod or pole. Use ¼” thread adapter (13) (if...
-
Page 305: Important Notes
SV 971A User Manual – Appendixes F.3 I MPORTANT NOTES Note: The SA 209 (8) at the part set picture) foam windscreen protects microphone from wind and rain. If the SA 209 windscreen is used continuously for a long period of time it is recommended to replace it at least once a year.
Need help?
Do you have a question about the SV 971A and is the answer not in the manual?
Questions and answers