Table of Contents
Advertisement
Quick Links
Owner's manual & Installation manual
使用說明書和安裝說明書
사용 설명 및 설치 설명서
VRX746VD
AM/FM DVD VIDEO / VIDEO CD / CD / MP3
PLAYER / CD CHANGER CONTROLLER WITH 7"
LC DISPLAY
帶7英寸液晶顯示器調
帶7英寸液晶顯示器調
帶7英寸液晶顯示器調幅 幅 幅 幅 幅 (AM)/
帶7英寸液晶顯示器調
帶7英寸液晶顯示器調
VIDEO/VIDEO CD/CD/MP3播放機
VIDEO/VIDEO CD/CD/MP3
VIDEO/VIDEO CD/CD/MP3
VIDEO/VIDEO CD/CD/MP3
VIDEO/VIDEO CD/CD/MP3
控制器
控制器
控制器
控制器
控制器
7인치 LC 디스플레이 화면의 AM/FM
DVD 비디오/비디오 CD/CD/MP3 플레
이어 / CD 체인저 컨트롤러
R
(AM)/調 調 調 調 調 頻 頻 頻 頻 頻 (FM)DVD
(AM)/
(AM)/
(AM)/
播放機
播放機
播放機 / CD
播放機
R
(FM)DVD
(FM)DVD
(FM)DVD
(FM)DVD
/ CD換片機
/ CD
/ CD
/ CD
換片機
換片機
換片機
換片機
Advertisement
Chapters
Table of Contents

Related Manuals for Clarion VRX746VD


Summary of Contents for Clarion VRX746VD
- Page 1 Owner’s manual & Installation manual 使用說明書和安裝說明書 사용 설명 및 설치 설명서 VRX746VD AM/FM DVD VIDEO / VIDEO CD / CD / MP3 PLAYER / CD CHANGER CONTROLLER WITH 7" LC DISPLAY 帶7英寸液晶顯示器調 帶7英寸液晶顯示器調 帶7英寸液晶顯示器調幅 幅 幅 幅 幅 (AM)/ 帶7英寸液晶顯示器調...
-
Page 2: Table Of Contents
Thank you for purchasing the Clarion VRX746VD. ∗ This owner’s manual is for the VRX746VD. ∗ Please read this owner’s manual in its entirety before operating this equipment. ∗ After reading this manual, be sure to keep it in a handy place (e.g., glove compartment). -
Page 3: Precautions
These may damage the disc or cause breakdown of the internal mechanism. VRX746VD Storage • Do not expose discs to direct sunlight or any heat source. • Do not expose discs to excess humidity or dust. -
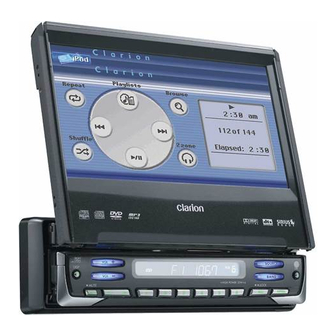
Page 4: Nomenclature
/ 전면 패널이 열린 상태에서 Note: Be sure to unfold this page and refer to the front diagrams as you read each chapter. 注意﹕在閱讀每一章時,請務必打開本頁,并參照本頁的前視圖。 참고: 이 페이지를 펼쳐두고, 각 장을 읽을때 전면 그림을 참조하도록 하십시오. VRX746VD 4. NOMENCLATURE Names of Buttons [ FUNC ] Note: •... - Page 5 5 steps when the liquid crystal panel is open. • When the panel is closed, holding this button depressed for 2 seconds or longer will enable the panel calibration function. [Q] button • Use this button to eject a disc. VRX746VD...
-
Page 6: Display
: Stereo indication : MAGNA BASS-EX indication : ALL indication : Scan indication : Repeat indication : Random indication VRX746VD Operation status indication ∗The frequency, play time, clock, etc. are displayed. : Preset channel indication Disc number indication ∗The disc numbers corresponding to the discs in the DVD or CD changer light. -
Page 7: Color Lcd Display
When the 5.1ch surround decoder (DVH940) is connected, the signal format of the digital input signal (for example, “Dolby D 3/2+LFE”) is displayed. WEST COAST (user title) USER SHINE (user title) SHINE (disc title) Time has come (track title) Time has come (artist) Clock time VRX746VD... -
Page 8: Outline Of Button And Touchkey Operation
∗ In addition to the above conditions, when the liquid crystal panel is open and the “PUSH POWER KEY” message is displayed, the system check screen can be displayed by pressing the [FUNC] button. VRX746VD ∗2 ∗1 Engine ON position... - Page 9 ∗6: Touch the [z] key to go to the next menu. Touch the [w] key to return to the previous menu. ∗7: Touch the [ESC] key to return to the main screen. (LIST screen) (Title input screen) ∗7 (Next page) ∗5 ∗6 VRX746VD...
- Page 10 ∗12: When the playback status has been displayed by pressing the [P.TIME] key, the display can be canceled by touching the screen. VRX746VD ∗8 ∗9 ∗11 ∗10 (SUB menu) ∗12...
- Page 11 (Next page) (ADJUST MODE menu) (DVD SETUP menu) (MONITOR menu) MONI ADJ PARENRTAL LEBEL VRX746VD...
- Page 12 When a 5.1 ch Surround (ADJUST MODE menu) Decorder is connected (AUDIO MODE menu) (GENERAL menu) BAL/FAD CLOCK VRX746VD...
- Page 13 (AUDIO EXT. menu) (AUDIO MODE menu) SPEAKER SEL STATUS SUB WOOFER VRX746VD...
-
Page 14: Remote Control
• Do not short-circuit, disassemble or heat batteries. • Do not dispose of batteries into fire or flames. • Dispose of spent batteries properly. VRX746VD Signal transmitter Rear side Operating range: 30˚ in all directions [ MUTE ] [ VOLUME ] [ P.TIME ]... -
Page 15: Features
∗ If you want to select a menu after the SETUP menu is displayed, touch the operation keys on the menu screen. [DVD TITLE] button • Press to display the title screen on DVD video discs. Some discs do not display the title screen. VRX746VD... -
Page 16: Cd Changer Mode
DVD video mode. (This button is available only on multiple angles DVDs.) [SLOW] button • Press to perform slow playback in DVD video or video CD mode. VRX746VD G CD changer mode [BAND] button • Press to switch discs. [DISC SEL] button •... -
Page 17: Dcp
Be careful not to damage it by pressing on it with fingernails, screwdrivers, etc. • Remote control unit cannot be used when front panel is open. Note: • If the DCP is dirty, wipe off the dirt with a soft dry cloth only. VRX746VD... -
Page 18: Cautions On Handling
VRX746VD • Do not place anything on the display when the panel is tilted. • The remote controller may not work if the remote control sensor is exposed to direct sunlight. -
Page 19: Dvd Video System
This low sound compression format delivers a large amount of data and makes it possible to reproduce a high quality sound. Menu screens Menus can be called up during DVD video playback to perform menu setting. • Example showing menu display VRX746VD... -
Page 20: About The Registered Marks Etc
DVD video players and DVD discs by sales area. The DVD video region number is marked on the disc jacket as shown below. VRX746VD TV color system This DVD player plays NTSC or PAL discs only and cannot be used for playback of SECAM discs. -
Page 21: Operations
Information Panel of the DCP. In this case, those characters will only be left blank. • SUB displays do not appear when panel is open. CAUTION MAIN Display SUB Display MAIN Display VRX746VD... - Page 22 • If the liquid crystal panel stops at any point less than 70°, the electronic beep will sound. VRX746VD Panel calibration function The liquid crystal panel’s maximum angle of inclination can be adjusted to match the installation configuration within the automobile.
-
Page 23: Adjusting The Audio
: –6 to 8 (The factory default setting is “0”) FREQ. : 50Hz/80Hz/120Hz (The factory default setting is “50”) : 1/1.25/1.5/2 (The factory default setting is “1”) 5. Touch the [RTN] key, [ESC] key, or press the [ADJ] button. VRX746VD... -
Page 24: Adjusting The Monitor
1. Press the [ADJ] button, then touch the [AUDIO] key. 2. Touch the [NON FADER VOL] key. VRX746VD 3. Touch the [w] or [z] key to adjust to desirable level. ∗ The factory default setting is “0”. (Setting range: –6 to 6) - Page 25 1. Press and hold the [ADJ] button for 1 second or longer. 2. Press the [FUNC] button to select the desired mode. 3. To cancel the monitor lock, press the [ADJ] button. The screen shows the image of the selected mode. VRX746VD...
-
Page 26: Setting The Beep
Touch the [BEEP] key to select “ON” and “OFF”. 3. Touch the [RTN] key, [ESC] key, or press the [ADJ] button. VRX746VD 4. Touch the [RTN] key, [ESC] key, or press the [ADJ] button. 5. To cancel the monitor lock, press [ADJ] button, touch the [REAR MONI LOCK] key and the [OFF] key. -
Page 27: Clock Adjustment
* The factory default setting is “10s”. 1. Press the [ADJ] button. 2. Touch the [GENERAL] key. 3. Touch the [HVAC MODE] key to set to “5s,” “10s,” or “30s.” 4. Touch the [RTN] key, [ESC] key, or press the [ADJ] button. VRX746VD... -
Page 28: Radio Operations
Selecting stations with the KEY PAD ∗ This function displays the KEY PAD on the screen enabling you to tune by entering a frequency. VRX746VD 1. Touch the [SRCH] key to switch the KEY PAD. 2. Touch the [0]~[9] key corresponding with the frequency you desired. -
Page 29: Preset Scan
GRecalling a station with ISR 1. In any mode, press [ISR] button to turn on the radio function and tune the selected radio station. “ISR” appears in the display. Press [ISR] button again to return to the previous mode. VRX746VD... -
Page 30: Dvd Video Player Operations
“WIDE” © “N PS” © “N LB” © “WIDE” ∗ The factory default setting is “WIDE”. VRX746VD GWhen watching through a conventional type of the rear view monitor (4:3) • N PS : The leftmost and rightmost areas of the screen are cut off. - Page 31 4. Touch the [w] or [z] key to select level 1 to 8, or 0 (no parental). ∗ The factory default setting is “8”. Input code 6678 7572 7368 7580 7582 7665 7789 7777 8072 8371 8472 8678 8480 7275 7779 8487 VRX746VD...
-
Page 32: Loading A Disc
Notes: • For your safety, the VRX746VD has a safety function which turns off the picture when the car is moving, so only the audio can be heard. The picture can only be watched when the car is stopped and the parking break is applied. -
Page 33: Dvd Video Operations
2. To resume playback. Touch the [s] key, and playback resumes from the scene where playback is stopped. Pausing playback 1. Press the [s] button or touch the [s] key during playback. Playback pauses. 2. To resume playback. Press the [s] button, and playback resumes. VRX746VD... -
Page 34: Fast Forward And Fast Backward
• The same operation can be performed by touching the screen to display the menu screen, then touching the [å] or [∂] key. VRX746VD Fast forward and fast backward 1. Press and hold the [a] or [d] button during playback. -
Page 35: Switching Subtitles
• It may take time to switch among subtitles. GTo turn off subtitles 1. Touch the [SUB TITLE] key several times, and subtitles are turned off. In initial setting: Subtitle 1 Subtitle 2 Subtitle X VRX746VD... -
Page 36: Pausing Playback
Playback status is display on the screen. 2. Touch the screen to turn off the display. The display will turn off after 7 seconds. VRX746VD Watching a video CD After disc loading, the play mode is automatically engaged. - Page 37 You can change the audio output method. 1. Touch the screen to display the menu, then touch the [SUB] key. 2. Touch the [AUDIO] key during playback. Each time you touch the key, you can switch among audio output methods. L (Left) R (Right) STEREO VRX746VD...
-
Page 38: Listening To A Cd
Playback pauses. 2. To resume playback, press the [s] button or touch the [s] key, and playback resumes. VRX746VD Skipping a track (searching) 1. Press the [a] or [d] button during playback. Tracks are skipped, as many as the times the button is pressed, and playback starts. -
Page 39: Displaying Cd Titles
“.mp3”, the file cannot be played. In addition, if you use upper case and lower case letters ∗ (capital and small letters) mixedly for file extensions, normal play may not be possible. 2. Files without MP3 data will not play. VRX746VD... - Page 40 Note: • If ID3 Tag information was entered with 2-byte characters, it may occur that the characters are not reproduced properly on the display. VRX746VD Pausing playback 1. Press the [s] button or touch the [s] key during playback. Playback pauses.
- Page 41 To cancel play, press the [F.SCN] key once again. TOP function The TOP function resets the DVD player to the first track of the disc. 1. Press the [BAND] button to playback the first track (track No. 1). ∗ VRX746VD...
-
Page 42: Visual Operations
Switching to the VISUAL mode Note: • For your safety, the VRX746VD has a safety function which turns off the picture when the car is moving, so only the audio can be heard. The picture can only be watched when the car is stopped and the parking break is applied. -
Page 43: Selecting A Track
∗ When the panel is open, the same operation is also available by using the [∂] key. GFast-backward Press and hold the [a] button for 1 second or longer. ∗ When the panel is open, the same operation is also available by using the [å] key. VRX746VD... - Page 44 * TRACK [RANDOM]; track random playback The random play selects and plays individual tracks on the disc in no particular order. VRX746VD * DISC [RANDOM]; disc random playback The disc random play selects and plays individual tracks or discs automatically in no particular order.
-
Page 45: Dvd Changer Operations
Watching TV Note: • For your safety, the VRX746VD has a safety function which turns off the picture when the car is moving, so only the audio can be heard. The picture can only be watched when the car is stopped and the parking break is applied. -
Page 46: Recalling A Preset Station
2. Tune into a station. GQuick tuning: Press and hold the [d] or [a] button for 1 second or longer to tune in a station. VRX746VD GStep tuning: Press the [d] or [a] button to manually tune in a station. - Page 47 1. Touch the screen to display the menu, then touch the [SUB] key. 2. Touch the [TV AREA] key to display a list of country name. 3. Touch the [COUNTRY NAME] key to select a desired country. 4. Touch the [RTN] key to return the previous mode. VRX746VD...
-
Page 48: Other Functions
8. Touch the [MEMO] key for 2 seconds or longer to store the title into memory and cancel title input mode. VRX746VD Title list play You can display a list of titles, then select the CD track, disc or broadcast station to listen to from that list. - Page 49 This unit requires special wiring to mute the audio signal automatically when a cellular telephone rings in the car. ∗ This function is not compatible with all cellular telepones. Contact your local authorized Clarion dealer for information on proper installation and compatibility. VRX746VD...
-
Page 50: Ch Surround Decoder Operations
• The phase of the “SUB WOOFER” is reversed in the ON- setting. The default value is “ON+”. VRX746VD GDolby PL II CONTROL ∗ This function is available only when the MUSIC MODE is selected for Dolby PL II. For setup details, see “Selecting the Dolby PL II (Dolby... - Page 51 5. Touch the [RTN] key, [ESC] key, or press the [ADJ] button. Note: • If the P.EQ effect is set to OFF, the adjustment made in “P.EQ” is not reflected in the music source. VRX746VD...
- Page 52 2. Touch the key for the desirable type to select 3. When the setting is finished, touch the [ESC] key or press the [ADJ] button to return to the previous mode. VRX746VD Output adjustment of subwoofer volume, center volume and balance/ fader 1.
-
Page 53: In Case Of Difficulty
Replace with a compact disc with no scratches. Let dry for about 1 hour with the power on. Release the view limitation or change the parental level. See the subsection “Setting up the parental level”. Measure The Reset button VRX746VD... - Page 54 There are red, green, and blue points in the display. VRX746VD Cause Check that the parking brake is applied. Adjust the brightness properly. The temperature inside the vehicle may be 0˚C or less. Set to an appropriate temperature (25˚C or so) and check it again.
-
Page 55: Error Displays
Eject the disc then reload it properly. Remove the disc and replace with an NTSC format disc. This is a failure of CD changer’s mechanism and consult your store of purchase. Replace with a non-scratched, non- warped-disc. Eject the disc then reload it properly. Measure VRX746VD... -
Page 56: Specifications
Video input: 1.0 ±0.2 Vp-p (input impedance 75 Ω) Video output Video output: 1.0 ±0.2 Vp-p (output impedance 75 Ω) VRX746VD LCD Monitor Screen Size: 7-inch wide type 6" Width (152 mm) × 3-5/16" Height (85 mm ) Display method:... -
Page 57: Installation And Wire Connection Manual
Flat head screw (M5 × 8) ... 4 Sems hexagonal bolt (M5× 8) ... 5 Electro tap Machine screw (M4× 3) ... 4 VRX746VD Installation and Wire connection manual I Contents 1. BEFORE STARTING ... 59 2. PACKAGE CONTENTS ... 59 3. -
Page 58: General Cautions
1. Do not open the case. There are no user serviceable parts inside. If you drop anything into the unit during installation, consult your dealer or an authorized CLARION service centre. CAUTIONS ON INSTALLATION 1. Prepare all articles necessary for installing the main unit before starting. -
Page 59: Installing The Main Unit
7-3/16" (182 mm) Hole Screwdriver Outer escutcheon Notes: 1) Some car models require special mounting kits for proper installation. Consult your Clarion dealer for details. 2) Fasten the front stopper securely to prevent the main unit from coming loose. Instrument panel Hole... - Page 60 Note 1: In some cases, the centre panel may require some modification (trimming, filling, etc.). VRX746VD direction of arrow to remove it. Repeat the same for the other side to remove the springs from the both sides. (Figure 7) 2.
-
Page 61: Removing The Main Unit
Note: There are various types of fuse holder. Do not let the battery side touch other metal parts. CAUTION After the connection, fix the lead by a clamp or insulation tape for protection. Fuse holder Figure 10 Spring Fuse (15A FUSE) VRX746VD... -
Page 62: Wire Connection
Note : Before making any installation, disconnect the car battery - (negative) cable. ∗2: Connect to a separately sold external amplifier with a separately sold RCA cord (L, R). ∗3: Connect to a Rear View Monitor (sold separately) for the rear seat. VRX746VD CeNET terminal... - Page 63 Front right - White Front left + White/Black Front left - Green Rear left + Green/Black Rear left - Blue/White Amplifier turn-on lead Orange/White Illumination Brawn Phone mute (*1) Blue Auto antenna +12V main power Ground Parking brake +12V accessory VRX746VD...
- Page 64 TV/VTR/DVD video/video CD when the parking brake is engaged. • When the parking brake lead is not connected, the monitor will stay off. VRX746VD Parking brake lamp + lead to battery Connect these three leads. - cord...
-
Page 65: Sample Systems
RCA cable (sold separately) Visual input CeNET Cable (included the Changer) CeNET Y-adapter (CCA-519-601, sold separately) CD Changer (DCZ625) VRX746VD RCA video cable (sold separately) Yellow VIDEO OUT Yellow DVD A/C IN Yellow TV IN CeNET cable (included the TV tuner) - Page 66 I Sample System 2 VRX746VD (Glay) Non fader output CeNET cable (included the TV tuner) TV Tuner (TTX7501z /TTX7504z) CeNET cable (included the DVH940) 5.1 ch Surround (Black) Decoder (DVH940) CeNET cable (included the VCZ625) Set the [SLAVE/STAND ALONE] switch to the [SLAVE] position.
Need help?
Do you have a question about the VRX746VD and is the answer not in the manual?
Questions and answers