
Related Manuals for Clarion VRX385USB


Summary of Contents for Clarion VRX385USB
- Page 1 Owner's manual & Installation manual Mode d'emploi et manuel d'installation Manul de instrucciones y de instalación RADIO/DVD MULTIMEDIA CENTER CENTRE MULTIMÉDIA DVD/RADIO CENTRO DE MULTIMEDIA DE DVD/RADIO...
-
Page 2: Table Of Contents
TAble oF ConTenTs 1.FeATures - - - - - - - - - - - - - - - - - - - - - - - - - - - - - - - - - - - - - - - - - - - - - - - - - - - - - - - - - - - - - - - - - - - - - - - - - - - - - - - - - - - - - - - - - - - - - - - - - - - - - - - - Description - - - - - - - - - - - - - - - - - - - - - - - - - - - - - - - - - - - - - - - - - - - - - - - - - - - - - - - - - - - - - - - - - - - - - - - - - - - - - - - - - - - - - - - - - - - - - - - - - - - - - - - - - - - - - - - - - - - - - - - - - - - - - - - - - - - - - - - - - - - Expanding Systems... - Page 3 ADJUST Operations 2Zone Operations - - - - - - - - - - - - - - - - - - - - - - - - - - - - - - - - - - - - - - - - - - - - - - - - - - - - - - - - - - - - - - - - - - - - - - - - - - - - - - - - - - - - - - - - - - - - - - - - - - - - - - - - - - - - - - - - - - - - - - - - - - - RADIO Operations - - - - - - - - - - - - - - - - - - - - - - - - - - - - - - - - - - - - - - - - - - - - - - - - - - - - - - - - - - - - - - - - - - - - - - - - - - - - - - - - - - - - - - - - - - - - - - - - - - - - - - - - - - - - - - - - - - - - - - - - - DVD Video Player Operations...
-
Page 4: Features
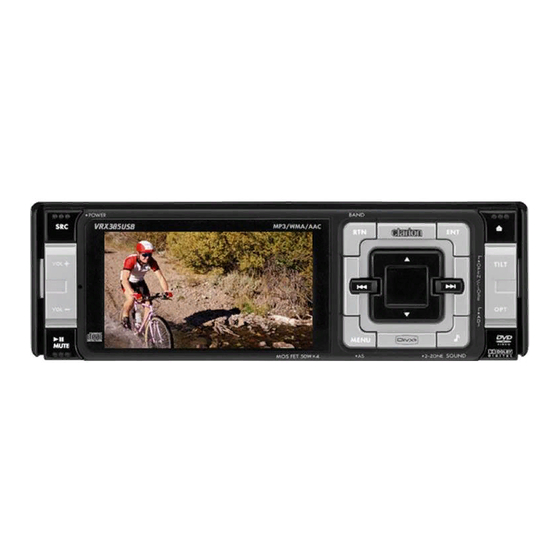
1. FEATUREs Description New 3 . 5 " Wide screen TFT Display • DVD Video / Audio CD / MP3 / WMA / DivX Play Capability • RCA 6 (+2)-Channel (2Zone) Output • Built-in 50 W x 4 Amplifier • CD-R/CD-RW/DVD±R/DVD±RW Compatible •... -
Page 5: Expanding Systems
Expanding systems... -
Page 6: Information Guide
FOR USA and Canada only www.clarion.com Dear Customer: Congratulations on your purchase of a Clarion mobile electronic products. We are confident that you'll enjoy your Clarion experience. There are many benefits to registering your product. We invite you to visit our website at www.clarion.com to register your Clarion product. -
Page 7: Precautions
2. PRECAUTIONs For your safety, the driver should not watch the DVD video/TV/VTR or operate the controls while driving. Please note that watching and operating the DVD video/TV/VTR while driving are prohibited by law in some countries. Also, while driving, keep the volume to a level at which external sounds can be heard. -
Page 8: Handling Discs
handling Discs handling ■ New discs may have some roughness around its edges. If such discs are used, the player may not work or the sound may skip. Use a ball-point pen or a similar object to remove any roughness from the edges of the disc. ■... -
Page 9: Controls
3. CONTROLs ① ② ⑬ ③ BUTTON To turn on/off the power (Press and hold this button more than 2 seconds. If you press this button for more than 2 seconds while turning the power off, ① the power of the unit will be turned on.) To change the operation mode during POWER ON To increase/decrease the volume ②... - Page 10 To enter/exit the SOUND mode To enter/exit the 2ZONE mode (Press and hold this button for more than ⑦ 2 seconds.) To scroll lists or move the cursor ⑧ To adjust the item value To perform the chapter/track/file down or up ⑨...
-
Page 11: Remote Control
Remote Control Remote Control Unit POWER/sRC sCAN sETUP sLOW P.Ch AUDIO sUB TITLE PWR/sRC BAND sCAN P.TIME sEARCh MODE sETUP MENU ENTER TOP MENU sLOW PLAY/PAUsE MUTE P.Ch VOLUME AUDIO sUB TITLE ANgLE 2-ZONE WIRELEss REMOTE CONTROLLER BAND 0 ~ 9 P.TIME sEARCh MODE MENU... -
Page 12: Inserting The Batteries
2. Inserting the Batteries ① Open the rear cover, and remove it and insert the AAA (SUM-4, IEC LR03/1.5V) batteries bundled with the remote control unit in the directions as shown in the figure and then, close the rear cover. ②... - Page 13 [sETUP] To display the setup menu in DVD mode. ⑩ [MENU] To display stored menu on the DVD video disc. ⑪ To select a menu or item ▲ ▲ ⑫ To scroll the track/folder list screen in MP3 mode ▶ ▼...
-
Page 14: Summary Of Each Mode
4. sUMMARY OF EACh MODE POWER ON/OFF Mode Press and hold the [SRC] button for more than 2 seconds after ENGINE ON. The "WARNING" sentence initially become displayed on the screen. Last mode screen(such as the TUNER mode) is displayed in a moment. If you want to turn the power of the unit off, press and hold the [SRC] button for more than 2 seconds again. -
Page 15: Tuner Mode
TUNER Mode Enter into TUNER mode. Press the [MENU] button to display the PRESET channels. Press the [RTN] button to switch to the reception band. -
Page 16: Dvd Video Mode
DVD Video Mode Insert a DVD-video disc. The playback will start automatically. Press the [OPT] button to change the detail setting. Press the [ ] button to choose the "SCREEN" item. ▼ Then press the [ENT] button to change the screen size. -
Page 17: Cd Mode
CD Mode Insert an Audio CD. The play mode is automatically engaged. Press the [OPT] button to change the detail setting. -
Page 18: Mp3 Mode
MP3 Mode Insert a CD on which MP3/WMA music data have been recorded. The play mode is automatically engaged. Press the [MENU] button to display folder and file lists. Press the [OPT] button to change the detail setting. -
Page 19: Aux Mode
AUX Mode Enter into AUX mode. Press the [OPT] to change the detail settings. -
Page 20: Ipod Mode
iPod Mode Connet an iPod unit (that an AUDIO/VIDEO data is stored) to your unit. The playback will start automatically. Press the [MENU] button to display data lists. Press the [OPT] button to change the detail setting. - Page 21 Press the [ENT] button to switch to VIDEO mode. Select the video data on the iPod unit. The video will be played back automatically. Press the [OPT] button and [▶ ▶ | ] button two times to choose the "SCREEN" item. Then press the [ENT] button to change the screen size.
-
Page 22: Sound Mode
sOUND Mode Press the [♪] button. Press the [ENT] button to use the detail functions. Press the [ENT] button to adjust the value of "BASS BOOST" item. - Page 23 Press the [RTN] button 2 times. And press the [▶ ▶ | ] button to search "BAL/FAD" item. Press the [▶ ▶ | ] button to select "OTHERS" item.
-
Page 24: Usb Mode
UsB Mode Connect a USB memory device(in which MP3/WMA/AAC files are stored) to your unit. The playback will start automatically. Press the [MENU] button to display folder/file lists. Press the [OPT] button to change the detail setting. -
Page 25: Adjust Mode
ADJUsT Mode Press and hold the [OPT] button for more than 2 seconds. Press the [▶ ▶ | ] button to select "GENERAL" item. Press the [ENT] button to adjust the detail functions. - Page 26 Press the [ENT] button to set the time. Press the [▶ ▶ | ] button to change "AM" to "PM".
-
Page 27: 2Zone Source Mode
2Zone sOURCE Mode Press and hold the [♪] button for more than 2 seconds. Press the [▶ ▶ | ] button and [ENT] button to select the source which you would like to use. -
Page 28: Cautions
5. CAUTIONs Control Panel/generalities For a longer service life, be sure to read the following cautions. ■ Be sure to close the control panel inside the main unit when parking the car outdoors for prolonged periods of time. The control panel will operate properly within a temperature range of 0 to 60°C. -
Page 29: Dvd Video System
6. DVD VIDEO sYsTEM DVD Video Features DVD video is a high-quality digital video source that provides crisp and clear images. One 12cm disc contains either one film or four hours of music. This unit provides the following functions in addition to the high image quality and sound quality of DVD video. -
Page 30: Discs
Discs Playable Discs This DVD video player supports the following disc formats. CD Extra Discs A CD Extra disc is a disc in which a total of two sessions have been recorded. The first session is the AUDIO session and the second session is the DATA session. Your personally-created CDs with more than two recorded DATA sessions are not supported by this DVD video player. -
Page 31: Registered Trademark
Registered Trademark ■ This product incorporates copyright protection technology that is protected by U.S. patents and other intellectual property rights. Use of this copyright protection technology must be authorized by Macrovision, and is intended for home and other limited viewing uses only unless otherwise authorized by Macrovision. -
Page 32: Operations
7. OPERATIONs DCP Operations The control panel can be detached to prevent theft. When detaching the control panel, store it in the DCP (Detachable Control Panel) case to prevent scratches. Please take the DCP with you when leaving the car. Remove DCP ①... - Page 33 Mode selections ■ Press the [SRC] button to change operation mode when the control panel is open/closed. ■ Each time you press the [SRC] button, the operation mode changes in the following order: TUNER mode → DVD(CD/MP3) Play mode → UsB mode or iPod mode → AUX mode ■...
-
Page 34: Audio Operations
AUDIO Operations Z-ENHANCER sOUND BAL/FAD OTHERS 1. Z-ENhANCER Press the [♪] button to enter into SOUND mode. Press the [ENT] button to adjust detail items. To adjust the "BASS BOOST", "IMPACT", "EXCITE", "CUSTOM" item, set the Z-ENHANCER to "ON". Use the [| ◀ ◀ ] or [▶ ▶ | ] button to adjust the level. BAss BOOsT - Seeing the following table, set the value to emphasize low sound. - Page 35 EXCITE - Seeing the following table, set the value to weaken intermediate sound and emphasize both low sound an d high sound. CUsTOM - Choose the "CUSTOM" item and select the "CUSTOM DETAIL" item. "BASS" controls low sound and "TREBLE" controls high sound. 2.
-
Page 36: Adjust Operations
ADJUsT Operations MONITOR GENERAL 1. MONITOR Press and hold the [OPT] button for more than 2 seconds to enter into ADJUST mode. Press the [ENT] button to adjust detail items. MONITOR ADJUsT ■ To adjust the BRIGHT, COLOR, HUE, DIMMER CAMERA INT ■... - Page 37 BRIghTNEss ■ To adjust the brightness of display image. ■ Press the [| ◀ ◀ ] button to make the image darker. ■ Press the [ ▶ ▶ | ] button to make the image brighter. DIMMER ■ To adjust the brightness of the LCD when the car lights are on/off. ■...
- Page 38 OFF, disconnect the mobile phone from the cable or turn off the power of the mobile phone.) ■ MUTE : To mute the sound during your telephone calls (This function is not compatible with all mobile telephones. Contact your local authorized Clarion dealer for information on proper installation and compatibility.) TEL sPEAKER ■...
-
Page 39: 2Zone Operations
2Zone Operations Description The 2Zone function is a function that outputs separate sounds/images from the MAIN and SUB Zone (such as the rear monitor) by simultaneously operating two sources in the one center unit. Thereby, plural listeners are allowed to enjoy separate audio/visual sources. The 2Zone function allows internal sources (TUNER, DVD, iPod) and external sources (AUX, etc.) to be played on the MAIN and SUB Zone. -
Page 40: Radio Operations
RADIO Operations Listening to the Radio ■ Switch to the tuner mode. ■ Press the [BAND] button on the remote control unit or press the [RTN] button to select the radio band. Each time you press the [RTN] button, the radio reception band is changed in the following order : FM1 ▶... -
Page 41: Dvd Video Player Operations
DVD Video Player Operations 1. size of the screen To change the screen size, press the [OPT] button during the VIDEO playback. Then select the "SCREEN" item on the DVD option screen. "FULL" "NORMAL" "CINEMA" values are displayed on the screen. Normal Mode Select the "NORMAL"... - Page 42 2. Parental Level You can change the level of parental lock. This function allows cutting scenes that are unfavorable for children or replacing them automatically with other scenes prepared in advance. For example, by replacing scenes of radical violence or portrayals of sex with safe scenes, you can make a trouble-free story as if it were so from the beginning.
- Page 43 4. setting the DVD Video The playing mode is revitalized automatically after the disc loading. The settings on the DVD SETUP menu can be set only with the remote control unit. To enter into the DVD SETUP menu, press the [SETUP] button on the remote control unit. Operation ■...
- Page 44 5. CD Playback The play mode is automatically engaged after the disc loading. When playback is not started, press the [▶||] button. ■ Press the [▶||] button to pause or resume the playback. Keep pressing the [▶||] button more than 2 seconds to stop during the playback. ■...
-
Page 45: Ipod Operations
④ The number of the file or folder A total of 3000 files and a total of 255 directories are allowed. If the numbers of files and directories are greater than this number, then such files will not be played. Track is played in accordance to the order as recorded by the user. -
Page 46: Usb Operations
■ You can view video data stored in the iPod. However, you cannot control and navigate an iPod device in video mode with a CLARION device. Only the iPod device can be used to make controls. To enjoy the video data, please operate in the following order: ①... - Page 47 ■ Press the [OPT] button to use the detail function. TRACK REPEAT : Track repeat playback. TRACK SCAN : Track scan playback. TRACK RANDOM : Track random playback. FOLDER REPEAT : Folder repeat playback. FOLDER SCAN : Folder scan playback. FOLDER RANDOM : Folder random playback.
-
Page 48: Troubleshooting
8. TROUBLEshOOTINg general PROBLEM Disconnected fuse No Power(no sound) Wrong Connection Wrong operation due to No button activation the interference from microprocessor Wrong Display Receiver is in the direct rays of the Remote Controller is not working Out of battery power DVD Player PROBLEM Unable to insert the disc... -
Page 49: Noise
Noise Noise may occasionally occur if a portable AUDIO-VISUAL device has been connected to the monitor in a state where you are connected to the vehicle power supply for charging, etc. In such a case, please us a portable AUDIO-VISUAL device without connecting to the power supply on the vehicle. -
Page 50: Specifications
9. sPECIFICATIONs Frequency range Quieting sensitivity FM TUNER Limiting sensitivity Stereo separation Frequency response Frequency range AM TUNER Usable sensitivity System Usable discs DVD PLAYER Frequency response Separation Distortion Sampling rate MP3 / WMA Bit rate Logical Format AUDIO Maximum power output AMPLIFIER Speaker impedance Screen size... - Page 51 unit : inch (mm) Specifications and designs are subject to change without notice for further improvement. ※ Power Output : 18W RMS x 4 Channels at 4Ω and 1% THD+N Signal to noise Ratio : 74dBA (reference : 1W into 4Ω )
-
Page 52: Installation And Wire Connection
① Do not open the case. There are no user serviceable parts inside. If you drop anything into the unit during installation, consult your dealer or an authorized CLARION service center. ② Use a soft, dry cloth to clean the case. Never use a rough cloth, thinner, benzine, or alcohol, etc. - Page 53 4. Cautions on Installation ① Prepare all articles necessary for installing the main unit before starting. ② Install the unit within 30° of the horizontal plane. ③ If you have to do any work on the car body, such as drilling holes, consult your car dealer beforehand.
-
Page 54: Main Unit Installation (Universal Mount)
• Console opening dimensions 7.2" (183mm) Hole Screw Drover Some car models require special mounting kits for proper installation. Consult your Clarion ※ dealer for details. Fasten the front stopper securely to prevent the main unit from coming loose. ※... -
Page 55: Removing The Main Unit
Removing The Main Unit ① When the rear of the main unit has been secured through the method as shown in the following figure, unfasten the special screw. ② Insert the hook plate into the universal mounting bracket, then pull the main unit out by the hook plate. -
Page 56: Electrical Connection
Electrical Connection 1. Wire Connection Grey White Black White Blue White Yellow Green White Yellow White Black Black Grey Black Black USB Cable Disconnect the Negative(-) power cable from the battery before installation. ※ The RCA pins and connector cables are sold separately. ※... - Page 57 2. Power supply Lead Fuse Box Filter & Yellow Battery Ground Black Violet Rear-Right(+) Violet / Black Rear-Right(-) Grey Front-Right(+) Grey / Black Front-Right(-) White Front-Left(+) White / Black Front-Left(-) Green Rear-Left(+) Green / Black Rear-Left(-) Blue / White Amp Remote On Orange / White Illumination Blue...
- Page 58 3. Connecting the Parking Brake Lead Connect the lead to parking brake lamp earth in the meter panel. Connecting the parking brake lead to lamp earth allows you to watch VTR/DVD video when the parking brake is engaged. When the parking brake lead is not connected, the monitor will stay off. Parking brake lamp (-)Cord parking brake signal lead...
- Page 59 5. sample system 4ch - RCA CAA-185 for Camera 2ch - Mini - Jack Steening Remocon CCA-691 sold separately 4ch - RCA CAA-185 for Camera 2ch - Mini - Jack Steening Remocon 2ch - RCA Phone Mute BLT370 iPod 3ch - RCA Audio / Memory 4ch - RCA 4 - ch...
- Page 60 Clarion Co., Ltd. All Rights Reserved.Copyright © 2007:Clarion Co., Ltd. Printed in Korea / Impreso en Corea / Imprimé en Corée QC-6826B-A 2008/01 (Y-YI)
Need help?
Do you have a question about the VRX385USB and is the answer not in the manual?
Questions and answers