
Related Manuals for Huazheng HZ1141


Summary of Contents for Huazheng HZ1141
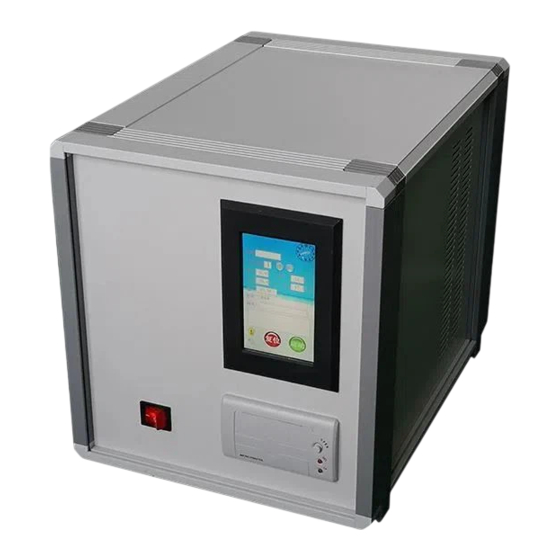
- Page 1 HZ1141 Transformer Oil Gas Content Tester User Manual Huazheng Electric Manufacturing (Baoding) Co., Ltd...
- Page 2 (0312) 6775656 to tell you to serve you at all times- Baoding Huazheng Elect ric Manufact ur ing Co. , Lt d. , our company will def initely make you satisf ied !
-
Page 3: Table Of Contents
Contents I. Overview............................1 II.Main Technical Indicators......................2 III.Complete Machine and Main Components and Functions...........2 IV.Installation and Precautions of the Instrument............... 4 V.Simple Operation of the Instrument................... 8 VI.Instrument Simple Fault Detection and Maintenance............17 VII.Instrument Accessories List....................19 VIII.Supporting Equipment Required for this Instrument............20... -
Page 4: Overview
I. Overview In order to prevent transformer failure better and more comprehensively, the power industry has set higher requirements for the safe operation of transformers at all levels, and the test requirements for the gas content of transformer oil have also increased accordingly. -
Page 5: Ii.main Technical Indicators
conveniently. 8. New printing function can print test data as required. 9. The number of tests can be selected for the same oil sample. After the test, the single and average results will be displayed on the display screen or printed out. II.Main Technical Indicators 1、... - Page 6 1. Display system: Display all the parameters and operating conditions to be displayed on the screen. 2. Printing system: print the test results to be printed according to the requirements. 3. Oil sample quantification system: introduce a certain amount (about 50mL) of oil sample into the degassing system for degassing.
-
Page 7: Iv.installation And Precautions Of The Instrument
instrument and discharge them automatically after each test. IV.Installation and Precautions of the Instrument 1. After unpacking the instrument, first perform the unpacking inspection according to the packing list at the end of the manual. In the case that the instrument may be severely dropped, open the upper cover of the instrument for inspection, and check the circuit board installed on the front panel in detail Check whether there is pressure breakage and disconnection of the power cord, whether the cable of the whole machine is... - Page 10 The rear panel of the instrument has oil inlet, vacuum pump interface, oil drain connector, vacuum pump (power supply), power socket, fuse holder, power switch, etc. a, a short section of 3mm polyethylene tube in the oil inlet connection connection fitting, the other end of which is connected to the syringe connector of the sampling syringe;...
-
Page 11: V.simple Operation Of The Instrument
V.Simple Operation of the Instrument 1. Switch on: Turn on the power of the instrument. The display shows the power-on self-test, which passes the self-test and enters the main screen. - Page 12 Home screen...
- Page 13 Function description of the main screen operation buttons: 1. The accumulated time column shows the time that has been worked. 2. The number of work can be increased or decreased according to the actual work needs. 3. The gas content column displays the gas content value of the previous work. 4.
- Page 14 2 Setting of parameters Press the setting button on the main screen to enter the parameter setting screen Parameter setting screen...
- Page 15 Press the cleaning time to set the time required for cleaning. Enter the time on the numeric keypad of the keypad in seconds. Press the key to confirm the entry and the key to cancel. The original value is 120 seconds. Set the analysis time according to the analysis time.
- Page 16 can help the syringe to better seal, and you can also apply some silicone grease to help seal. 2) Calibration: It is used to check whether the calibration of the instrument is accurate. After pressing the calibration button, the instrument enters the inspection procedure.
- Page 17 3、Make oil samples Connect the oil sample with the syringe connector connected in the above five, 3, and b, try to ensure its tightness and free movement of the needle core, and then hang the syringe into the syringe holder on the rear panel of the instrument Inside the hole. At this time, you can press the start key to make an oil sample, and the gas content of the oil sample will be displayed on the display after more than seven minutes.
- Page 18 the start button. After the gas content work is completed, it will automatically jump to the print screen. You can print the items according to your needs. Press the print button to print. Gas content printing...
- Page 19 4、Data retrieval, printing and deletion Press the data search button on the main screen to enter the data search screen. Press the recycle button to delete all records, press the print button to print the records, and press the back button to return to the main screen.
-
Page 20: Vi.instrument Simple Fault Detection And Maintenance
5、To turn it off It is strictly prohibited to turn off the machine when the machine is running, that is, turn off the machine when the gas content is displayed at the end of the test or when the machine is started. VI.Instrument Simple Fault Detection and Maintenance... -
Page 22: Vii.instrument Accessories List
The fault Maintenance instructions the fault value has Instrument sensor malfunction, report to corresponding display manufacturer for maintenance. Printer is offline, out of paper, or other Restart the printer after changing the printer paper. malfunction Test data shows 0.0% Check that the solenoid valve connected to the when waste oil is sensor is intact made... -
Page 23: Viii.supporting Equipment Required For This Instrument
M8 × 1 nut 10 pcs Seal 10 pcs 1 pc ( installed on the left rear pillar of the gas Syringe holder content tester) 1mL calibration 1 pc(For calibration equipment) syringe VIII.Supporting Equipment Required this Instrument 1. A rotary vane vacuum pump (distributed randomly). 2.
Need help?
Do you have a question about the HZ1141 and is the answer not in the manual?
Questions and answers