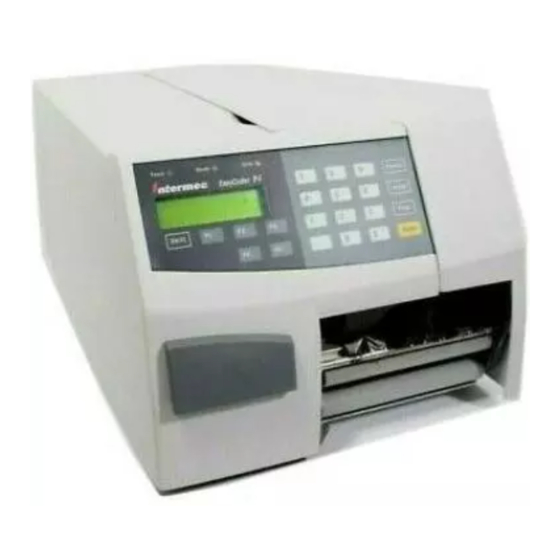
Intermec EasyCoder F2 Installation Instructions Manual
Rfid 13.56 mhz interface board
Hide thumbs
Also See for EasyCoder F2:
- User manual (112 pages) ,
- Installation & operation manual (111 pages) ,
- Installation and operation manual (101 pages)
Summary of Contents for Intermec EasyCoder F2
- Page 1 Installation Instruc- tions RFID 13.56 MHz Interface Board for EasyCoder F2 and F4 Printers...
- Page 2 Intermec Printer AB. © Copyright Intermec Printer AB, 2002. All rights reserved. Published in Sweden. EasyCoder and Fingerprint are registered trademarks of Intermec Technologies Corp. The word Intermec, and the Intermec logo are trademarks of Intermec Technologies Corp.
- Page 3 Description Introduction RFID 13.56 MHz Interface Board for EasyCoder F2 and F4 Printers – Installation Instructions The term RFID (radio frequency identifi cation) describes the use of radio frequency signals to provide automatic identifi ca- tion of items. RFID is a fl exible technology that combines advantages not available with other identifi...
-
Page 4: Printing Recommenda- Tions
Interfaces Printing Recommenda- tions RFID 13.56 MHz Interface Board for EasyCoder F2 and F4 Printers – Installation Instructions The RFID 13.56 MHz Interface Board is an optional device for EasyCoder F2 or EasyCoder F4, that provides these printers with two extra interfaces, "uart2:" and "uart3:". The printer must be fi... - Page 5 Max 125 mm (5 inches) RFID 13.56 MHz Interface Board for EasyCoder F2 and F4 Printers – Installation Instructions Because the RFID tag is a part of a system consisting of the printer, the tag, the media in which the tag is fi tted, and the reader, all applications should be tested before installation.
-
Page 6: Declaration Of Conformity
SP Swedish National Testing and Resarch Institute /. Intermec assumes no responsibility as regards fulfi lling the CE Directive if the printer is han- dled, modifi ed or installed in other manners than those described in Intermec’s manuals. -
Page 7: Field Installation
F2 printers. #T20 Torx screws (3 places) RFID 13.56 MHz Interface Board for EasyCoder F2 and F4 Printers – Installation Instructions The RFID 13.56 MHz Interface Kit comes in two versions, one for EasyCoder F2 and another for EasyCoder F4. Each kits contains: •... - Page 8 Fitting the Interface Board, cont. RFID 13.56 MHz Interface Board for EasyCoder F2 and F4 Printers – Installation Instructions • Remove the two #T10 Torx screws that hold the interface cover plate on the printer’s rear plate. Remove the cover plate.
- Page 9 Fitting the Interface Board, cont. RFID 13.56 MHz Interface Board for EasyCoder F2 and F4 Printers – Installation Instructions www.idsys.co.uk www.idsys.co.uk SYSTEMS SYSTEMS UART3 IC10 RS232: IC2 RS485: IC4, S3, S4* UART2 RS422isolated: IC3, S2, S4 RS422nonisol.: IC18, S1,S4 * Term. if end of cable IC18 •...
-
Page 10: Fitting The Antenna
Platen Roller Liner Drive Roller RFID 13.56 MHz Interface Board for EasyCoder F2 and F4 Printers – Installation Instructions The shape of the antenna differs between EasyCoder F2 and EasyCoder F4. The antenna is fi tted inside the lower media guide. - Page 11 Media Guide assy. Lower Media Guide (inner side) RFID 13.56 MHz Interface Board for EasyCoder F2 and F4 Printers – Installation Instructions • EasyCoder F4 only: From the electronics compartment, disengage the snap-lock that holds the cable guard and pull it out along the shaft.
- Page 12 Chapter 2 Field Installation Fitting the Antenna, cont. RFID 13.56 MHz Interface Board for EasyCoder F2 and F4 Printers – Installation Instructions • Route the cable through the same slot in the center section as the LSS cable. • Fit back the media guide assy and grounding spring using the three #T20 Torx screws while pulling at the antenna and LSS cables.
-
Page 13: Completing The Installation
Completing the Instal- lation RFID 13.56 MHz Interface Board for EasyCoder F2 and F4 Printers – Installation Instructions • Put back the cover over the electronics compartment. • Connect the power cord. • Now you have one new interface connector on the printer’s rear plate in addition to the standard interfaces "uart1:"... - Page 14 Strap on S1 deactivated (fi tted on one pin only) RFID 13.56 MHz Interface Board for EasyCoder F2 and F4 Printers – Installation Instructions The serial communication port "uart2:" can be confi gured for one of four different types of serial communication: •...
- Page 15 No circuit on IC2 Fit RS-422 circuit on IC3 Fit strap on S4 Fit strap on S2 only RFID 13.56 MHz Interface Board for EasyCoder F2 and F4 Printers – Installation Instructions Chapter 3 Serial Port Confi guration "uart2:" www.idsys.co.uk SYSTEMS...
-
Page 16: Connector Confi Gura- Tion
Fit RS-485 circuit on IC4 Fit strap on S4 if end of cable Fit strap on S3 only Connector Confi gura- tion RFID 13.56 MHz Interface Board for EasyCoder F2 and F4 Printers – Installation Instructions www.idsys.co.uk UART3 RS232: IC2 RS485: IC4, S3, S4*... - Page 18 Intermec Printer AB Idrottsvägen 10, P.O. Box 123 S-431 22 Mölndal, Sweden tel +46 31 869500 fax +46 31 869595 www.intermec.com RFID 13.56 MHz Interface Board for EasyCoder F2 and F4 Printers, Installation Instructions *1-960495-01* *1-960495-01*...


Need help?
Do you have a question about the EasyCoder F2 and is the answer not in the manual?
Questions and answers