Moxa Technologies VPort P06-1MP-M12 Series Quick Installation Manual
Hide thumbs
Also See for VPort P06-1MP-M12 Series:
- User manual (65 pages) ,
- Quick installation manual (16 pages) ,
- Quick installation manual (16 pages)

Subscribe to Our Youtube Channel
Related Manuals for Moxa Technologies VPort P06-1MP-M12 Series


Summary of Contents for Moxa Technologies VPort P06-1MP-M12 Series
- Page 1 VPort P06-1MP-M12 Series Quick Installation Guide Moxa IP Camera Version 6.0, August 2022 Technical Support Contact Information www.moxa.com/support 2022 Moxa Inc. All rights reserved. P/N: 1802000060015 *1802000060015*...
-
Page 2: Ordering Information
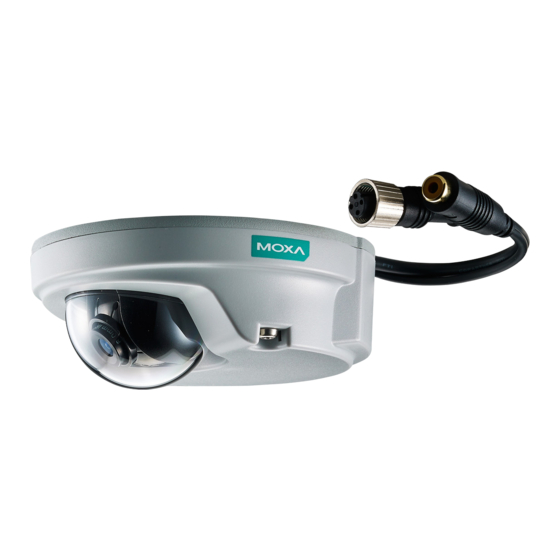
Overview The compact VPort P06-1MP-M12 cameras provide an HD (720P, 1280 x 720) video image, and feature an H.264/MJPEG IP dome, giving them the versatility and ruggedness to excel in many different installations and environments for mobile IP video surveillance applications. In addition, the cameras are compliant with mandatory sections of EN 50155, covering operating temperature, power input voltage, surge, ESD, and vibration, as well as conformal coating and power insulation,... - Page 3 EN 50155, T1 EN 50155, TX Lens Focal Line-in/ Length Microphone -25 to 55°C -40 to 70°C VPort P06-1MP VPort P06-1MP 3.6 mm Microphone- -M12-MIC-CAM36- -M12-MIC-CAM36- CT-T VPort P06-1MP VPort P06-1MP 4.2 mm Line-in -M12-CAM42-CT -M12-CAM42-CT-T VPort P06-1MP VPort P06-1MP 4.2 mm Microphone- -M12-MIC-CAM42-...
- Page 4 Sticker for camera mounting positions • Quick installation guide • Warranty card NOTE Check the model name on the VPort’s side label to determine if the model name is correct for your order. NOTE This product must be installed in compliance with your local laws and regulations.
-
Page 5: Product Description
*This product is suitable for rolling stock railway applications, as defined by the EN 50155 standard. For a more detailed statement, click here: www.moxa.com/doc/specs/EN_50155_Compliance.pdf • 1 10/100BaseT(X) port with M12 D-code connector • 1 audio input with water-proof RCA-type connector, or 1 built-in microphone •... - Page 6 NOTE To connect the VPort P06-1MP-M12 to a network, use an Ethernet cable with a D-coded M12 connector and an M12 PoE switch or RJ45 PoE switch M12 D-code to M12 D-code M12 PoE switch (e.g., TN- cable 5508-4PoE) M12 D-code and RJ45 cable RJ45 PoE switch (e.g., EDS-P510) NOTE The power input rating of the VPort P06-1MP-M12 is 48 VDC,...
- Page 7 • Lens with fixed focal length: The VPort P06-1MP-M12 Series includes models with 3 different focal lengths. Choose the appropriate focal-length lens based on the viewing angle and object distance.
-
Page 8: Hardware Installation
Calibration for rotating the lens (0 to 360°): Rotate the lens to • get the optimal image. When done, mark the position of this calibration for future placement or mass installation. Calibration for tuning the vertical position of the lens (0 to •... - Page 9 NOTE The 4 screws for mounting the VPort P06-1MP-M12 are M4 type with a 30 mm length thread. b. Mounting with the side-cable-out adapter Use the side-cable-out adapter VP-SCO1 (VP-SCO1) if your installation requires the cable–out on the side. Drill a hole through the blue portion of the sticker for mounting the adaptor on the surface with 3 nut/gasket/...
- Page 10 NOTE The 4 screws for mounting the VPort P06-1MP-M12 onto the VP-SCO1 are M4 type with a 12 mm length thread. c. Mounting with the fixed plate VP-FP1 If you cannot use the nut/gasket/spring-washer set to mount the camera on your ceiling, use the VP-FP1 fixed plate.
-
Page 11: Software Installation
NOTE The screw hole for mounting the VP-FP1 fixed plate is a countersunk hole with 5 mm diameter, and 90° 2 x 2 mm chamfer. Take this into consideration when drilling these 2 screw holes. NOTE The 2 screws for mounting the VP-FP1 onto the ceiling are M4 type with a 16 mm length thread. - Page 12 infrastructure/network-management-software/mxconfig-series. 2. Run the MXconfig software utility. After the utility’s window opens, click the Search button to initiate a search. 3. When the search has concluded, the model name, IP and MAC address, and firmware version of the VPort will be listed in the utility’s window.
- Page 13 NOTE For Windows XP SP2 or above operating systems, the ActiveX Control component will be blocked for system security reasons. In this case, the VPort’s security warning message window may not appear. You should unblock ActiveX or temporarily disable browser security to enable the installation of the VPort’s ActiveX Control component.
-
Page 14: Wiring Requirements
Step 6: Access the VPort’s system configuration. Click on System Configuration to access the overview of the system configuration to change the configuration. Model Name, Server Name, IP Address, MAC Address, and Firmware Version appear on the green bar near the top of the page. Use this information to check the system information and installation. -
Page 15: Dimensions (Mm)
• You can use the type of signal transmitted through a wire to determine which wires should be kept separate. The rule of thumb is that wiring that shares similar electrical characteristics can be bundled together. • Keep input wiring and output wiring separate. •... - Page 16 NOTE The equipment is intended to be supplied by an external power source (UL listed/IEC 60950-1/IEC 62368-1), of which the output complies with ES1/SELV/PS2/LPS, and the output rating is 48 VDC, 0.12 A minimum in ambient temperatures of at least 70°C.
Need help?
Do you have a question about the VPort P06-1MP-M12 Series and is the answer not in the manual?
Questions and answers