Advertisement
Advertisement
Table of Contents

Subscribe to Our Youtube Channel
Related Manuals for Shengmilo MX03


Summary of Contents for Shengmilo MX03
- Page 2 If you are not sure you have the experience, skills, and tools to correctly perform all assembly steps in the manual and the assembly video at www.shengmilo-bikes.com, consult a local, certified, reputable bike mechanic. WARNING: To reduce the risk of injury, close supervision is necessary when the product is used near children.
- Page 3 Damage to your ebike's electrical system caused in any manner, including water intrusion, can lead to battery failure, electrical system malfunction, or electrical fire and consequent property damage, injury, or death. Follow all recommendations to minimize chance of water damage. If you have any questions, contact Shengmilo Product Support.
- Page 4 Using a damaged battery or charger can create additional bike damage or a fire hazard. Stop using your battery and charger and contact Shengmilo immediately if any of the following occur: (1) Your charger's flexible power cord or output cable or any...
- Page 5 Ebikes from Shengmilo are equipped with an on/off switch for the throttle. These switches can be set to “off ” even while the bike electrical system is on in order to prevent use of the throttle.
- Page 6 We take pride in bringing you a quality product that will offer years of enjoyment. Please read and understand this manual fully before assembling and riding your bike. If you have questions after reading this manual, please refer to the Shengmilo Support, contact us by email. We are here to help! Shengmilo Support: www.shengmilo-bikes.com...
-
Page 7: Using This Manual
Assembly and first adjustment of your bike from Shengmilo requires special tools and skills and it is recommended that this should be done by a certified, reputable bike mechanic if possible. -
Page 8: Table Of Contents
Table of Contents Using This Manual ........................................7 General Info ..........................................9 Assembly Instructions .........................................13 Battery Charging .........................................24 Operation ............................................ 30 Maintenance ..........................................42 Troubleshooting ..........................................47 Warnings and Safety ........................................49 Limited Warranty ........................................54 Link to Assembly Video and Online Resources ................................. 60... -
Page 9: General Info
NOTICE: A critical aspect of assembling your bike by Shengmilo is securing the front wheel and checking the tightness of the rear wheel axle nuts. All bikes by Shengmilo use a quick release front wheel mounting mechanism and the rear wheel is bolted on. These mechanisms may become loose or unsecured during shipment or over time. - Page 10 Shengmilo. Do not attempt to true wheels or tighten spokes unless you have adequate knowledge, tools, and experience. Ensure the tires and inner tubes are in good working condition without any visual damage and have the correct amount of air pressure.
- Page 11 Handlebar grips should not move easily on the handlebar end. Loose, worn, or damaged handlebar grips should be replaced before you ride and can be purchased from www.shengmilo-bikes.com The seat and seatpost should be properly aligned, fitted to the user, and the seatpost quick release should be properly tightened, fully closed, and secured before riding.
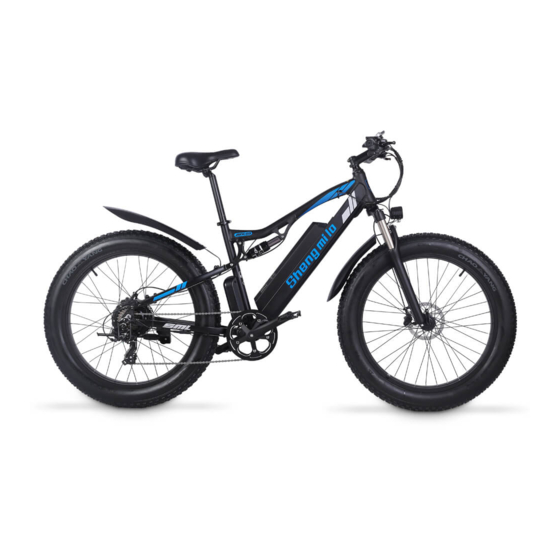
- Page 12 Assembled Shengmilo MX03...
-
Page 13: Assembly Instructions
Unpack the bike. Open the bike box and remove the small box inside. With the help of another person capable of safely lifting a heavy object, remove the Shengmilo MX03 from the bike box. Carefully remove the packaging material protecting the bike frame and components. - Page 14 Step 2: Install handlebar onto stem as shown in the assembly video for the Shengmilo MX03 in the www.shengmilo-bikes.com. COMMUNITY>>Video>>MX03 ASSEMBLY Video Place the handlebar on the stem correctly. Trace the front brake cable directly up A. from the front brake caliper to the left handlebar and ensure the cables and wires are not twisted.
- Page 15 Install the front wheel. Step 3: Locate the quick release lever, which holds the protector plate in place during shipment. Open the lever and remove the thumb nut and cone spring (opposite the lever). Remove the quick release skewer from the plate, keeping the washer and other cone spring in place on the lever side.
- Page 16 E. If needed, align the handlebar and stem and torque the stem clamp bolts evenly to the specification for the handlebar stem clamp bolts in the Recommended Torque Values table below. After torquing the stem clamp bolts to the proper specification, perform the twist test again. If the handlebar still moves, contact Shengmilo Product Support.
- Page 17 WARNING: If you are not sure you have the experience, skills, and tools to correctly perform all steps to properly secure and verify the security of the handlebar, front wheel, and handlebar stem you MUST consult a certified, reputable bike mechanic to check your work and/or secure those components to the bike properly. Step 5: Install the pedals.
- Page 18 Step 6: Install the headlight as shown in the assembly video available at www.shengmilo-bikes.com A. Remove the fender and headlight mounting bolt from the fork arch and set aside. B. Place the fender in position. From the back of the front tire, pass the front fender mounting point under the front fork arch.
- Page 19 Step 9: Always check that the battery is locked to the frame of the Shengmilo MX03 before riding. The Start-Up Procedure section of this manual has more information on the Key positions of the battery; on and locked to the frame, off and locked to the frame, and off and unlocked (ready for removal from the frame).
- Page 20 Ensure all hardware is tightened properly following recommended torque values. Step 10: Recommended Torque Values Hardware Location Hardware Torque Required (Nm) Handlebar Area Handlebar Stem Clamp Bolts Handlebar Area Handlebar Stem Faceplate Bolts Handlebar Area Brake Lever Clamp Bolt Handlebar Area Shifter Clamp Screw Brakes Caliper Adapter to Frame...
- Page 21 WARNING: If you have any questions regarding the assembly of your bike, contact Shengmilo. If you are not able to ensure all the assembly steps in the assembly video are performed properly, or you are unable to view the assembly video, you MUST consult a certified, reputable local bike mechanic for assistance in addition to contacting Shengmilo for help.
- Page 22 Adjusting the Seat Height For most users, the seat height should be set by placing the ball of their foot on the pedal when the crank is at its lowest point. In this orientation their leg should almost be fully extended, with a slight bend at the knee. The correct seat height should not allow leg strain from over extension and the hips should not rock from side to side when pedaling.
- Page 23 A bike fitting professional, such as a certified, reputable bike mechanic who specializes in bike fit, should be consulted to ensure you have a good fit. NOTICE: If you have any questions regarding the proper fit of your bike please consult a certified, reputable local bike mechanic for assistance fitting the bike to a rider or contact Shengmilo.
-
Page 24: Battery Charging
Always charge your battery in temperatures between 50 °F - 77 °F (10 °C - 25 °C) and ensure the battery and charger are not damaged before initiating charge. If you notice anything unusual while charging, please discontinue charging and use of the bike and contact Shengmilo... - Page 25 Battery Charging Information • Check the charger, charger cables, and battery for damage before beginning each charge. • Always charge in a safe area that is cool*, dry, indoors, away from direct sunlight, dirt, or debris, in a clear area away from potential to trip on the charging cords, or for damage to occur to the bike, battery, or charging equipment while parked and/or charging.
- Page 26 Use caution to avoid damage to battery connector terminals, which are exposed when the battery is unlocked and removed from the frame of the bike. In the case of damage to the terminals or battery mounts, please discontinue use and contact Shengmilo Product Support immediately. When Installing the Battery onto the Bike •...
- Page 27 Fully charge the battery before each use to ensure it is ready to go the full range per charge, to extend the life of the battery, and help reduce the chance of over-discharging the battery. • Do not charge the battery with any chargers other than the one originally supplied from Shengmilo or a charger designed for use with your specific bike purchased directly from Shengmilo. •...
- Page 28 Repeat battery balancing steps 1-5 only after a period of long-term battery storage (see the Long-Term Battery Storage section), if experiencing noticeable range decline, when instructed to do so by Shengmilo Product Support, or up to once per month with frequent use as proactive battery...
- Page 29 Long-Term Battery Storage If storing your bike from Shengmilo for longer than two weeks at a time, follow the instructions below to maintain the health and longevity of your battery. • Charge (or discharge) the battery to approximately 75% charged.
-
Page 30: Operation
Not taking care to familiarize yourself and practice the operation of the power system on your bike from Shengmilo can lead to damage, serious injury, or death. - Page 31 Battery Key Positions & Switch Position Familiarize yourself with the key port and key positions before riding the bike. The photo below shows the key port aligned in key position 1, in line with the small open circle icon. In key position 1, the battery is in the "lock" position, with the battery locked to the frame, and the key removed so the bike is ready to ride.
- Page 32 Handlebar Features Location on Handlebar Component Location on Handlebar Component LCD Display Remote “+”Shifter On/off switch for the throttle “-”Shifter LCD Display Throttle Turn on the headlight...
- Page 33 LCD Display Information The table and image below show the various features and information displayed on the LCD display. LCD Display Controls Location Information on Display Power Level Speed Display Area: Maximum speed MAX, average speed Unit MPH, KM/H The meter will calculate the true speed based on the wheel diameter and signal data.
- Page 34 LCD Display Operation Operation Directions Turn on bike Press and hold MODE (3)until power engages Press and release up arrow Increase pedal assist (PAS) level Decrease pedal assist (PAS) level Press and release down arrow Toggle odometer, trip odometer Press and release MODE Toggle current speed ("SPEED”), Press and hold up MODE and arrow...
- Page 35 Start-Up Procedure After the bike has been properly assembled following the assembly video, all components are secured correctly, and you have read this entire manual, you may turn the bike on and select a power level following the steps outlined below: Test the battery lock security.
- Page 36 Start in PAS level O or 1 and adjust from there. 6. Begin riding carefully. With the proper safety gear and rider knowledge, you may now operate your bike from Shengmilo. On a flat surface, in a low gear (1 or 2), most riders should be able to begin pedaling the bike with pedal assist level O or 1. You may also use the throttle to accelerate and maintain your desired speed.
- Page 37 Shimano Seven-speed Transmission Operation Shengmilo MX03 comes with a Shimano seven-speed adjuster. The gear of the rear wheel is generally on the right handlebar of the bicycle. As shown in the picture, there are 7 gears, which correspond to different gears. You can adjust the gears by swinging (1) and (2).
- Page 38 Battery Charge Level Indicator The LCD display on the handlebars of your bike from Shengmilo features a battery charge level indicator (like a fuel gauge on a car). This indicator calculates battery life based on the battery power output (instantaneous voltage reading) and can fluctuate while riding if power demand and/or output changes.
- Page 39 Driving Range The range of your bike from Shengmilo is the distance the bike will travel on a single full charge of the onboard battery. The range values in this manual are estimates based on expected usage characteristics of bikes by Shengmilo. Some of the factors that affect range include changes in elevation, speed, payload, acceleration, number of starts and stops, ambient air temperatures, tire pressure, and terrain.
- Page 40 Carrying Cargo Carrying a cargo load involves additional risks, which require special attention and care. Braking, acceleration, and balancing are all significantly affected by the addition of cargo loaded on the ebike. To safely operate your ebike while carrying cargo, you must get used to the differences in braking, steering, balance, etc.
- Page 41 • Locking up your bike is recommended to ensure your bike is secure and the chance of theft is reduced. Shengmilo makes no claims or recommendations on the proper lock hardware or procedures to secure your bike, but we do recommend you take appropriate precautions to keep your bike safe from theft.
-
Page 42: Maintenance
Basic Bike Care To ensure safe riding conditions you must properly maintain your bike from Shengmilo. Follow these basic guidelines and see a certified, reputable bike mechanic at regular intervals to ensure your bike is safe for use and fun to ride. See the Pre-Ride Safety Checklist and Recommended Service Intervals sections in this manual for more detailed information. - Page 43 Recommended Service Intervals Regular inspection and maintenance are key to ensure Shengmilo function as intended, and to reduce wear and tear on their systems. Recommended service intervals are meant to be used as guidelines. Real world wear and tear, and the need for service, will vary with conditions of use. We generally recommend inspections, service, and necessary replacements be performed at the time or mileage interval that comes first in the following table.
- Page 44 Pre-Ride Safety Checklist Notice: Before every ride, and after every 25-45 miles (40-72 km), we advise following the pre-ride safety checklist. Safety Check Basic Steps 1. Brakes Ensure front and rear brakes work properly. Check brake pads for wear and ensure they are not overworn. Ensure brake pads are correctly positioned in relation to the rims.
- Page 45 Your cables, spokes, and chain will stretch after an initial break-in period of 50-100 mi (80-160 km), and bolted connections can loosen, Always have a certified, reputable bike mechanic perform a tune-up on your Shengmilo MX03 after your initial break-in period of 50-100 mi (80-160 km) (depending on riding conditions such as total weight, riding characteristics, and terrain).
- Page 46 Tire Inflation and Replacement The Shengmilo MX03 uses 26” x 4” rubber tires with inner tubes. The tires are designed for durability and safety for regular cycling activities and to be checked before each use for proper inflation and condition. Proper inflation, care, and timely replacement will help to ensure that your bike's operational characteristics will be maintained, and unsafe conditions avoided.
-
Page 47: Troubleshooting
Troubleshooting Symptoms Possible Causes Most Common Solutions The bike does not work Insufficient battery power Charge the battery Faulty connections Clean and repair connectors Battery not fully seated in tray Install battery correctly Improper turn on sequence Turn on bike with proper sequence Brakes are applied Disengage brakes Irregular acceleration... - Page 48 Components of the Shengmilo MX03 are subject to higher wear when compared to bikes without power assistance. This is because the Shengmilo MX03 can travel at higher average speeds than regular bicycles and has a greater weight. Higher wear is not a defect in the product and is not subject to warranty.
-
Page 49: Warnings And Safety
• Familiarize yourself with all the features and operations of the bike by Shengmilo. Practice and become proficient at shifting gears, applying the brakes, using the power assist system, and using the throttle in a controlled setting before riding in riskier conditions. - Page 50 Failure to review these notes can lead to serious injury or death. • All users must read and understand this manual before riding their bike from Shengmilo. Additional manuals for components used on the bike may also be provided and should be read before installing or using those components.
- Page 51 Always use the lowest assist level until you are comfortable with the bike and feel confident in controlling the power. • Any aftermarket changes to your bike from Shengmilo not expressly approved by Shengmilo could void the warranty and create an unsafe riding experience.
- Page 52 A Note for Parents and Guardians As a parent or guardian, you are responsible for the activities and safety of your child. The Shengmilo MX03 is not designed for use by children under the age of 18. If you are carrying a passenger in a child safety seat, they should also be wearing a properly fitted and approved helmet. Additional safety information can be found in the Helmet section of this manual.
- Page 53 Wet Weather It is recommended to not ride in wet weather if avoidable. Ride in wet weather only if necessary. This electric bike is not meant for use in puddles, heavy rain, or streams. Never immerse or submerge this product in water or liquid as the electrical system may be damaged.
-
Page 54: Limited Warranty
Warranty Info • All Shengmilo ebikes are covered under our manufacturer's 1 year, 6 months and three months warranty for the original owner against all manufacturing defects (All free Accessories are not covered by warranty service). • Only the original owner of bikes purchased from Shengmilo' online store are covered by this Limited Warranty. - Page 55 This warranty includes a replacement frame only. Labor charges to changeover parts to replacement frames are not included. • Shengmilo reserves the right to use scratch and dent stock when replacing a frame under this warranty. Frame styles and/or colors not in stock may be replaced with a compatible style and/or color at the discretion of Shengmilo.
- Page 56 • For the avoidance of doubt, Shengmilo will not be liable and/or responsible for any damage, failure or loss caused by any unauthorized service or use of unauthorized parts. •...
- Page 57 Damage to a Covered Component during shipping is not covered by this Limited Warranty, but Shengmilo will replace such damaged Covered Components if you: • Notify Shengmilo of a Covered Component damaged in the shipping process within thirty (30) days of your receipt of the ebike; •...
- Page 58 Covered Component into your ebike. • You will be responsible for shipping costs associated with returning a Covered Component, unless Shengmilo agrees in writing to pay for such shipping costs. Replacement Covered Components under this Limited Warranty shall only be...
- Page 59 THE REMEDIES DESCRIBED ABOVE ARE YOUR SOLE AND EXCLUSIVE REMEDIES AND Shengmilo ENTIRE LIABILITY FOR ANY BREACH OF THIS LIMITED WARRANTY. Shengmilo LIABILITY SHALL UNDER NO CIRCUMSTANCES EXCEED THE ACTUAL AMOUNT PAID BY YOU FOR THE EBIKE, NOR SHALL Shengmilo UNDER ANY CIRCUMSTANCES BE LIABLE FOR ANY CONSEQUENTIAL, INCIDENTAL, SPECIAL OR PUNITIVE DAMAGES OR LOSSES, WHETHER DIRECT OR INDIRECT.
-
Page 60: Link To Assembly Video And Online Resources
Link to Assembly Video and Online Resources Assembly Video Please refer to the “COMMUNITY Video" at Shengmilo website to view the official Shengmilo MX03 Assembly Video. www.shengmilo-bikes.com/pages/videos Online Resources For more information on best practices, please visit the Shengmilo official website www.shengmilo-bikes.com... - Page 61 We are here to help! If you have questions, please: Access Shengmilo official website www.shengmilo-bikes.com. Contact us directly by email to support@shengmilo-bikes.com...
- Page 62 Shengmilo...
Need help?
Do you have a question about the MX03 and is the answer not in the manual?
Questions and answers
I am facing error 24