Table of Contents
Advertisement
Quick Links
Advertisement
Table of Contents

Related Manuals for Fisher & Paykel WM1490P2


Summary of Contents for Fisher & Paykel WM1490P2
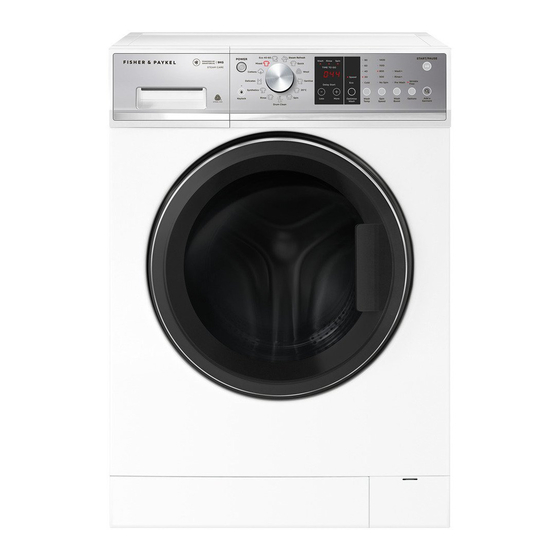
- Page 1 FRONT LOADER WASHING MACHINE WM1490P2 USER GUIDE BI EU...
-
Page 3: Table Of Contents
CONTENTS Safety and warnings Safety features Control panel Wash cycles Detergent and softener Wash preparation Getting started quickly Customising a wash cycle Changing pre-set options Factory reset Caring for your washer Before you call for service Fault codes Troubleshooting Energy consumption and cycle times Manufacturer’s warranty Customer care European Directive 2012/19/EU on... -
Page 5: Safety And Warnings
SAFETY AND WARNINGS WARNING! Electric Shock Hazard Failure to follow this advice may result in electric shock or death. • If you are using an extension cord or a portable electrical outlet device (eg multi-socket outlet box), ensure that it is positioned so that it does not come into contact with water or moisture. - Page 6 Do not overload your washing machine beyond its rated capacity. MODEL CODE MAXIMUM CAPACITY* (KG) WM1490P2 *Capacity refers to the maximum dry weight of items the washer can wash at any one time Disposal When disposing of the washer, it is recommended that the door is removed to avoid children getting trapped inside, and that the electrical cable is cut off...
-
Page 7: Safety Features
SAFETY FEATURES Keylock can be used to lock the buttons on your washer when not in use. This will avoid KEYLOCK accidental button pushes. Refer to ‘Control panel’ for more information. Add a Garment button can be used to interrupt the cycle to add or remove a garment ADD A GARMENT at any time during the wash part of the cycle (provided the wash temperature selected is lower than 60°C). - Page 8 SAFETY FEATURES Opening the door during a power failure Do not attempt to do this if the water level in the washer is above the bottom of the door. If there is a power failure during a wash cycle your washer will stop and the door will remain locked.
-
Page 9: Control Panel
CONTROL PANEL 1 Power Press to turn the washer ON/OFF. 2 Keylock Press to disable all buttons on the control panel, except the button. This prevents accidental button presses. POWER 3 SmartTouch™ Rotate to select your desired wash cycle. Control Dial Icon of the selected wash cycle will illuminate. - Page 10 CONTROL PANEL Add a Garment Enables you to add or remove items during the wash stage of the cycle, under certain conditions. Press , wait until you hear ADD A GARMENT the door unlock. Open the door and add or remove items. Close the door and press to restart the cycle.
- Page 11 CONTROL PANEL and you want to pause your washer: KEYLOCK To pause your washer at any time during the cycle, press and hold for three seconds then press and you want to power your washer at any time: KEYLOCK Press POWER...
-
Page 12: Wash Cycles
WASH CYCLES Your washer has a number of wash cycles to suit your laundering needs. Selecting the most appropriate cycle for each particular wash load will help ensure you get the best wash result. The most energy efficient cycles are those that perform at lower temperatures and longer duration. - Page 13 WASH CYCLES ¹ cycle is recommended for cleaning normally soiled cotton laundry, declared to be washable at 40°C ECO 40-60 and 60°C together in the same cycle. This programme is used to assess compliance with the ecodesign and energy labelling legislation. This programme is the most efficient in terms of energy and water consumption for washing cottons.
-
Page 14: Detergent And Softener
DETERGENT AND SOFTENER Detergent Your washer requires low-sudsing detergent to prevent oversudsing problems. Low sudsing detergent comes in powder or liquid and is labelled front loading, low suds, high efficiency or HE. Using top loader detergent in your front loader washer may lead to excessive suds formation, which will lengthen the cycle time as the washer waits for the suds to dissolve. - Page 15 DETERGENT AND SOFTENER Where to put the detergent Pods Detergent pods are a no mess alternative to powdered or liquid detergent. They must be placed at the back of the drum prior to loading your clothes. This will ensure they are activated quickly in the wash.
- Page 16 DETERGENT AND SOFTENER Powdered detergent If you wish to use powdered detergent, the liquid detergent compartment MUST be removed from the dispenser drawer. To remove the liquid detergent compartment, firmly grasp and twist the left hand side of the internal compartment and pull upwards.
-
Page 17: Wash Preparation
WASH PREPARATION Sorting Sort items according to colour, fabric type, and soil type. Wash fine, delicate fabrics separately from thick, heavy fabrics. Always separate coloured items from whites, especially when they are new. Colour run could be an issue if you wash items at higher temperatures. Some soils, like mud and blood are best washed in cold water. - Page 18 WASH PREPARATION SUGGESTED ITEMS/WASH REQUIREMENTS SUGGESTED CYCLE AND OPTIONS TEMPERATURE Towels Cottons, 1400 or 1100 rpm spin 30°C or 40°C Sheets, pillowcases Mixed, 1400 or 1100 rpm spin 30°C or 40°C Bulky items – doonas, Delicates, 800rpm 30°C or 40°C duvets, sleeping bags Shirts, pants, other creasables Synthetics...
-
Page 19: Getting Started Quickly
GETTING STARTED QUICKLY Open the detergent drawer. Pour liquid or powder detergent in the draw or place the pod in the drum. Pre-dissolving detergent in warm water when washing can improve the performance of the liquid and powder detergent. Press to activate your washer. - Page 20 GETTING STARTED QUICKLY Press to start the cycle. The washer will start to fill with water and select the correct wash action for your load. to lock the buttons on the control panel, preventing them from being activated accidently by a washing basket or little fingers.
-
Page 21: Customising A Wash Cycle
CUSTOMISING A WASH CYCLE Delay Start You can delay the start of the wash cycle between 15 minutes and 12 hours. This can be useful to time your washing to finish when you arrive home from work, or to start once you have finished in the shower. - Page 22 CUSTOMISING A WASH CYCLE Wash Temp Your washer has five wash temperatures ( COLD, 30°C, 40°C, 60°C 90°C Some temperatures are not available on some cycles as a safeguard for your clothes (eg temperatures above 40°C on the cycle). DELICATE The washer will fill with both hot and cold water (if possible) to achieve the selected wash temperature.
- Page 23 CUSTOMISING A WASH CYCLE Optimise Wash Your washer offers two optimise wash modes – – allowing you to save water SPEED and energy or save time. For clothes care reasons not all options are available on all cycles. mode to save water and energy. Selecting will reduce the wash temperature slightly and alter the wash and rinse programming.
- Page 24 CUSTOMISING A WASH CYCLE To save a customised cycle You can program your washer to remember the wash options you prefer for each wash cycle. For instance, you may want to set the cycle to default to or set the MIXED 40°C cycle to include...
- Page 25 CUSTOMISING A WASH CYCLE Select your preferred setting for the option, then press to save. A long beep will sound to confirm that your changes have been saved. Continue to select any other options you wish to customise for this cycle. Press to save your customised cycle.
-
Page 26: Changing Pre-Set Options
CHANGING PRE-SET OPTIONS Option Adjustment mode This allows you to change the default setting wash temperature to CONTROLLED COLD . If your incoming cold water temperature is very low and you choose to do COLD TAP wash, the wash may be less effective. COLD TAP To enter Option Adjustment mode: Turn your washer on at the wall but do... -
Page 27: Factory Reset
FACTORY RESET You can reset your washer to factory default settings by following the steps below. To reset your washer to factory default settings: Select the cycle. SPIN Press buttons MORE LESS OPTIONS together for three seconds, will appear on the screen and the washer will beep. -
Page 28: Caring For Your Washer
CARING FOR YOUR WASHER When you have finished using your washer Turn off the taps to prevent the chance of flooding should a hose burst. Unplug the washer from the power socket. Cleaning your washer Before you start cleaning your washer, ensure that it is disconnected from the power (ie unplug the washer from the power socket). - Page 29 CARING FOR YOUR WASHER Cleaning the drum and the door Use a soft damp cloth to wipe the door, cleaning any water marks or residue off it. Wipe the rubber seal around the door. Remove any items or lint accumulating in the bottom of the seal catchment and wipe out any water accumulated here.
- Page 30 CARING FOR YOUR WASHER Cleaning the inside of your washer It is important that you regularly clean the inside of your washer using the DRUM CLEAN cycle. After 100 cycles, a notification will pop up on the display screen to remind you to clean your washer.
- Page 31 CARING FOR YOUR WASHER Cleaning the pump filter The pump filter must be checked and cleaned at least every 6 months. Turn the power off and unplug the washer. Use a coin to open the filter cover, place the edge of the coin into the slot and tilt upwards whilst levering the cover open.
- Page 32 CARING FOR YOUR WASHER Products that might damage your washer Concentrated bleaches, laundry pre-soakers/sanitisers, stain removers and hydrocarbon solvents (eg petrol and paint thinners) can cause damage to the surfaces, eg control panel, and components of your washer. Be careful when washing garments stained with solvents as they are flammable. DO NOT put them in your dryer.
-
Page 33: Before You Call For Service
BEFORE YOU CALL FOR SERVICE User warnings Your washer is capable of self diagnosis and may sound a series of beeps and display a notification or warning to inform you when there is a problem. In most cases you will be able to address the problem the washer is alerting you to. Check this chart before you call for service. - Page 34 BEFORE YOU CALL FOR SERVICE PROBLEM DISPLAYED AS WHAT TO DO The washer has Washer will stop and flash while waiting for suds too many suds to dissipate. The washer will not beep during this time. When the suds have dissipated the washer will automatically restart.
-
Page 35: Fault Codes
FAULT CODES If a continuous series of beeps sounds, all the lights turn off on the control panel and a number appears on the display, a fault has occurred. The washer automatically enters this mode when there is a fault. The word will be shown in the control panel display followed by a number (refer to example shown here). -
Page 36: Troubleshooting
TROUBLESHOOTING The following is a list of problems you may encounter when using this appliance and some suggestions that may help to correct the problem. If you still have problems, contact your Fisher & Paykel trained and supported service technician. PROBLEM POSSIBLE CAUSES WHAT TO DO... - Page 37 TROUBLESHOOTING PROBLEM POSSIBLE CAUSES WHAT TO DO Washer is Drain hose blocked. Clear the drain hose. not draining Pump filter blocked. Clear the pump filter, refer to ‘Cleaning the pump filter’. Drain hose higher than Lower the level of the drain hose, 1000mm above floor level.
- Page 38 TROUBLESHOOTING PROBLEM POSSIBLE CAUSES WHAT TO DO Cycle time Cycle time is approximate. Cycle time is influenced by a number of longer than factors refer to ‘Wash cycles’. usual / Low water pressure or Ensure that inlet hose filters are inaccurate flow rate.
- Page 39 TROUBLESHOOTING PROBLEM POSSIBLE CAUSES WHAT TO DO Creasing Washer overloaded. Do not overload the washer. Incorrect cycle for Use the SYNTHETICS DELICATE load type. cycle for creasable items. STEAM REFRESH Spin speed too fast. Select a slower spin speed. Wet clothes left Laundry left sitting wet is more likely to in washer or crease.If not removing clothes from washer...
- Page 40 TROUBLESHOOTING PROBLEM POSSIBLE CAUSES WHAT TO DO Dye transfer Coloured items not washed Remember to separate whites separately from white/ and colours. light coloured items. New or non-colourfast items Wash non-colourfast items separately not washed separately. and select wash temperature. COLD Wet items have been left sitting Remove items from washer as soon as for too long.
-
Page 41: Energy Consumption And Cycle Times
ENERGY CONSUMPTION AND CYCLE TIMES Information on product Energy Labeling and Eco-design can be found in the European Product Database (EPREL) at the following link http://eprel.ec.europa.eu/. The below values are indicative only. LOAD SPIN REMAINING MAXIMUM ENERGY WATER DURATION CYCLE SIZE SPEED MOISTURE... -
Page 42: Manufacturer's Warranty
MANUFACTURER’S WARRANTY For details of your 5 year manufacturer’s warranty and contacts for servicing, please refer to your separate service & warranty document online at fisherpaykel.com/uk. This product has been designed for use in a normal domestic (residential environment). This product is not designed for any commercial use. - Page 43 CUSTOMER CARE If you need service Fisher & Paykel has a network of Fisher & Paykel trained and supported service technicians that can carry out any service necessary on your appliance. Our Customer Care Centre can recommend a Fisher & Paykel trained and supported service technician in your area.
-
Page 44: European Directive 2012/19/Eu On Waste Electrical And Electronic Equipment (Weee)
EUROPEAN DIRECTIVE 2012/19/EU ON WASTE ELECTRICAL AND ELECTRONIC EQUIPMENT (WEEE) EU This appliance is marked according to the European Directive 2012/19/EU on Waste Electrical and Electronic Equipment (WEEE). By ensuring this product is disposed of correctly, you will help prevent potential negative consequences for the environment and human health, which could otherwise be caused by inappropriate handling of this product. - Page 48 FISHERPAYKEL.COM © Fisher & Paykel Appliances 2021. All rights reserved. The models shown in this guide may not be available in all markets and are subject to change at any time. The product specifications in this guide apply to the specific products and models described at the date of issue.
Need help?
Do you have a question about the WM1490P2 and is the answer not in the manual?
Questions and answers